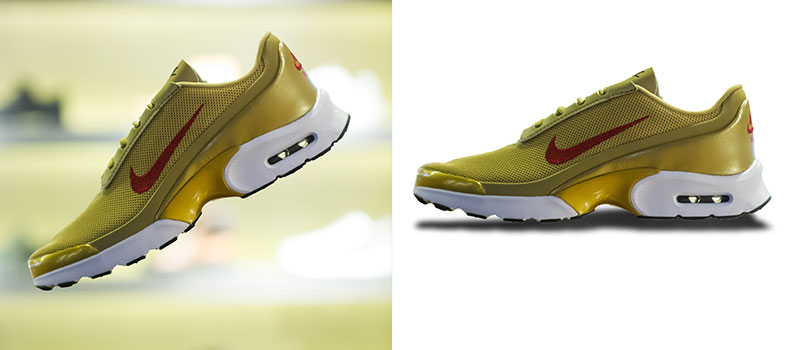
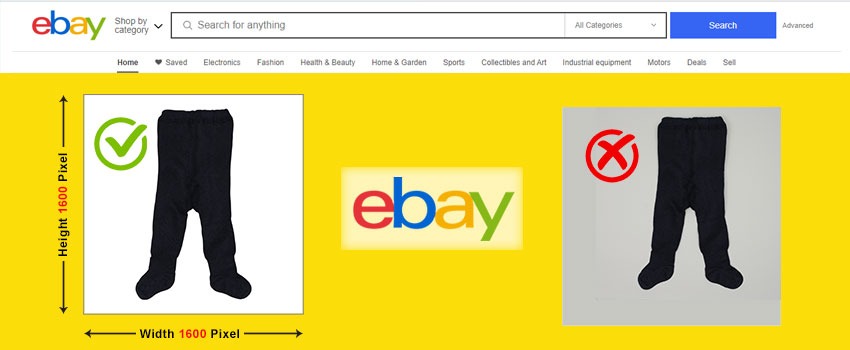
6 out of the 10 customers like an Ecommerce product when the product photo has a realistic shadow. You can notice product photography having a drop shadow photoshop on Amazon, eBay, and other popular Ecommerce websites.
Drop shadow is added to an object via Adobe Photoshop. It looks like the shadow is real and the product is rising. It brings a realistic look to the image.
Using a drop shadow with an Ecommerce Product makes product photography more appealing. Every Ecommerce business owner, Manager and Product Photographers want to attract more customers through product photos.
Adding a drop shadow Photoshop can help you to grab the opportunity. You can get it through the Ecommerce Image Editing service.
How will it be if you can add a drop shadow to your product photos? It seems that will be great. This article will help to make this happen how to add drop shadow in photoshop cc.
I am going to share step-by-step guidelines on how to add a drop shadow in Photoshop. In this tutorial, you will learn how to add a realistic drop shadow to your Ecommerce product images.
Without wasting any second, let’s get started.
Know More: Ultimate Product Photography Pricing Guide
How To Add Drop Shadow Photoshop cc?
I am going to use this shoe for create a drop shadow Photoshop tutorial. You need to have Photoshop CC, CS5, CS6, or any other updated versions of Photoshop to follow this tutorial. Permit me to start.
Step 1: Open image in Photoshop
In the first step, you need to open the image in Photoshop. Go to the File option from the top and select the product image file location. After opening the picture, you will find a lock icon on the background layer. Click on that icon to unlock the layer. Here you can see the icon.

After doing that, you are ready to jump to the second step.
Step 2: Background remove
Before we add a drop shadow in Photoshop, we have to remove the background. To get the best look, we have to put the shadow on a white background. Now, pick the quick selection tool to select the shoe.

At this stage, the selection is applied to the shoe. Use the keyboard shortcut “CTRL + SHIFT + I” to reverse the election. Now, you can remove the blurry background. Simply, press the Delete key and it will present the shoe on a transparent background.
Looking for a sample? Here you go.

The shoe is not in the best position for putting a drop shadow under it. You can press “CTRL + T” to change the position of the object through free transform. We can keep the object in a flat position.

Now, we need a white color background for the object. A solid color option will allow us to do that. You can find the option from here.

You have to pick the white color. Then, drag the pure white background layer down to the object layer. Let’s have a look here.

Step 3: Duplicate the image layer
At this stage, we have got our product on a white background. To add drop Shadow in Photoshop, we need to make a duplicate layer for the shadow creation. Select “Layer 0” and right-click on it. You will see the option “Duplicate Layer”.

You have to click on that option and you will get a duplicate layer of the object.
Step 4: Change the foreground color
We are going to add a black shadow to the object. Therefore, we need to set the foreground color as black. Let me show you how to change the foreground color.

You have to pick the black from the color picker foreground color. When we are going to create shadows in Photoshop? You will find the answer in the next step.
Step 5: (Layer 0 copy) Turn Into Black Color
In this step, we are going to turn the copied layer into black color. Eventually, we will convert this layer as a shadow for the object. To do that, we have to turn off the “layer 0” and solid color fill layer. Here you can see.

We have selected the “Layer 0 copy” and turned off other two layers. Now, you can use a shortcut to turn the layer into black. Press “ SHIFT + ALT + Delete” and you will find the object will be turned into black.
Have a look here.

Now, we can start the process of creating shadows.
Step 6: Create the shadow
As we are going to add a drop shadows in Photoshop, we need to bring the object from the copied layer into a shadow form. We will use the free transform option to do that. You can enable the feature by pressing CTRL + T. Then, drag the object down to this form to add the shaodw effect.

This looks like a shadow, doesn’t it? We’’ refine the shadow in upcoming steps and make it look like a real shadow.
Step 7: Release free transform
Click on the Okay from the top of the right or press Enter key to save the form of the object. It will release the free transform and save the changes. After that, place the copied layer next to layer 0. Now, you have to turn on both layers.

Here is the look after releasing free transform.

Step 8: Place the shadow in the right position
You may feel like the shadow isn’t positioned in the right place. This step will teach you how to place the shadow in the right position. Select the “Layer 0 Copy” and click on the arrow key from the top of the left.

It will allow you to move the shadow. Then, place it down the object properly. It should feel real. Don’t place the shadow too close to the object or too far from the object. You need to keep the shadow to a decent position.
Step 9: Apply motion blur on the shadow
You might be thinking that the shadow isn’t looking realistic enough. In this step, you will learn how to apply motion blur to the shadow. It will make the drop shadow Photoshop more realistic and attractive. Find the motion blur option from the top and apply motion blur on the shadow.

Have you applied the motion blur on your shadow? Well, let’s move to the 10th step.
Step 10: Smooth around the shadow
After applying the motion blur, you will find this pop-up window.

You have to set the angle 0. Thinking about the distance? Keep the distance nearly 20 pixels depending on the requirements. Still, the shadow needs some improvements. Permit me to take you to the next step.
Step 11: Apply gaussian blur on the shadow
Now, go to the Filter option once again from the top. This time, you need to choose the Gaussian Blur. Can’t find the option?
Here you can see.

Change the radius to nearly 20 considering the density of the shadow.

At this point, the Photoshop drop shadow is looking pretty realistic. We just need to apply the brush on the shadow for the final touch.
Step 12: Add layer mask in shadow
Click on the mask icon from the bottom to add a layer mask in shadow.

Now, we’re going to use the brush tool. That will be the final touch for the drop shadow in Photoshop tutorial.
Step 13: Swipe the brush tool to make the shadow perfect
Finally, you have to pick the brush tool and select a soft brush.

After picking a soft brush, paint over the shadow and the shadow will become lighter. Here is the ultimate look.

Final Words
That was the step-by-step tutorial on how to add a realistic drop shadow in Photoshop. It’s a reliable Photo editing service for photographers. We have added a drop shadow in Photoshop to the Ecommerce product image.
It will boost your sales in Ecommerce and attract more potential customers. Would you like to get assistance from professional designers?
You can outsource your photos to Clipping Way to get Drop Shadow Service for your Ecommerce product.
They offer professional Image Editing Services at a reasonable price. Stay tuned with us to get helpful articles for photographers and Ecommerce business owners.
FAQ’s
How to custom warp text in Photoshop?
Using the Wrap command you can create custom wrap text in Photoshop.
How to add white shadow in Photoshop?
You need to change the foreground color to white to add white shadow in Photoshop.
How do i add effects to text in Photoshop?
You can add effects to text in Photoshop from the layer style option.
How do i make text thicker in Photoshop?
You can make text thicker in Photoshop by customizing the text layer style.
Can i change the shadow color in Photoshop?
Yes, you can change the shadow color in Photoshop from the foreground color picker option.
