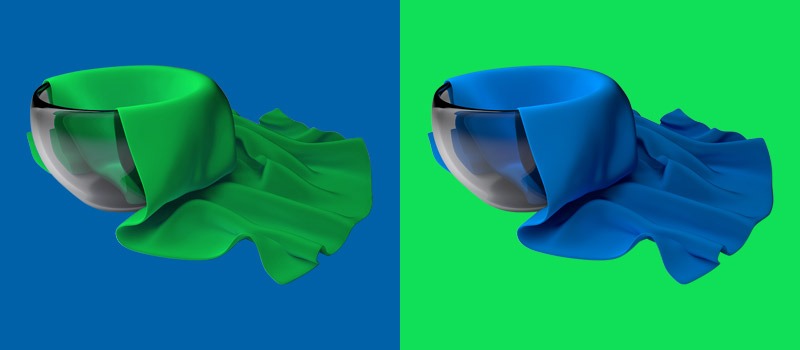
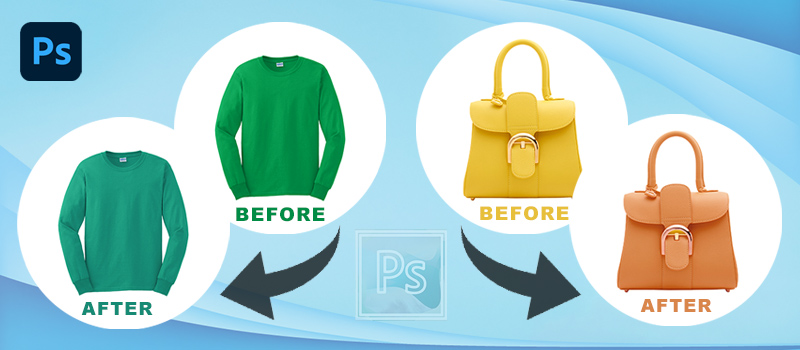
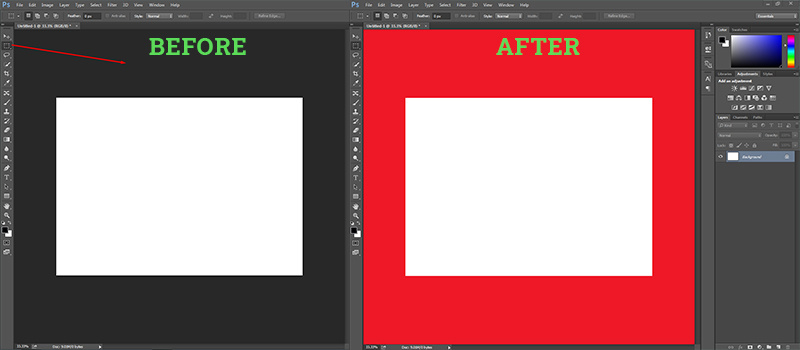
How many occasions did you feel unhappy about the color of the picture’s element? I think more than often. A long time back, I was deeply interested to know how to replace color in Photoshop.
Then I get introduced to an awesome Photoshop color replacement technique. From then on, removing specific colors from images becomes an easy task for me.
Are you also feeling interested to know this Color Replacement technique? Well, today I am going to share it with you.
In a few minutes, you are going to learn how to remove a specific color in Photoshop and replace it with another color. Without any further delay, let’s jump into the tutorial.
How to Replace Color in Photoshop?
Step 1: Open the picture and take a new layer
To start the procedure, open the picture in Photoshop that one you want to customize. Open Photoshop and press CTRL + O. Then choose the picture.
For this tutorial, I am going to proceed with this picture.
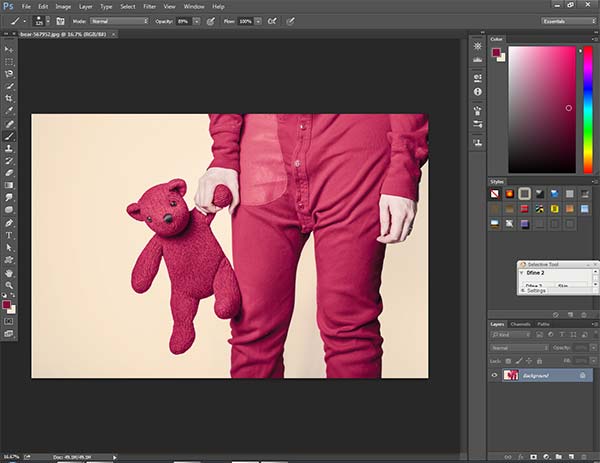
After that, press CTRL + SHIFT + N to create a new layer. It will create e new blank layer. If you find that there is a confirmation box, simply press Enter.
Step 2: Make selection via Color Range
Almost all of us know that lots of selection tools are available in Photoshop like Pen tool, Quick Selection Tool, Magic Wand Tool, etc. Only a few people know that we can also make selections based on color. No, I am not talking about the Magic Wand Tool.
Know More: How To Change The Color Of A Shirt In Photoshop
As we are going to replace the color in Photoshop, I am to make the selection according to the color. To do that, go to the Select > Color Range option from the top.
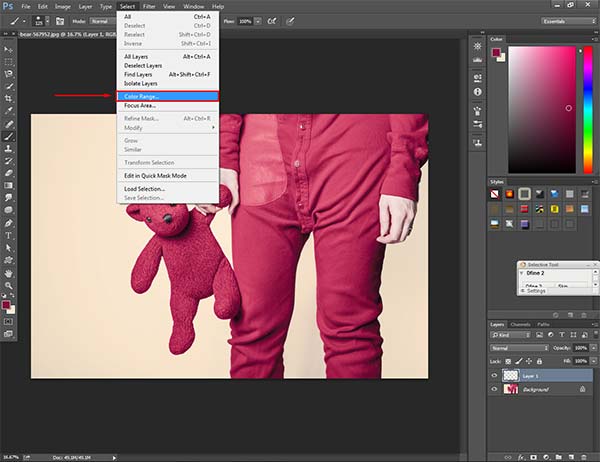
After that, Color Range options will appear on your screen. Make sure that you have selected Sampled Colors. There are multiple options available for selection preview.
In my opinion, Grayscale is the most convenient among those. Not forget to click on the Multi Selection Icon from the below Save option.
Allow me to show you my screen.
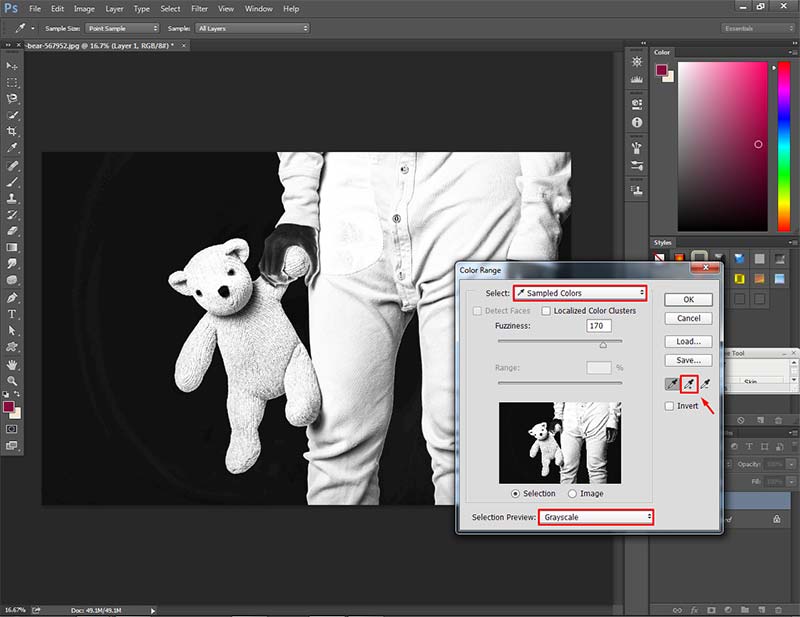
Let replace the color of the background. Therefore, click on any area of the background and it will turn into white. Remember that, white areas will be included as a selection.
Try to convert the background as pure white and the rest of the things as pure black. Our further process will only affect the white area. Reduce the fuzziness from the Color Range options.
Perhaps, you will not get a proper result at this stage but no need to worry. We will fix it in the later step.
Here is my selection.
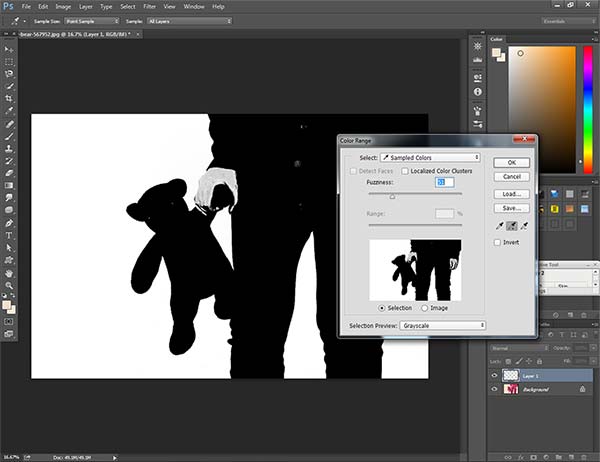
The background is in white form and the rests of the things are in Black form. Now, press Enter and move to the next step.
Step 3: Choose Hue & Saturation from the New Adjustment Layer
For this tutorial, we are going to use Hue & Saturation as the Photoshop color replacement tool. Is that sounding strange? But trust me it provides an excellent result. Choose the option from here.
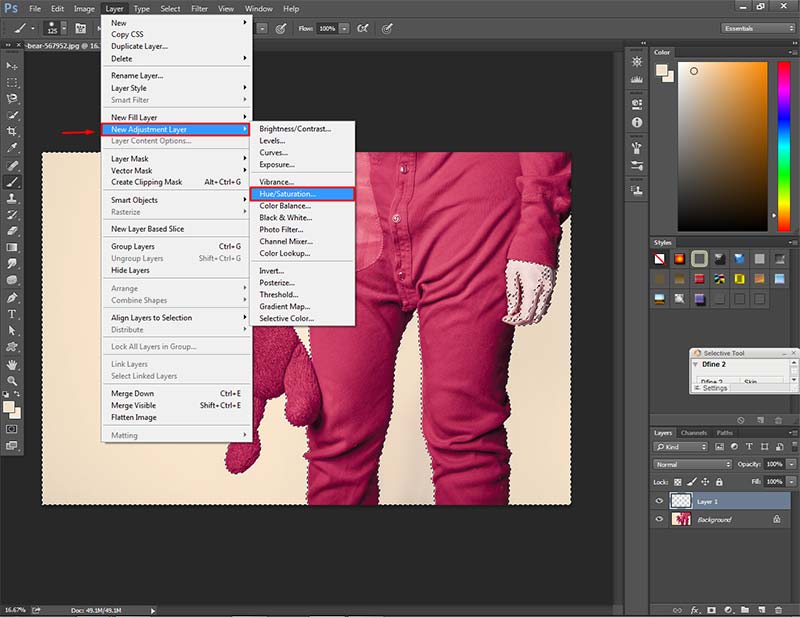
It will create a new Hue & saturation Adjustment layer. Change the value of Hue, Saturation, and Lightness. You will notice that it’s affecting the background color that you have selected. But the concern is, it is also affecting some areas of other elements.
Let’s have a look at the hand from this picture.
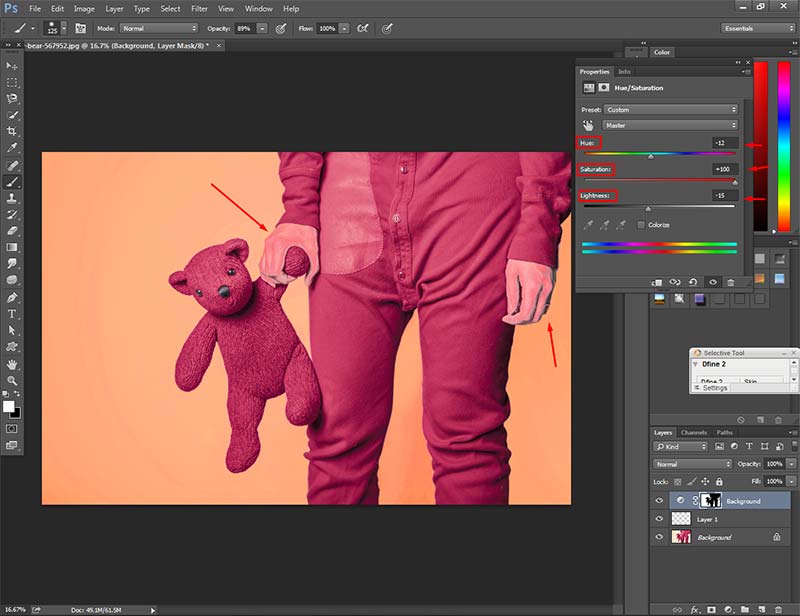
So, what to do to fix this error? Relax; we are going to fix it in the next step.
Step 4: Making correction of the selection
To fix the selection, Press ALT and click on the Mask Icon of the Background Layer. It will bring a black & White view of that layer.
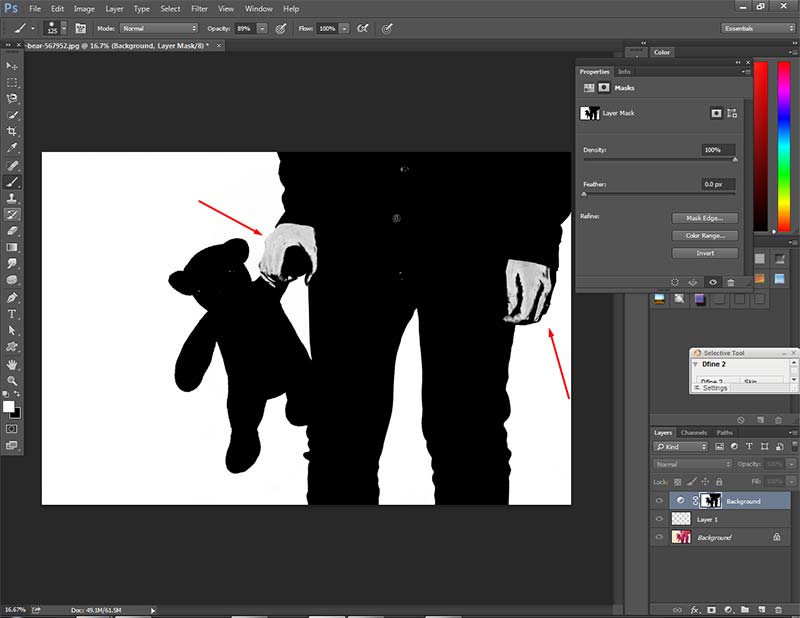
See, both hands are not completely black. This is the reason why hue & saturation effects are applying to those areas. Pick up the Brush tool and decrease its hardness to Zero (0).
You will find the hardness option by clicking on the top of the Brush Size Icon. Later on, Pick the Black color and paint those areas with black.
If you notice that any areas of the background are not completely white, also paint on this area with white color. You should remember a fact. To remove the specific color from an image paints it as white. After doing corrections,
I have got this result.
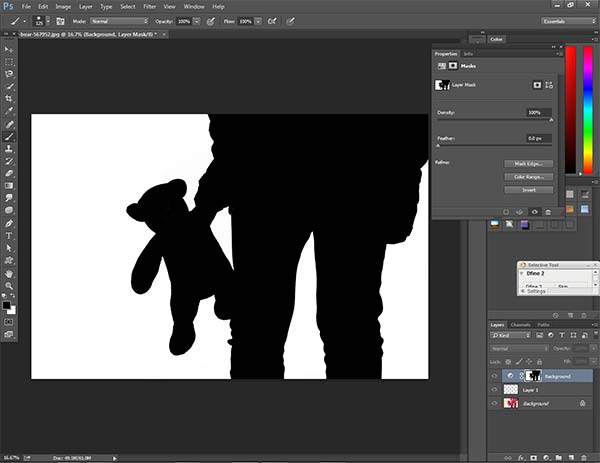
Now, again press ALT and click on the mask icon of that layer to go back to the normal view
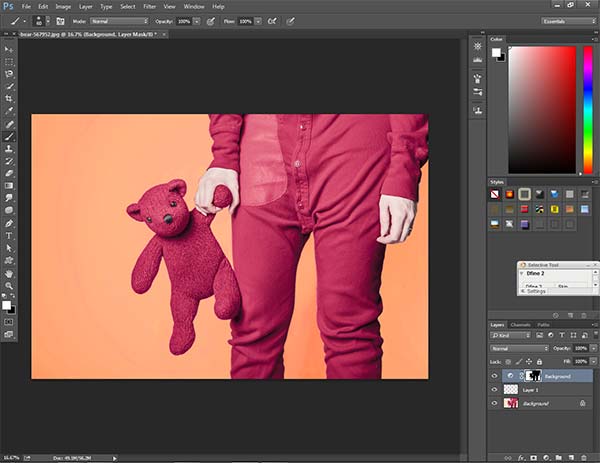
See, we have replaced the color of the background in Photoshop. At this stage, just in one click from Hue & Saturation, you will be able to change the color of the background.
Let’s try it and bring another new color. Simply change the value of hue and saturation.
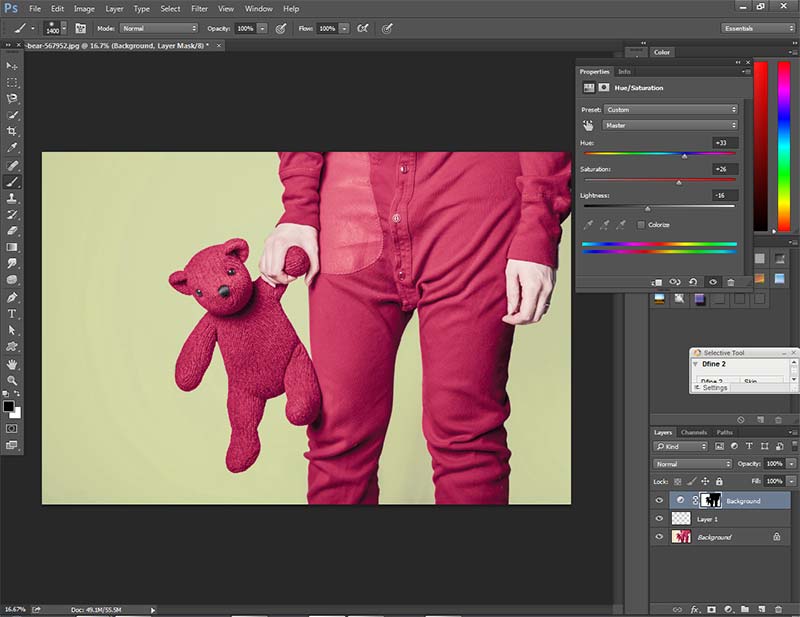
You might be thinking about how to change multiple colors from an image in Photoshop? Let me show you by changing the color of the panda.
Step 5: Remove & Replace specific color
To proceed into this step, move the Blank layer at the top. Click & hold the mouse on the layer and place it at the top. Again go to the color selection option.
At that time, I am going to click on the panda to make it white and other areas should be black. As the color of the Panda and Clothes are the same both are turning into white.
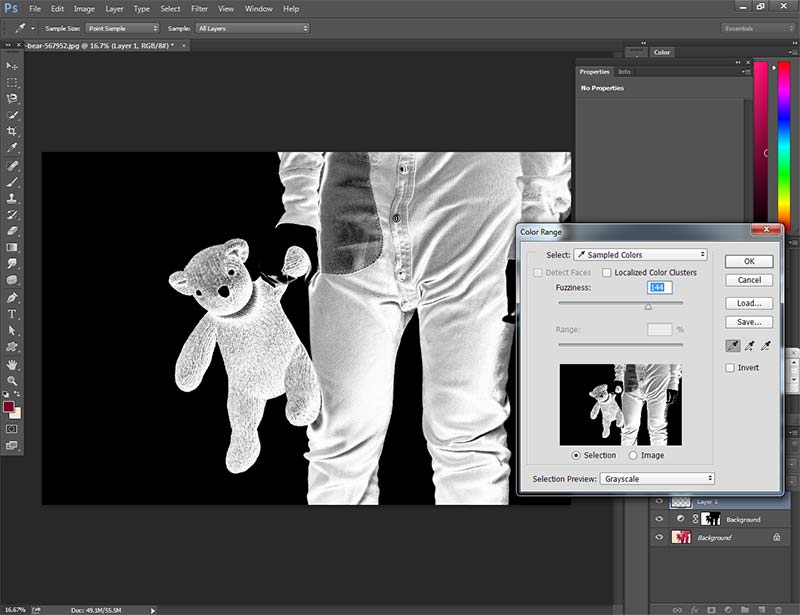
Press Ok and take another hue & saturation adjustment layer following the previous process. After this, press ALT and click on the mask icon of this new layer.
I have renamed it “Panda”. Pick up the brush tool once again. Keep the color of the panda as white. Except for it, everything will be black.
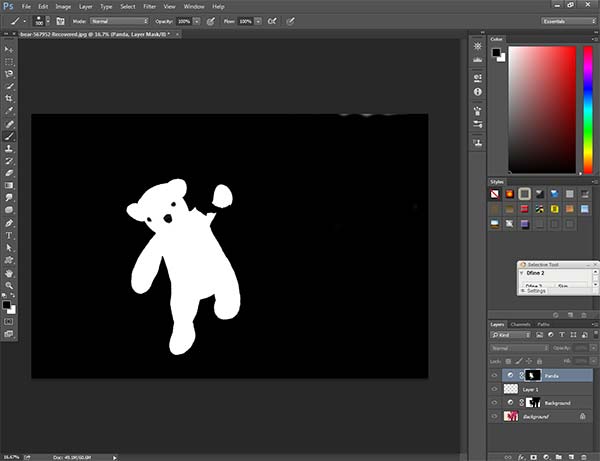
When you feel that you have perfectly painted on the picture, go back to the normal view. I hope now you know how to do the rest of the stuff.
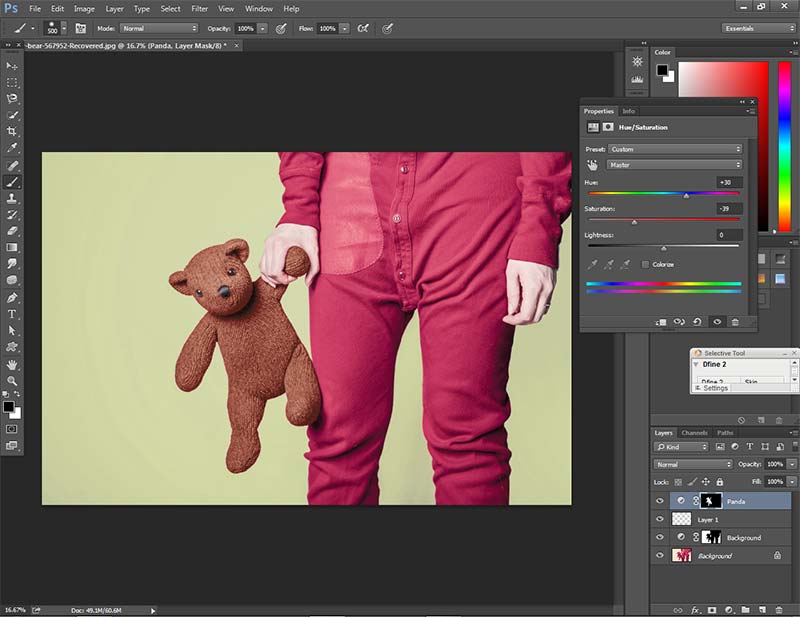
Simply change values of Hue, Saturation, and Lightness. It will only change the color of the panda as we have painted it as white.
Let me show you the final picture.
Final Words
That’s all about how to replace the color in Photoshop. From now on, remove any specific color of an image is not a big deal for you. In the first attempt, you might not be able to bring a perfect result. Just a little bit of practice will make it easier for you.
Have you enjoyed the tutorial? Stay tuned with us. More exciting and useful Photoshop tutorials are waiting for you.

