Table Of Contents
- What is Product Photography?
- Types Of Product Photography
- Key Skills You Need To Get Into Product Photography
- 7 Must Need Equipment To Get Into Product Photography
- Importance Of Product Photography
- 2 Key Factors To Consider To Get Into Amazon Product Photograph
- Product Photography Editing
- Final Words
- Frequently Asked Questions (FAQs)
Getting started in product photography could be an excellent decision to boost your photography career.
As you are reading this article, I guess you are somehow connected with product photos. However, you are going to find in-depth guidelines about how to get into product photography.
We will inform you about the product photography cameras, equipment, skills, and some excellent tips to become a product photographer. Overall, we are going to cover every essential query related to becoming a top-notch product photographer.
What is Product Photography?
Literally, product photography means capturing photos of products for E-commerce websites and online sellers. Demand for professional product photographer is increasing day by day.
There’s a massive opportunity to achieve decent remuneration through product photography tips.
At the same, competition is also increasing. Product photography isn’t only about placing a product in front of the camera and pressing the shutter key.
You have to pay attention to the details so that the product not only looks beautiful but also attracts potential buyers. Also, you need to focus on product photo editing to get perfectly polished photos. After reading this article, you will get the idea to do that.
Types Of Product Photography
Different options are available when you are getting started in product photography. Here are some common types of product photography.
- Individual Product Shot
- Group Of Products Shot
- White Background Photography
- Jewelry Photography
- Product Catalog Photography
- Lifestyle Shot
- Garments Item Photography
- 360 Product Photography
- Studio Product Photography
- E-Commerce Item Photography
Key Skills You Need To Get Into Product Photography
Before you get started as a professional photographer, you have to sharpen some key skills.
Pay Attention To Product Features
At the very first, you have to know about the product features that you are capturing. It will assist you to highlight the features through your photography.
Some photographers overlook small details and product features while capturing photos. Don’t make this mistake. Paying attention to an object’s small details is compulsory for professional photographers.
See Through Viewer’s Perspective
When you are willing to get into product photography business, you have to think from the viewer’s perspective. Which type of product would you choose while shopping online?
Your captured photos should have that quality to convince the viewers. If you see through the viewer’s perspective, it will give you a better concept to showcase the product.
Detect Best Angles

Sometimes angles create differences between an ordinary shot and a professionally captured shot. You need to be adventurous to find out the best possible angles.
For example, in Amazon product image requirements multiple photos are allowed. In the additional slots, you can use those photos from different angles.
Understand Client’s Requirements
Last but not the least, understanding the client’s requirements will help you to become a good product photographer.
As a product photographer, you have to capture photos for online sellers, companies, reputed brands, and product-selling websites. Brand requirements are different from individual sellers. At the same time, E-commerce websites have specific requirements.
You need to have the skill to understand those requirements and execute them properly. At this point, you have got to know about the skills to get started in photography. Now, it’s time to jump on the equipment list.
7 Must Need Equipment To Get Into Product Photography
1. Camera

The camera is the most important element of product photography. That’s why you need to be selective while choosing your camera for product photography.
Buying the expensive one according to your budget isn’t the best idea. Rather, you can start with a 24 MegaPixel DSLR camera. If you have the budget, you can go for a higher-resolution camera.
Nikon D7200 and Sony Alpha A6000 will be the best choice for mastering product photography. If you have a tight budget, you can choose Fujifilm X100F. Now, you have to pick the camera as per your budget.
2. Lens
Lens is the second most essential equipment for product photography and professional photography. If you pick the wrong lens, the camera alone won’t help you to capture professional-looking photos.
Right now, Canon 50mm and Tamron 90mm are two of the best lenses available in the market for commercial product photography.
You need to keep in mind the aperture and focal length while selecting a lens. Basically, it is better to avoid any wide-angle lens. Most professional product photographers use an 85mm lens to capture E-commerce items.
You should choose at least a 50mm lens. Otherwise, the product photo won’t be able to showcase the natural look.
3. Tripod
Tripod is more than essential to maintain consistency in product photography. It not only keeps the photographers away from shaking issues but also maintains specific angles and heights for all photos. In product photography, you have to take flat-lay shots of individuals and groups of products.
Tripod will assist you to take clear shots even from difficult heights and angles. Here’s an important point to consider. While buying a tripod for product photography, you should select a tripod that allows you to take overhead shots.
4. White Background
To be a good product photographer, you have to master the art of white background photography. E-commerce products look trustworthy and reliable on white background.
You might be wondering what photographers use for white backgrounds. Alright, you can use foam core board and seamless paper as a white backdrop.
In online stores, you can also find affordable white backdrop options. Besides, you can also use Photoshop to change the background color and replace it with a white backdrop. Now, it depends on you which type of background you prefer.
5. Artificial Light
Lighting setup is the key to running a successful campaign of product photography. To be more specific, you have to purchase an artificial light source to get into product photography.
In commercial product photography, you have to showcase your product most attractively. You can’t rely on natural light all time as we don’t have any control over it.
Strobe lights and other artificial light produce a warm color that suits product photography. For example, LED video lights and Fluorescent mercury vapor tubes are preferable when you are taking pictures of Amazon products. So, you need to have a continuous lighting source.
6. Table
A stable surface is required in product photography to keep the product on it. A table will be an affordable and flexible option do that. In particular, you can move it easily anywhere you want.
Also, it gives you the option to put clothes, a white sheet, or foam board on the table to use as a backdrop. Besides, you can use tape and pins to stick products on the table.
In that way, you can get specific shapes as you want. Keeping all those things in mind, you should purchase a medium size table to keep the product on it.
7. Light Modifiers
To get started into product photography as a professional photographer, you should have light modifiers in your photography equipment list.
Light modifiers are used in photography to enhance lighting conditions while capturing photos. Also, you can utilize it to highlight the product. You can modify the color mood of a light source with it.
You can use the reflector, strip box, grid box, softbox, umbrella, and diffuser as light modifiers. Professional product photographers provide a premium touch to their imagery.
Actually, these are small things that create huge differences in outcomes. If you have that 7 equipment and proper skill, you can also capture high-quality photos like a pro.
Importance Of Product Photography
While browsing thousands of products online, customers won’t read your product specification or features at the first sight. It’s the picture that will be the only deciding factor to click on a product.
So, your image should have that quality to stand out from other competitor products. Buyers can’t touch your products online. About 90% of online buyers consider product photo quality as the most important factor while shopping online.
Apart from that, nearly 75% of online buyers in the USA consider product image quality to add a product to the cart. Therefore, product photography plays an important role to establish any sort of E-commerce business.
High-quality images can increase the conversion rate notably. On the other hand, low-quality photos can decrease your sales.
Keeping those stats in mind, you have to execute your skill, plan, and mindset to produce good-quality product photos. It will help you to get more clients and photography projects.
Without proper quality, you won’t be able to survive in this competitive niche. Before you publish your photos online, you should do the post-production work to provide the finishing touch. Here’s a tip for you.
2 Key Factors To Consider To Get Into Amazon Product Photograph
Exposure For Amazon Product Photography
To become a professional product photographer, you should have good control of exposure. Learn about Aperture, Shutter Speed, and ISO.
Good control of these trios will help you capture great photos. It will also enable your habit of not using the Auto mode.
Never stop practicing. You should try different settings. Also, capture from various angles and distances. Gradually, you will understand what will be the best distance and angle for the best-looking product picture.
Lighting For Amazon Product Photography
Lighting is another key factor for product photography that you should focus on. When you are going to get into product photography, you have to learn how light reacts to a product. You have to be proficient in making the best use of lighting.
The light condition of a picture can create a big difference between a professional and an amateur photographer. You might struggle a little bit when you are just starting. Don’t worry about that. Regular practice will give you good control over that.
Now, you’re all set to select the pricing.
Product Photography Editing
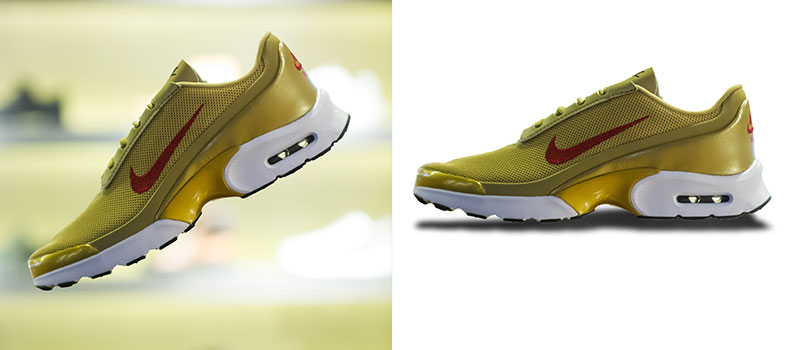
This is the final step to making product photography look professional. Without professional photo editing, your product photography won’t look premium and fail to stand out from others.
To edit photos professionally, you need to learn Photoshop skills. Also, you have to invest a lot of time in it. So, what will be the best solution?
You can send your product photography to a Professional Photo Editing Company such as Clipping Way. They have got 150+ professional highly experienced photo editors.
Surprisingly, their price starts at $0.25 only. Clipping Way is available 24/7 providing Ecommerce product photo editing services all over the world.
This is the final step to making product photography look professional. Without professional photo editing, your product photography won’t look premium and fail to stand out from others.
To edit photos professionally, you need to learn Photoshop skills. Also, you have to invest a lot of time in it. So, what will be the best solution?
Customize Your Product Photo As You Like
We Are Available 24/7
Final Words
Hopefully, you have got the answers on how to get into product Photography. Now, you have to follow our above-mentioned tips to be a good E-commerce product photographer.
Best of luck to you!! If you need any assistance with image post-production, don’t hesitate to ask for a free quote.
Frequently Asked Questions (FAQs)
How much does a product photographer make per hour?
A professional product photographer earns nearly $25 per hour on average. The amount gets higher depending on the experience and quality of the photographer.
How can I become a good product photographer?
To become a good product photographer you have to practice more and more. Also, you should capture different types of products from various angles.
How can I become a photographer for Amazon products?
You have to contact Amazon sellers and show them your portfolio. You can offer a free photo session. If you can impress them with your quality, you can be an Amazon product photographer.
What are some ways to learn product photography?
Watching YouTube videos, doing photography courses, and working as an intern photographer are some of the best ways to learn product photography.
How can I get my first client as a product photographer?
You can create an account and post ads in online marketplaces. Also, you can use social media platforms and groups to get your first photography project.
How Much Should I Charge As A Beginner Photographer?
In the United States, beginner photographers charge 50 to 150 USD per hour on average.


