Want to get an “infinite” resolution for an Image? Only a Vector image can provide you with that option. Whenever we feel the necessity of a high-resolution image, vector graphics come into play.
Printing media, Graphics Designers, Embroidery, and Animation making sectors are too much dependent on vectorized Images.
Do you know that you can also convert jpg to vector in Photoshop? Want to do it yourself without Outsourcing Photo Editing Services?
This is what I am going to teach you in this tutorial. By following this tutorial, you will learn about creating vector image in Photoshop.
I have tried my best to explain every step with details information in a simple way. I hope it will be easy for you to follow this tutorial.
So, let’s dive into the tutorial.
How to Vectorize An Image in Photoshop?
Step 1: Open the image and prepare it
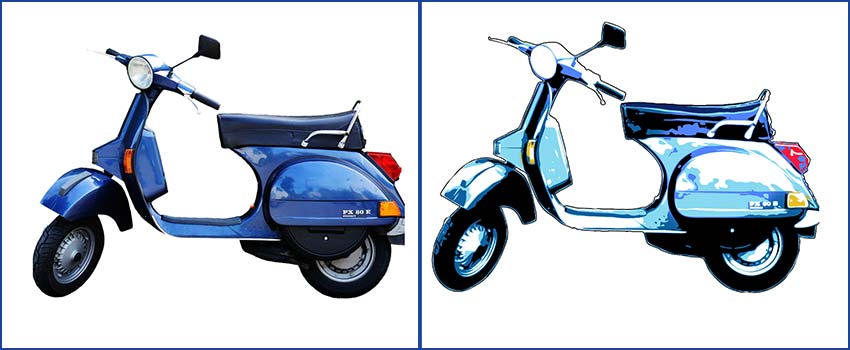
I am going to convert this image to vector in Photoshop.

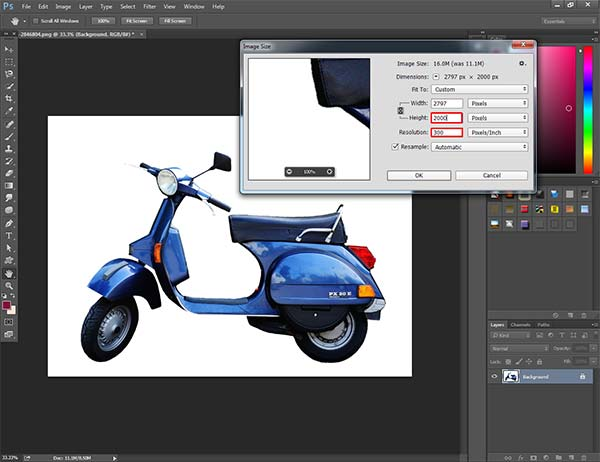
After opening the picture, we have to customize its size to prepare it. Go to the Image> Image Size option from the top menu and set the image resolution 300.
Know More: Ultimate Amazon Product Photography Guideline ( Must See )
Along with it set the image height 2000 pixels. It will automatically increase the Width value. Keep the changed value and Press Enter.
Step 2: Select the object
In the 2nd step, you have to select the object that you are going to vectorize. You can use any of the selection tools. It depends on the object’s shape and size. I am going to use the Quick Selection tool as I think this tool will be perfect for this Scooty.
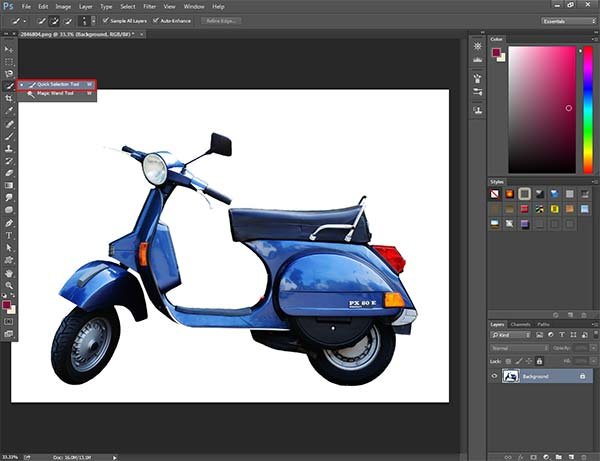
After picking the selection tool, select your object. Then, press CTRL + J to extract the selection in a new layer.
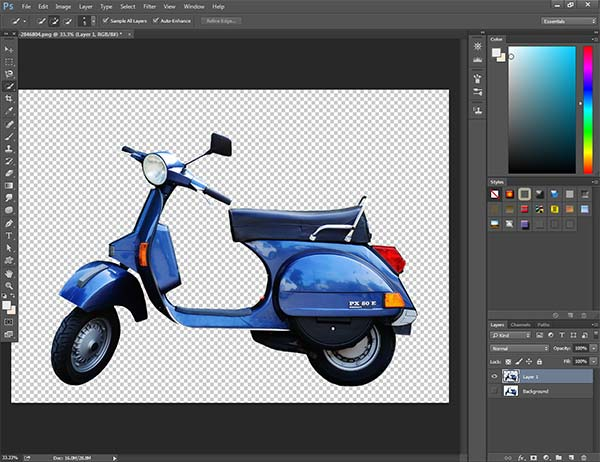
Now, Disable the background layer and choose the new layer. We are going to work on the new layer. Let’s move to the next step.
Step 3: Oil paint effect
At this step, you have to apply the oil paint effect to your new layer. Go to the Filter > Oil Paint option from the top menu. It will bring oil paint option and put these values in their respective boxes.
- Stylization-5
- Cleanliness- 4
- Scale-3
- Bristle Detail-4
- Angular Direction-0
- Shine- 0.2
Then hit OK.
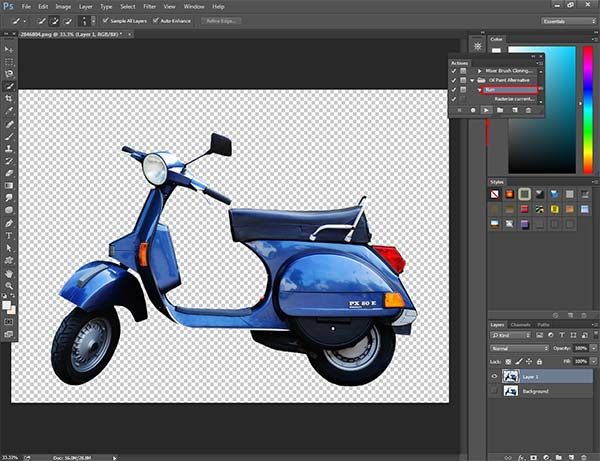
In some versions of Photoshop, the Oil paint filter is missing. If you don’t find that option in your Photoshop, download the oil paint option from here.
Next, extract the downloaded file using 7 Zip or any other extractor. Later on, Press ALT+ F9 to bring the action menu. Click on the more icon and choose Load Acton.
Later on, Press ALT + F9 to bring the action menu. Click on the more icon and choose Load Acton.
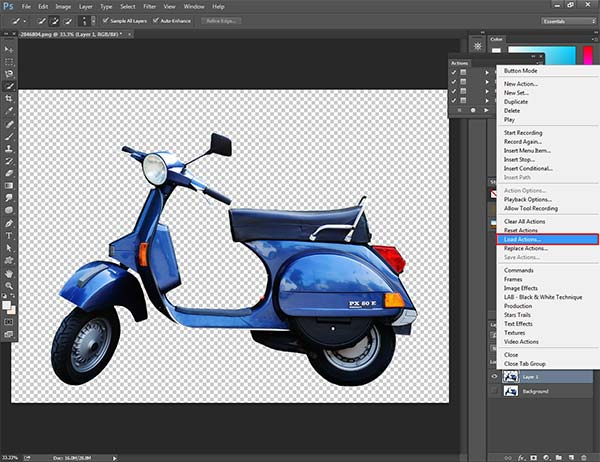
Next to this, choose the extracted file named Oil Paint Alternative. It will load that in the Action menu. Select Run and click on the left mouse.
Let’s jump into the 4th step.
Step 4: Desaturate object
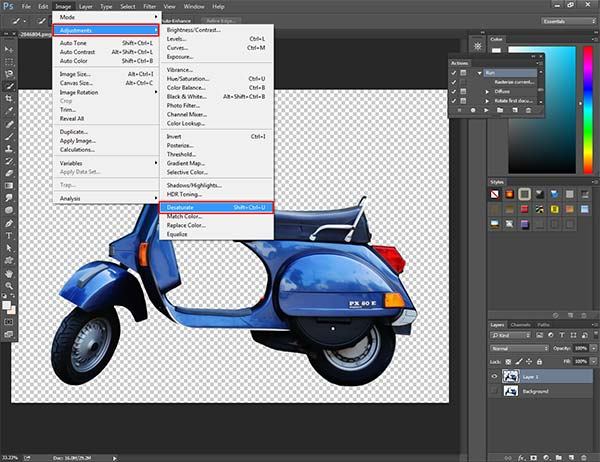
To convert jpg to vector in Photoshop, you ought to desaturate the object. To do this, go to Image> Adjustment > Desaturate.
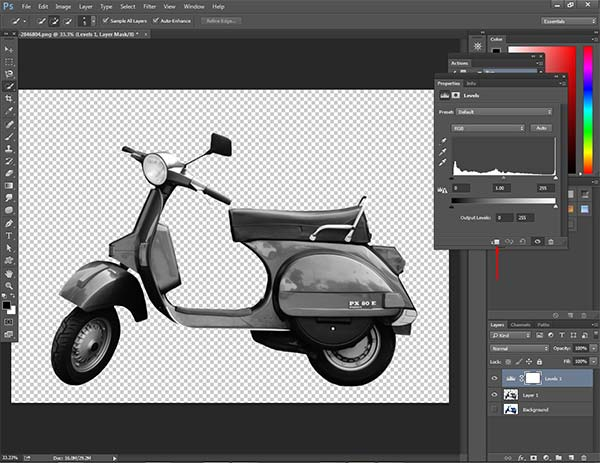
Afterward, select Levels from the Adjustment Layer option. You have to click on the showed icon so that it will only affect this layer.
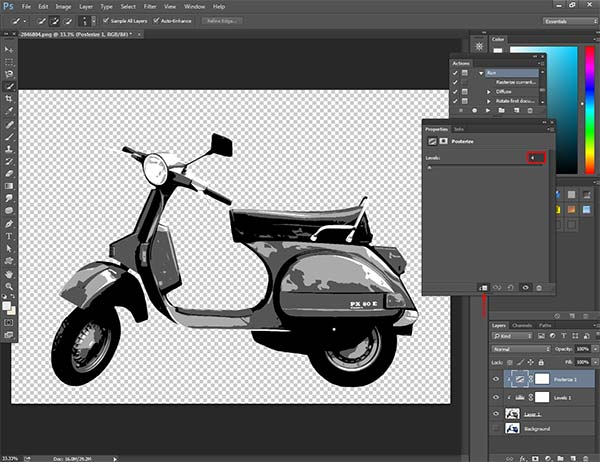
Again, go to the Adjustment Layer option and select Posterize. You will notice there will be a level option. The number of the layer determines the number of color in your object. Put 4 on that box and click on the showed sign.
Now, click on level 1. Then, decrease darkness and increase the brightness to bring more details of the object.
Have a look at the sample picture.
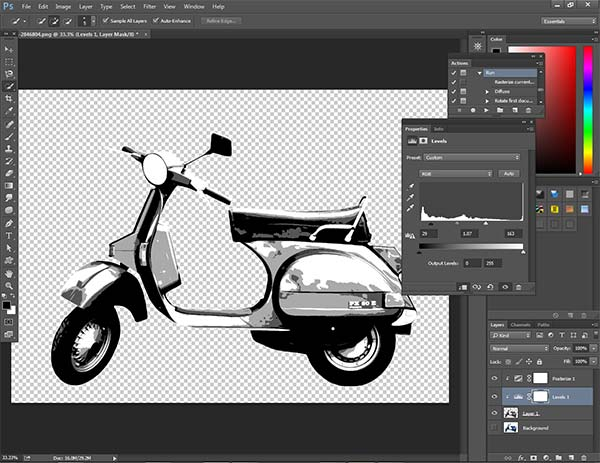
I think it is okay to proceed forward. Press CTRL and click on those three layers to select them. After that, do right-click on the mouse and select Merge Layers to mix these 3 layers into a single layer. At this point, we have got two layers.
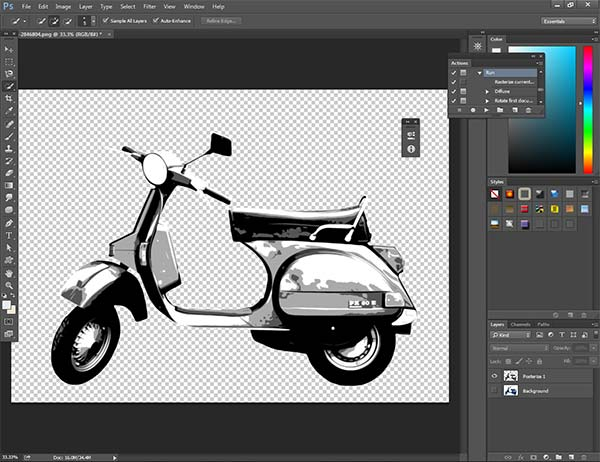
Let see what happened in the next step.
Step 5: Isolate the object into vector layers
This is an important step in vectorizing an image in Photoshop. We are going to use the “blend if” option for making the adjustment. Double click on the Posterize layer to bring the blending option. Reduce the value of the blend if and makes only the white color visible. Take a look at this screenshot.
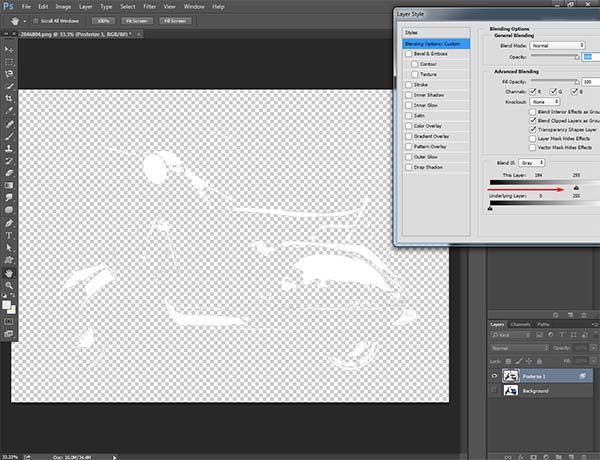
When you are done with this, simply press Enter. Then, type CTRL + J to take the selected part into a new layer. Press and hold CTRL, click on the layer icon. It will select the object. Right-click on the selection and choose to Make Work Path.
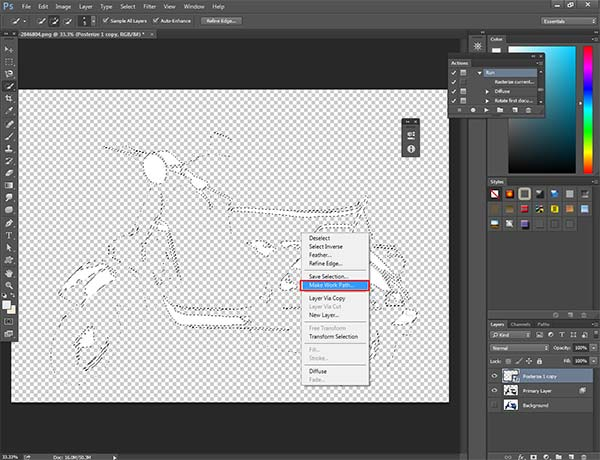
Then, go the Selective Color from Layer Adjustment. Choose white from the color panel and rename this layer as Highlight, primary layer as “Base”. Delete other copied layers. After doing all of this, disable the Highlight layer and select the “Base” layer.
At this point, we have got a vector layer for the white color. We have to repeat the same process for the other 3 colors. Is it sounds time-consuming? Don’t have to be worried about that.
I have a solution for you. Download the “Vectorizer with Blend If!” action from here and extract the file. It is time to move to the next step.
Step 6: Load actions from vectorizer with blend if
Follow the earlier process and load the action named “Vectorizer with Blend If”. You will find 4 different types of actions are available there. To use these actions make sure that the main layer is named as the “Base”.
We have already created the highlight layer. So now we will work on “Midtone 1”. Bring back the blending option by double-clicking on the base layer. Reduce the “blending if” and makes grey color visible.
Press enter after doing that step. Now, select Base Layer and run the “Midtone 1” from the Action menu. It will create a new layer named Midtone 1. It is the vector layer for the gray color.
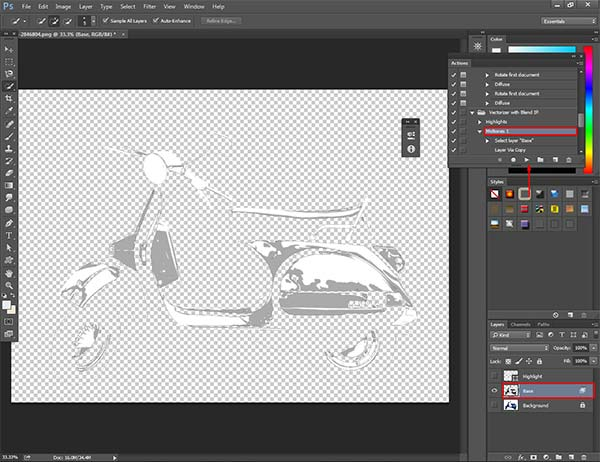
Later on, disable the Midtone 1 layer and select the “Base” layer. Once again go to the blending option and makes the 2nd gray color visible. Next to this, Select the Base layer and Run the Midtone 2 in the previous layer. You will get a new layer. You have to disable that layer too.
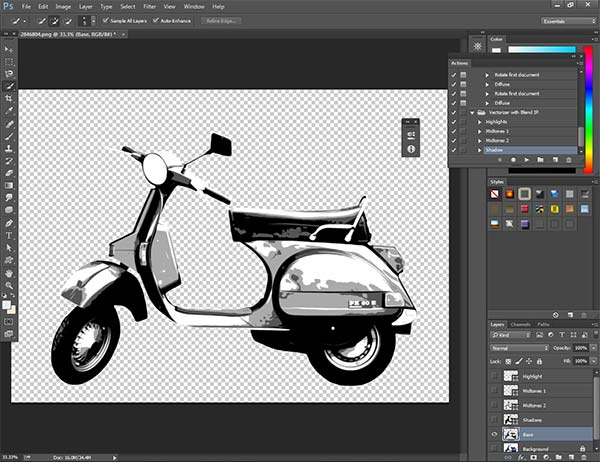
After doing that, in the same procedure create another shadow layer for the Black color and run Shadow from the Action menu. Now, you should have got 4 vector layers for different colors. Have a look at this screenshot.
Step 7: Change the color of vector layers
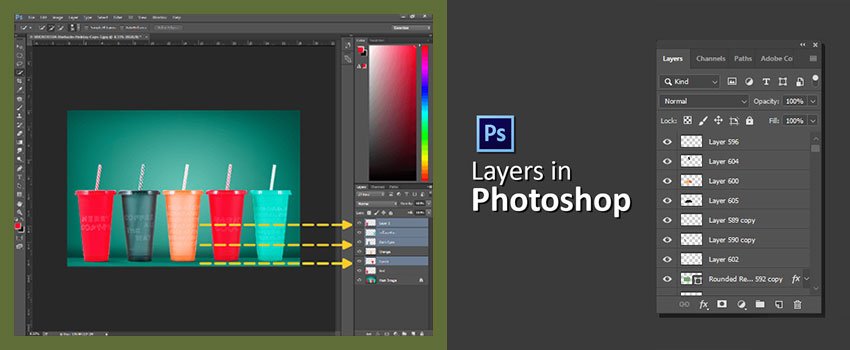
Before going forward, select 4 vector layers and drag them into the group icon to make a Group of those vector layers. Rename that group as Vector. Let’s see our object in the screenshot.
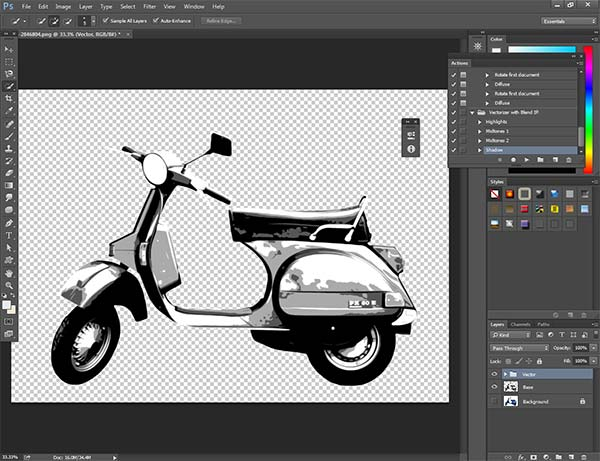
Open layers from the Group and double click on the shadow.
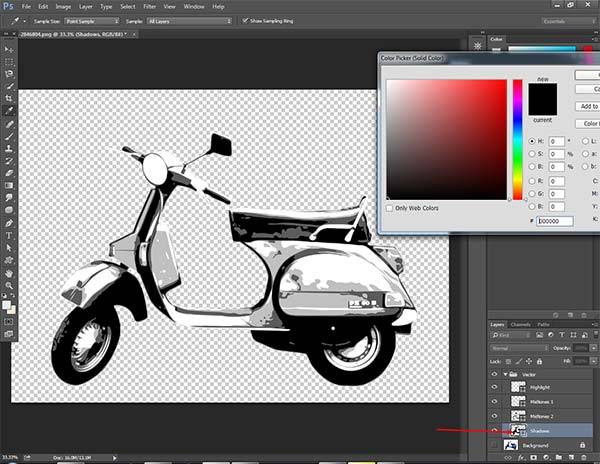
Choose the Black color for the shadow layer. Also, double-click on the Midtone 1 and choose the color according to the object color. I am picking light blue for this object.
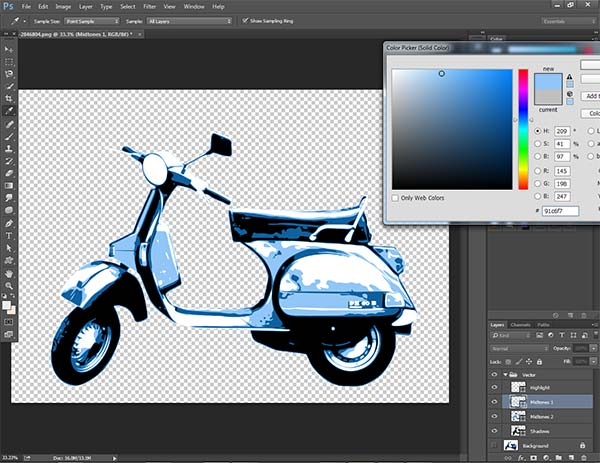
Want to paint different colors on a specific portion? Select that particular layer and press CTRL + J. Then, right-click on the newly created layer and choose the clipping mask option. Afterward, pick the brush tool and start painting in the preferred area.
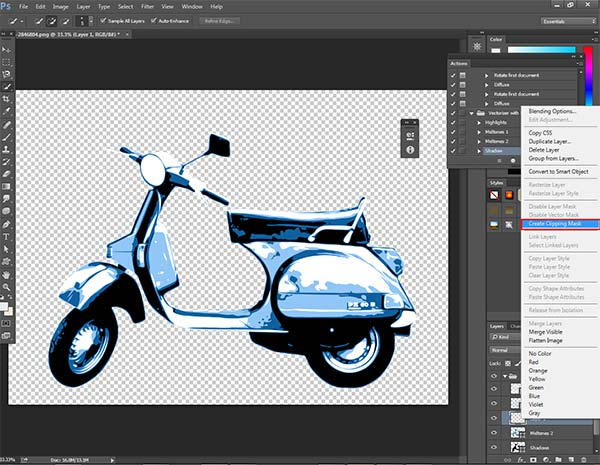
Following this process, you can paint in any portion. I have painted light of the object. Permit me to show you.
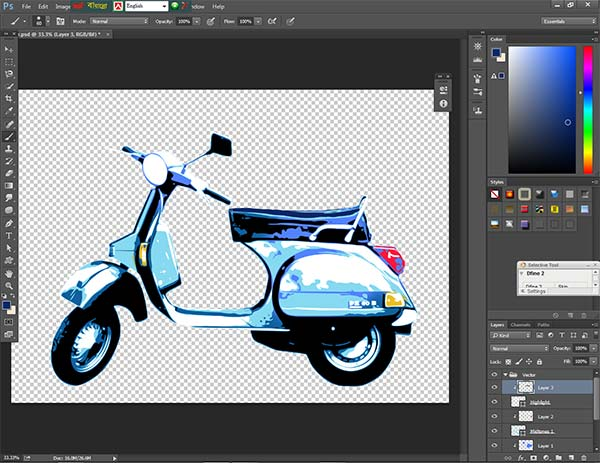
Step 8: Put stroke
This is the final step of vectorizing an image in Photoshop. Go to the Shadow layer, double-click on it. Put a tick on the stroke and change the size of the structure as per requirement. I am going to set it to 5 px. Don’t forget to keep the position outside and hit Ok.
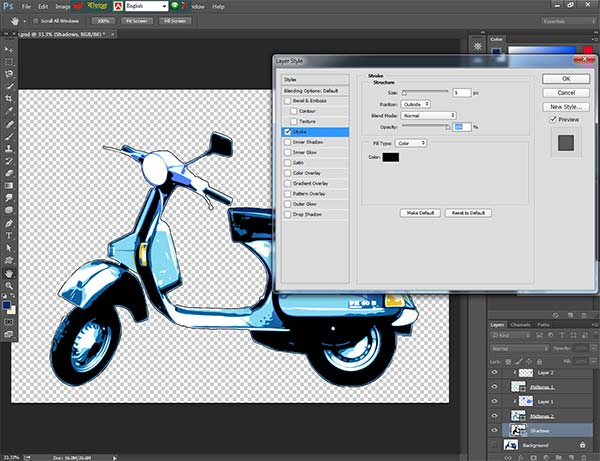
That’s it. Permit me to show you the final output.
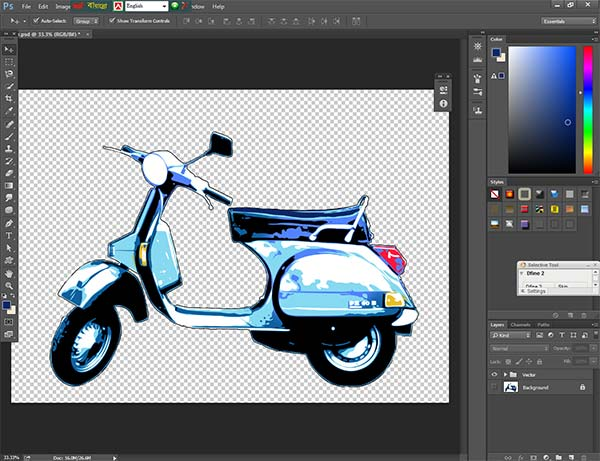
See, we have got a perfect vectorize photo. Zoom in on the picture as much as you want. It won’t lose any resolution.
Conclusion
Thinking about how to turn a drawing into a vector in Photoshop? Following these same steps, you will be able to convert any picture to vector in Photoshop.
From now on, there is no need to worry about high-resolution Vector images. I think all of you will be beneficial from this tutorial.
Stay connected with us to get more helpful and exciting Photoshop tutorials. Goodbye for today.
