Nowadays photos have become the main element of product promotion. As the E-commerce industry is growing at a rapid pace, product photography has a great impact to inspire online buyers. Online buyers make judgments about a product’s quality by seeing the picture’s quality.
When it comes to quality, Photo Retouching is the best image editing method to apply. With the help of Photo Retouching Service, you can improve the overall quality of your photos.
Unfortunately, most people don’t know how to retouch photos properly. Are you keen to know about Photoshop image retouching? This article is going to guide you about that.
Let‘s move forward and learn how to retouch photos in Photoshop like a professional designer.
What is Photo Retouching?
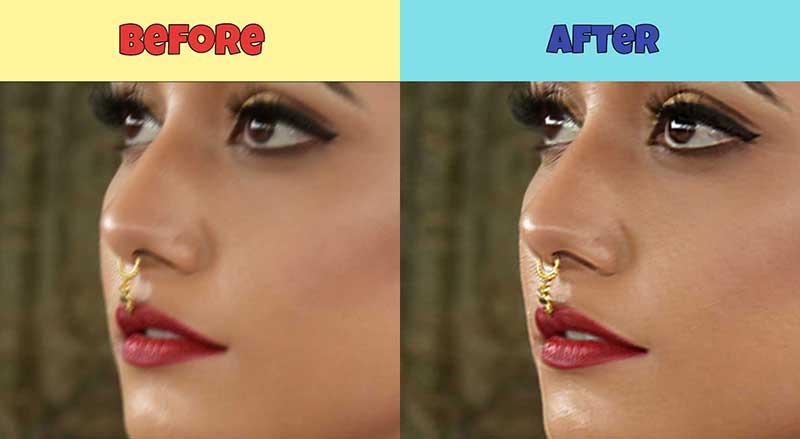
Photo retouching denotes the overall procedures to make an image look error-free, eye-catchy and appealing. Retouching is not only a specific type of correction but also it is a combination of overall perfection.
For example, correcting brightness, color, and exposure and eliminating unnecessary elements.
Why is Photo Retouching Important?
If you want to inspire customers to make a purchase, you have to rely on high-quality photos. Now the question is, how can you achieve superior quality for your photos?
It’s the image retouching service that ensures that quality. Every top-rated online seller, successful E-commerce website, professional photographer retouch their photos to make their photos look perfect and unique.
Even if you are using the most expensive camera and lenses, you can’t produce perfect-looking pictures without retouching properly. Nearly 80% of online buyers get attracted to professionally retouched photos.
Whenever you are looking forward to attracting targeted audiences, you have to make sure that your images have superior quality. Image retouching is mandatory to make this happen.
Difference Between Photo Editing and Retouching
Some people misjudge photo editing and retouching by considering both as the same method. But there are some major differences between those image post-production techniques.
Retouching is also one sort of photo editing. Any type of changes you apply to a picture is considered photo editing. It can be background removal, color correction, removing dust, retrieve damage area, matching color, retouch over exposed area of your product image, or any other changes.
On the other hand, retouching is the post-production procedure applied for beautifying an object. Photos can be retouched in different ways such as
High-End Image Retouching, Soft Retouching, Body retouching, E-commerce product retouching, and jewelry item retouching. Have you got the difference between those two image post-production techniques? I hope so.
Why Do You Need Image Retouching?
Are you still thinking about whether you should apply image retouching or not? Permit me to give you the answer. If you’re involved in a competitive field like photography or an online product selling business, your sales rely on the quality of your images. Image retouching will ensure the highest quality of your photos.
As a result, you can beat your competitors by getting more engagement. Overall, it will improve your business visibility, brand value, and credibility. That can increase your business conversion rate by up to 63%. That would be an excellent milestone to achieve this goal, won’t it?
Does the image retouching task put extra pressure on you? On that note, you can try Image Retouching Service by Clipping Way. They will assist you to get rid of image post-production tasks.
Are you eager to know about how professional designers retouch their photos? Let me inform you of that process.
What Do Professionals Use to Retouch Photos?
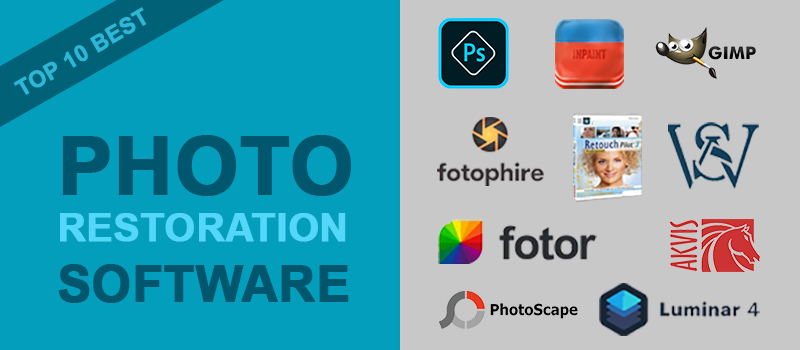
Adobe Photoshop, Lightroom, and Photoshop Elements
Professional designers can’t imagine a list of photo editing applications without having Adobe Photoshop in it. Nearly 6 of the 10 professional editors use Adobe Photoshop, Lightroom, and Photoshop elements.
You can also edit like professional designers with the assistance of Adobe Photoshop. Below, you will find a step-by-step guide about that. We will discuss the procedure in detail.
Affinity Photo
Looking for reliable photo editing software for several photo editing purposes? Affinity Photo is such an application that experts use to retouch photos.
Along with the retouching, you can also perform other Advanced Photo Editing tasks like photo manipulation and color correction. Ready to get introduced to another useful software for product photographers?
Here you go.
PhaseOne CaptureOne Pro 20
Having a user-friendly interface, PhaseOne CaptureOne Pro 20 is recommended by professional designers. Particularly, this photo editing software is handy for retouching Raw files.
Also, there are options to customize the workspace. Overall, it has the perfect combination of useful tools to retouch photos professionally. You can have a try with this for retouching your raw images.
Nik Collection 3
You may get confused by seeing this on this list. Nik Collection 3 is a useful plug-in for retouching photos. Most professional image retouchers are used to this handy plug-in. You can install the plug-in with photoshop. It will improve your entire photo retouching experience with more customized brushes and powerful filters. This plug-in will help you to retouch photos quickly.
Topaz DeNoise AI
Feeling concerned about noisy or grainy images? Topaz DeNoise AI is a powerful plug-in that assists you to remove noise from your photos. For photographers who perform low-light photography, this plug-in will be helpful while image retouching. You can use this plug-in along with Photoshop.
Luminar 4
Skylum Liminar 4 is another top-rated photo editor that some professionals use. It has lots of powerful tools and features to retouch photos according to your requirements.
Specifically, this photo editor is really helpful for retouching images with high contrast. Do you have that type of image? You can retouch like professionals with the help of Luminar 4.
ON1 Photo RAW 2020
Have you already guessed about the purpose of this photo editor? Alright, ON1 Photo Raw 2020 works excellent for retouching Raw files. If you are a beginner, you can start retouching your photos on this photo editor. For advanced and high-end retouching, you may not be fully satisfied with this one. But for performing basic retouching, this photo editor is more than helpful.
Types of Retouching Services
Depending on the type of photos, Clipping Way has classified Photo Retouching into 3 different categories. Permit me to introduce you to those categories.
Product Photo Retouching
Product photo retouching includes all sorts of E-commerce products such as jewelry, fashion accessories, furniture, electric gadgets, accessories, toys, and other products.
You can avail of the service at a reasonable price from Clipping Way. Product photo retouching and cleaning will bring the best outlook to your photography.
Car Photo Retouching
Want to showcase your cars in the most appealing look? Professionally retouched car photos will help to generate more conversion and improve the overall look of your website.
You can get the advantage of a positive first impression. Clipping Way offers Car background changing, high-end retouching, removing people, HDR effect, and 360 effects. Try a Free Trial now for Car Photo Retouching.
Auto Parts Retouching
Auto parts buyers are shifting towards online to make their purchases. You can put your products on focus with the assistance of Auto Parts Retouching.
Professional designers will remove the background and present your accessories on a plain white background. Ask for a quote now to get special discounts.
How To Make Retouch Photo In Photoshop
Here’s the step-by-step explanation of how to retouch photos professionally in photoshop.
Step 1: Open image in Photoshop and pick Pen Tool
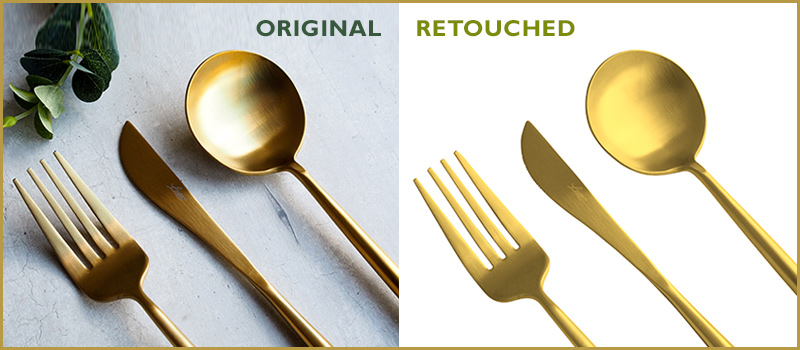
First of all, open the image that you want to retouch in Photoshop. After that, enable the pen tool from the left side. I am going to use this picture for the explanation.

We need to create a path around the object so that we can isolate the main object from its original background. Next to that, zoom in on the picture and left-click on the outside line of your products.
Here’s an example.

Step 2: Zoom in 300% for complex area
While creating paths around your object, you ought to zoom in 300% so that you don’t miss any details.

Here’s the look after creating paths.

At this point, the object is covered by vector paths. Now, we need to convert the path into a selection. Click on the work path icon to turn the path into selections.
After turning the path into selections, you can copy the selected object into a new area. To do that, click on the background layer and press “CTRL + J”.

Step 3: Select Clone Stamp Tool
Next to that, you have to fix unwanted spots and wrinkles with the help of a clone stamp tool. You can get the tool here.

Select the copied layer and left-click on the areas where you want to apply the clone stamp tool. It will fix unwanted spots and unnecessary marks.

Then, we have to create a new layer with a plain white background. You have to click on the “Create New Layer” and set the background color to white. After that, place the layer next to the copied layer. Here you can see the sample.

To change the layer position you just need to click on the layer and drag it down. At this point, we have got the product photo on a plain white background. Let’s move forward.
Step 4: Customize Hue, Saturation, and Color Balance
You need to start by copying the previous layer. Click on the layer and press “CTRL+J”. Then, open the image adjustment option from the top and select “Hue and saturation” from the list.

Later on, you have to reduce the saturation according to the actual color of your product. Next to that, you have to customize the color balance. As the actual color of the spoon is golden, I am going to customize the yellow color from the color balance box. Here you can see the difference.

You have to make sure that the image is denoting the real color of your object. At this point, the sample color feature will be helpful. Allow me to show you how to apply it.
Step 5: Apply Sample Color
You have to open another image having the exact color of your product. Then, we are going to match our product’s color with the sample. Drag the image on Photoshop to a new window. After that, click on the previous image and go to the “Image>Adjustments” option from the top.

You will get the “Match color” option. After that, you have to select the sample image to match that color.
You will get that option from here.

That’s it. It will apply the sample color to your image. While applying the “match color” effect, you have to reduce the color intensity a bit. Have you reduced that? Let’s give the finishing touch.
Step 6: Increase “Contrast” & Save the Image
Go to the Image option from the top and select “Contrast”. You have to increase the contrast so that the product photo looks sharp and glossy.
Here is the final look.

To save the image, go to the file option from the top and click on the “Save As”. After that, you have to select your preferred image format. Now, the image is ready to be uploaded online.
Have you also completed retouching your image? Don’t hesitate to contact us for Professional Photo Retouching Services. You can also consult with our experts.
5 Tips For A Natural-Looking Photo Touch Up
Here are 5 tips for you so that you can retouch your photo with a natural look.
Tips 1: Don’t customize the shadows and contrast too much
Customizing shadows and contrast too much can change the actual color of the image. Therefore, you should change it considering the color of the main product. To undo any changes you can type “CTRL + Z”. Also, take a new layer while working on shadows that will give you more flexibility.
Tips 2: Utilize clone stamp tool
You can utilize the clone stamp tool for a natural-looking photo touch-up. Let me explain to you. Professional designers use that tool to fix wrinkles and spots. Do you know how to pick the sample? You can do that by pressing the “ALT” key.
Tips 3: Reduce tolerance and opacity while working on light colors
While retouching a light-colored image, you should reduce the tolerance and opacity. Where to find those options? Well, “Tolerance” and “Opacity” options are available at the top. You can keep those around 25% to 50% for the light color.
Tips 4: Apply Dodge Burn Tool
Are you involved with jewelry photography? You can apply the dodge and burn tool to make your jewelry product photos more attractive. You can control the lightness and darkness of your image while keeping the outlook natural.
Tips 5: Use History Brush Tool
Have you made any mistakes? You can bring back the previous version with the help of the history brush tool. You just need to select the tool and drag the mouse over your image. It will undo the changes and show you the original look of those areas.
Conclusion
At this stage, you know everything in detail about how to retouch photos. From now on, you should be able to retouch your own photos. Are you looking for expert assistance? In that case, Clipping Way will be the best choice for you to outsource your photos.
FAQ’s
How much do you charge for photo retouching services?
It depends on your requirements and image categories. Ask for a quote to get the exact price. Our price starts from $0.5
Which photo editor do you use to retouch photos?
We use the latest version of Adobe Photoshop.
How many images can you retouch in a day?
We Can Deliver 3000+ Professionally Retouched Images Per Day.
How do i fix imperfections in my image?
You can use spot-healing brush tools to fix imperfections.
