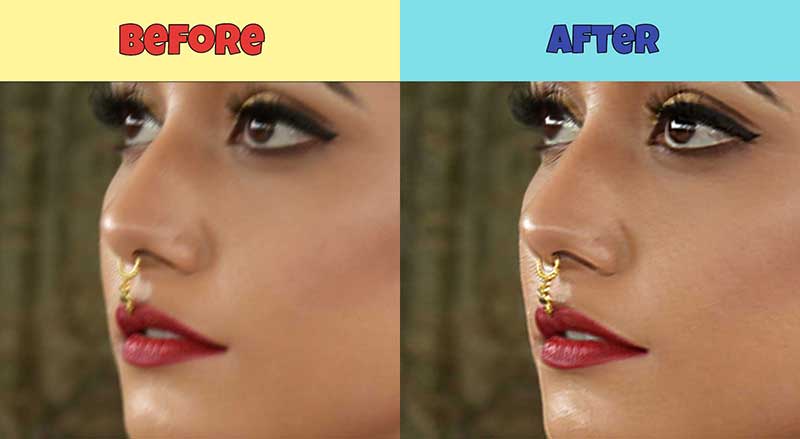
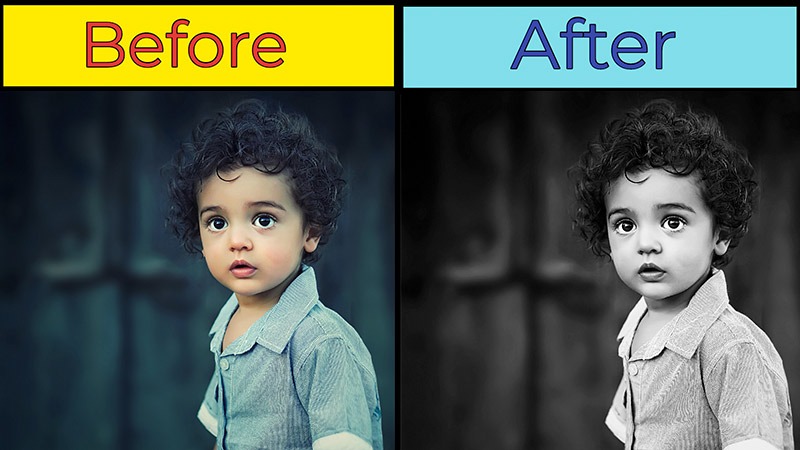
An image fade-in effect is a process of changing the opacity of the main object so that it looks hidden to visible.
This effect is used for promoting something and making any special announcement through images. It looks awesome when the subject seems to be floating from the background.
After reading this article, you can also apply this trick to your images to grab more attention from the viewers. You are going to know about the two best methods of how to fade an image in Photoshop.
You do it with any recent version of Photoshop including Photoshop CS5, CS6, Adobe Photoshop CC, Photoshop 2021, and so on.
Method 1: How to Fade An Image in Photoshop with Gradient Tool
Step 1: Open your image and copy the background layer
Firstly, we need to begin by opening the image in Photoshop. After that, you have to press CTRL + J to copy the layer. We are going to show you how to fade an image to any color background with Photoshop with this picture.
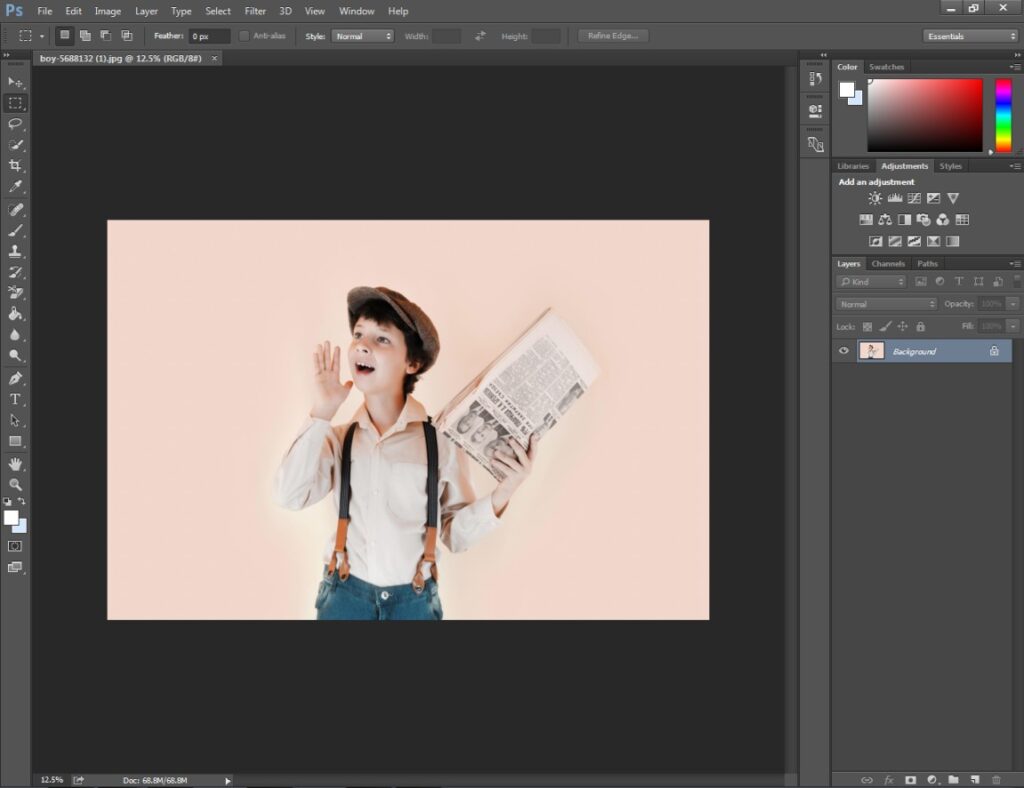
This type of image looks eye-catchy after applying fade in effect. You can use this effect for creating flyers, and product promotion campaigns. Then, you have to press CTRL + J to copy the original background layer.
Step 2: Select subject using the Pen Tool
In the 2nd step, you have to select the pen tool from the left side and zoom in on the image. You will get the tool from this option.
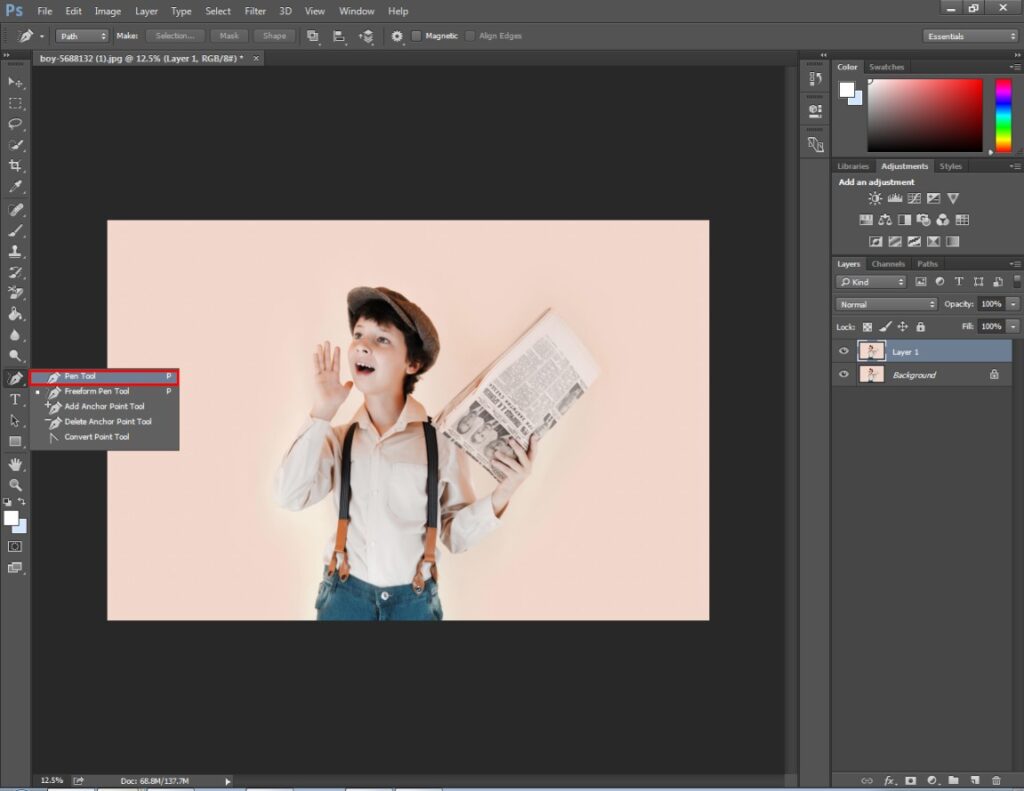
After that, you need to zoom in on the subject and start creating vector lines around the subject. Click on the left mouse using the path from here.
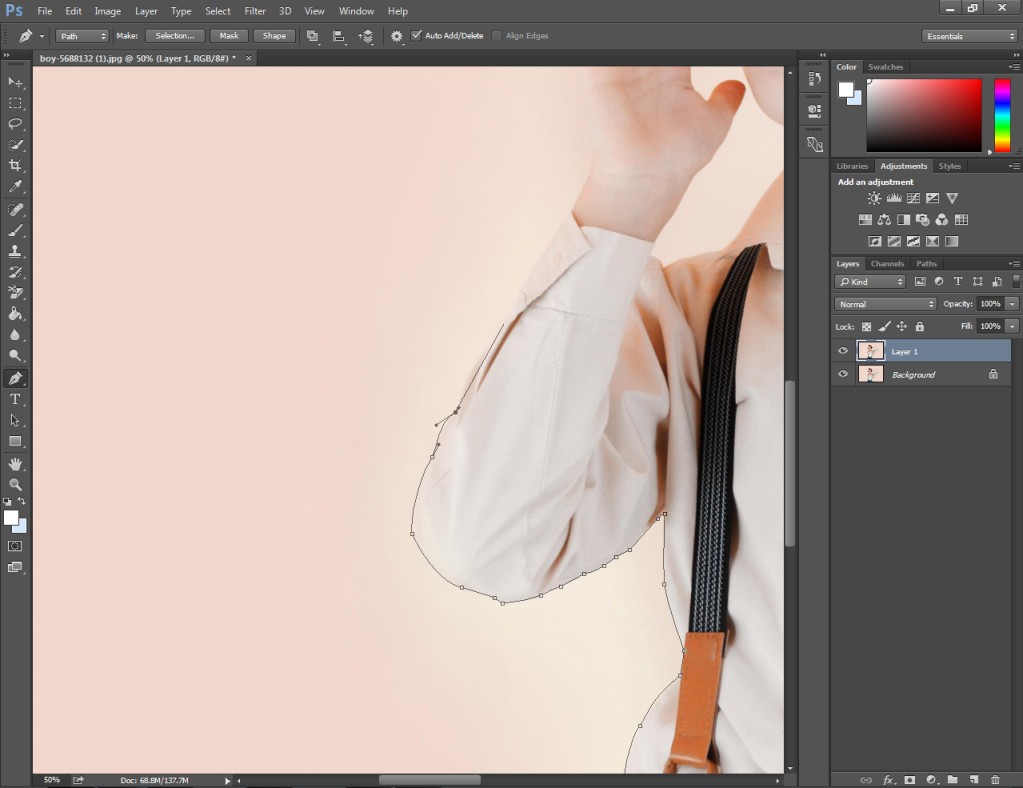
You have to make sure that the entire subject is covered with the paths created by the Photoshop pen tool.
Step 3: Subject selection and remove background
After covering the subject using the path, you have to make a selection of the subject. Hold the ALT key and select the subject to make the anchor point visible.
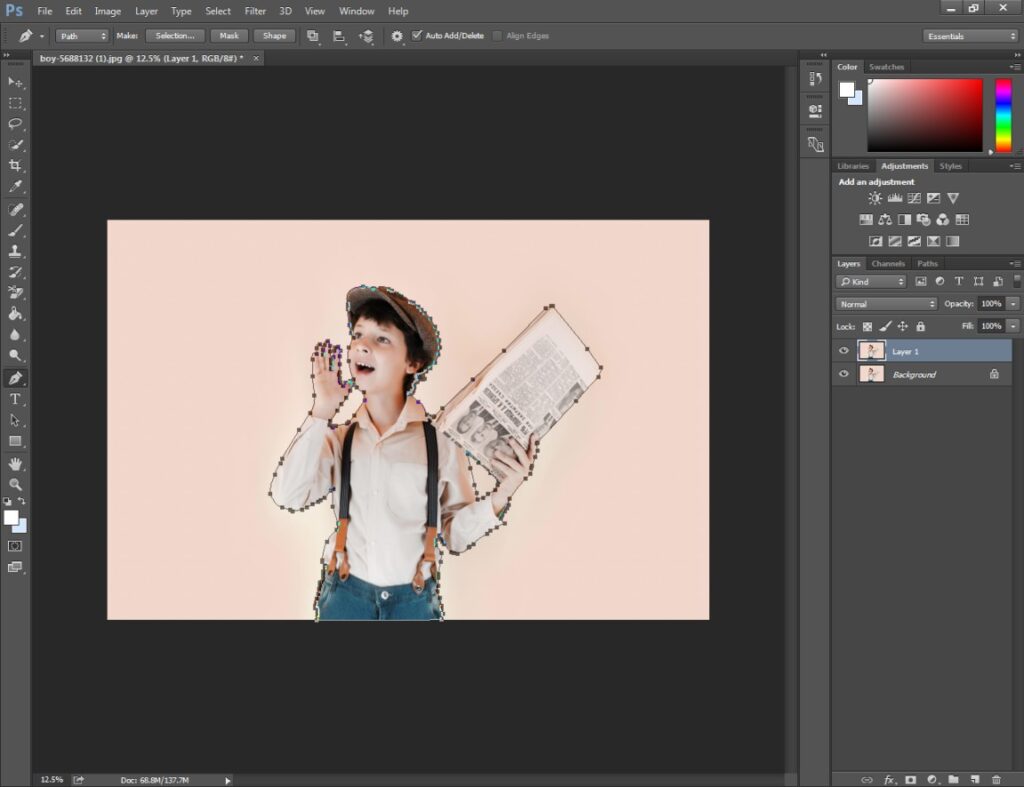
Then, you have to right-click on the subject and click on “Make Selection”. After that, there will be moving lines around the subject indicating that the subject is selected.
At this point, you have to press CTRL + SHIFT + I for inverse selection. Next to that, you have to press the Delete key to remove the background.
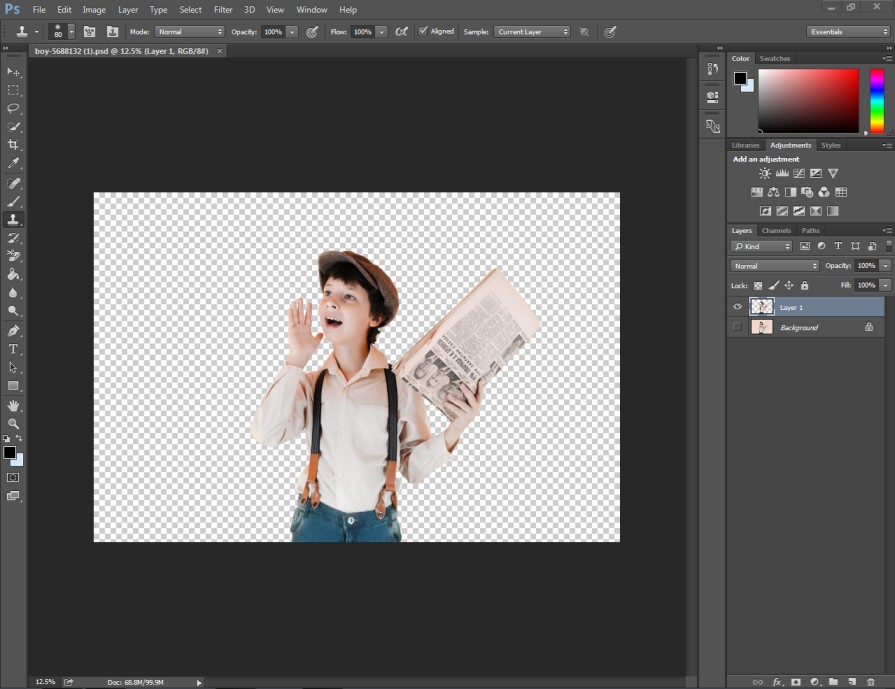
Background Removal is also essential for other types of editing in Product photography. However, it’s time to proceed to fade an image in Photoshop.
Step 4: Add a solid color background
In this step, we are going to put a solid color background behind the subject. To do that, go to the Adjustment layer option from below and click on the solid color opinion from the list.
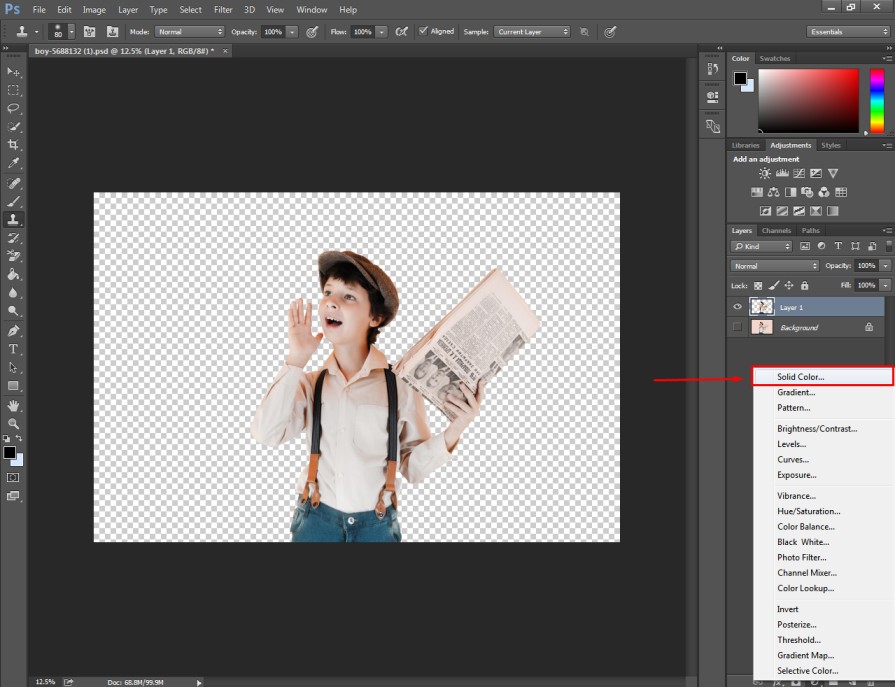
After picking a color, you have to place the color fill layer below the previous layer. Here you can see how to position the color fill layer.
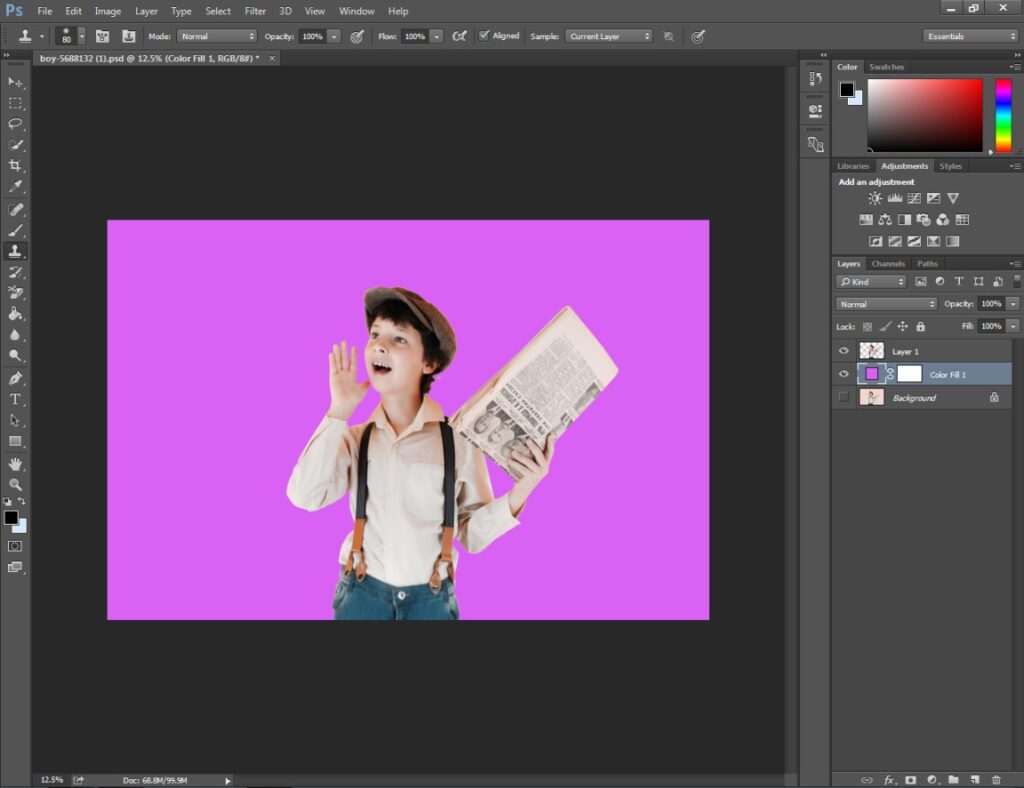
Now, we are going to reposition the subject so it looks floating.
Step 5: Reposition the subject with the Move Tool
Click on the move tool from the top and move the subject a bit at the top. It will leave more space in the below. It will make the image fade in effect more attractive. Also, make sure that you don’t move the object too far from the top.
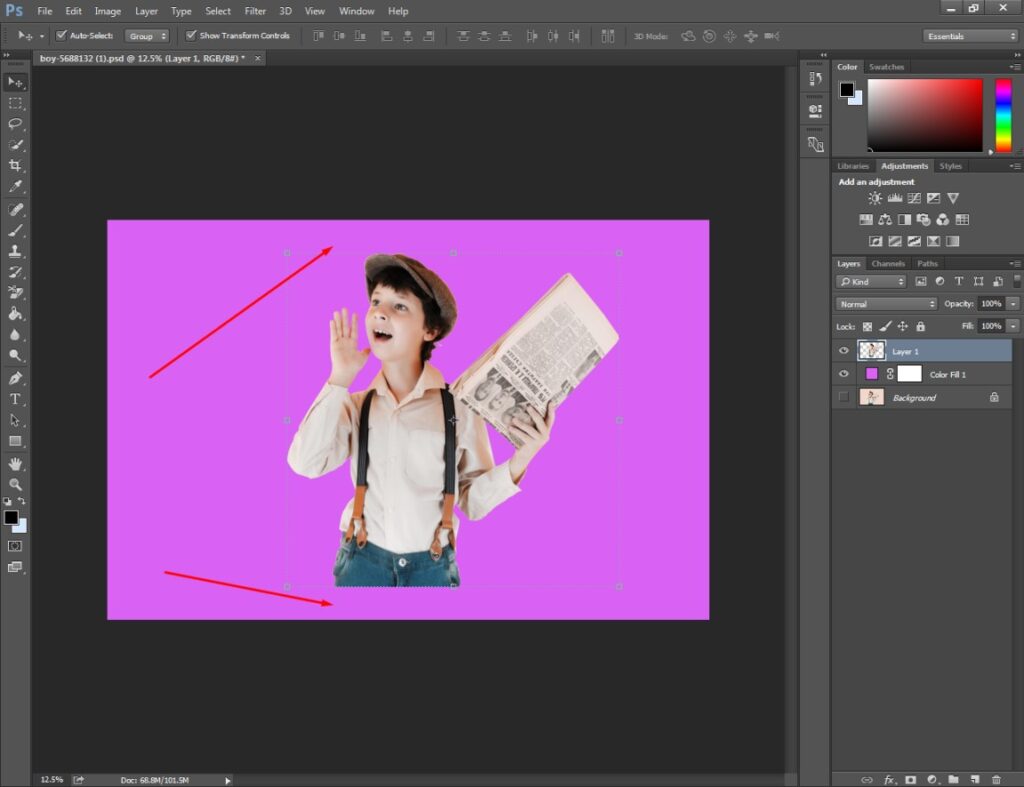
Now, we are going to apply the gradient tool. It will make the image fade in Photoshop.
Step 6: Select Gradient Tool
In this step, you have to click on the mask icon from the layer panel and add a mask to the layer. Then, you have to pick the gradient tool from the left side.
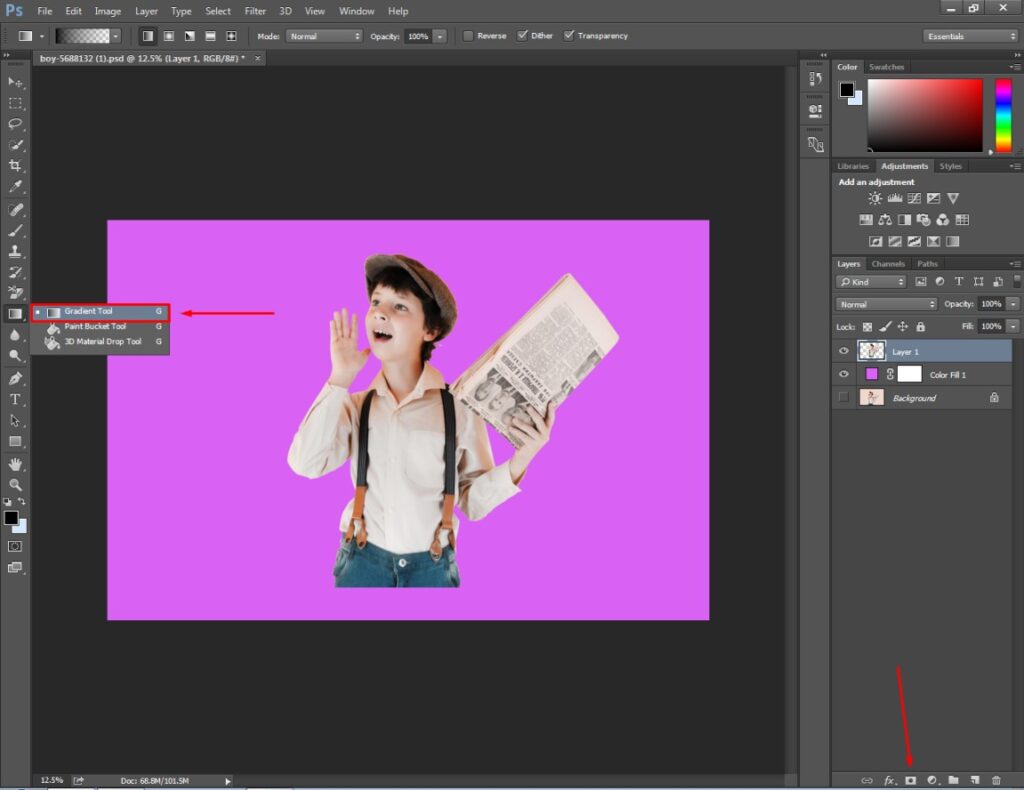
Next to that, you have to click on the gradient option from the top and select the “Foreground to Transparent” option. It will make the effect of fading an image in Photoshop more accurate.
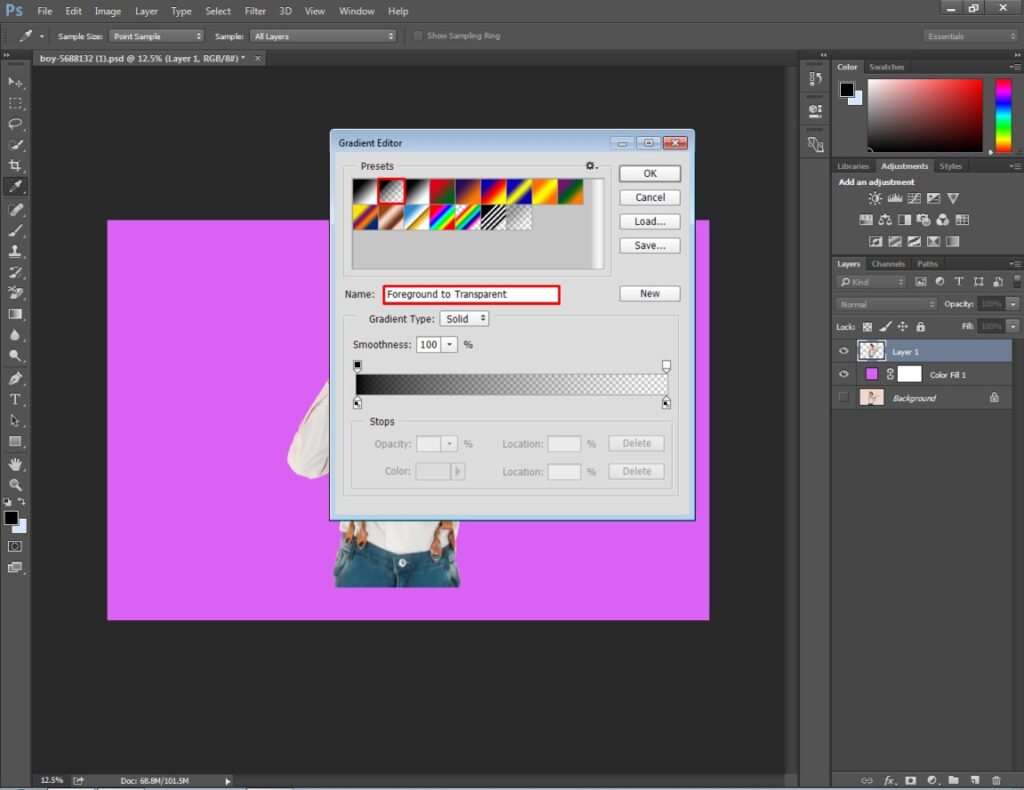
After that, you have to drag the mouse from the bottom side to the upper side. It will make your image look faded.
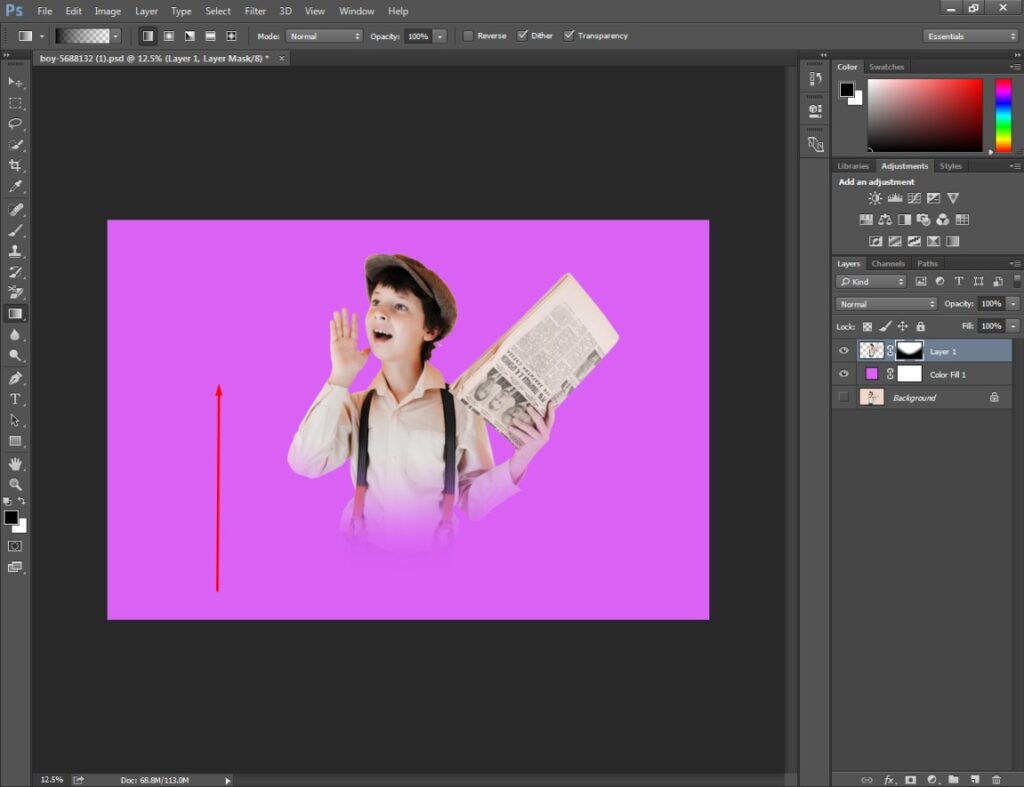
According to your requirement, you can drag the mouse several times up and down to apply fade in the image in Photoshop. This is the final output.
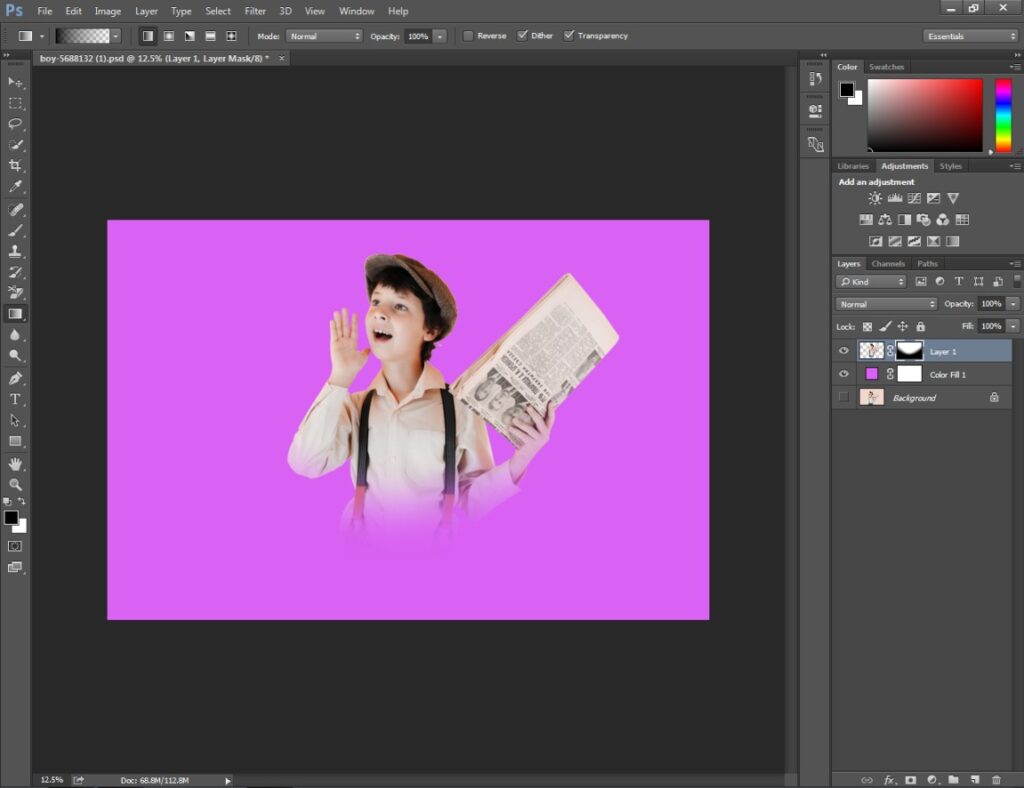
This was the first method of how to fade an image in Photoshop using the gradient tool. In the second method, I am going to show you how to fade an image in Photoshop using the brush tool.
Method 2: How to Fade An Image in Photoshop with Brush Tool
For this method, we are going to use the quick selection tool and brush tool to fade in the image. You can use this trick on your product photography Here’s the step-by-step procedure.

Step 1: Copy the background layer
Firstly, open your E-commerce product photo in Photoshop and copy the original background by pressing CTRL + J.
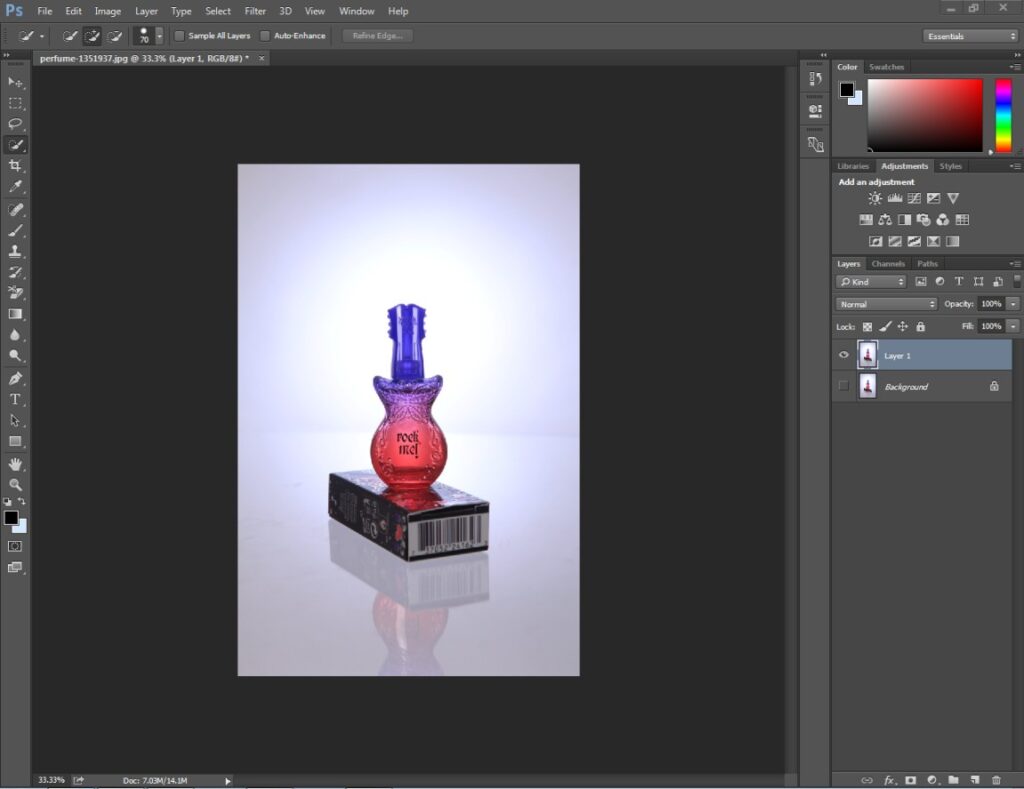
Then, disable the original layer by pressing the eye icon on the left side of the layer panel. In this method, you can always have a look at the original form of the image when needed.
Know More: How Much to Charge to Edit Photos in 2022
Step 2: Pick the Quick Selection Tool
For this fade image in the Photoshop tutorial, we are going to use the quick selection tool to select the subject. You will get it from here.
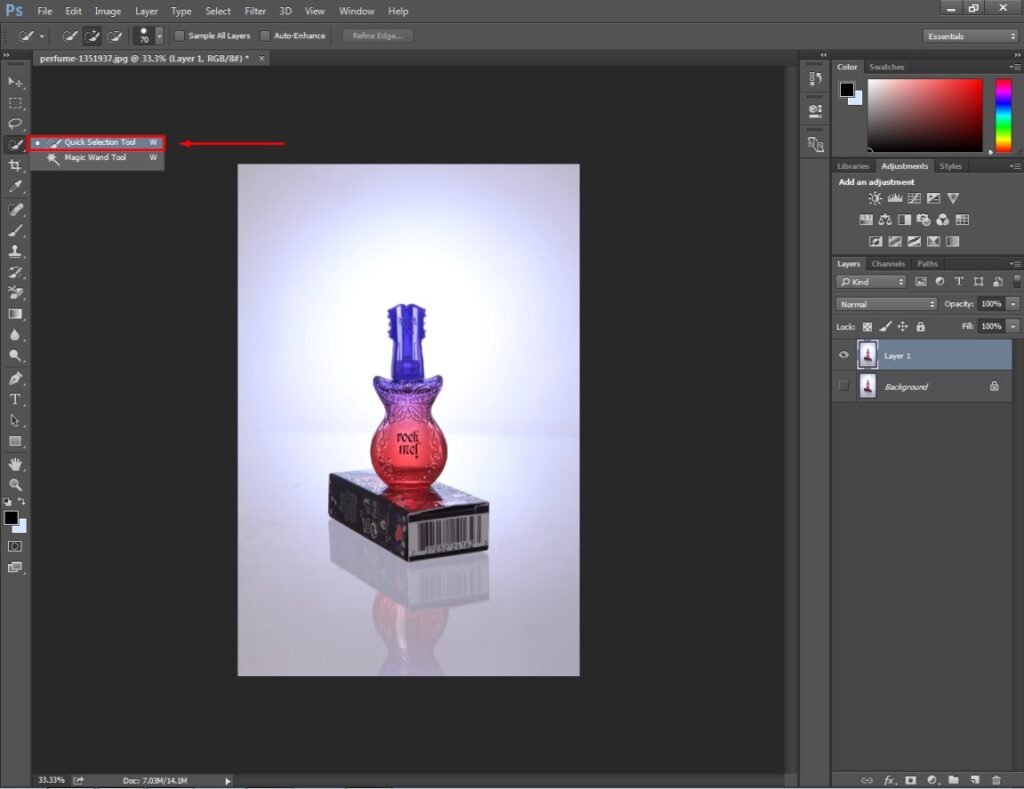
Considering the type of subject, you can start selecting the background. Or, you can also make a selection of the subject directly.
Hold the left mouse key and drag it over the subject to make a selection. You can also use the refine edge option to fix visible edges.
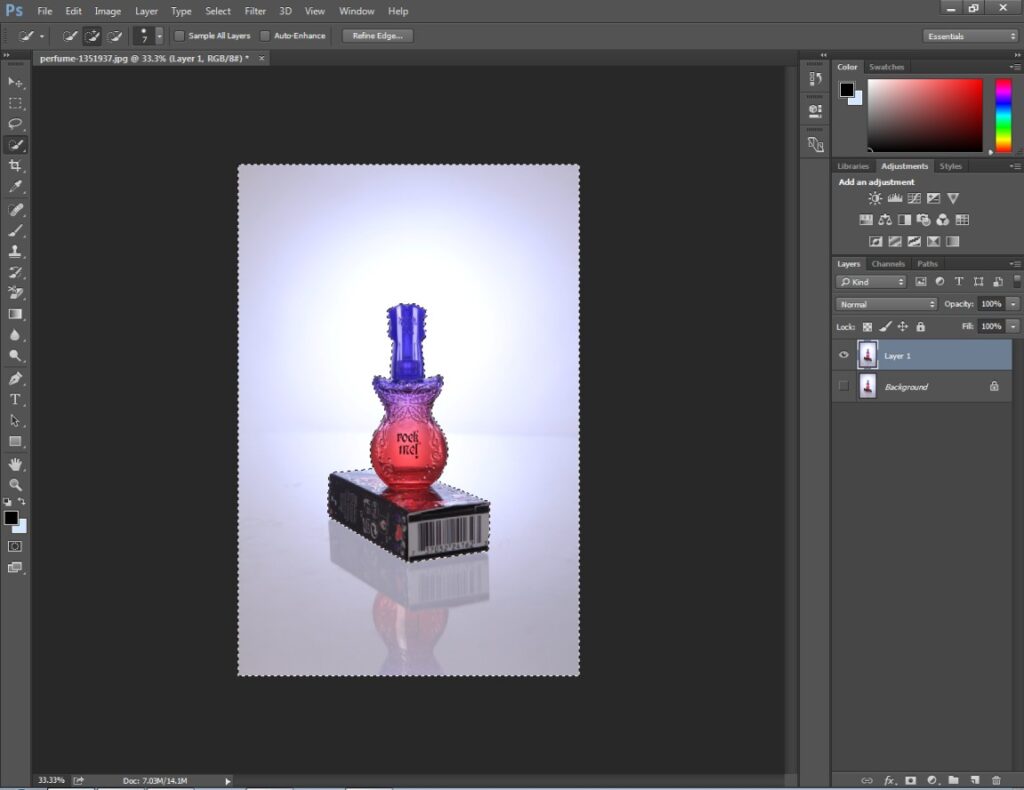
After selecting the background, you need to press the Delete key to make the background transparent. This step is pretty similar to the previous method.
Step 3: Add Layer Mask
In this step, add a layer mask to the copied layer that you are working on. Then, we are going to add a solid color layer using the layer adjustment option. You can find the solid color option in this section.
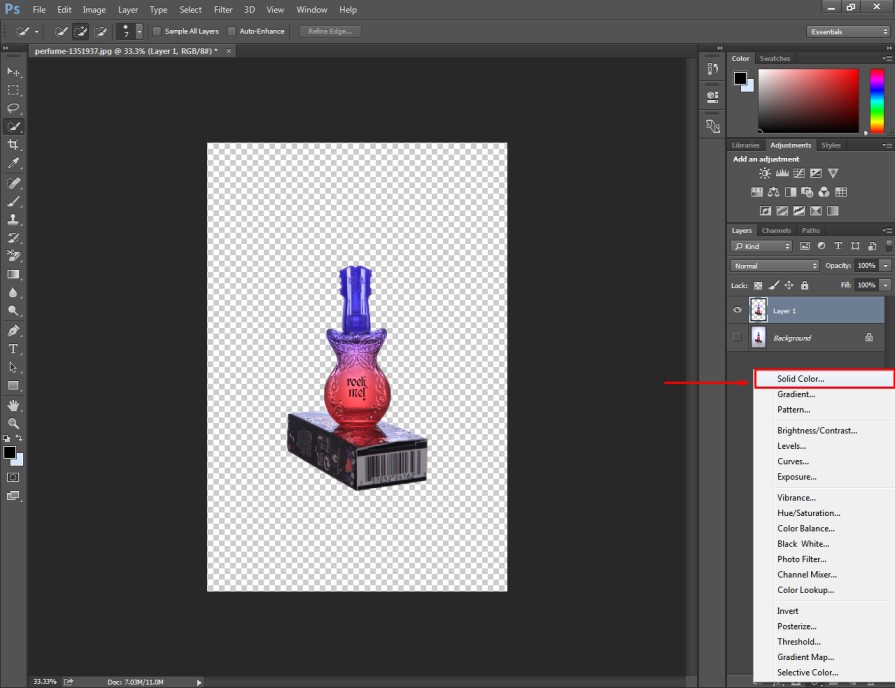
After that, choose a suitable color considering the object and place the color fill layer below the previously copied layer. Now, we are going to apply the brush tool to bring the fade into effect.
Step 4: Apply Brush Tool
You will get the brush tool from the left-side editing panel. After picking the tool, go to the top and select a soft brush from the above option.
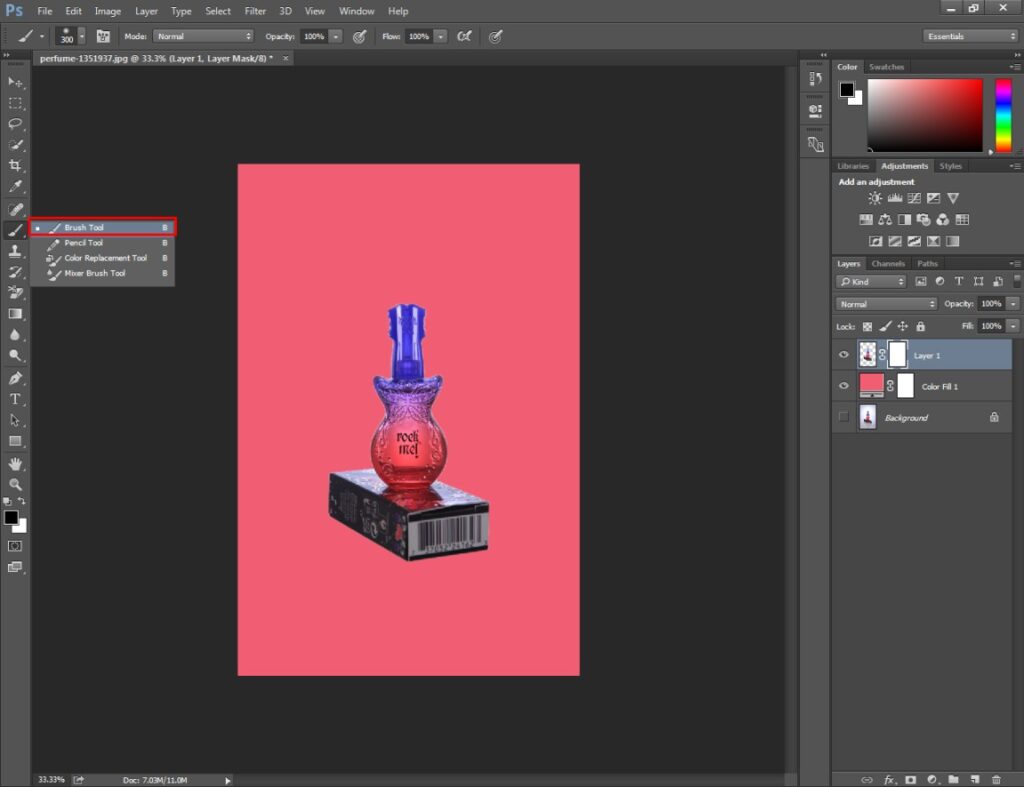
Also, you have to make sure that you set the hardness to 0. Otherwise, the fade effect will look harsh. After that, you should left-click on the below subject or anywhere else where you want to bring the fade effect. Here’s the ultimate result.
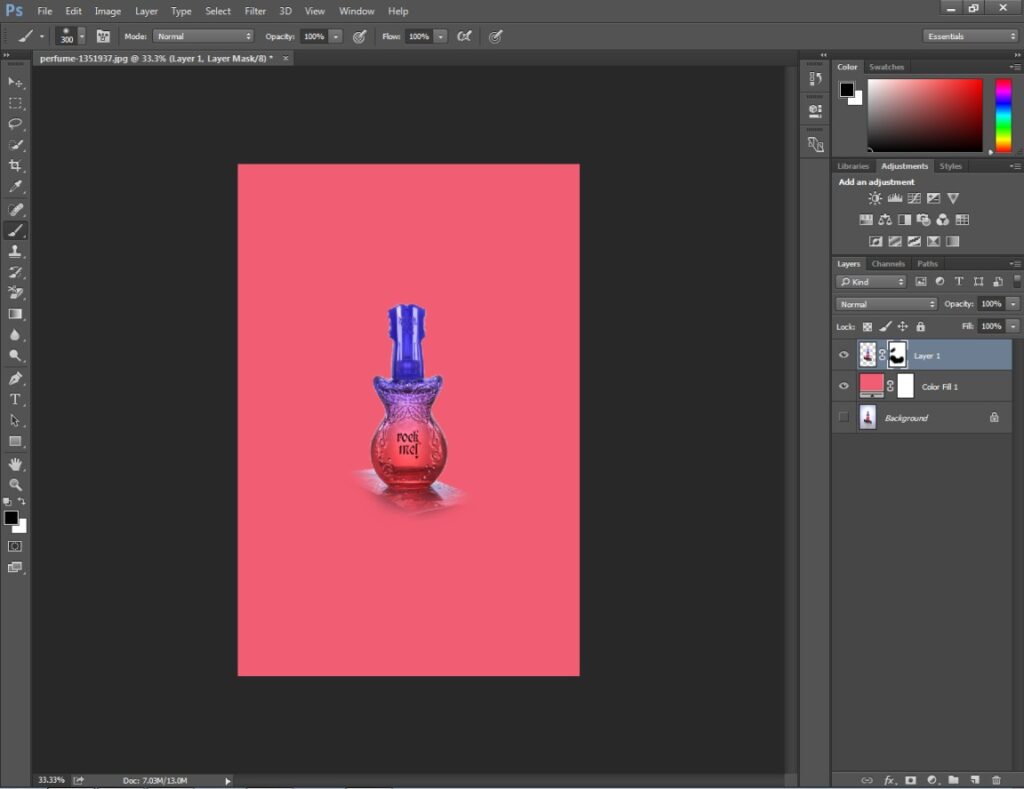
Now, it looks like the subject is floating in the background. You can also apply these procedures to your product images to get this type of effect.
Tips You Should Follow
- Separate the targeted object before applying the gradient tool.
- Add a solid color layer instead of the transparent background.
- Copy the original layer before adding a mask to the layer.
Tips You Should Follow
- Do not set the hardness of the brush tool too high.
- Do not use the quick selection tool for soft edges.
- Do not use White as the foreground color while masking.
Do you want to enhance the beauty of your product photos? Then, we highly recommend you try the Product Photo Editing service by Clipping Way.
Final Words
Those are the two methods of how to fade an image in Photoshop. You can follow the first method for creating flyers or any commercial announcement pictures.
The second method is suitable to use for product promotional campaigns and product advertisements.
Do you want to get assistance from professional photo editors? Clipping Way is available 24/7 to assist you with the best-quality image editing. You can start now with a free trial.
FAQ’s
How can I fade an image gradually in Photoshop?
You can use the gradient tool to fade an image gradually in Photoshop.
Is it mandatory to separate the original background to fade an image?
No, it is not mandatory to separate the background. But separating the background will assist your photograph to achieve a better look.
How do i fade a picture into colorful backgrounds?
You have to add a solid color background from the layer adjustment option to fade a picture into a colorful background.
Which size of the brush is recommended to fade an image in Photoshop?
You should set the size according to the measurement of the targeted object. You can change the size of the brush by pressing “CTRL [ ]”.


