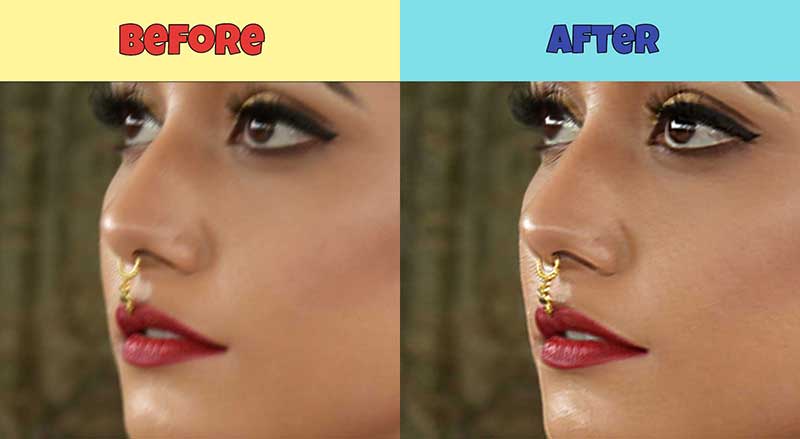
To bring variety in Photography face swapping is an effective method. You can also apply the technique in such photos where everything looks perfect apart from the model’s face. Would you like to know the exciting face-changing technique?
Through this article, you are going to learn how to face swap in Photoshop. After reading this article, you will be able to swap your face with celebrities or anyone else you want.
This is going to be helpful for portrait photographers, fashion photographers, and product photographers.
Why Should You Swap Face in Photoshop?
You may have to swap the face for many reasons to bring a perfect look to your image. Suppose you have captured lots of images with a similar model. By swapping faces in Photoshop, you can do it without changing the model. It will reduce your photography cost and time.
It’s also suitable for eCommerce Product Photo Editing. On the other hand, you can use the Photoshop face-swapping technique for product photography.
Publish photos with different faces will bring uniqueness to your images. At the same time, this is a great method to fix imperfect faces without taking a reshoot.
Know More: How Much To Charge To Edit Photos
How to Do Face Swap in Photoshop?
Step 1: Bring your Photos in Photoshop
First of all, you have to start by opening your photos in Photoshop which shows the face clearly.
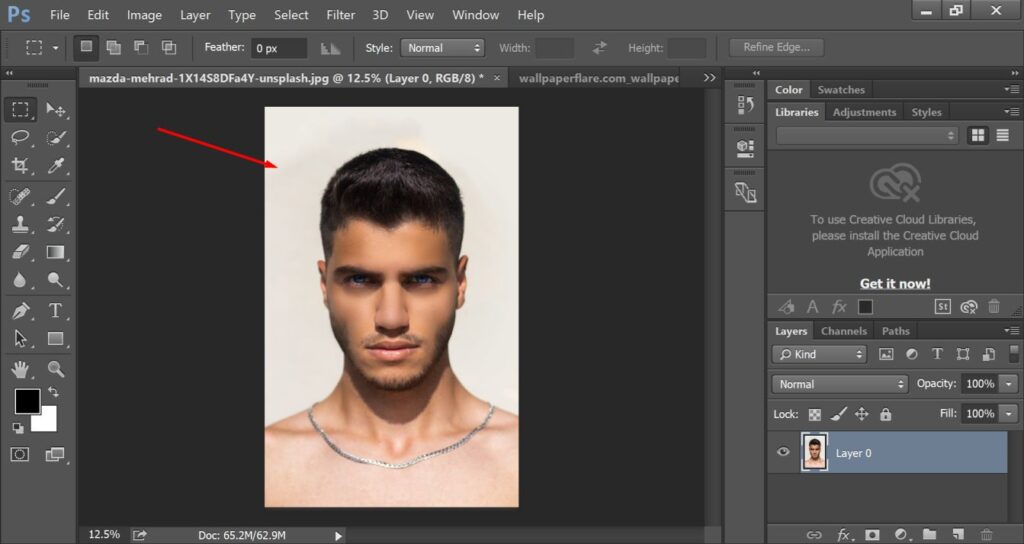
You have to open both of the image source images that have the body and destination image that you want to replace the face. That’s the face I am going to swap.
Here is another image of Tom Cruise where I want to place the face.
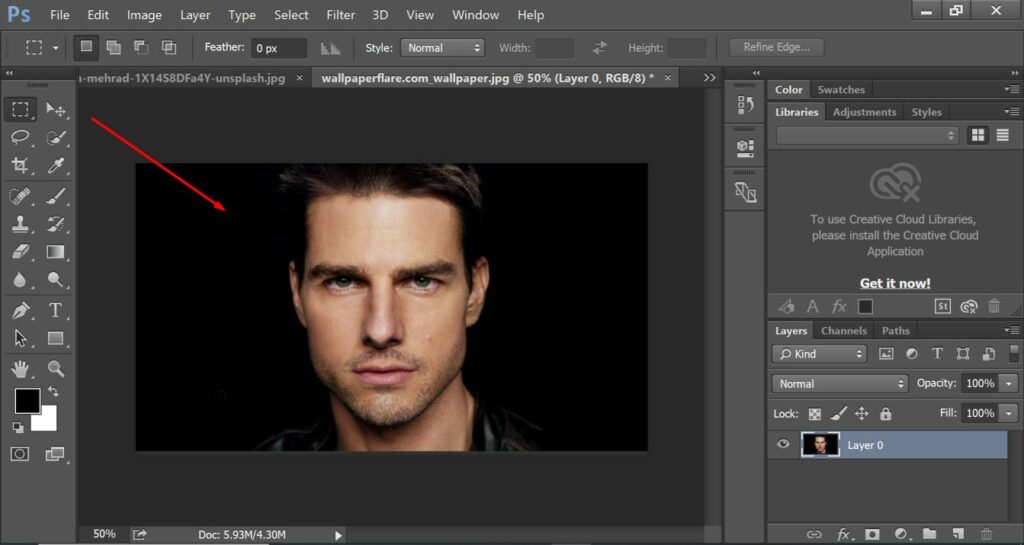
Make sure that both images have an unlocked layer. We need to work on the source image to separate the face from its body.
Let’s do it.
Step 2: Pick the Elliptical Marquee Tool
The Elliptical Marquee Tool is the most suitable option to swap faces in Photoshop. You can pick it up from here.
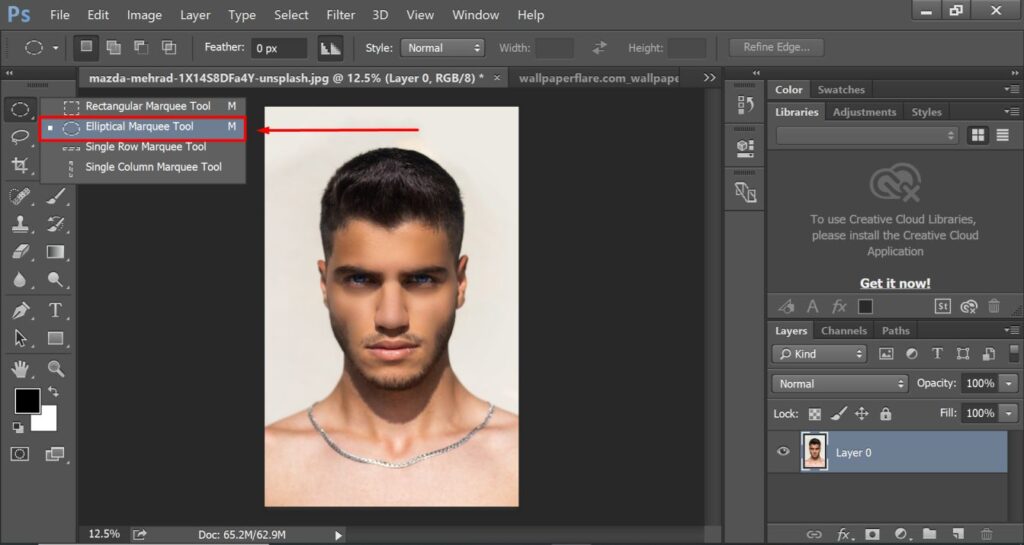
You have to create an ellipse according to the face of the model. You should select the portion having eyes, nose, and lips. You should exclude hair and ears from the selection.
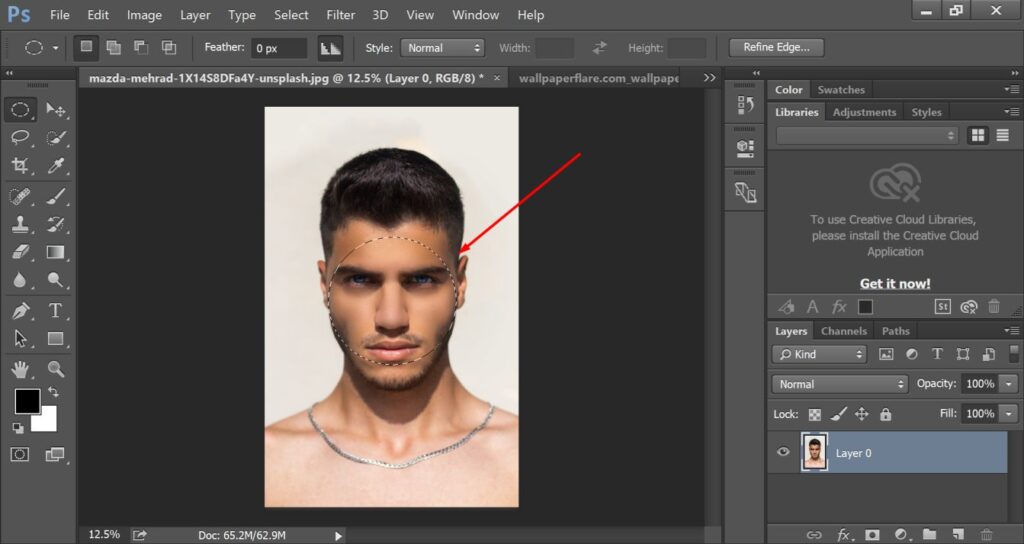
You should make a selection like that one.
Step 3: Swap face with the Move Tool
After making a selection, you have to pick the move tool from the left side. You have to move the face by left-clicking on it. Move it and place it on the body where you would like to face-swap in Photoshop.
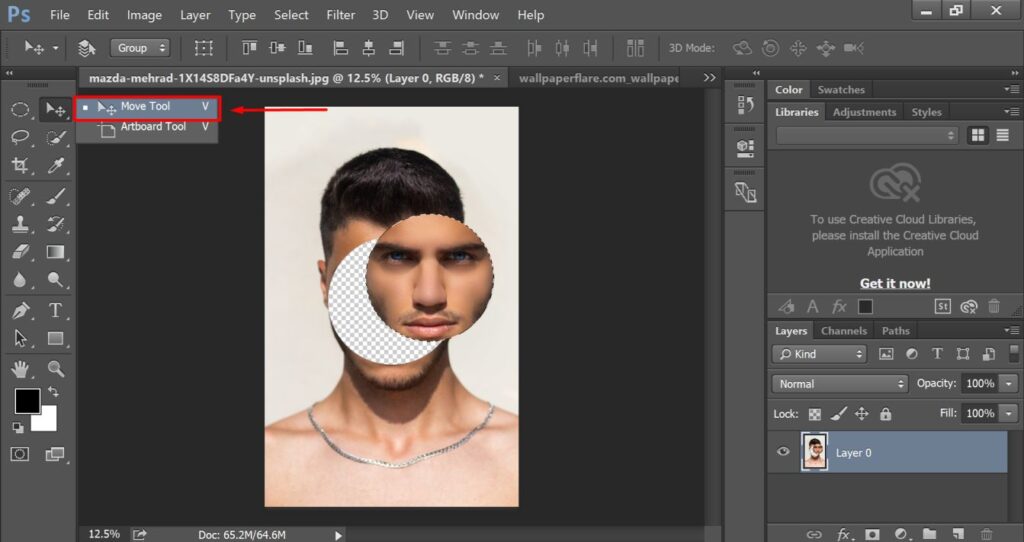
After that, you have to drag the face on the body of the targeted images.
Step 4: Apply Free Transform
You have to press CTRL + T to enable the free transform option. Then, you will be able to change the size of the face freely. You have to press the shift key while resizing the image so that the shape stays stable.
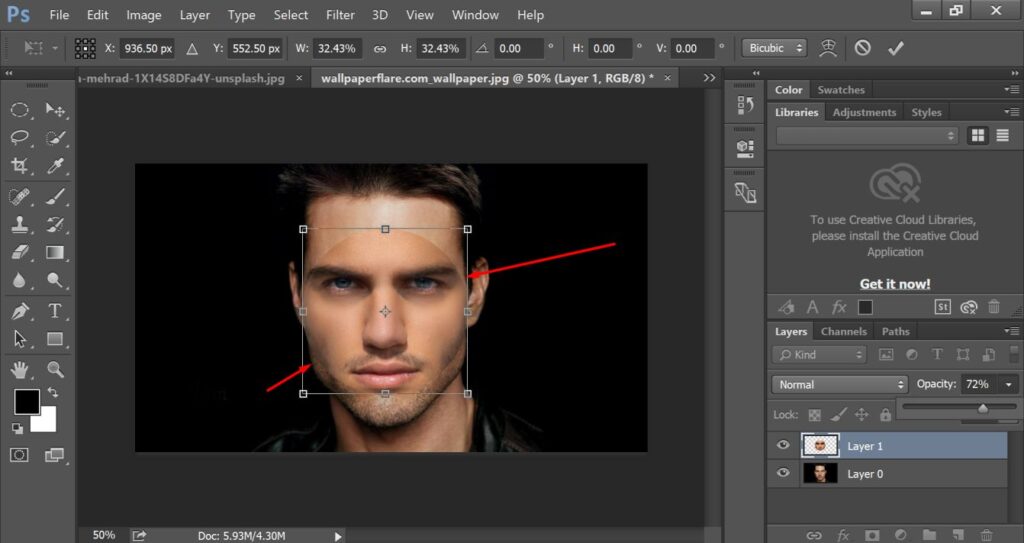
When you are okay with the face positioning, you have to press the enter key.
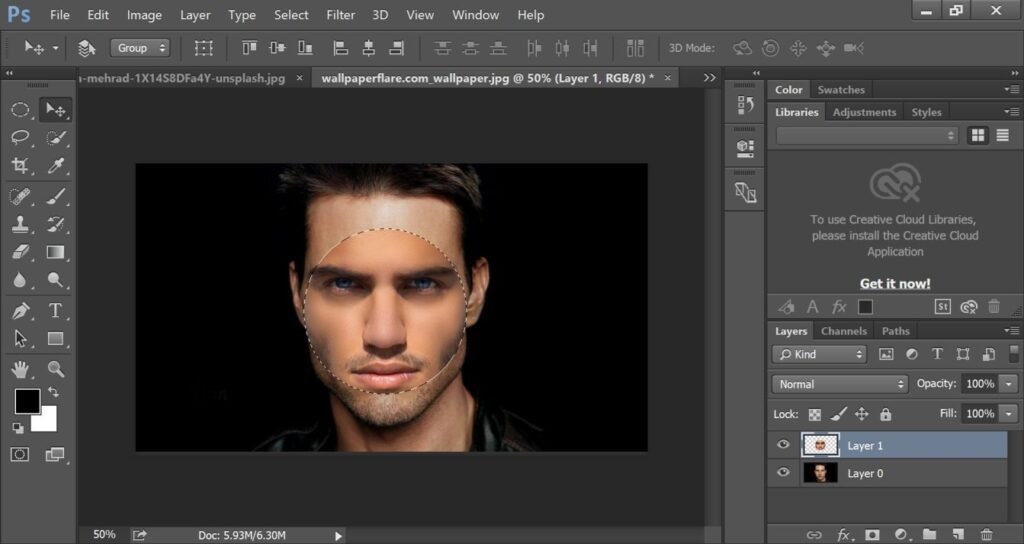
At this point, you just need to focus on the face placement rather than color adjustment. We are going to fix it in the next step.
Step 5: Match Color
You have to click on the adjustment option from the top and click on the match color. Here’s the option.
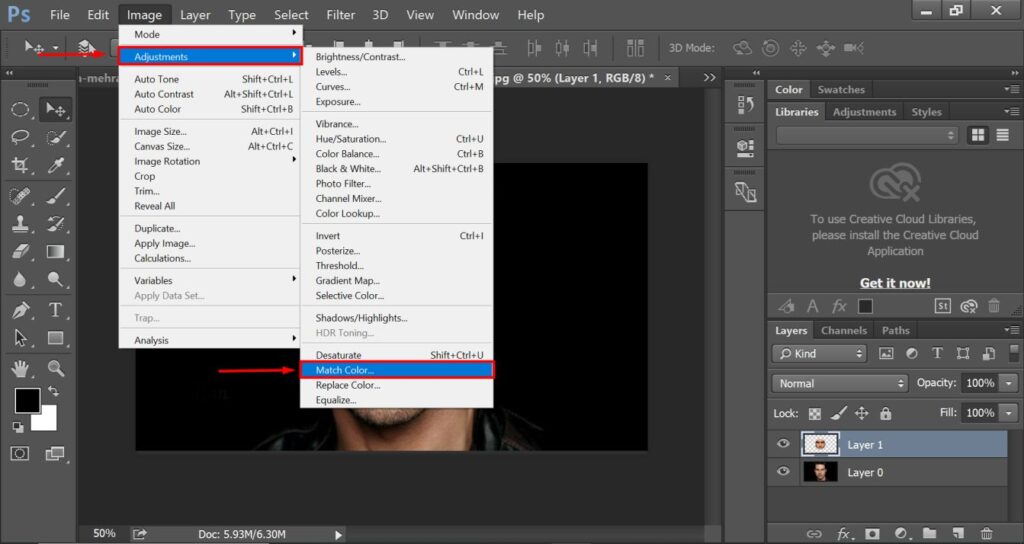
Next to that, you will get a new match color window. You have to select the image that you want to match the color and choose the layer.
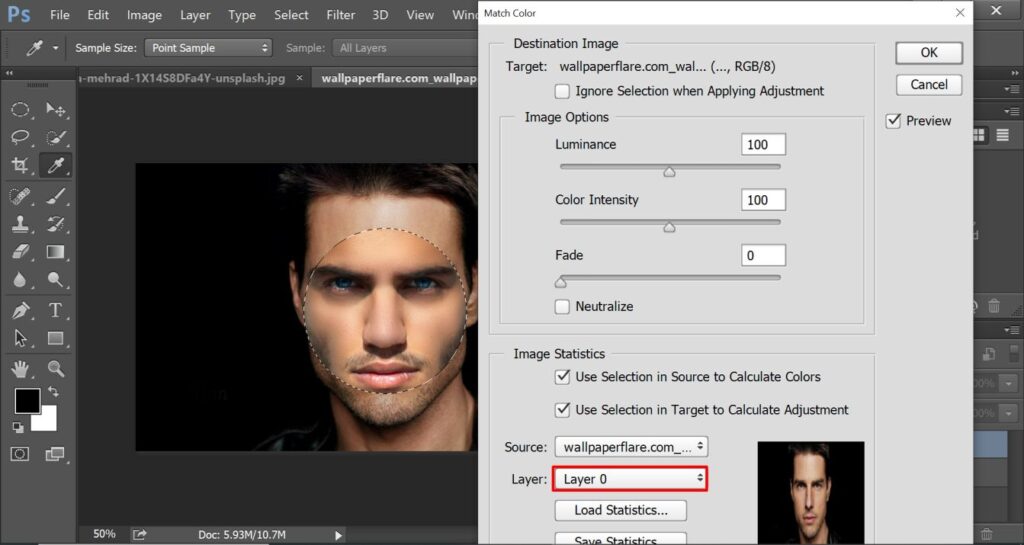
You have to choose Layer 0 from that option. It will match the swapped face color with the original face color. Press the enter key when you are done with the match color process.
Step 6: Modify Layer
You have to click on Layer 0 and press “CTRL + J” to copy the layer. After that, you will get three layers in that form.
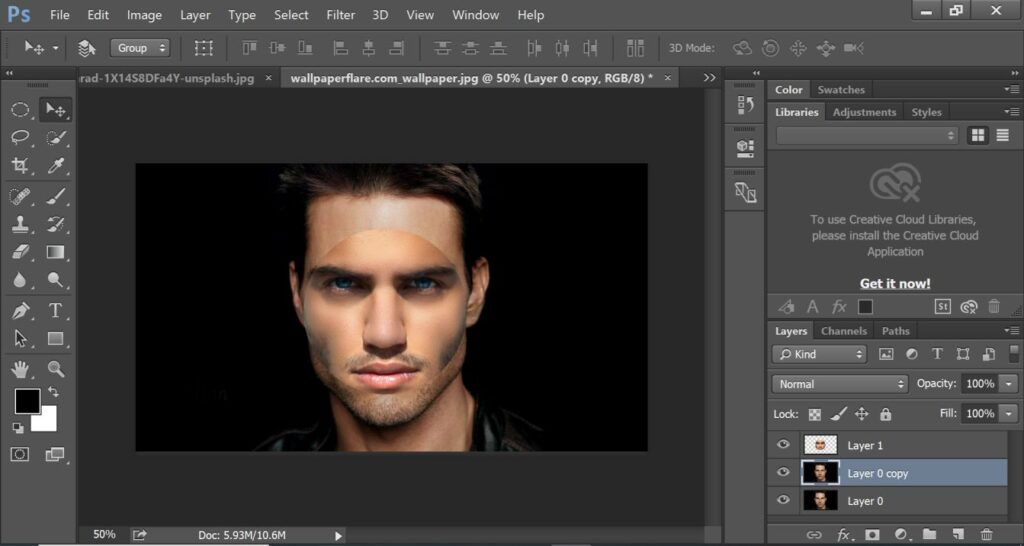
At this stage, you have to rename each layer for convenience. You should rename the face layer as face and rename the layer as body for the model.
After that, you have to press the CTRL key and click on the face layer to select the face portion. Then, you should go to the select option from the top and click on “modify”.
Next to that, you have to click on the contract.
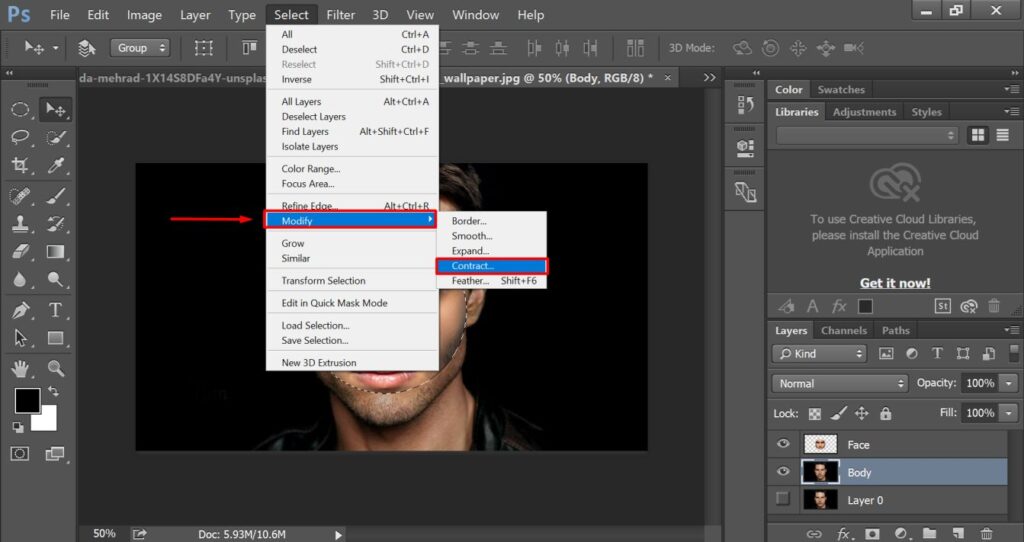
It will remove the face portion of the body layer and you will get your picture in this look.
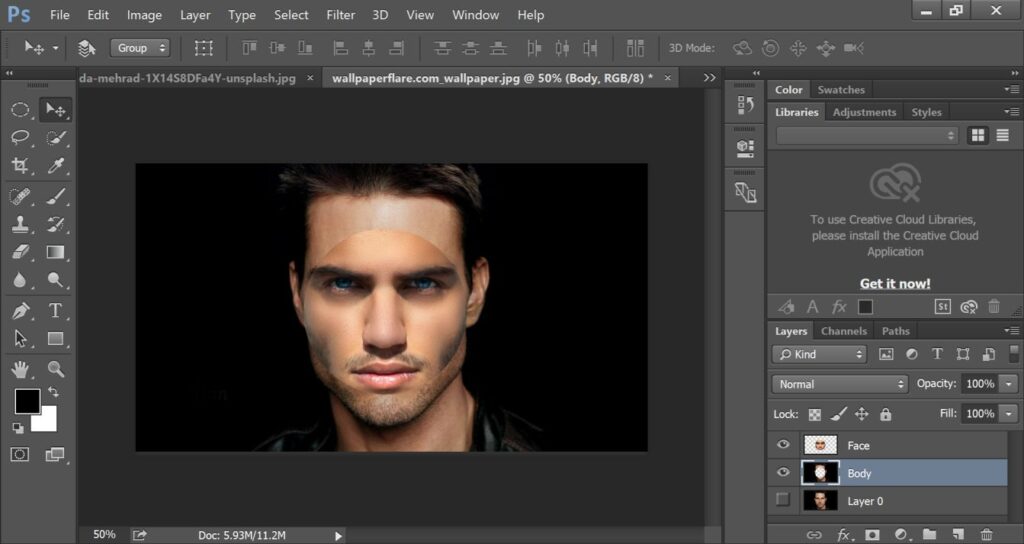
Now, we just have to combine the body layer and face layer to perfectly face swap in Photoshop.
Step 7: Apply Auto Blend Layers
You need to select both body layers and face layers. Then, you have to click on the edit option from the top and select “Auto-Blend Layers”.
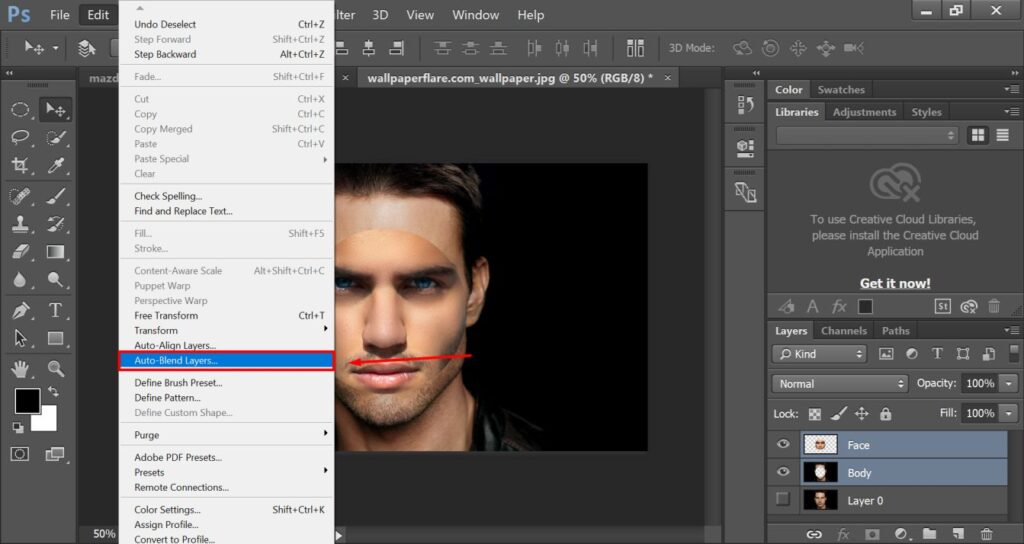
Here’s the final result after applying the auto-blend method.
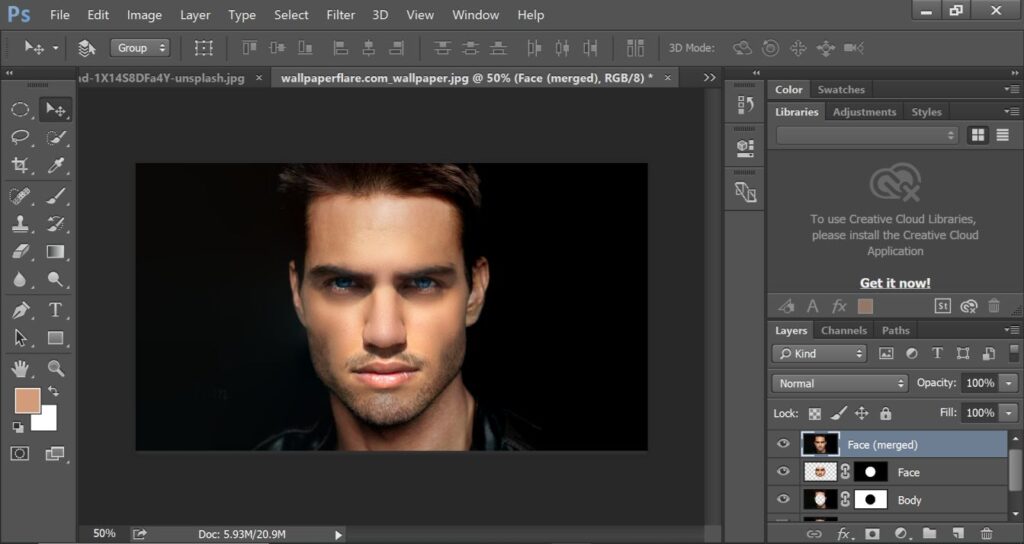
Now, it’s looking perfect. So, that’s the most effective way to face swap in Photoshop. If you follow the above method, you can also do a Photoshop face swap like this one.
3 Tips
- Make sure that you match the eye-line while swapping faces in Photoshop.
- Make sure that you match the lips of the source body with the face.
- Reduce the opacity of the face layer to match the face with perfect alignment.
3 Mistakes
- Don’t include hair or ears with the face selection from the initial image.
- Don’t keep the opacity low when you have matched the image with the source layer.
- Don’t resize the face without enabling the free transform option to swap any face.
Sum Up
Before we sign off, let me give you a brief overview of face swap in Photoshop. You can swap any face perfectly using Photoshop. But the photos should be taken from a similar direction.
Otherwise, the result might not be as perfect as you have expected. When you take two photos from a similar angle, it will produce a perfect face swap image.
If you have bulk images and are looking for expert assistance to do your image post-processing, Clipping Way will be the best destination for you. You can assign a photo editing project now with a free trial.
You don’t have to pay any credit card information for that. It will be the best photo editing solution for photographers, online sellers, and studio people.
FAQ’s
Can you face swap in Photoshop?
Yes, you can swap faces in Photoshop by making a selection for the face and blending it with a new face.
How to do a perfect face swap with Photoshop?
To do a perfect face swap, you have to pick two images captured from a similar angle and a similar type of face positioning. Select the face using the marquee tool and blend it with the source layer.
How can I put my face in another picture?
You have to cut out the face using a precise selection tool and isolate the selection in a new layer. Then, you have to blend the face with another picture.
How do I swap heads in Photoshop?
You have to make a selection for the heads and pick another image to replace the photos. Then, you have to match the source color and apply a layer blending method for perfect blending.


