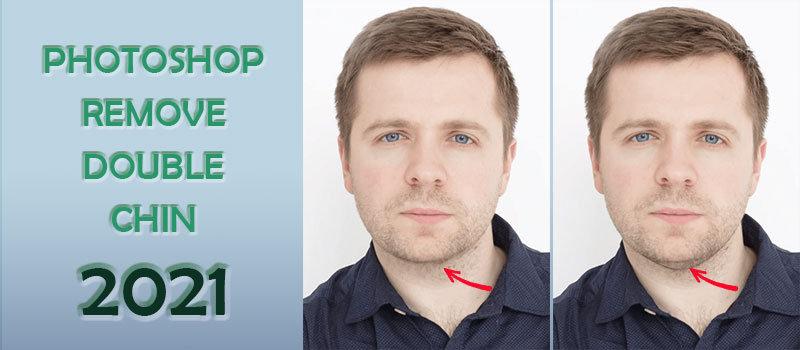
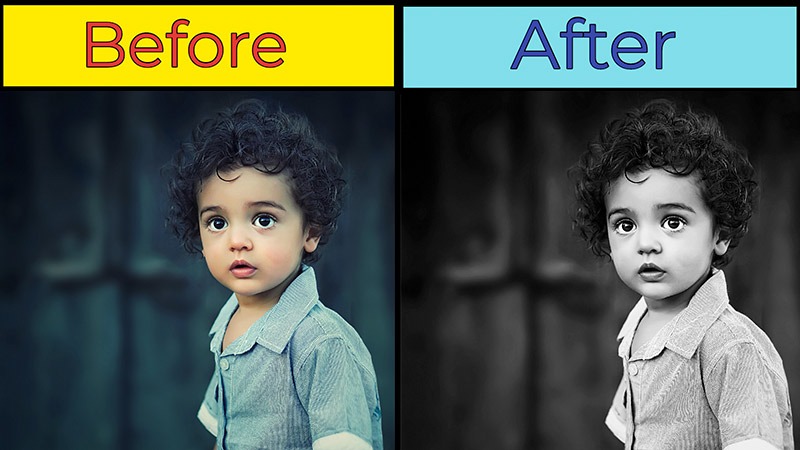
A double chin can spoil the beauty of portrait photography. In the USA, about 27% of people have a double chin after their 40s.
If you want to how to get rid of a double chin in photoshop naturally, it will take some time. But by using Photoshop, you can get rid of double chin in just 10 minutes.
Portrait Photographers sometimes use some tricks to hide double chin while capturing photos. To get the ultimate solution, you need to take the help of Photoshop.
Thinking about learning the trick? Fine, through this article you are going to learn how to get rid of a double chin in Photoshop.
You can apply the trick to your photos. This trick is also going to be helpful for portrait photographers who are looking for Photo Retouching Service to satisfy their clients.
Getting excited to know about the trick? Let’s get started.
Easy Steps to Get Rid of A Double Chin in Photoshop
Step 1: Define Jawline
To get rid of a double chin in Photoshop, you have to define the jawline. We are going to use the pen tool to indicate the line. Creating a path is the best way to indicate jawline precisely. Open the picture in Photoshop and click on the Pen Tool.
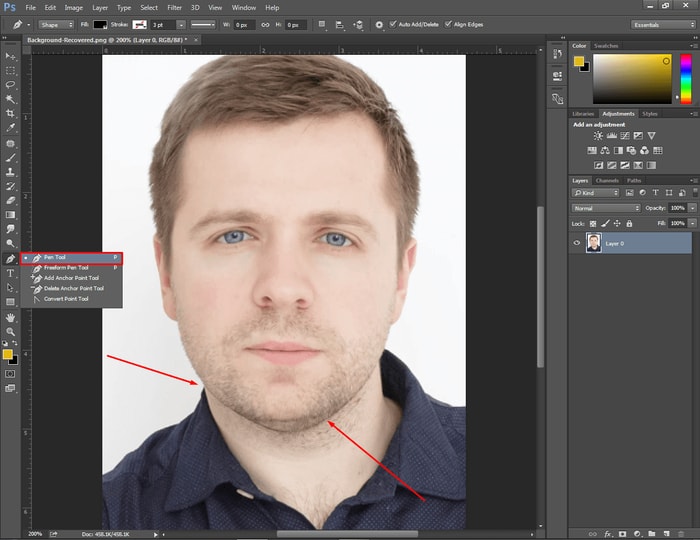
Then, zoom on the picture and start creating a path on the jawline. Are you thinking about where you should start? Okay, you can start from next to the ear. For your convenience, let me show you my created path.
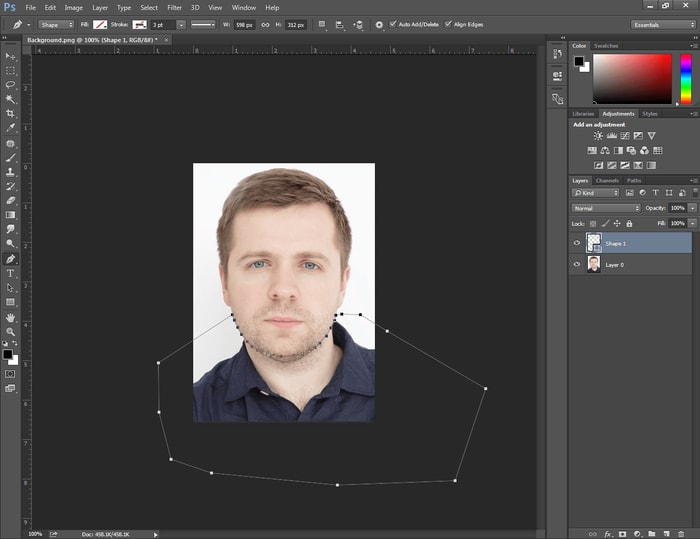
I have included the double chin area inside the path. You should also follow the same procedure. Make sure that you have created a path accurately. This step will determine the ultimate result of your image.
So, take some time to do it but make sure that you have included the double chin area within the path. Also, you need to finish your path right at the starting point. Are you okay with that step? Fine, let’s jump into the next step.
Step 2: Save the Path
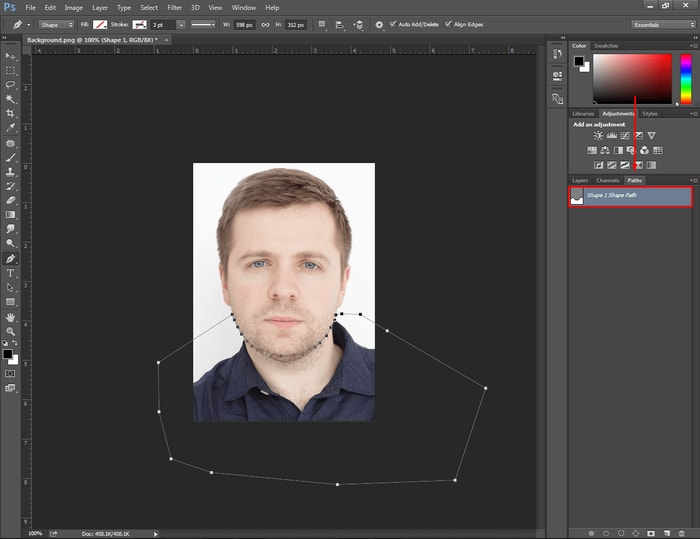
Now, we will save the path that we have created in the first step. Saving the path gives you some advantages. Like, if you lost the path or selection while editing your photo you can easily bring it back. This technique will be helpful for you in other photo editing techniques too.
For saving the path, click on the path from the top of the Layer Panel. Then, double click on the Shape Path and type a name for this path. You can set the name “Jaw”.
Step 3: Create mask for the double chin
We have got the selection of the double chin. Now, we have to remove the double chin using Photoshop. The best way of doing this is to create a mask for the chin area. Click on the primary layer and press “CTRL + J” twice. It will create a double copy of the primary layer.
After that, we have to rename these two layers so that we don’t get confused. Double-click on the layer’s name and rename both layers. Which name to set? Rename the top layer as “Above” and the 2nd layer as “Below”.
Now, you have to select the “Above” layer and click on the path “Jaw”. Next to this, paths will be visible that you have created. All you need to do is to right-click on the path and click on the “Make Selection”.
Know More: How Much to Charge to Edit Photos in 2022
Then, press ALT and click on the Mask Icon from below. It creates masks for the chin area.
If you disable other layers, you will see only the face is visible. Want to see the example? Here you go.
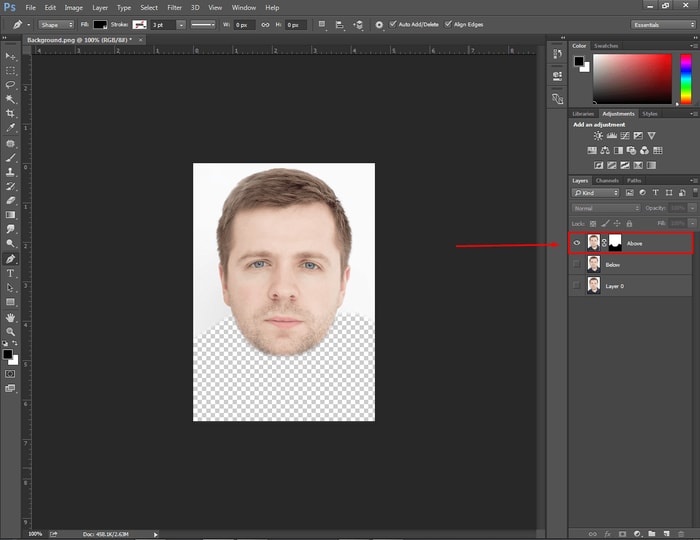
Step 4: Convert for smart filter
Enable both layers and select the layer named “Below”. Afterward, go to the filter and choose “Convert for Smart Filter”.
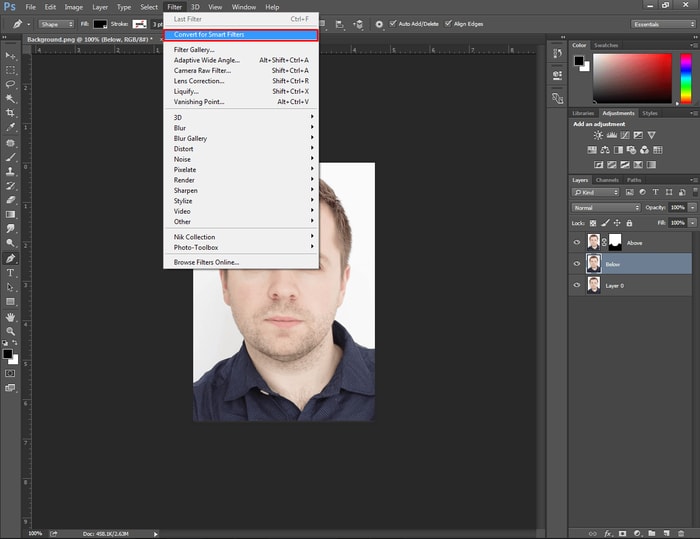
Now, your below layer has been converted into a smart filter. Again, go back to the Filter option and hit on the “Liquify”. You will see this type of interface on your screen.
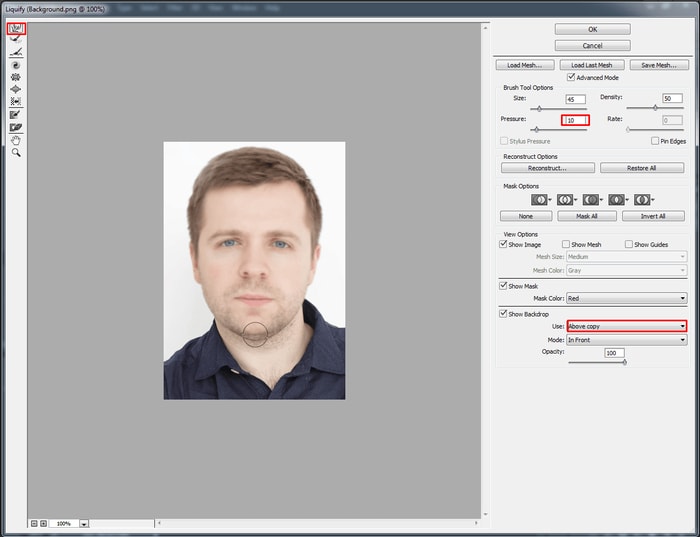
Click on the “Show Backdrop” and use the layer “Above Copy”. Next to the “use” option, you can see “Mode” and “Opacity”. Set the Mode to “In Front” and opacity into 100. Also, set the pressure to 10.
Then, select the brush from the left side and start painting on the Jawline area. The double chin will be starting to vanish. Continue the process until it looks normal.
Step 5: Give finishing touch
After completing the liquify procedure, press ok and the picture will be back to normal mode. Our job isn’t done yet. For the finishing touch, you have to click on the mask from the above layer.
Then, select the blur tool from the left side. Set the blur strength to 50 and drag the mouse over the jawline area.
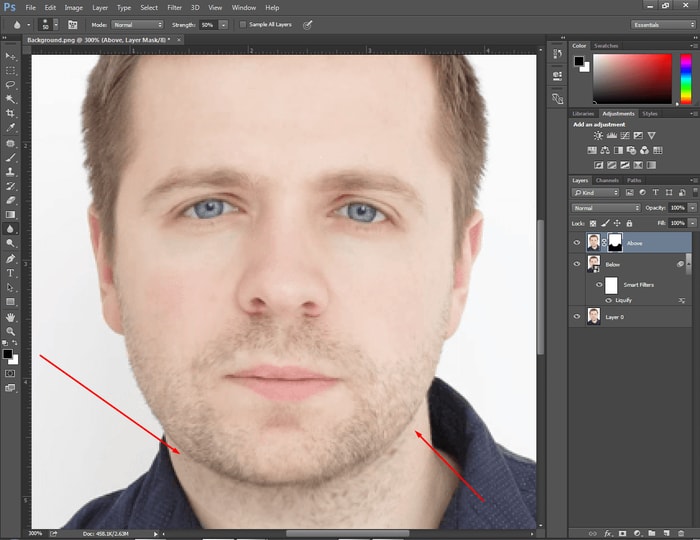
After doing that step, your picture will be ready. Here, you can see the result.
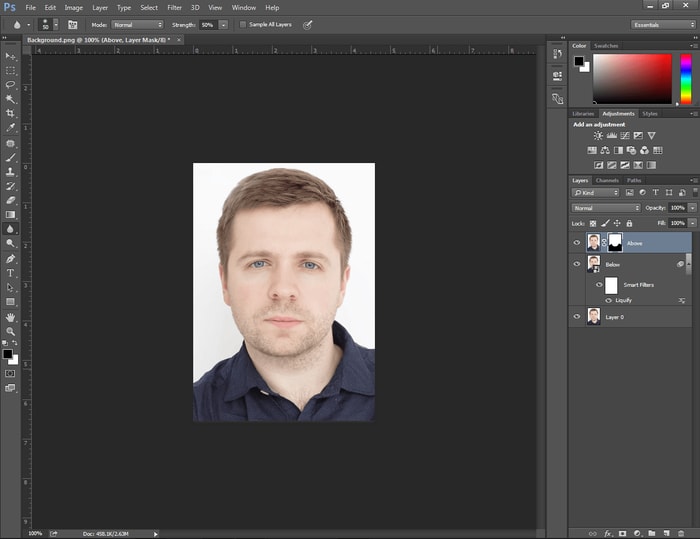
We have remove double chin photoshop from this portrait photo. You can also do it by following the above steps.
Conclusion
From now on, you should not be worried about the portrait having a double chin. You have learned the best way to remove double chin in photoshop. However, as a photographer, you might not get enough time to edit your photos. Clipping Way can be helpful for you at this point.
You can get Photo Retouching Service for your photos at a reasonable price. Thinking about having a try? A free trial is available for you.
Would you like to get a more useful Photo Editing Tutorial like this one? Stay tuned with us. If you have any query related to Photographer Editing Service, contact us without any hesitation.
FAQs- I’ve got some questions
How do you get rid of a double chin in pictures?
You can remove the double chin from a picture using the liquify option in Photoshop.
Is there an app to remove double chin?
Photoshop is the best application for removing double chin from a picture.
Can Photoshop make my face look thinner?
Yes, Photoshop can make your face look thinner by making selections and using liquify.
How much does it take to get rid of a double chin in Photoshop?
It takes approximately 10 minutes to remove a double chin in Photoshop.
