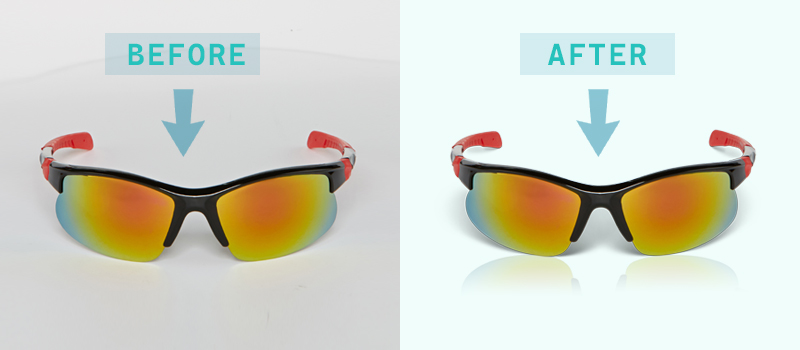
Editing product photos is the best way to make potential customers engaged with the imagery. Whether you’re a product photographer or seller, editing product photos is mandatory to run a successful business.
Therefore, we are going to show you how to edit product photos and make your products look exceptional.
When you apply product photo editing tips to your product photography, you’ll be able to discover the best version of your images. You don’t have to have in-depth knowledge of Photo editing to follow our tips.
We’ve explained the entire process with simplicity so that anyone can follow it. Within a while, you will learn how to edit product photography.
How to Edit Product Photo in Photoshop
To edit product photos, you have to learn different types of editing methods such as making a selection, unwanted spot removal, eliminating particular areas, changing colors, cropping, resizing, and so on.
Firstly, we mention how to select an object in Photoshop. You can follow our product photo editing service tutorial with any recent version of Photoshop. Here you go.
Tips 1: Remove Spots from Product Photo in Photoshop
You can use the below tools to remove spots from your product photography while editing.
● Clone Stamp Tool
● Spot Healing Brush Tool
● Patch Tool
Here’s a detailed overview of those spot-removal tools for editing your product photography.
Clone Stamp Tool
The clone stamp tool is used for removing unnecessary spots and blemishes from the images. To get amazing product images, you can apply this tool to your photography. You can pick the tool from that option.
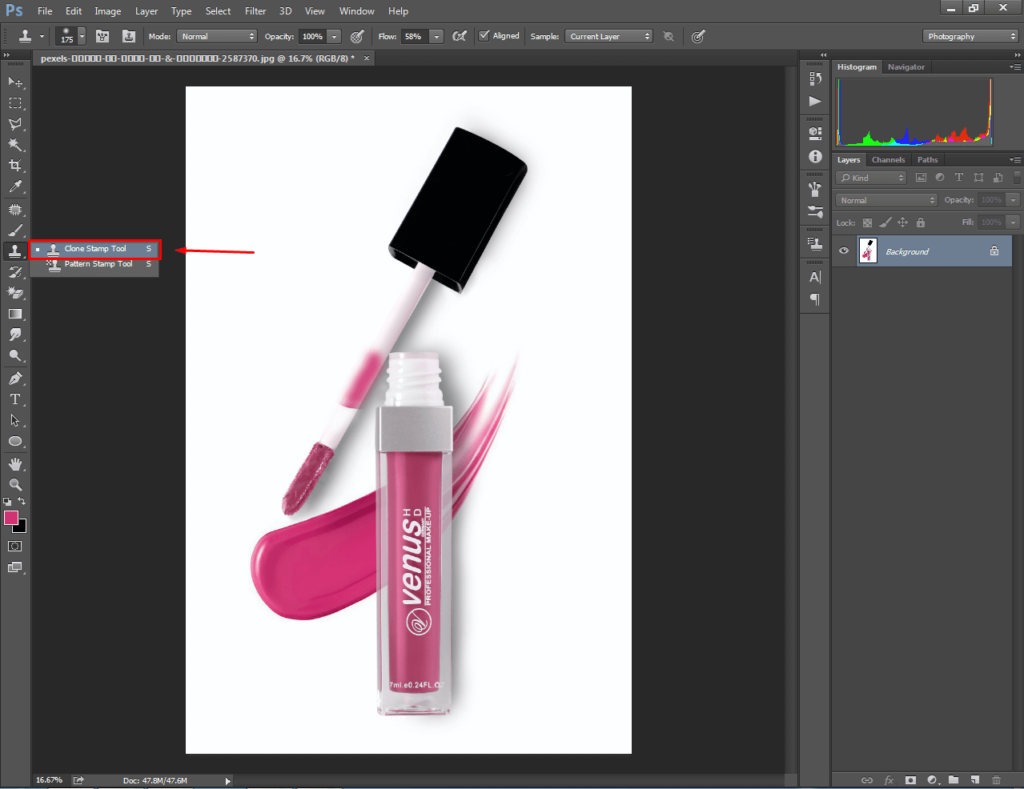
We have got some imperfections here. Due to the pink mark on the nail polish, the entire image looks a bit imperfect. Using the clone stamp tool we can fix those imperfections.
Firstly, you have to press the ALT key and click on your object to pick a sample color. After that, hold the left key and drag the mouse over the spots. The area will be replaced based on the sample color.
Here’s an example.
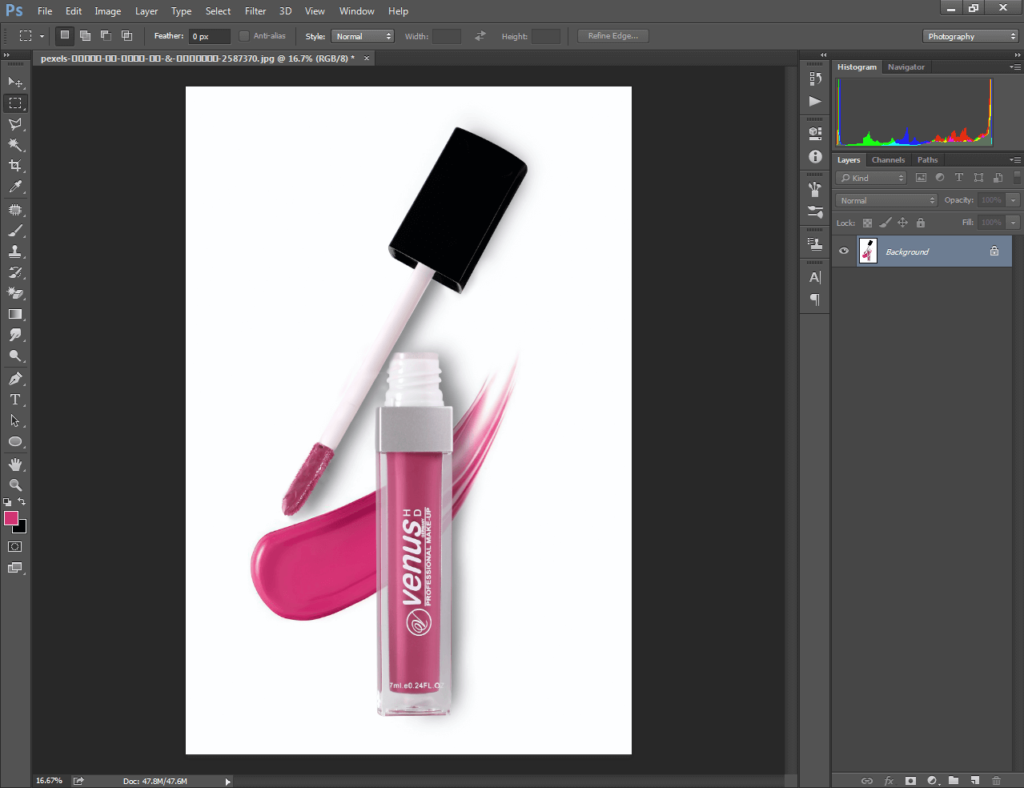
From the upper left-hand corner, you can change the brush size and hardness for convenience. In this method, you can edit product photos and remove unwanted spots or imperfections from your photography.
Spot Healing Brush Tool
The spot healing brush tool is the most convenient option to remove marks or dust while editing a product photo.
In your product photography, there might be some unwanted spots in the background or on the surface. Those spots will make your photography look imperfect. You can fix it with this tool.
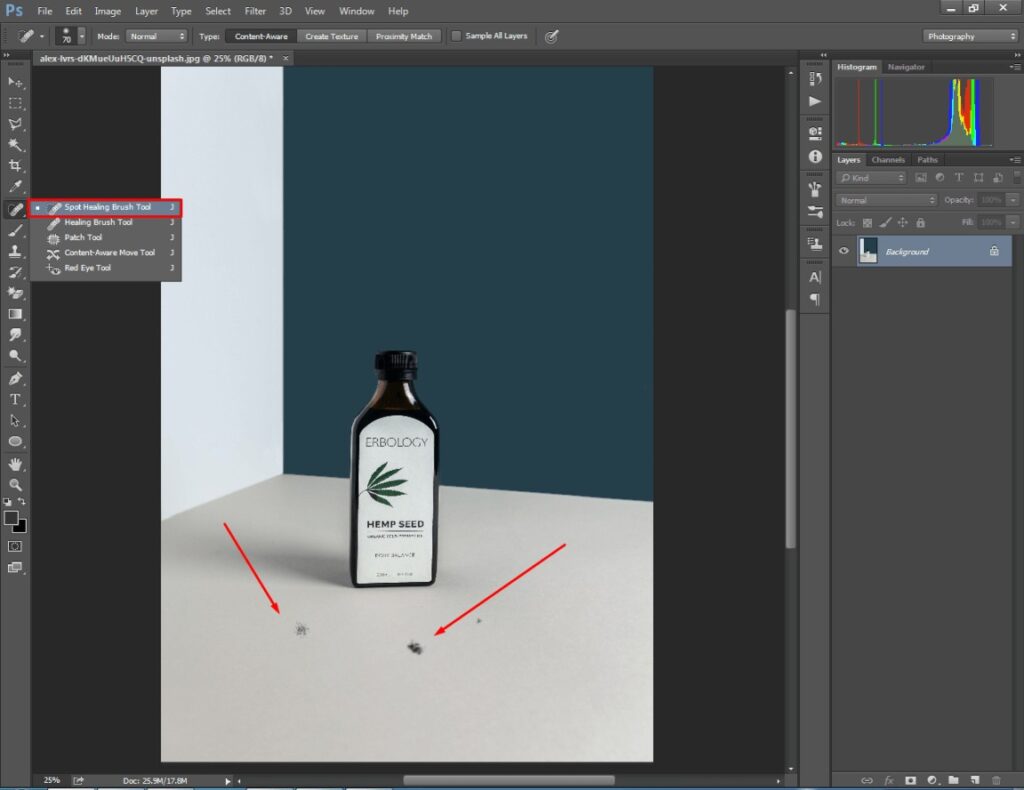
As you can see, there are several unwanted spots on the surface. You just need to select the tool and pull the mouse over the spots while tapping the left key. It will remove the spots automatically. Here’s the result after applying the tool.

Now, the product photo is looking perfect as there is no spot or distortion.
Patch Tool
The patch tool is the ultimate tool that you can use to edit your product photo for spot removal. This tool is used for removing distortion from images.
The tool is located within the spot healing brush tool option. You can pick it up from here.
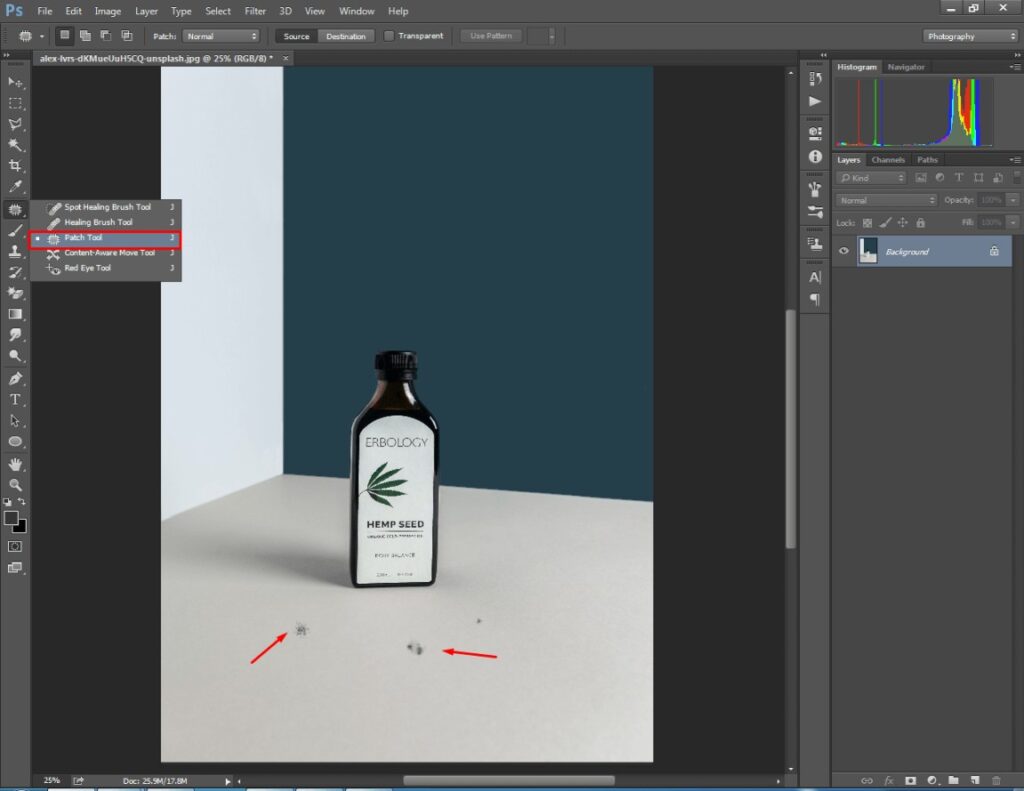
The procedure for using this tool is really simple. You just need to select the spots or imperfect areas by pressing the left mouse key. After that, the area will get selected like this.

After that, you have to drag the selected area and release it to a perfect area. Adobe Photoshop will fix the selected area based on the pixels of the released area.

The tool is pretty similar to the spot healing brush tool. The difference is you select the sample pixels while releasing the selected portion.
Have you got the point? I think so. Let’s move forward to essential product photo editing tips.
Tips 2: Delete An Element in Product Photo
In your product photo, you may find something unnecessary, unsuitable, or distractive.
Sometimes, you just want to remove a particular element without changing the background. The content-aware option is the suitable option to use for this. Here’s the procedure.
Content-Aware
The content-aware tool is located within the “Fill” option. This tool can remove an element from the image and replace those portions with the background color.
Let’s have a look here.

Using the content-aware tool we can remove the indicated object without making any changes to the background. First of all, you need to select the item with any selection tool.
For this portion, I have used the rectangular marquee tool as it seems to be the suitable option considering the shape of the product. Then, press the “Delete” key and you will see the fill option.

Then, you have to select the “content-aware” option. After that, you need to set the opacity to 100% and choose the blending mode “Normal”.
Ultimately, you ought to press “Enter” to apply the effect. The selected area will get removed without making any changes to the background.

Using that method, you can get rid of unwanted elements, items, and any specific area for your product photo.
At this point, you have learned how to edit product photos using Photoshop selection tools, spot removal tools, and content-aware tools. Now, we’re going to move forward to color-changing.
Tips 3: Change The Color of Product Photo
Color carries a significant value in product photography. Nearly 77% of online buyers purchase a product based on color. You can utilize the “Hue and Saturation” option to change the color of your product.
Here are product photo editing procedures for changing colors.
Hue & Saturation
The “Hue and Saturation” option is available in the sub-menu of Adjustments. Using this tool, we are going to change the color of this t-shirt.

Go to the “Image” option from the top and click on “Adjustments” to open the sub-menu. There will be the “Hue & Saturation” option.

Then, you will find the Hue/Saturation box on your screen. You just need to move the hue and saturation bar to change the color of your product. You can also change the brightness and shadow from the “Lightness” option.

See, we have got a new color for the clothing item. When you edit product photos in Photoshop, you should not change the lightness too much. Otherwise, the product photo will look burned or too dark.
Tips 4: Crop & Resize Product Photo
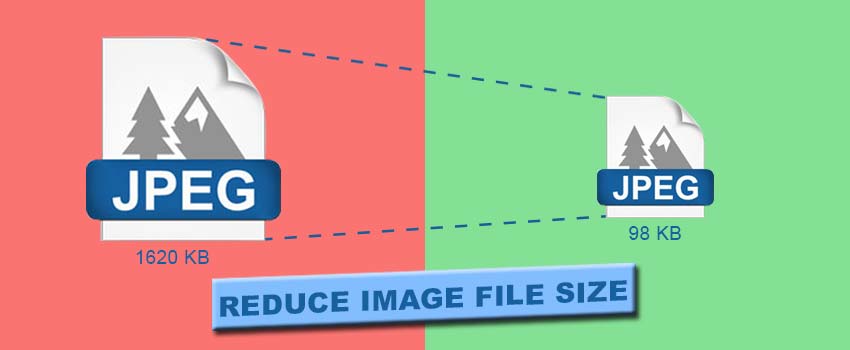
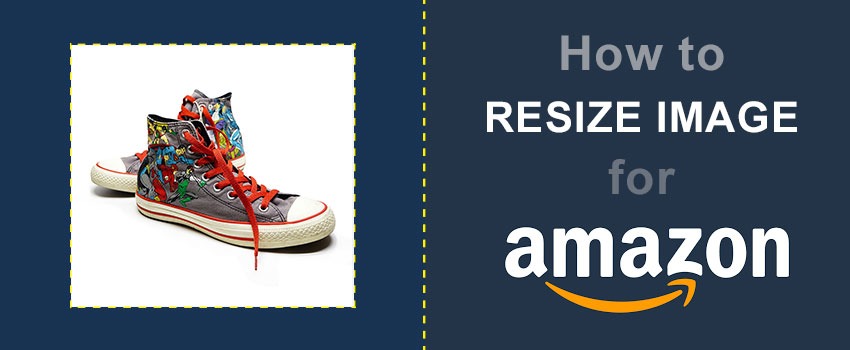
Last but not the least, you should save the image in a suitable size. Otherwise, your product photo might not get approved on Amazon or other E-commerce websites.
That’s the point why image cropping and resizing are important for product photos.
Image Cropping
Let’s have a look at this photograph.

It looks like there is a bit more white space in the background than necessary. Using the image cropping tool we can cut out unnecessary portions and resize the image as per requirements.
Here’s the cropping option below of the Quick selection tool.

From the above, you can set image width, height, and resolution. If you don’t have any specific size requirements, you can just manually crop the image in free shape.
Change the size of the rectangle with the left mouse key and press “Enter”. For this image, I have cut out some unnecessary background. Here’s the outcome.

Have you got your product photo in the required size? Hopefully, you have already got it.
Now, let me share some product photo editing tips that you should follow and some common mistakes that you should avoid.
Tips 5: Customize Specific Colors in Product Photo
While editing product photos, you may have requirements to customize a specific color. In that case, you can use the “selective Color” option. Here’s the explanation.
Selective Color
Firstly, open the image in Photoshop and make a copy of the original layer with “CTRL + J”. Then, disable the original layer to hide it and go to the image adjustment options.

After that, you will get a box having 9 different colors. You just need to select the color that you would like to change.
After that, you can customize that color and even convert it to another color. Here I have changed the red color.
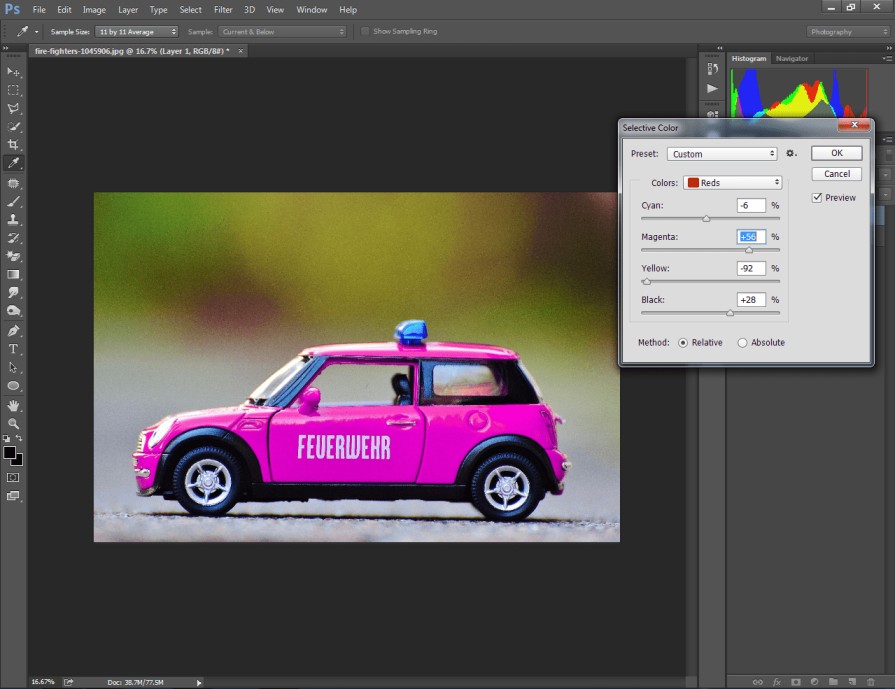
If you want to compare the edited image to the original one, you just need to make the previous layer visible.
Tips 6: Remove Wrinkles in Product Photo
Having wrinkles in clothing photography could be distracting for the viewers. Thankfully, you can fix the issue by editing your image in Photoshop. Here’s the procedure.
Smudge Tool
Open your clothing item photography in Photoshop and select the smudge tool from the left side.
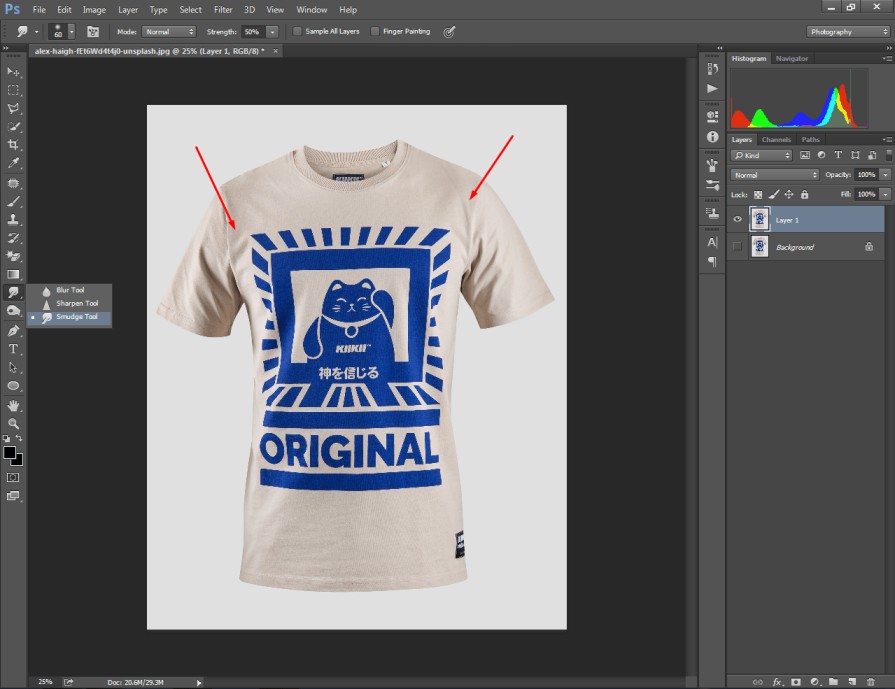
Then, you need to zoom in on the image of the wrinkles.
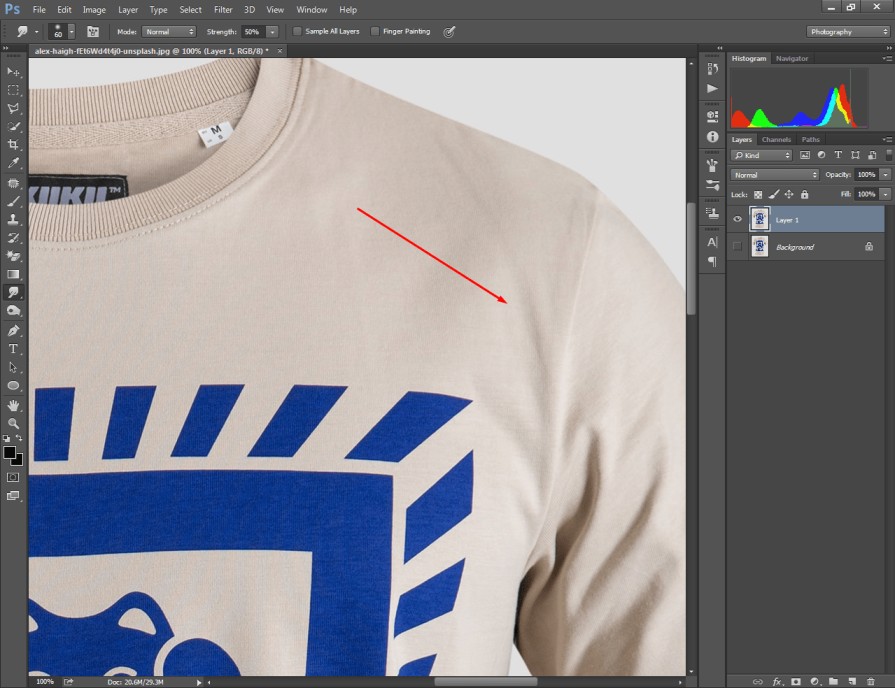
After that, press and hold the left mouse key and drag the mouse over the wrinkles area. It will remove the wrinkles from clothing photography.
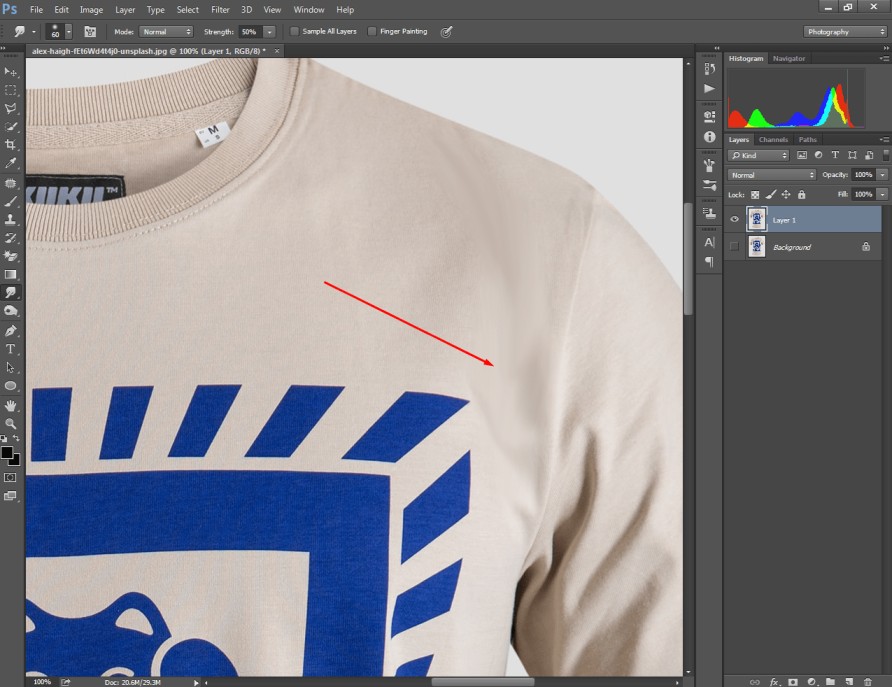
See, it looks perfect now.
Bonus Tips: Add Blur to Product Photo
You may want to make some portion of your product photo looks blurred. You can easily apply the blur effect using the blur tool.
Blur Tool
Open your product photo in Photoshop that you want to look blurred. Then, pick the blur tool from here.
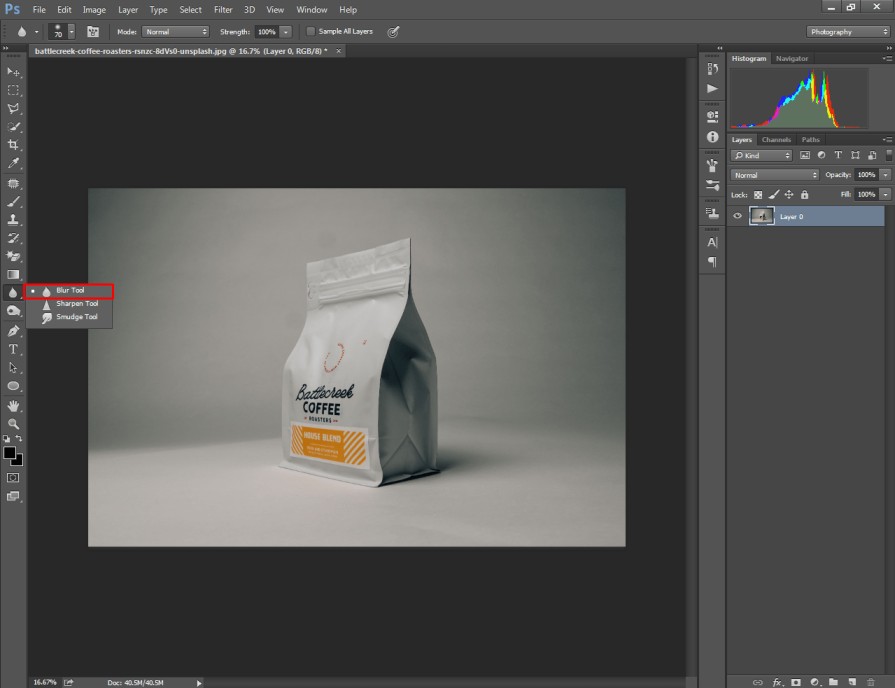
After that, you have to zoom in on the image where you want to apply the blur tool.
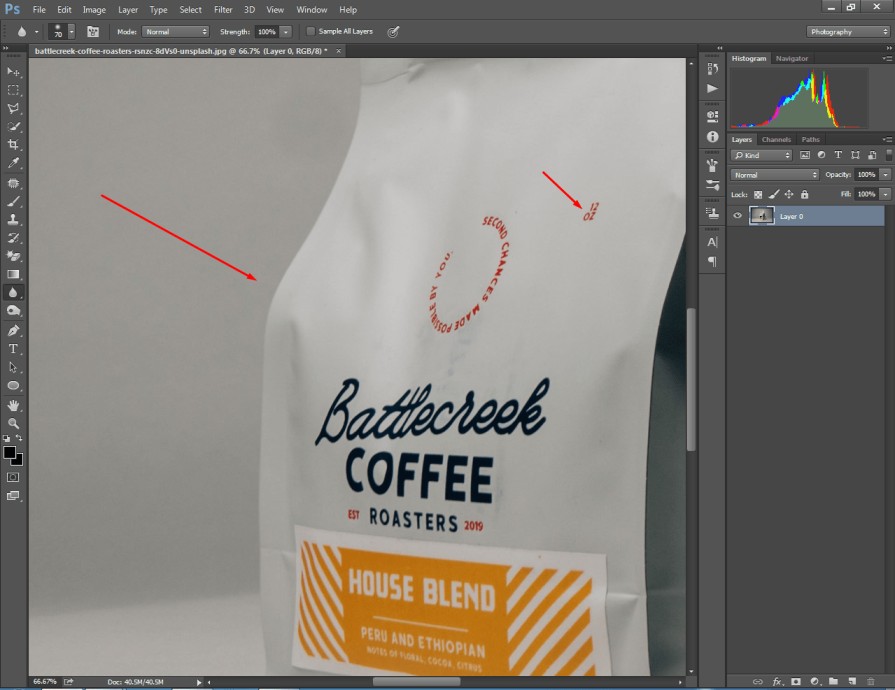
You can apply the blur tool around the edge of your object. Also, you can bur text or any other element inside the object if required. You just need to press and hold the mouse to make that portion blur.
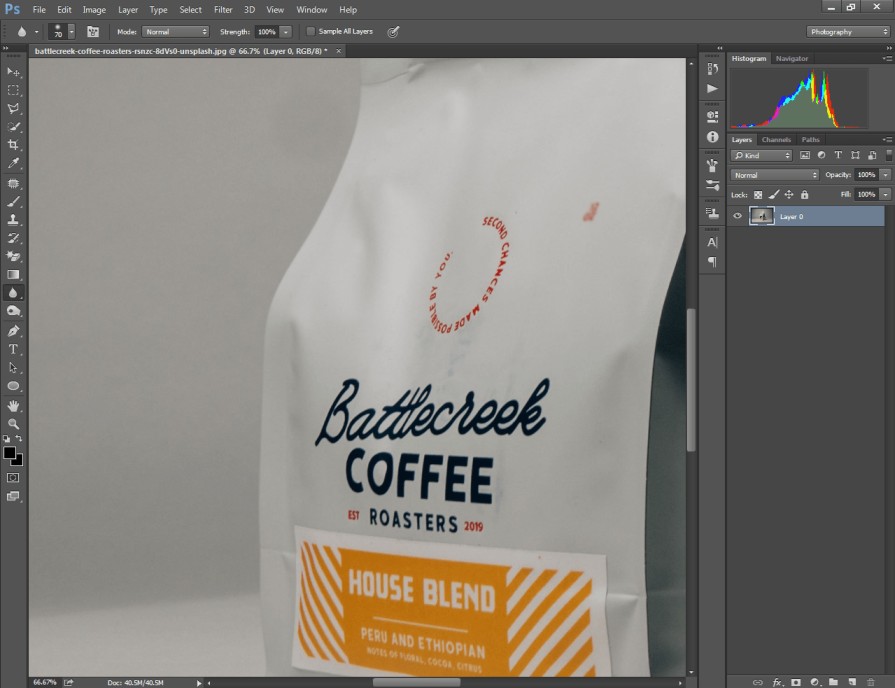
In that way, you can edit product photos conveniently and fill up your image editing requirements.
Tips You Should Follow
- Use the pen tool for the selection.
- Use the Patch tool for spot removal.
- Use the content-aware tool to remove an object.
- Crop your photo and maintain consistency.
Mistakes You Should Avoid
- Don’t use the magic wand tool for soft edges.
- Don’t use the background eraser tool to remove spots.
- Don’t change the blending mode while using content-aware tool.
- Don’t save images in random sizes and shapes.
Conclusion
That’s all about how to edit products in Photoshop. We have covered every essential aspect of product photo editing. If you follow our product photography editing steps, you’ll get a better response from your audience.
Do you need any assistance related to product photo editing? Feel free to contact our expert photo editors.
FAQ’s
How do you clean up product photos?
“Adobe Photoshop Express” is one of the best android applications to edit a product photo.
Which is the best application to edit product photos on an iPhone?
“Snapseed” is one of the best IOS applications with advanced features to edit product photos.
How can i make my product photos look edited professionally?
You need to edit your photos in Photoshop utilizing several photo editing tools to make your product look professional.
What is the quickest way to edit product photos?
Using online photo editing tools like BeFunky, Canva, and PicMonkey, you can edit product photos quickly.
