When there is something dust, wrinkles, or unnecessary marks are noticeable on the background, it makes the overall appearance of the image unattractive. More than often, a wrinkled background makes an image unsuitable to use online. You can get the solution from this article.
Within a while, you are going to learn how to smooth out backgrounds in Photoshop through 3 easy methods. Different types of methods are required to fix the background considering the shape. After reading this article, you will be able to clean any background in Photoshop from your images.
Method 1: How to Smooth Out Background in Photoshop Using Patch Tool
Step 1: Open your image to clean the background
First of all, you have to start by opening your image in Photoshop to clean the background. This method is applicable when your image background has light wrinkles or dust marks. Here you can see the sample image.
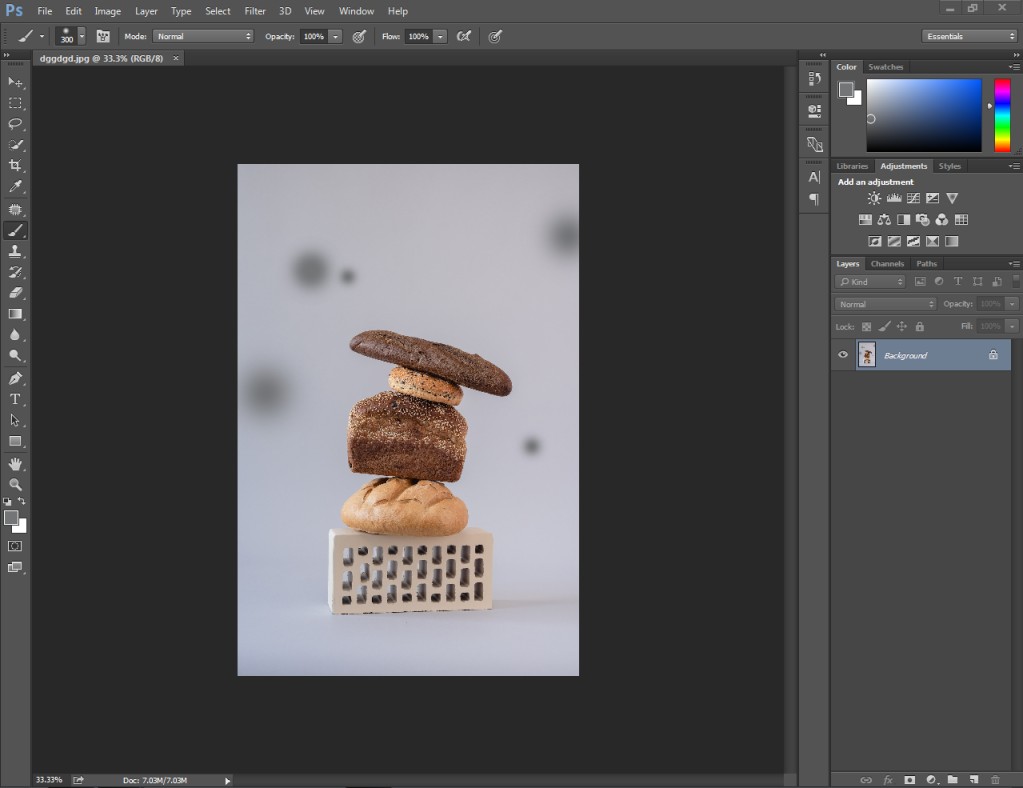
On the background, there are several dust marks that we need to remove to smooth out the background. You need to press CTRL + J to duplicate the layer.
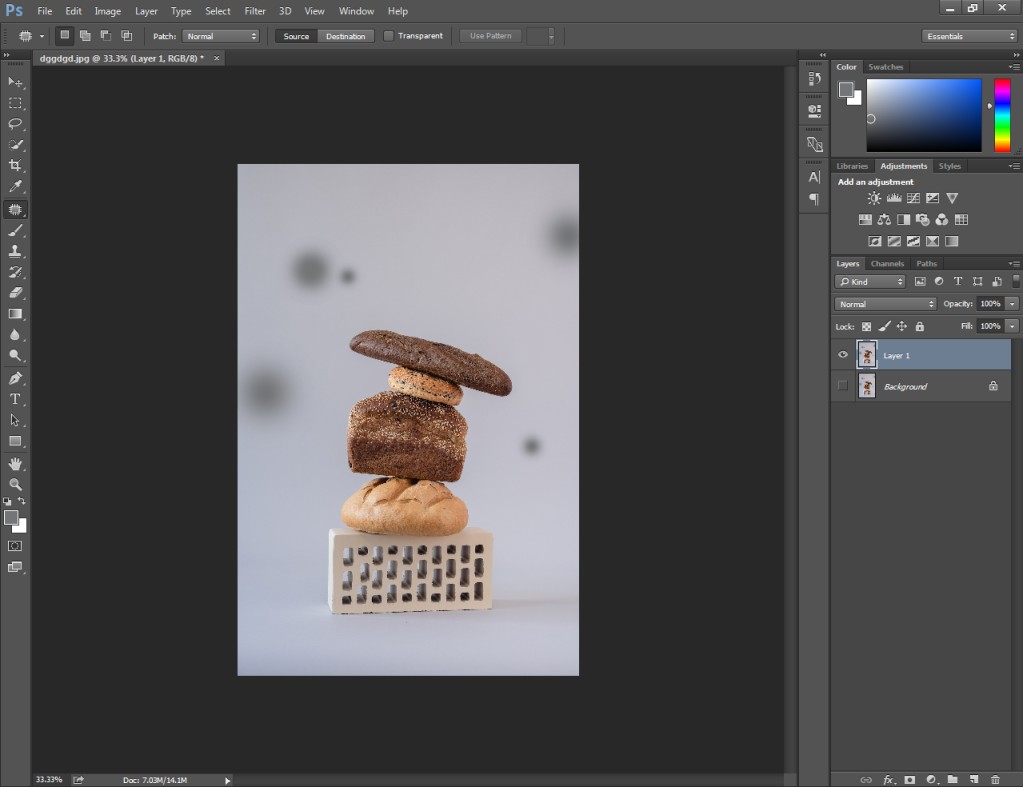
Then, you have to disable the original layer and select the copied layer.
Step 2: Select the Patch Tool
Now, we need to pick the patch tool from the left side. You can pick it up from here.
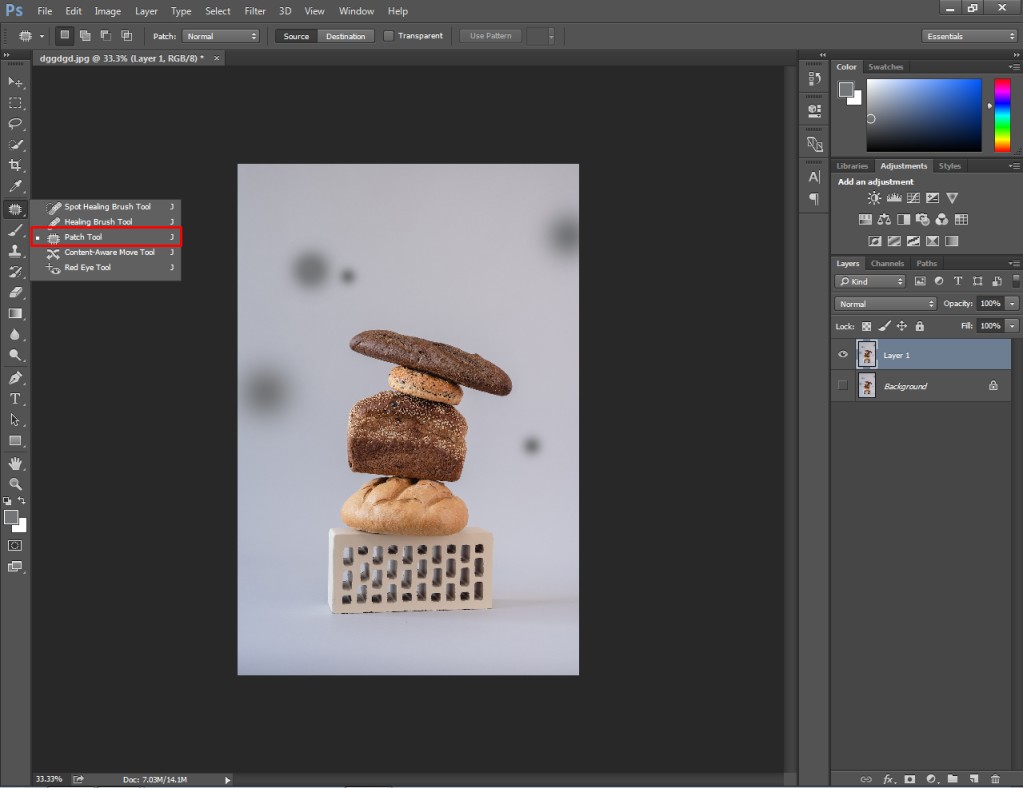
Using the patch tool, you can replace any portion having marks or wrinkles in the image. You need to create a circle around the marks. You can do it by pressing the left mouse key.
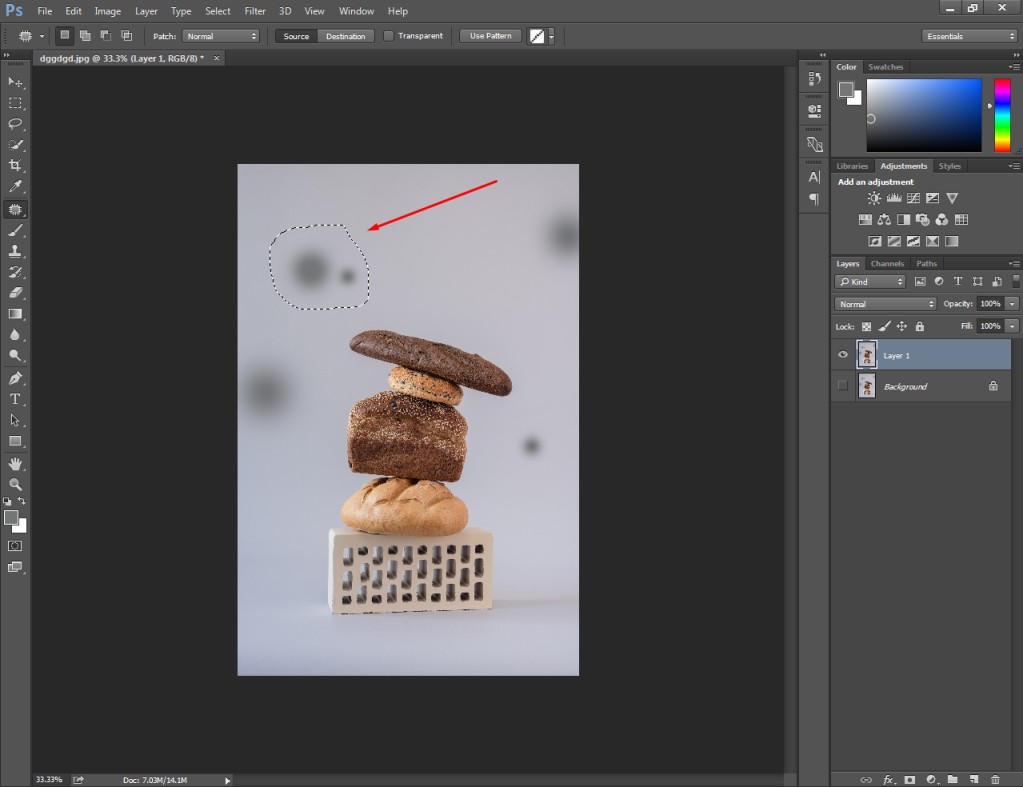
Next to that, you have to drag the marked area and release it on a perfect background area. Photoshop will replace the released portion with the marked areas.
Now, you can see the back marks have been removed.
Step 3: Clean wrinkles & marks from the Background
You have to repeat the previous steps until you get rid of all unnecessary marks from the background. As you can see in the below picture, we have removed all marks.
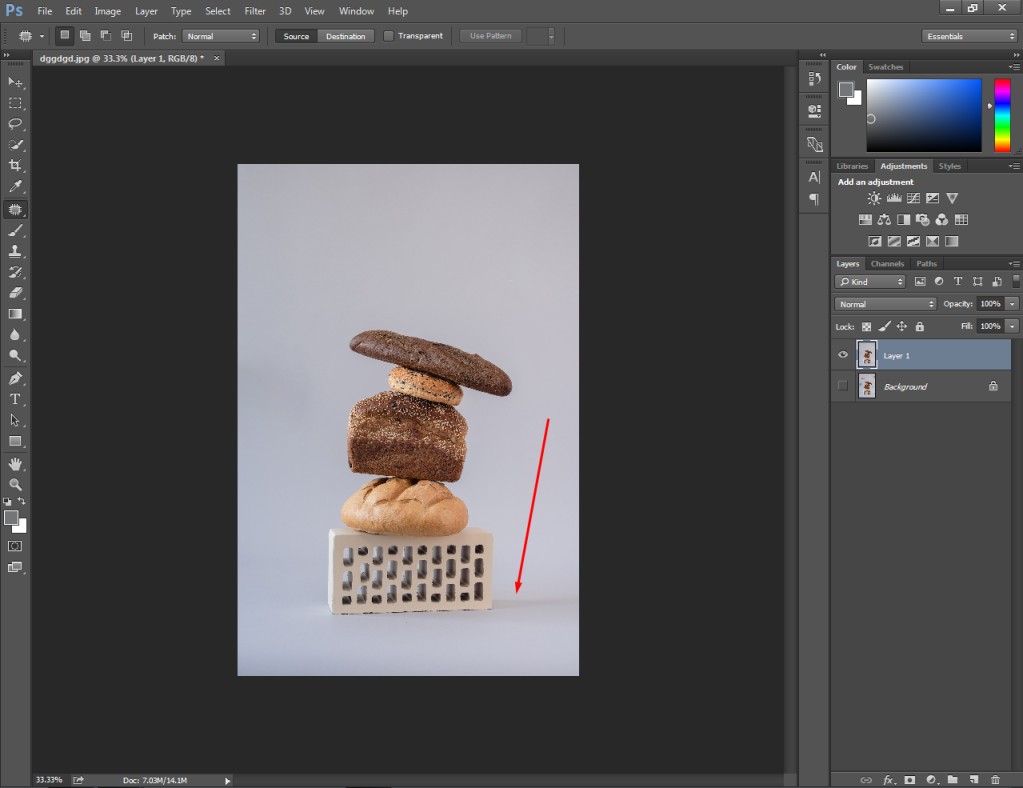
Some shadows are still available beside the object. I want to clean up the background without having any shadows. Therefore, we need to zoom in on the image and replace the shadow.
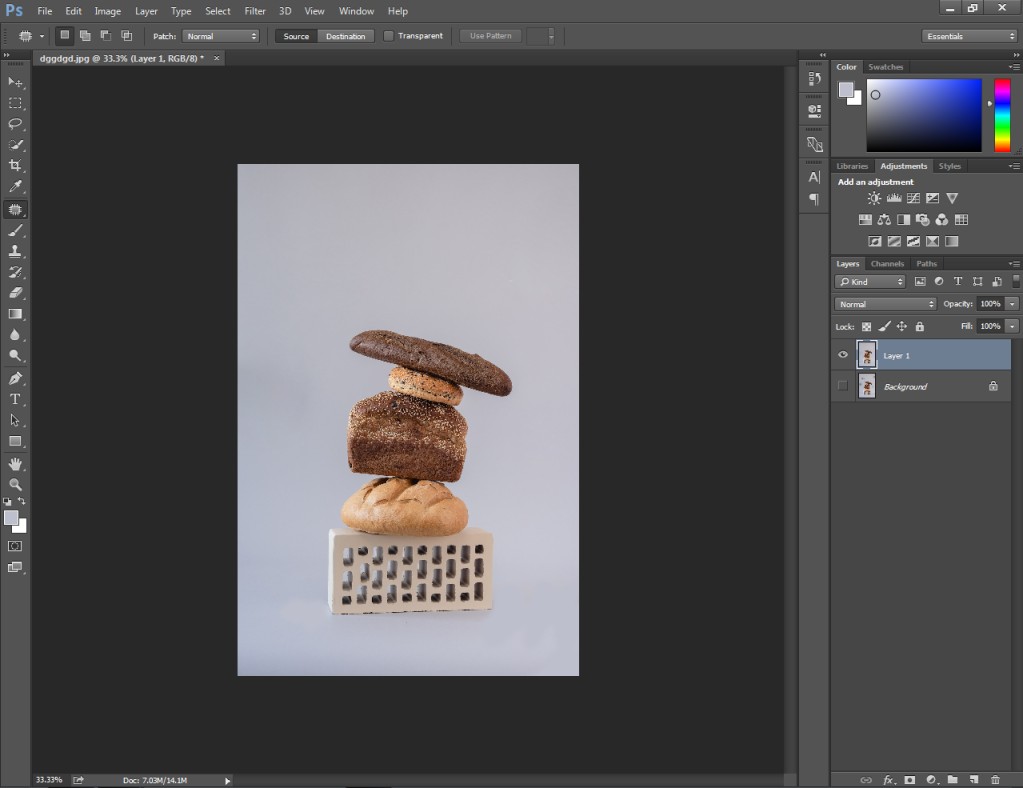
After that, your photos will be ready with a perfect background. Now, there are no distracting things available in this image.
Step 4: Save your image
Ultimately, your image is ready for saving. You have to go to the “File” option from the top and choose “Save As”. After that, you can save the image in any format you required.
In this method, you can fix shadows, unwanted marks, dust, and wrinkles without background removal. Do you want to smooth out the background for portrait photography? You can fill in the empty space in the background by following the second method.
Here’s the method.
Method 2: How to Smooth Out Background in Photoshop Using Patch Clone Stamp Tool
Step 1: Open your portrait photo to smooth out the background
First things first, you need to open your image in Photoshop that you want to fix the background. For this method, we are going to use this picture.

The background isn’t looking perfect in the picture as it has some white portions. We need to fill in the white portion using the clothing background behind the object. You have to right-click on the layer and select “copy layer” from it.

It will make the editing non-destructive as we can always get back to the original version without using the undo command.
Step 2: Pick the Clone Stamp Tool
For this method, we are going to use the clone stamp tool. If you don’t know about the tool, let me explain it shortly. Using this tool, you can clone a portion based on a sample area.
You can get the tool from here.

You have to click on the sample area that you want to clone. For the above picture, I am going to clone the clothing background for the blank white space.

We are going to clone the background in the next step.
Step 3: Clone the Background
You have to hold the ALT key and left-click on the background area to pick it as the sample. After that, you just need to left-click on the background to clone the sample.
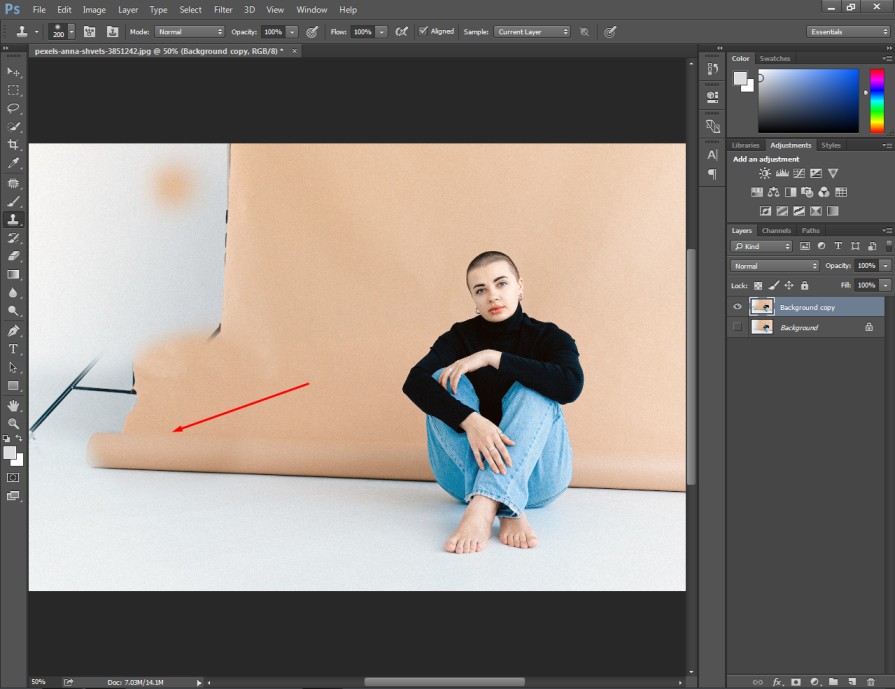
You have to repeat the same process for the other portion of the background. You should make the background of your image like the picture below.

Now, you can proceed to save the image.
Step 4: Save your image with Smooth Background
When your image is ready, you can press SHIFT + CTRL + S to save the image. Before saving, you can choose in which image format you want to save the image. If there is no transparent background in your image, you should save the image in JPG.
Now, we are going to jump to the third method. In that method, we are going to smooth out the background of a picture in Photoshop using the brush tool only.
Method 3: How to Smooth Out Background in Photoshop Using Brush Tool
Step 1: Open portrait photograph to Smooth out Background
Firstly, you have to start by opening the photograph that you want to clean and fixing the background.
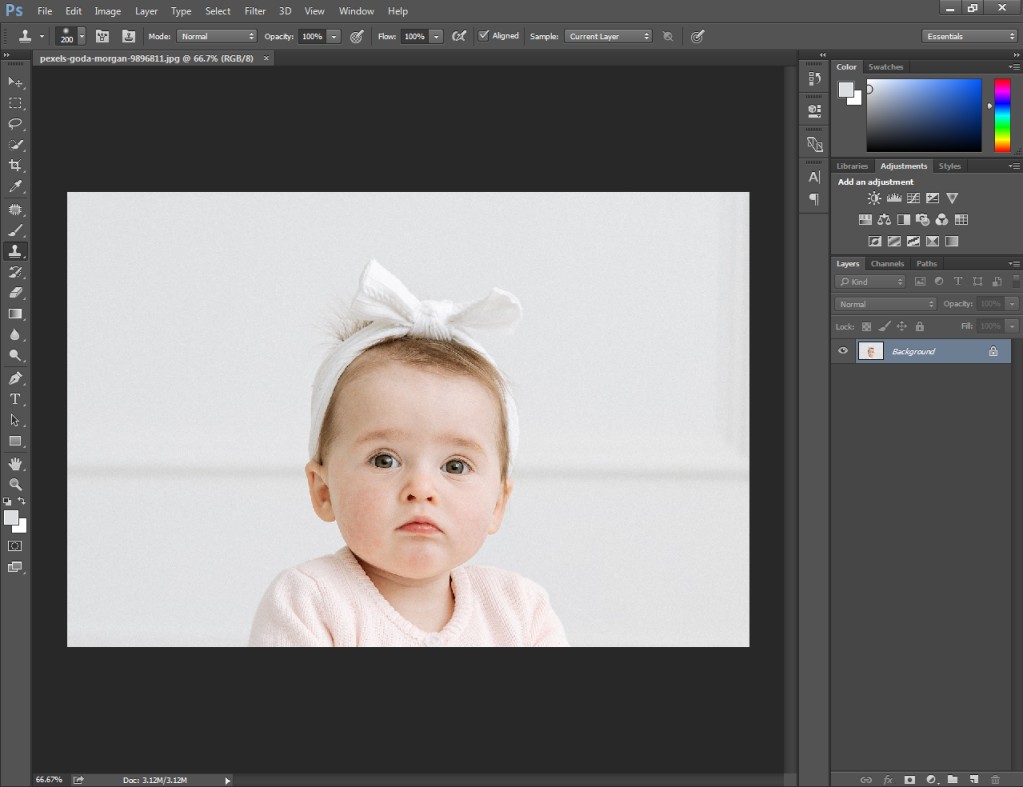
As you can see, there is a narrow blacking line behind the object. If we remove it from the background, it will make the portrait look perfect. Right-click on the background layer of your image and select the “Duplicate Layer” option.
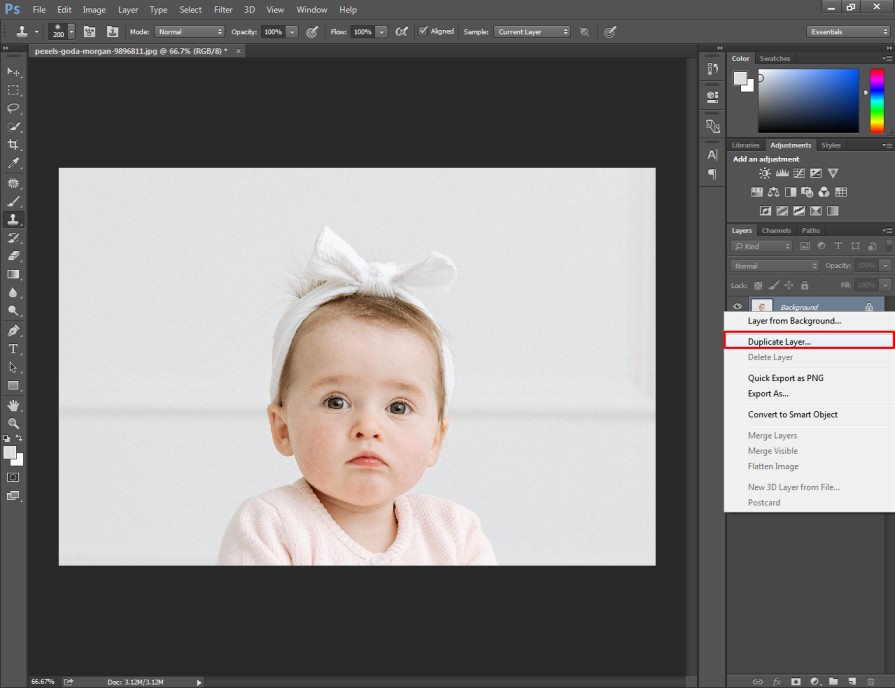
We are going to work on the copied layer to clean up the background.
Step 2: Select the Brush Tool
You can pick up the brush tool from the left-side editing toolbar. You can get it from here.
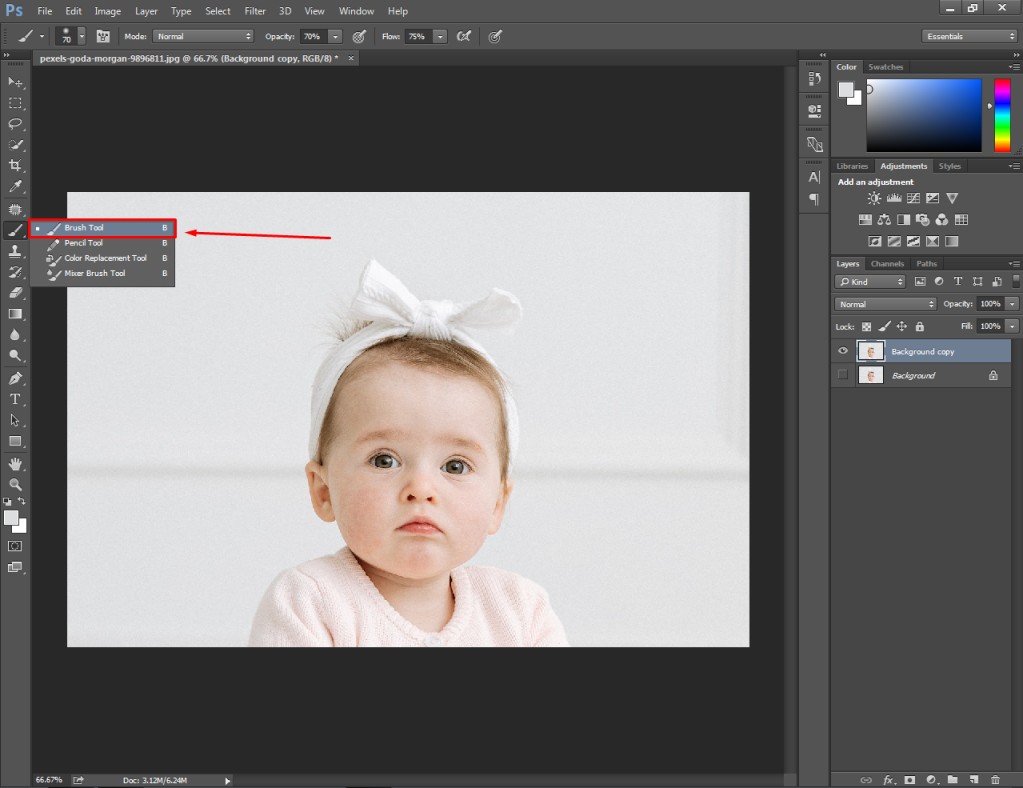
After picking the brush tool, we have to make some customization to clean up the background perfectly. Click on the above option to customize the brush tool.
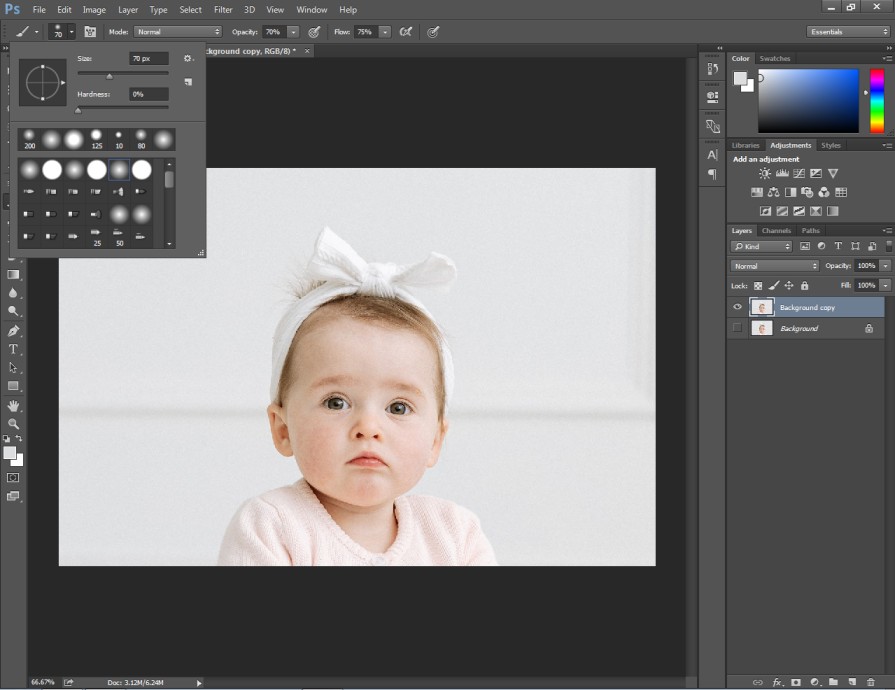
You have to pick up a soft brush tool and set the hardness to 0. You can change the size according to the size of the marks on the background. It will be perfect to keep the brush size around 50 pixels to 70 pixels. You should choose the opacity to 70% and use the flow around 75%.
Step 3: Clean Up the Background
In this step, you have to zoom in on the image where to apply the brush tool. For the sample image, we have to zoom in on the straight line behind the object.
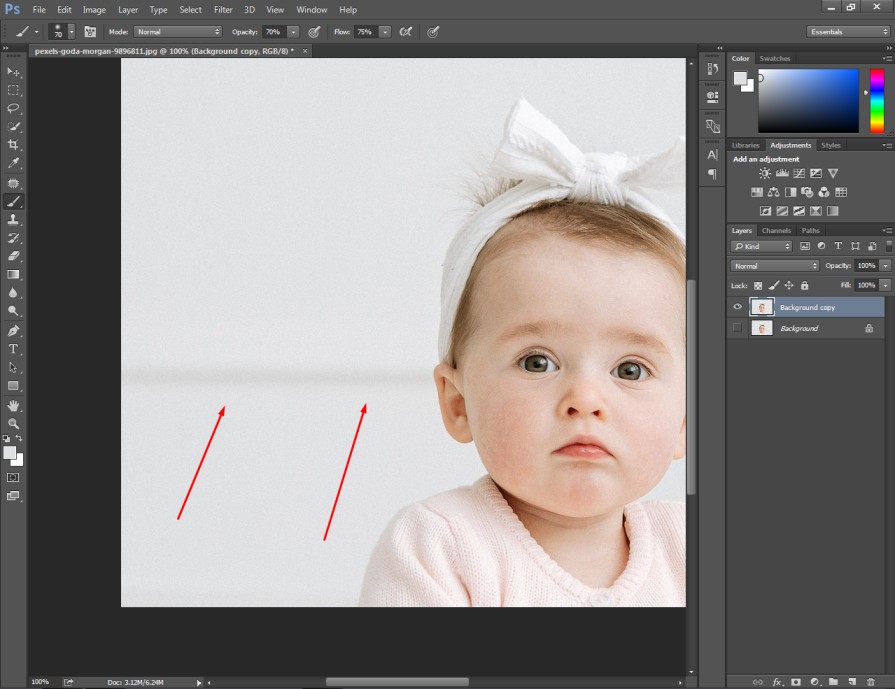
After that, you have to click on the foreground color from the left side and click anywhere on the background. It will pick the color as the sample color. Next to that, you just need to hold the left mouse key and move it over the line.
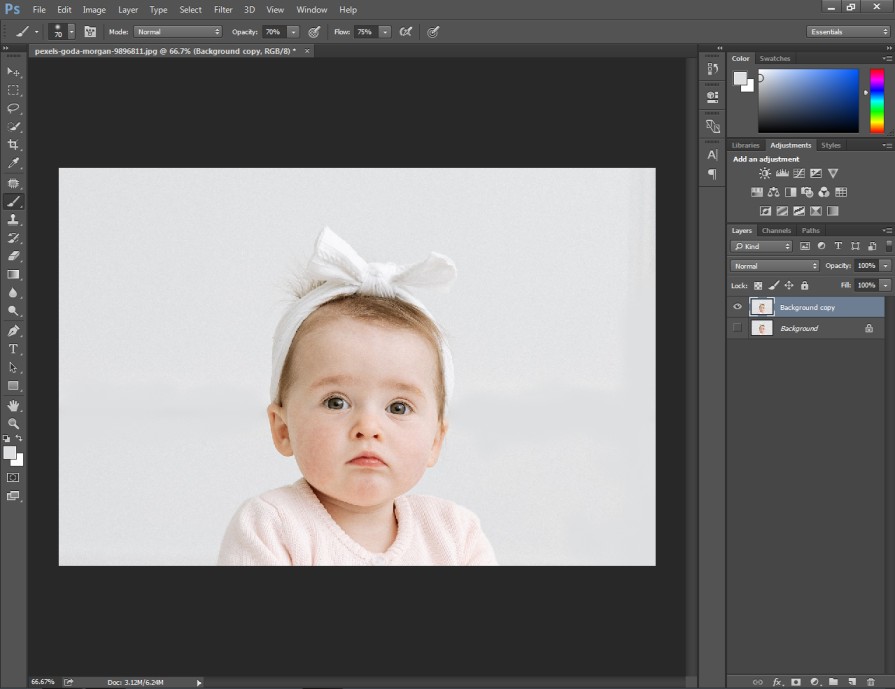
It will clean up the background just like in the above picture. You can apply it to your image background to clean up dust, marks, shadows, and other unwanted marks.
Would you like to improve your image editing with some bonus tips? At this point, we are going to reveal some tricks to improve your editing instantly.
Here you go.
5 Tips To Follow
- When you are working on a white background, you should use the brush tool to clean up the background.
- Use the clone stamp tool for a solid color background to get a smooth result.
- Use the patch tool to fix wrinkles, dust, marks, and shadows.
- Use a soft brush without any hardness to smooth out any background.
- Always copy the original layer so that you can get back to the original look.
5 Mistakes To Avoid
- Don’t use the brush tool to clean up busy background.
- Don’t set full opacity and flow while working with the Brush tool.
- Don’t use the clone stamp tool for a background having several colors.
- Don’t apply the patch tool without zooming in on the background.
- Don’t apply the clone stamp tool without holding the ALT key while choosing the sample area.
Conclusion
At this stage, you have learned how to smooth out the background in Photoshop. We have shared 3 different methods so that you can choose the suitable one considering your picture type. If you can’t fix the background, you can also consider removing the background.
Do you have any queries about Background Removal Services? Don’t hesitate to contact us now. We’re also available on Skype and Whatsapp.
FAQ’s
How can I smooth out the background in Photoshop without removing anything?
You can apply the “Gaussian Blur” filter from “Blur” in Photoshop to smooth out the background. In that case, you have to select the background before applying blur.
Will smoothing out the background affect the main subject of my image?
If you select the object before working on the background, the changes won’t affect anything else outside the selection.
Is there any tool to achieve a seamless background in Photoshop?
Yes, you can use the “Clone Stamp” tool to eliminate any imperfections in the background. It will bring a seamless look.
How can I adjust the intensity of the background blur?
By applying the “Gaussian Blur” filter, you can adjust the intensity of the background blur effect.
What should I do if I want to smooth out specific areas of the background?
You should select that particular area using Photoshop selection tools. Then, you can smooth out specific areas in your photography.
How can I reduce the edges of the main subject after smoothing the background?
You can use the “Refine Edge” option to minimize the edges of the main subject. This feature will ensure a seamless blend between the subject and the background.


