Product Photography has become so competitive that you can’t impress viewers without proper editing techniques. Lightroom can assist you to improve your product photography offering some powerful image editing tools.
Through this article, we are going to discuss how to edit product photos in Lightroom. By making some adjustments like cropping, exposure, contrast, and spot removal, you can make your product photography look its absolute best.
Why Should You Edit Product Photos in Lightroom?
Lightroom is a powerful photo editing software that offers a user-friendly interface and a wide range of tools.
It’s great for enhancing product photos due to its features like precise color adjustments, exposure control, and batch editing. Ecommerce Product Photo Editing is mandatory to get a higher conversion rate in online business.
It will assist your business to acquire more customers. High-quality product photos are also essential for maintaining brand value and trustworthiness.
You are most likely to get a positive first impression whenever a new buyer looks at your products.
7 Simple Steps How to Edit Product Photos in Lightroom
Step 1: Import product image into Lightroom library
First of all, we have to begin by choosing the image from the import option in Lightroom’s library. We are going to use the below picture of a watch for this Lightroom product photo editing tutorial.
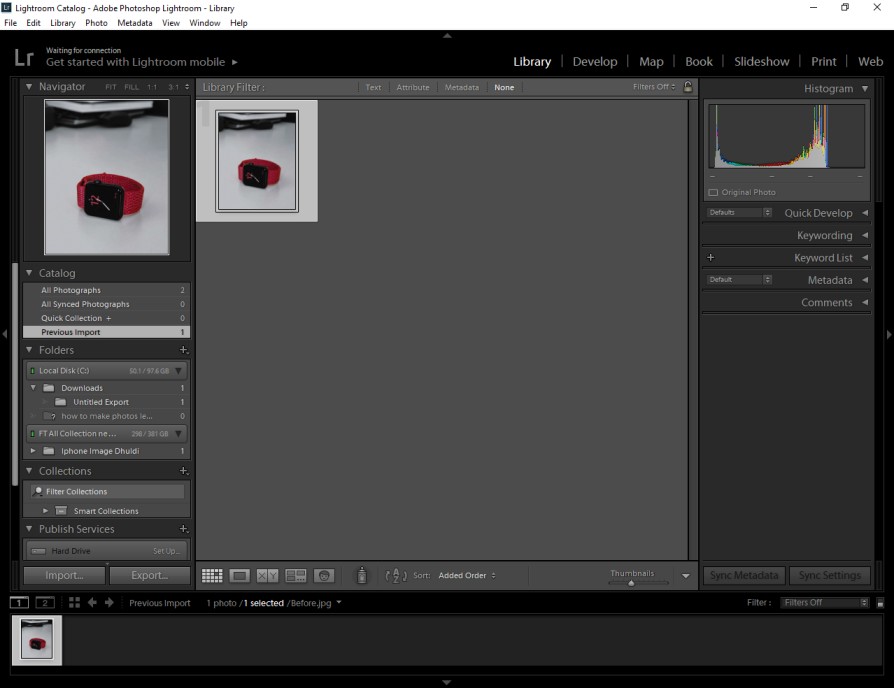
Next to that, you have to jump on the develop option to begin the editing. You can find the “Develop” option in Lightroom from here.
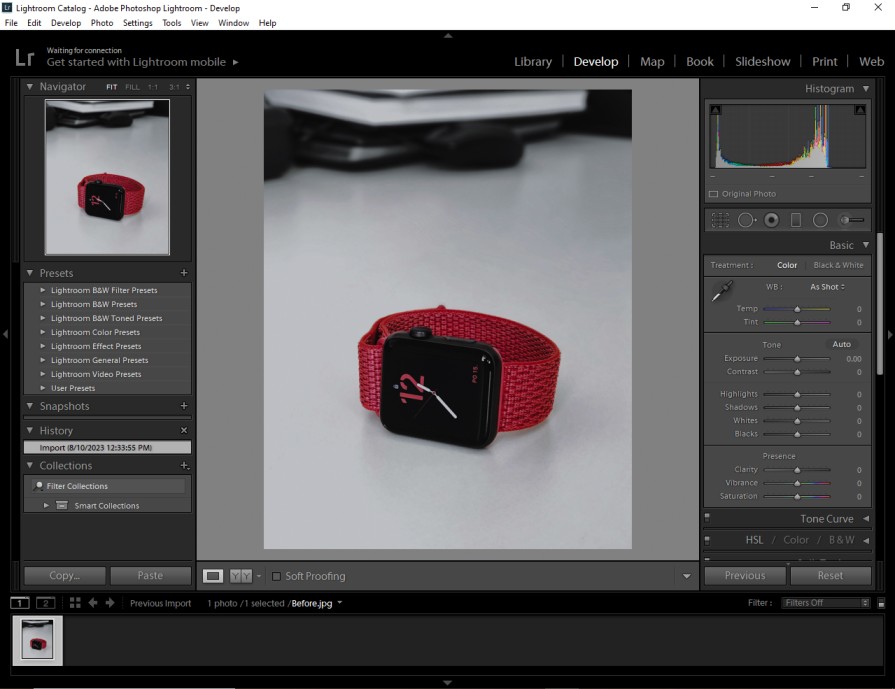
Have you also opened your product image in Lightroom? Well, we are going to begin the post-production step.
Step 2: Crop the image
For product images, you have to follow the product image requirements of the eCommerce platform. You have to eliminate any additional items from the background. Here’s the crop option in Lightroom.
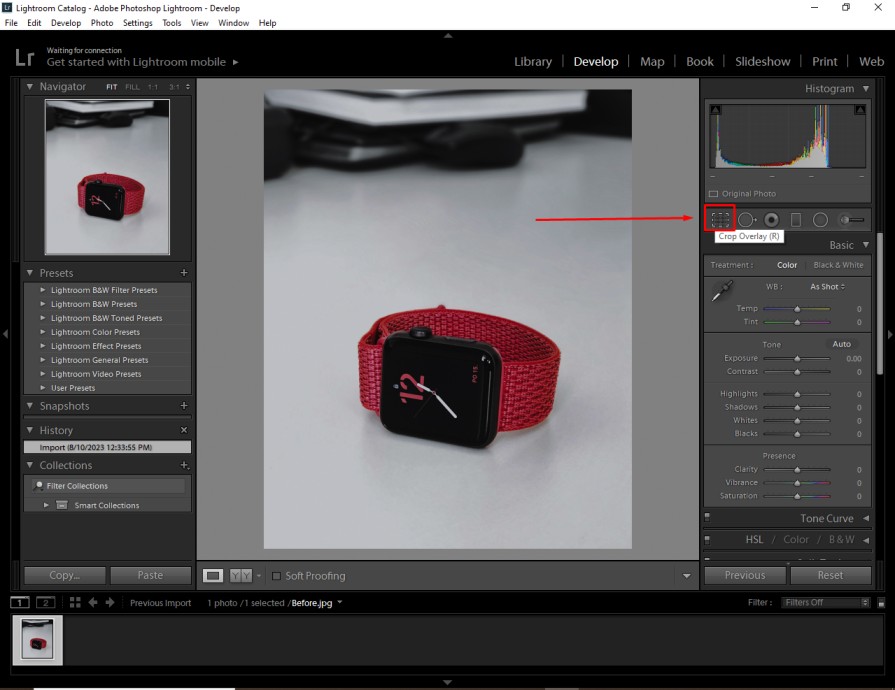
After clicking on that option, you will get different types of cropping options. You can choose the preset aspect ratio. Also, you can set a new custom aspect ratio according to your product image requirements. Or you can apply lightroom presets for product photographers.
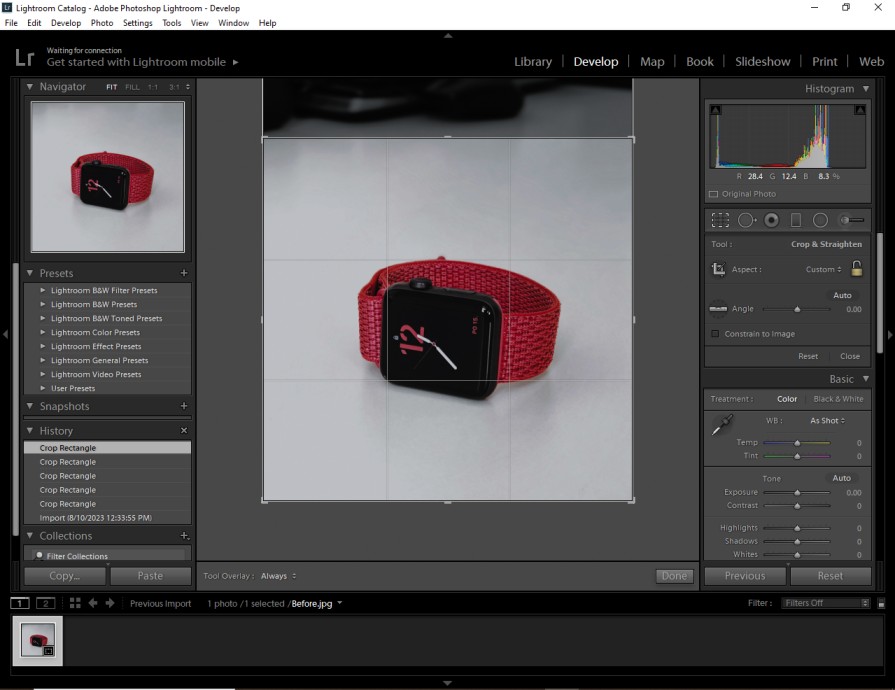
As you can see, I am going to erase the blurred objects from the background. It will improve the appearance of the watch. After placing the rectangle properly, you have to press the “Enter” key to crop the image.
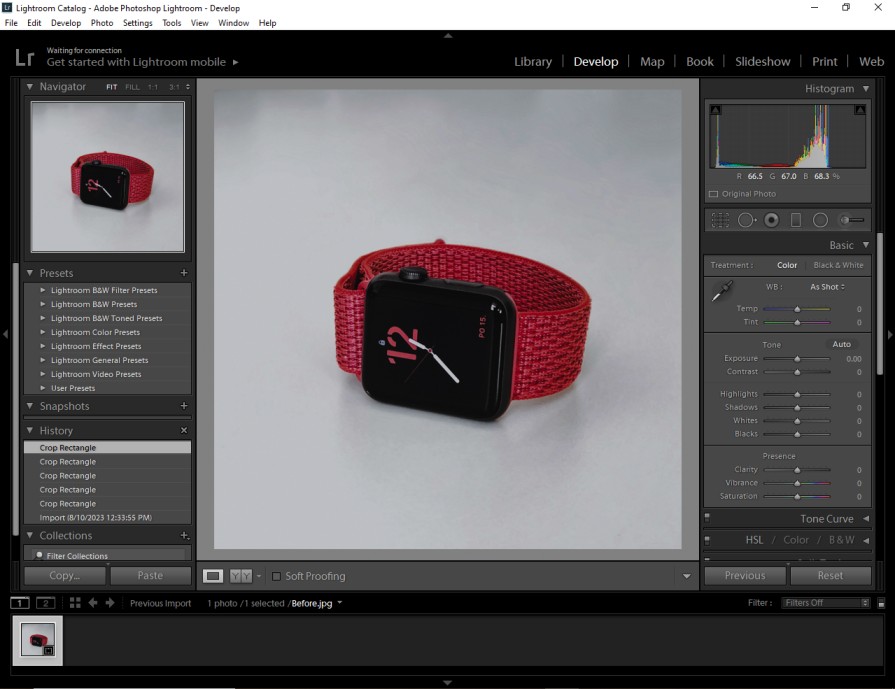
At this point, we are going to make the color adjustments.
Step 3: Exposure correction
As the product image is looking dull, we have to adjust the exposure to fix the issue.
You can fix it from here.
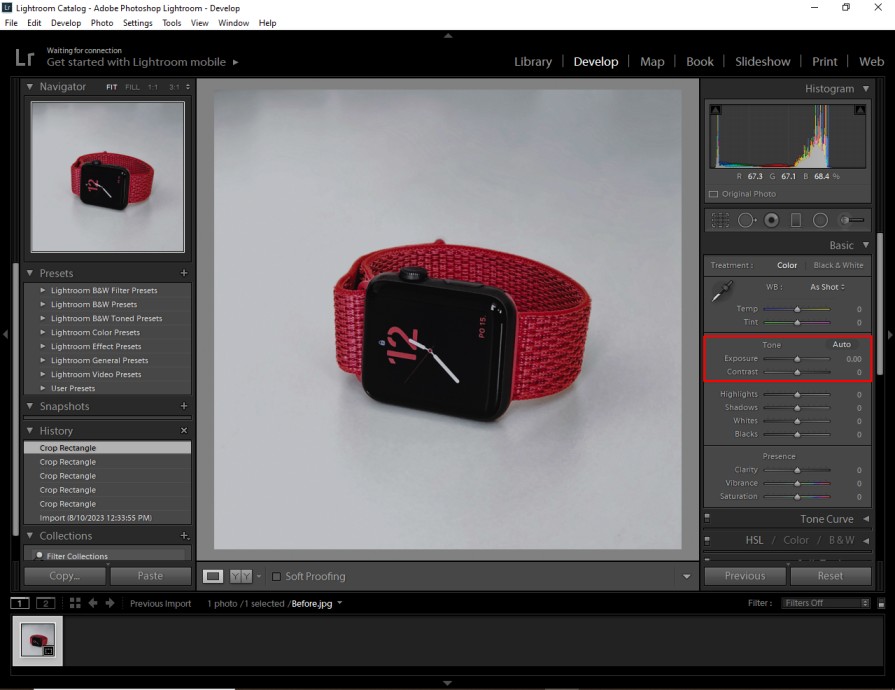
Basically, we need to increase the exposure. Whenever you work on the exposure, you have to adjust the contrast also to make the changes look natural.
If you increase the exposure, then you have to decrease the contrast. When you decrease the exposure, you should increase the contrast.
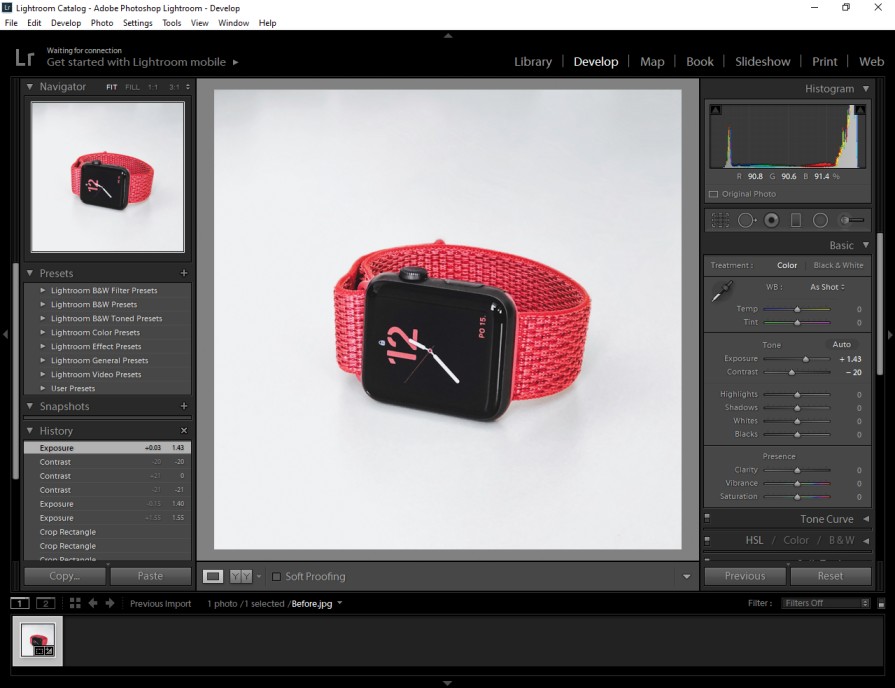
For this product photo, we have to increase the exposure. After that, we have to decrease the contrast. At this point, you might be wondering how much exposure you should increase for your image.
Well, it depends on the light condition of the image. You can keep the exposure around +1.50.
Step 4: Shadow correction
You can fix the shadow and highlights from the tone option in Lightroom.
Here are those options.
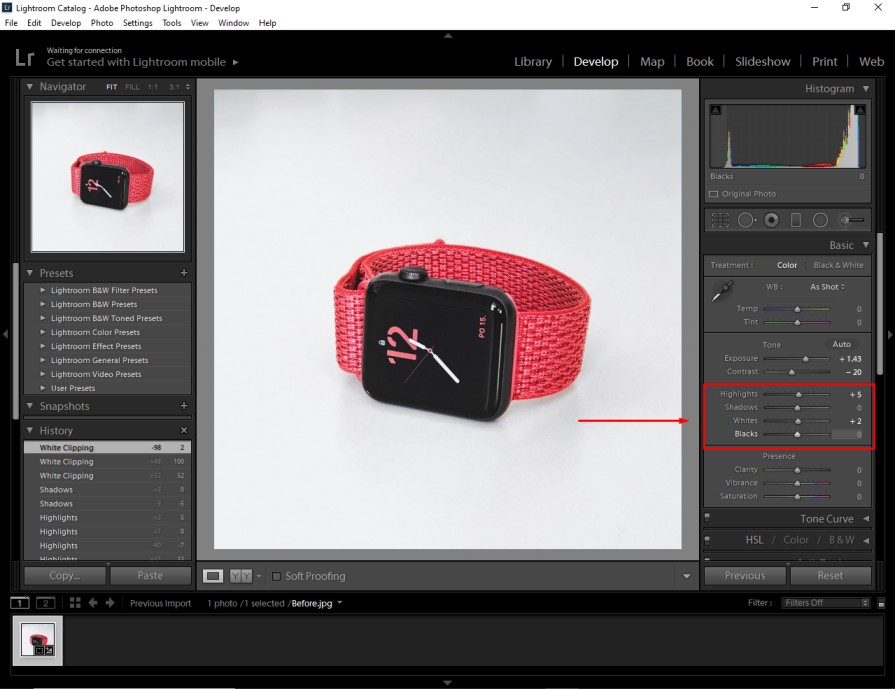
For this image, we’re going to increase the highlight just a bit. At the same time, we have to increase the Whites option as the background isn’t looking perfectly white. Or collect white lightroom preset to apply
You can also adjust the black option if you want to make the object look dark.
Step 5: Noise reduction
Next to the “Tone adjustment” option, Detail options are available in Adobe Lightroom.
Here you can see this.
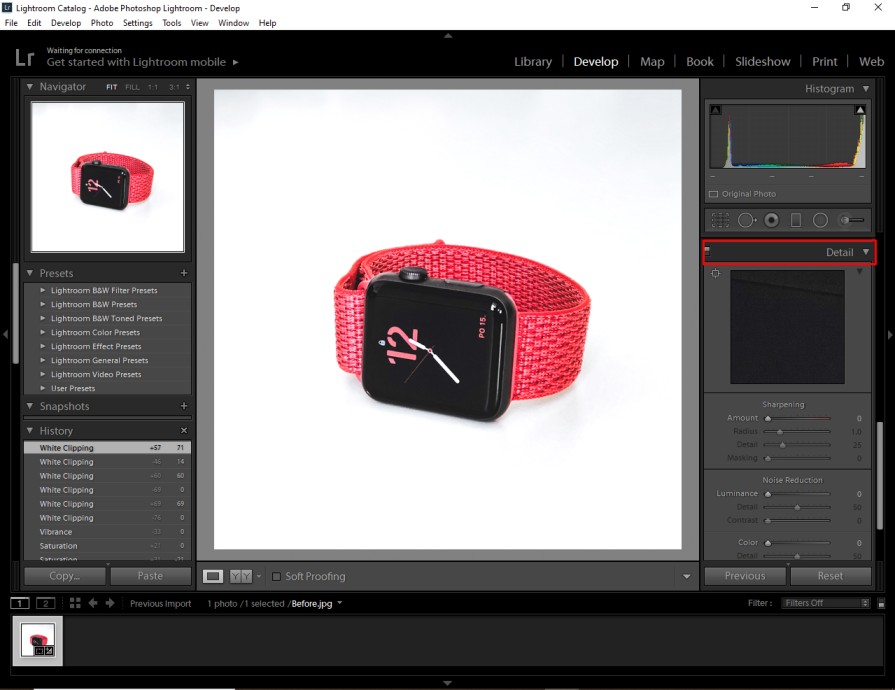
From this menu, you can fix the noise. Here’s the noise reduction option.
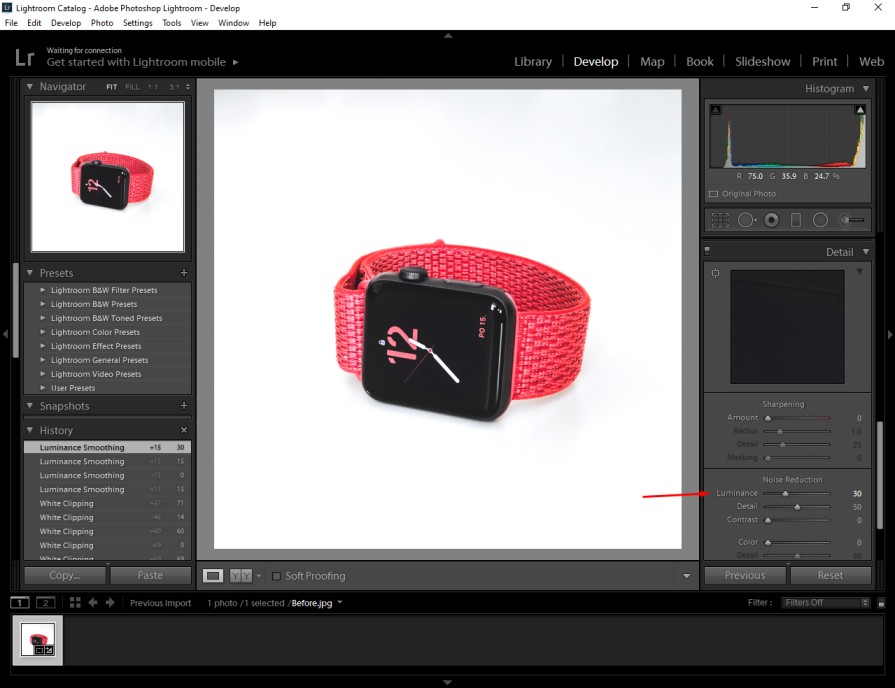
You have to increase the luminance to adjust the noise. According to the noise in your photo, you can increase it to around 30-50. That is needed to reduce the noise from your product photo.
Step 6: Lens correction
In this step, you just need to click on the Lens Correction option to expand its menu. From the basic menu, you have to select “Enable Profile Correction” and “Remove Chromatic Aberration”
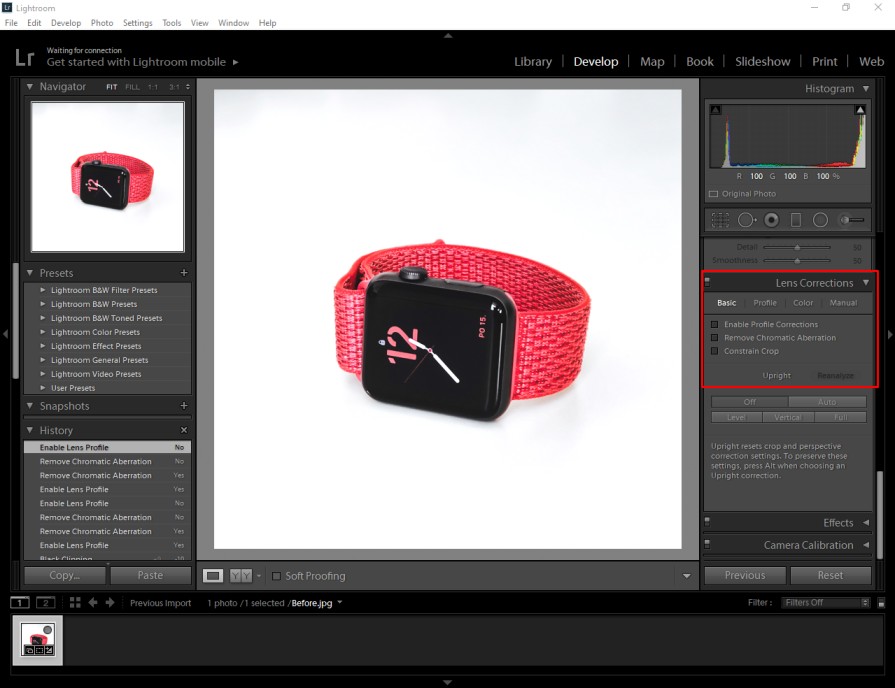
It will fix the issues created by the movement of the lens while capturing the product photo. Next to that, we are going to fix any visible spots in your product image.
Step 7: Spot correction
You have to be careful about any type of spot in your image. If there is any spot, viewers won’t show interest to purchase the product. You can access the spot removal option in Lightroom from here.
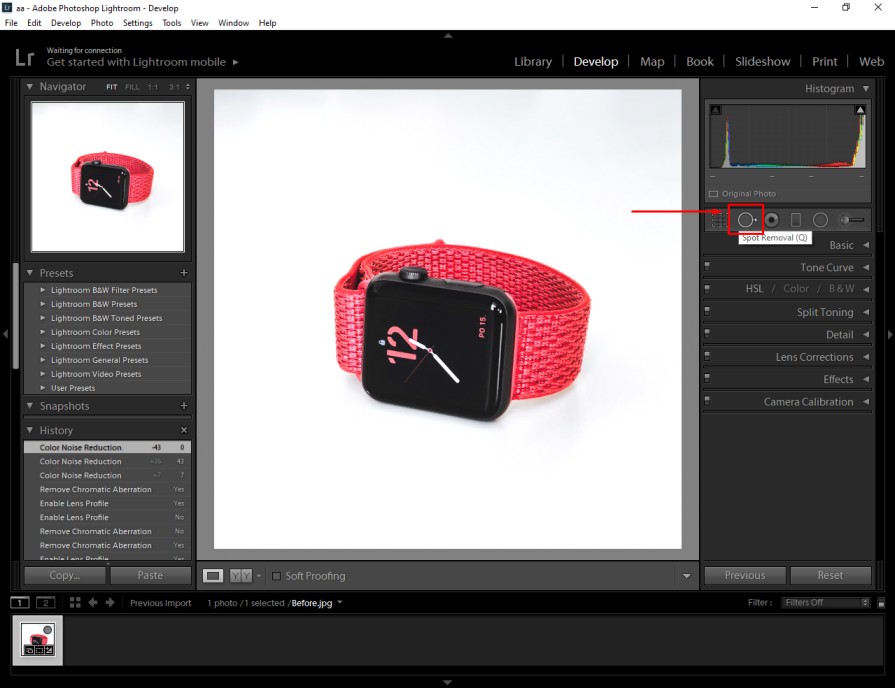
You just need to click on that option and you will get a pointer on your screen. You have to place it on the spot and press the Enter key to fix the spots.
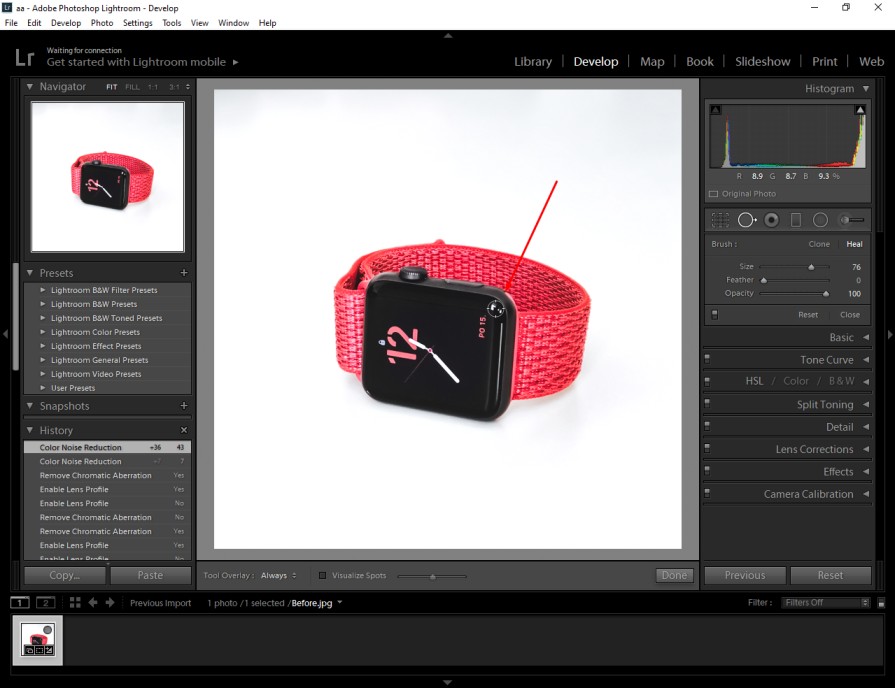
This is the final look after removing the spots and making overall corrections.
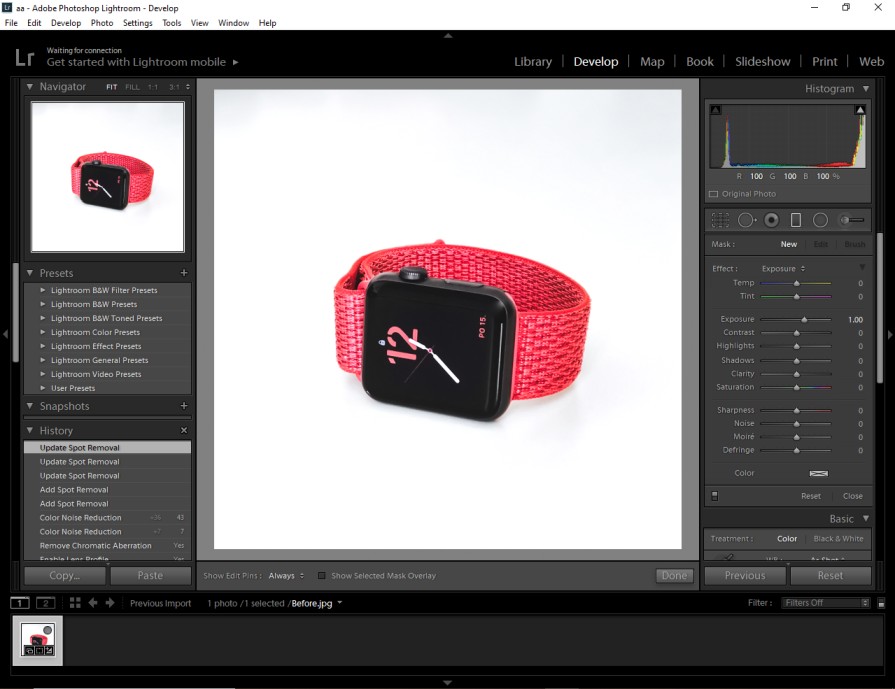
To save the image, you have to go to the “File” option from the top and choose “Export”.
In that way, you can edit product photos in Lightroom like a professional editor.
Who Can Be Beneficial Through Product Photo Editing in Lightroom?
- Online Sellers
- E-commerce Owners
- Product Photographers
- Advertisers
- Resellers
- Online Shop Owners
- Amazon & eBay Sellers
- Product Promoters
Tips To Follow
- Crop the product image according to the eCommerce Product Image Size Requirements.
- Use the Selective color option to enhance a specific color in your product photography.
- Increase the “White” option from the tone adjustment to get a crystal clear background.
Mistakes To Avoid
- Don’t keep any additional items in the background. That can distract a potential buyer.
- Don’t increase the exposure that much when you have captured the image in direct sunlight.
- Don’t increase the exposure when you have already increased the contrast value.
Wrap Up
With the approach mentioned above, you can edit your product photography like a pro. Is there still anything else to know about how to edit product photos in Lightroom? Contact us now to get assistance from our expert photo editors.
FAQ’s
Can i edit multiple product photos at once in Lightroom?
Yes, Lightroom allows you to edit multiple photos simultaneously using the “Sync” or “Auto Sync” feature. This is especially useful when you have a batch of product photos that require similar adjustments.
How do i ensure consistent colors across all my product photos?
To maintain consistent colors, you have to use the “Develop” module in Lightroom. Adjust white balance, apply presets, and utilize the “Match Total Exposures” feature to balance the lighting among different product photos.
How can i make my product images sharper and more detailed?
In Lightroom’s “Detail” panel, use the “Sharpening” and “Noise Reduction” sliders to enhance image sharpness. At the same time, it will reduce unwanted noise, ensuring your product photos look clear.
What is the quickest way to adjust exposure in my product photos?
From the “Basic” panel in Lightroom, you can quickly adjust exposure. You have to use the “Exposure,” “Highlights,” “Shadows,” “Whites,” and “Blacks” sliders to fine-tune lighting.
Are there any time-saving features for editing similar product photos?
You can create and apply presets in Lightroom. You need to create a preset with your required edits for one product photo. Then, you can apply it to other similar photos to save time and ensure consistency.
