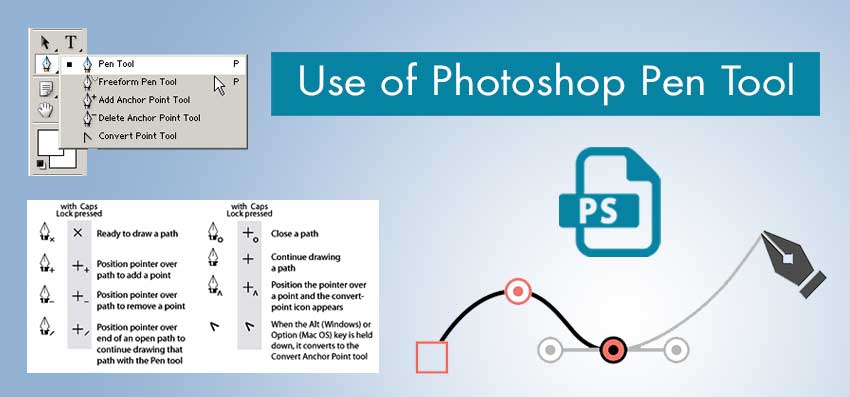
There are lots of ways to improve when it comes to product photography. Product photographers and Ecommerce owners try their best to showcase their products in the most appealing looks.
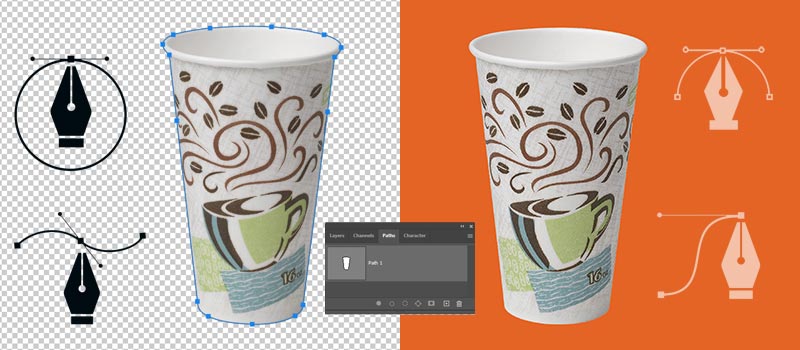
Different types of Photo Editing are used for improving product photos. Clipping Path is one of those methods that is used for improving product photos and making photos suitable for uploading online.
Using the Pen Tool in Photoshop we can separate a product from its original background. In that method, you can remove unsuitable and unwanted backgrounds from your photos.
Therefore, you can capture your photos in any type of background. Do you know how to do a clipping path in Photoshop?
That you’re going to learn through this article. Within a short time, you’ll learn how to do Photoshop Clipping Paths.
I am going to explain it in 5 easy steps that anyone can follow.
How to Do A Clipping Path in Photoshop? 5 Easy Steps
Step 1: Unlock first layer
First of all, we have to start with unlocking the first layer. Whenever you open an image via Photoshop, it will be opened in a locked layer by default. You unlock the layer by clicking on the lock icon positioned on the right side of the layer.
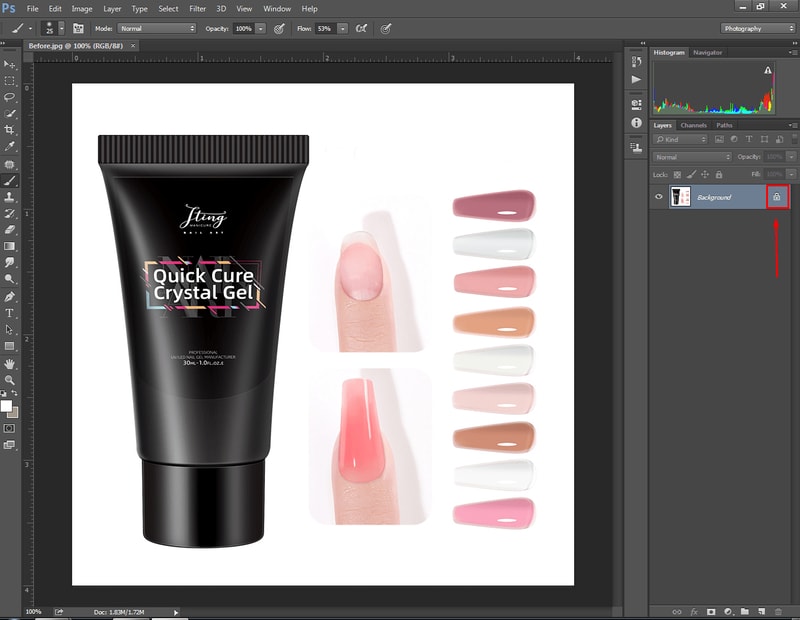
Simply, you have to click on this icon and it will disappear. Without unlocking the layer, you can’t get a transparent background for your product.
Step 2: Select pen tool
Now, we can proceed to select the Pen Tool. Can’t find the tool in Photoshop? Here you go.
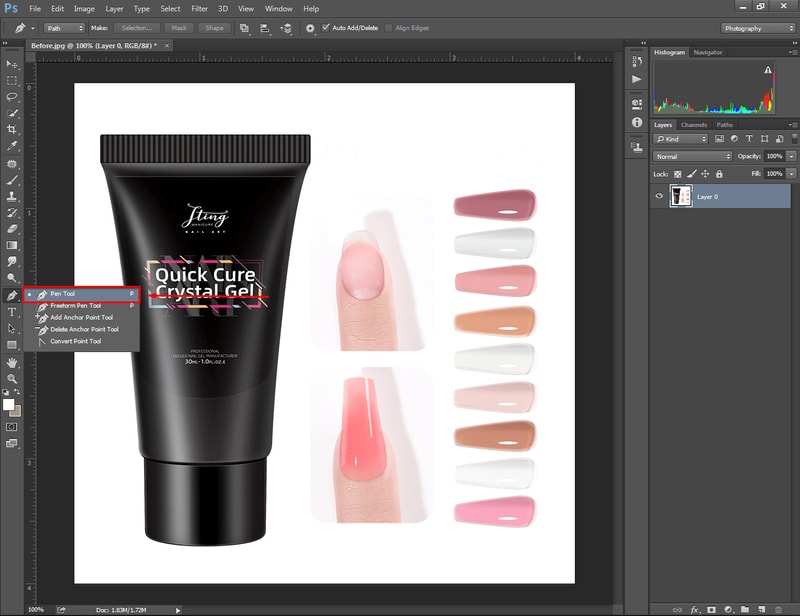
After picking the tool, it’ll enable the vector path creation option. Creating several anchor points we can select any type of object in Photoshop. Later on, we can separate the selected portion from the previous background. Let me show you how to do a clipping path in Photoshop using the pen tool.
Step 3: Select the object by creating paths
Use the shortcut keys “CTRL + Z” to zoom on your photos. After zooming in, right-click on your object outlines to create paths surrounding the product. Here’s an example.
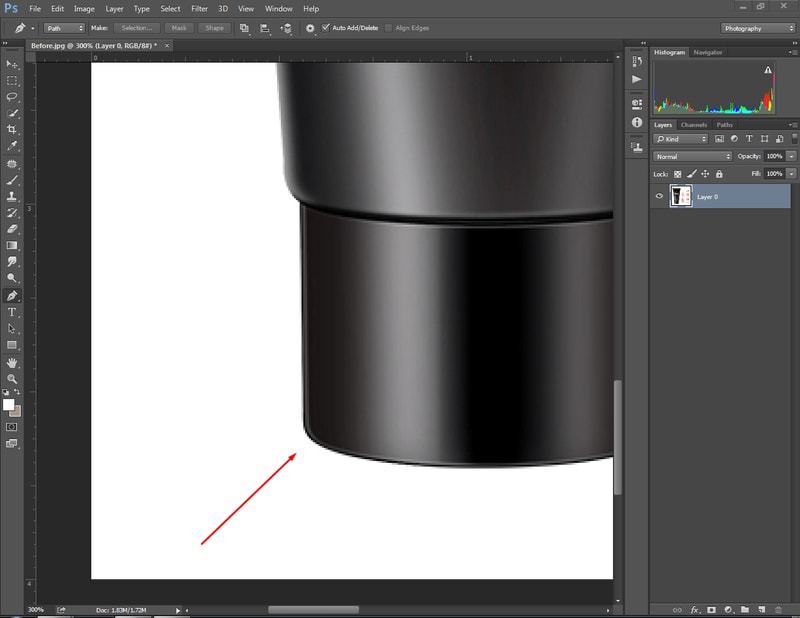
You can start from the bottom area of your product. You have to create several anchor points and select the object by creating vector paths.
An important note here, you have to finish the vector paths at the starting point. Otherwise, you won’t be able to do a clipping path in Photoshop.
Read More: How To Replace Color In Photoshop – Best Step In 2024
While creating paths, you may have to change the direction of the path to match the object’s shape. You can do that by holding the “ALT” key.
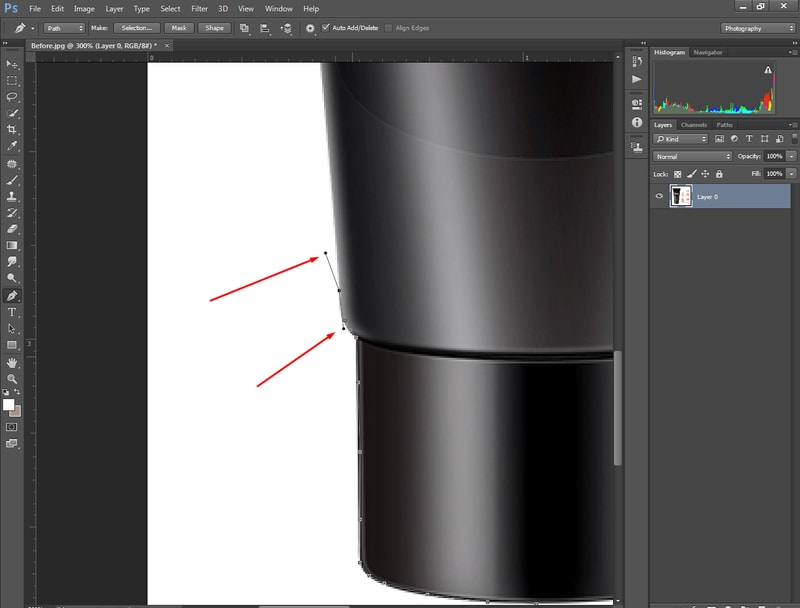
At this point, we need to convert the path as a selection. Jump to the next step to learn this.
Step 4: Convert path into selection
After creating clipping paths surrounding your object outline, you’ll find your object in this form.
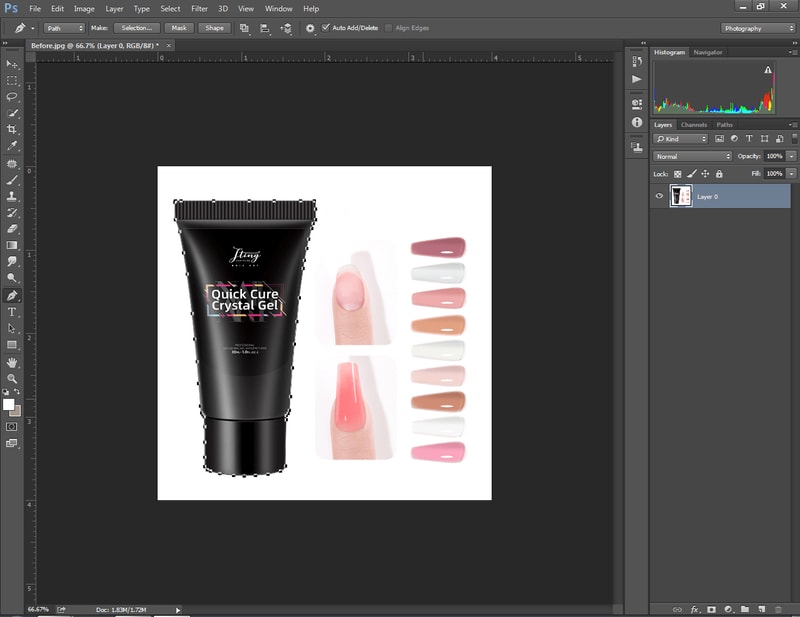
Everything outside of the selection will be eliminated. You’re going to get your Ecommerce product on a transparent background. However, you have to right-click on your object at this point.
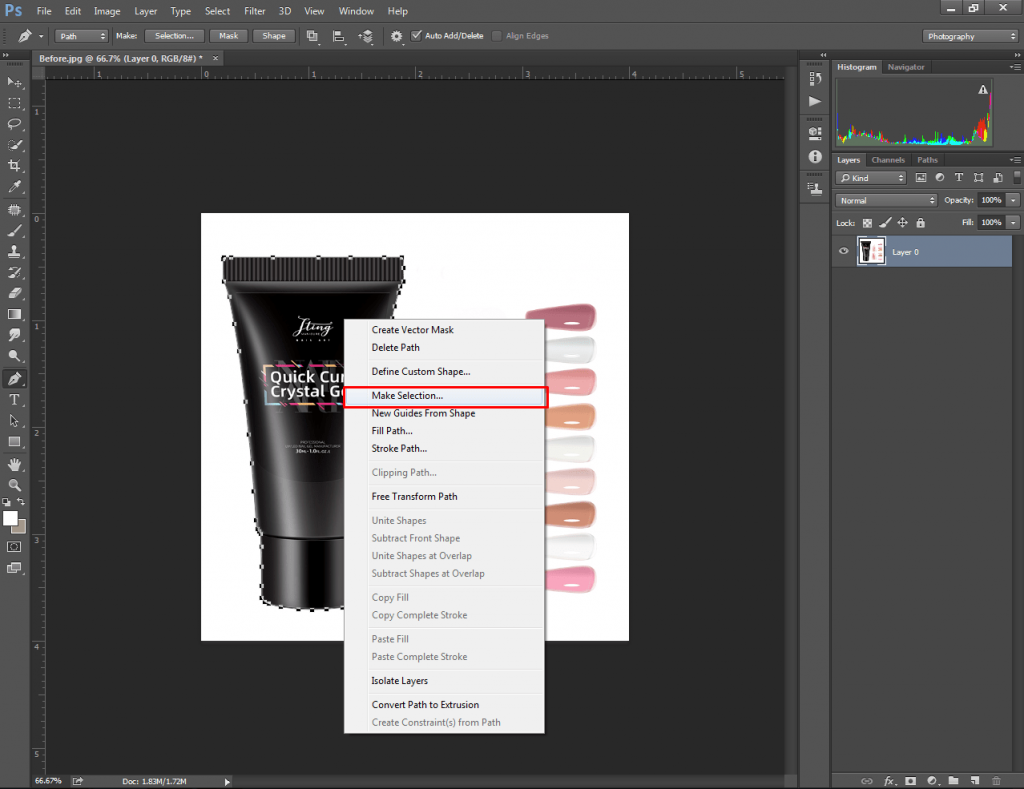
You need to select the “Make selection” option from the above list and press the “Enter” key. After that, the created path will be converted to moving dot lines.
It’s the indication that you have selected your object. Now, you have to use another shortcut key. Press “CTRL + SHIFT + I” to switch the selection from the object to the background.
Then, press the “Delete” key to eliminate everything outside the object. It’ll show your product on a transparent background without having anything that may divert the viewer’s attention.
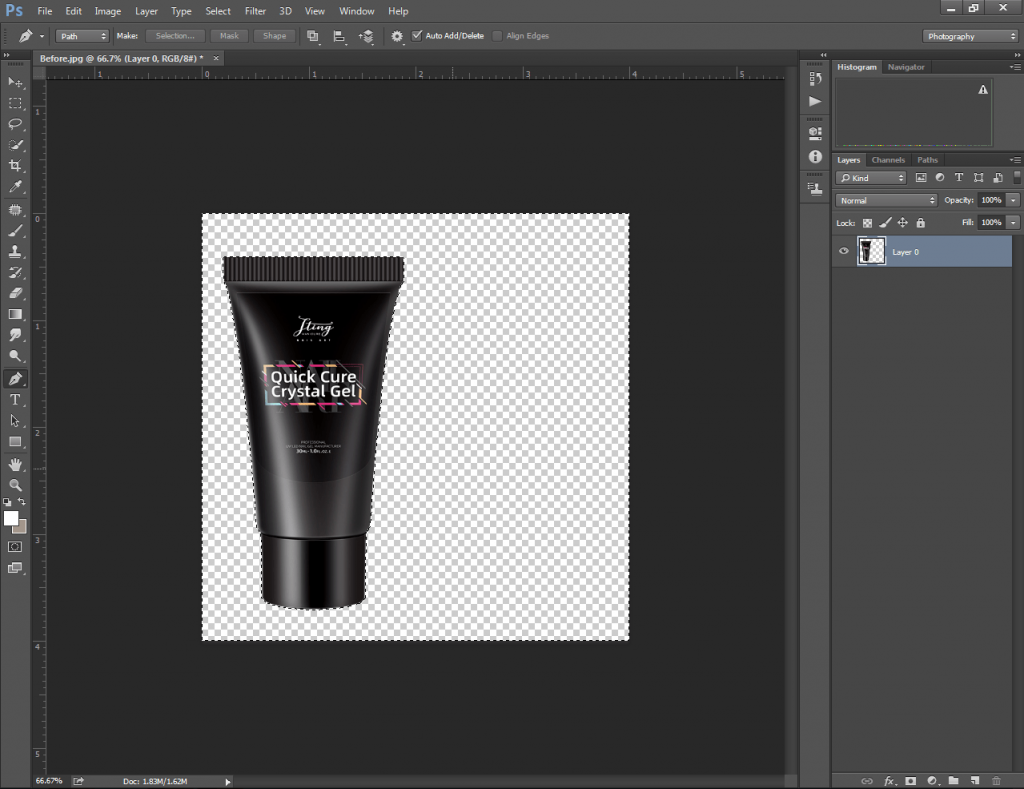
Let’s move to the ultimate step.
Step 5: Fix Object’s Position & Save Your Image
Before saving the image, we have to align the object correctly. Do you know how to change the position of the Object? Well, you can do it using the arrow key. You can find it here.
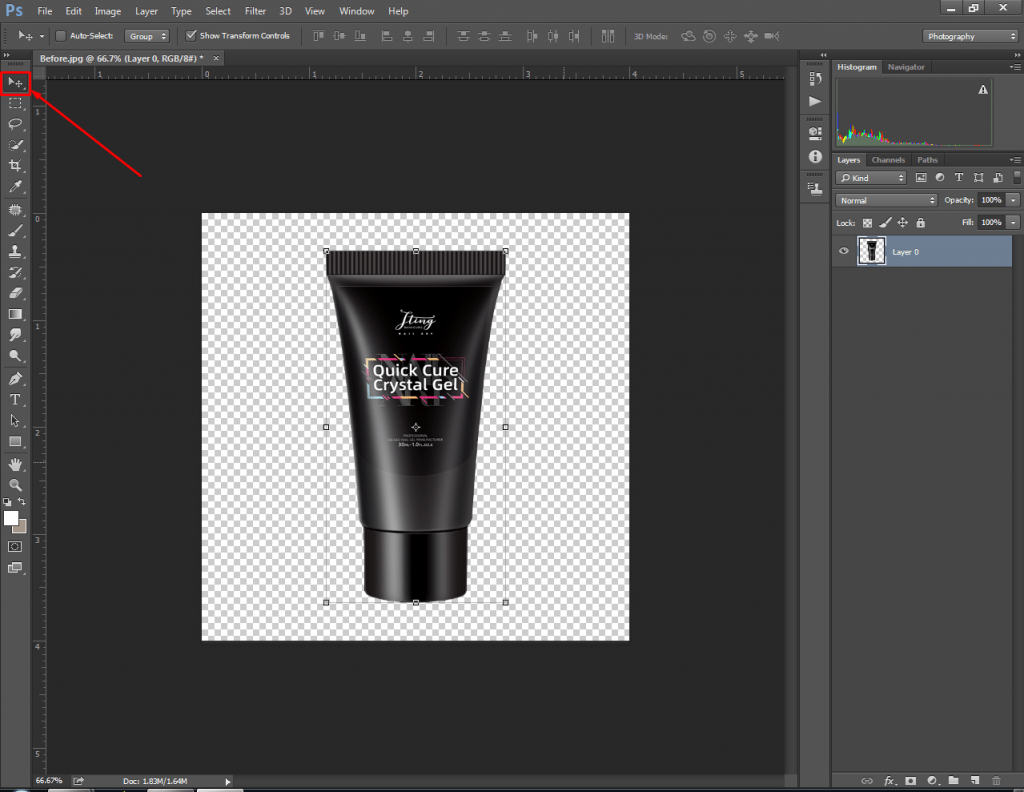
Change the position of the object to the center. It will make the overall appearance more attractive. Finally, your image is ready to upload online. Go to the “File” option from the left to save your image.
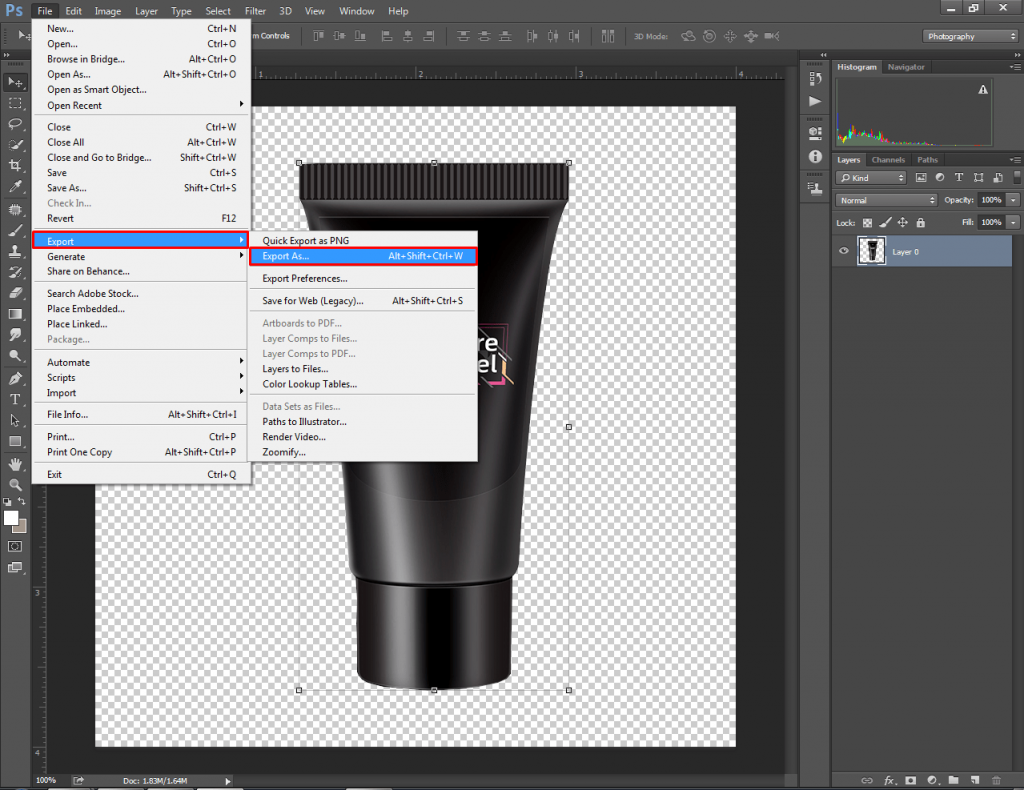
After clicking on “Export As”, you’ll find a different type of format to save the image. For a transparent background, “PNG” is the most suitable format.
Get Assistance From Expert Designers
When you need to apply a clipping path on a few images, you can easily do it yourself. But, when you have lots of images, it’s become challenging to create a clipping path and maintains top quality.
That’s why we’re available to help you out of this hassle through the best Clipping Path Service.
Request a free quote now to get the assistance of our professionally trained and skilled designers. We also offer a free trial.
Final Words
At this stage, you have learned how to do a clipping path in Photoshop. Following those simple 5 steps, you will be able to create paths for any type of object or Ecommerce product. Do you have to deal with bulk photos?
Clipping Way can help you with that. You can ask for a quote now to get our Clipping Path Service or any other professional photo editing services.
FAQ’s
How to reposition an object after doing a clipping path?
Using the “Free Transform” option you can reposition or resize an object after creating a clipping path.
How to create paths with the freedom pen tool in Photoshop?
Click and drag the mouse over your object to create paths using the freedom pen tool.
Can i create a clipping path using the lasso tool?
Lasso tool is used for selecting an object or a particular area. You can create a clipping path using the pen tool only.
How can i save multiple paths for an image?
Go to the path section from the layer panel. Then, you have to save paths individually from the work path options.

