Making necessary adjustments to make an image look perfect is the ultimate goal of image editing. Sometimes designers have to adjust the brightness, color, and contrast.
Sometimes designers have to change the position of an object. To do that, we have to rotate the layer in Photoshop.
Most beginners find it difficult to rotate layers and images in Photoshop. Through this article, we are going to make the process easier for them to learn Photoshop.
We are going to share how to rotate a layer in Photoshop. This is going to be extremely easy to follow the steps.
You can do it with any recent version of Adobe Photoshop.
Why to Rotate A Layer in Photoshop?
Rotation of layer or image is required in eCommerce Image Editing to adjust the direction of the product. Also, it’s useful for making adjustments to product positioning in a realistic way.
Professional image editors rotate a single layer or multiple layers to make necessary adjustments to make the image look better.
How to Rotate A Layer in Photoshop? Do It Like A Pro
Step 1: Unlock the background layer
First of all, you need to check whether the layer is unlocked or not. If you notice the lock key, you have to click on the icon to unlock the layer.
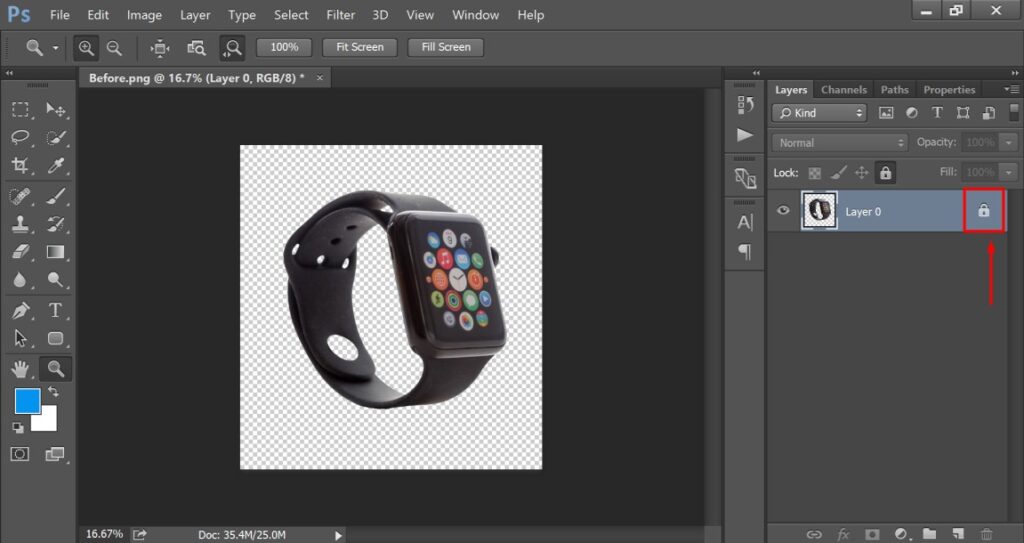
Now, you can do the basic rotation from the image rotation settings.
Step 2: Go to image rotation
As the layer is unlocked, you can rotate the image from image rotation. You have to open the “Image Rotation” option from the “Image”.
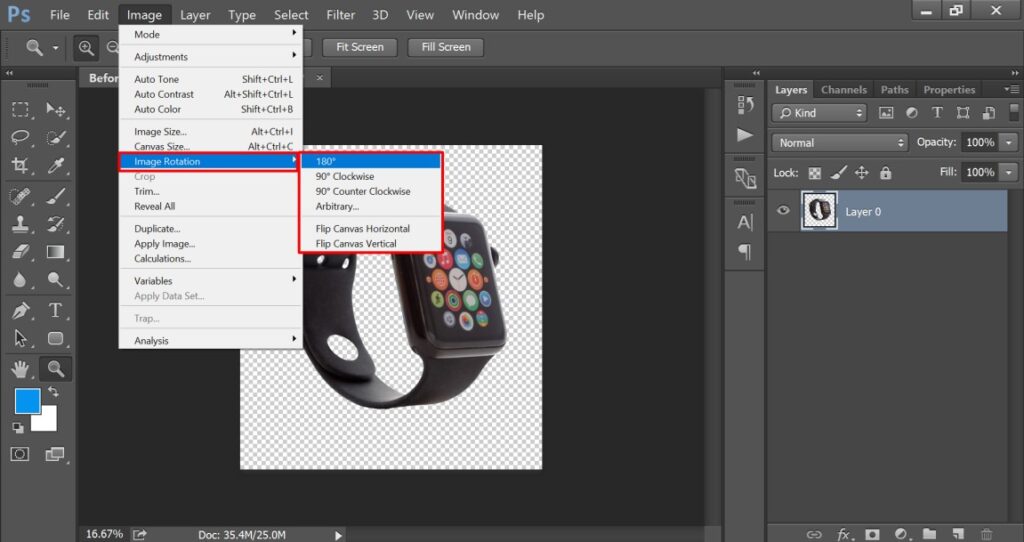
You can rotate a layer in Photoshop with those rotation features.
However, this is not a professional way to rotate a single layer or rotate an image in Photoshop. You can rotate the image but you don’t get the flexibility in that feature.
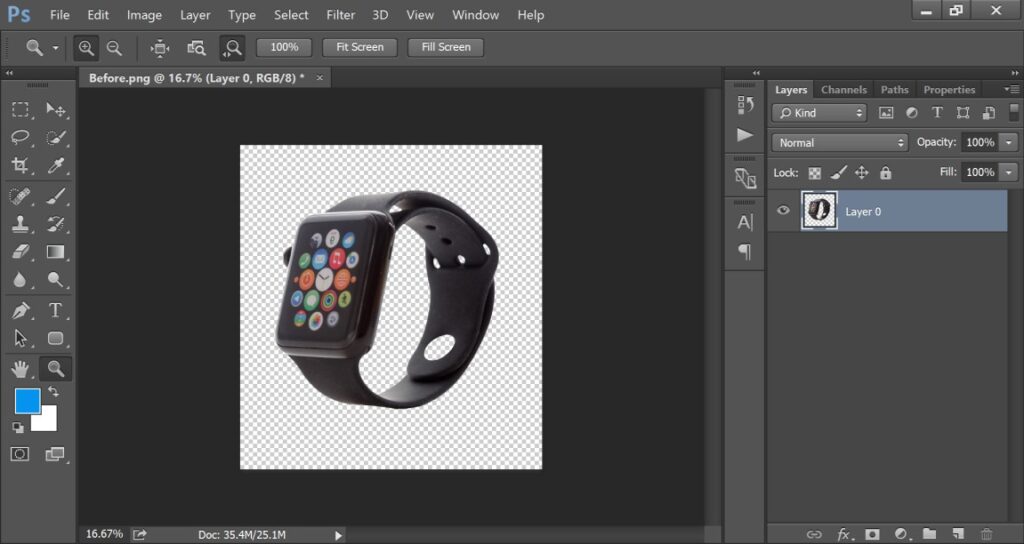
Now, let me show you how to rotate a layer freely in Photoshop.
Step 3: Enable Free Transform
For this step, you have to enable the free transform option. You can get the option from the “Edit” section located at the top.
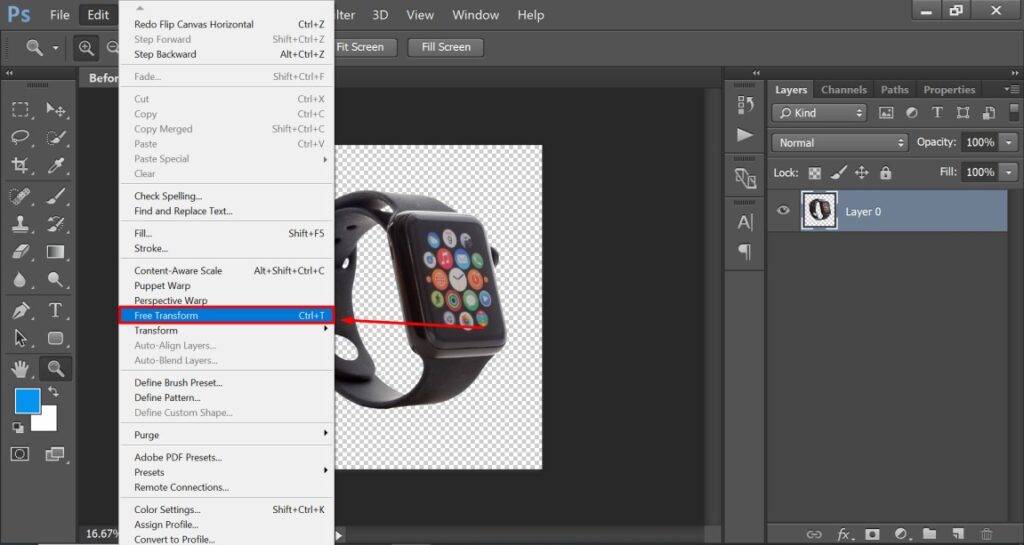
After that, you will get the image layer in this form. There will be a rectangle around the image.
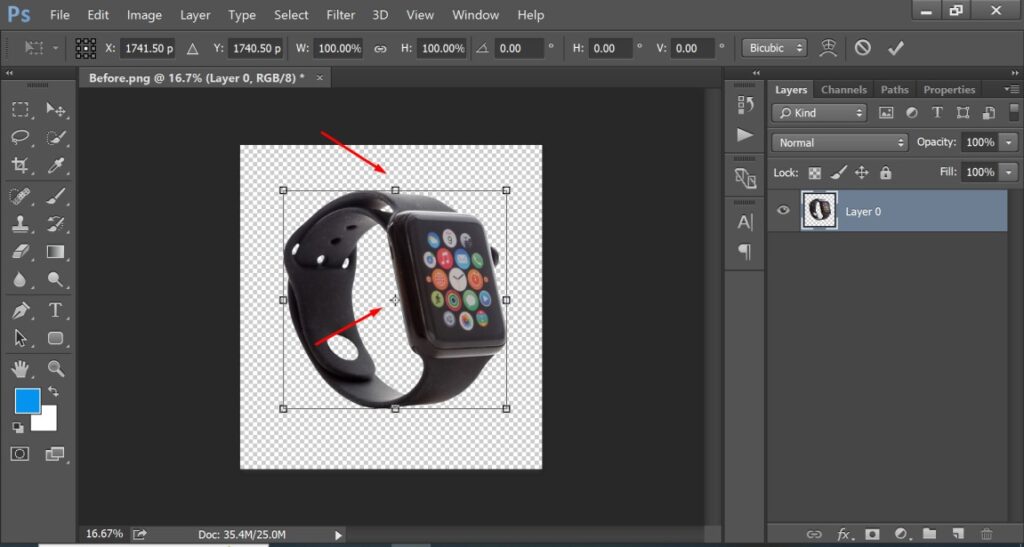
You can rotate the image or layer along with changing the image size. Also, there is no specific limitation to rotate the image. You can do it freely at 360 angle.
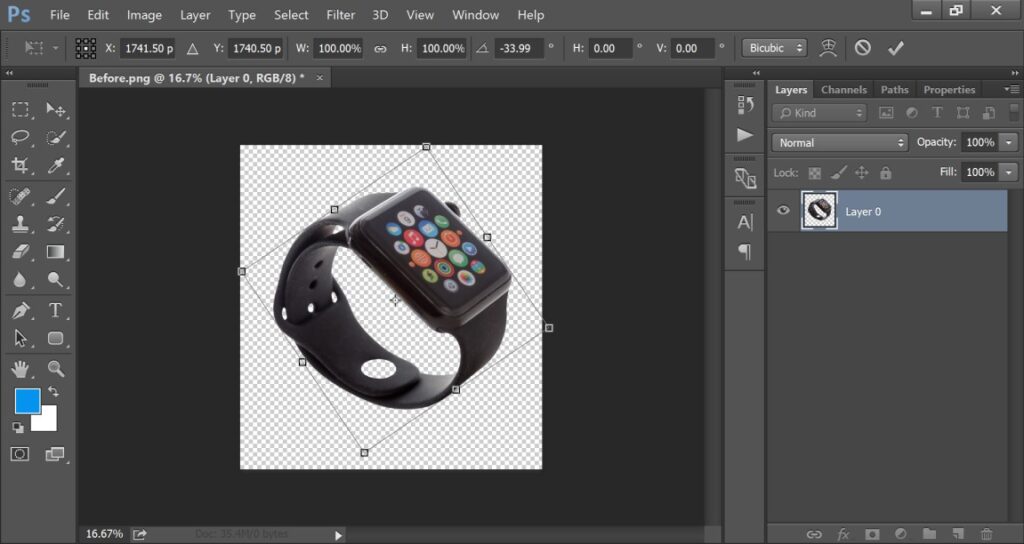
Here’s the result after rotation. Now, let me show you how to rotate a logo or text in Photoshop using the same method.
How to Rotate A Logo in Photoshop?
You have to start by inserting the logo within the image. We are going to start with this logo “Clipping Way”.
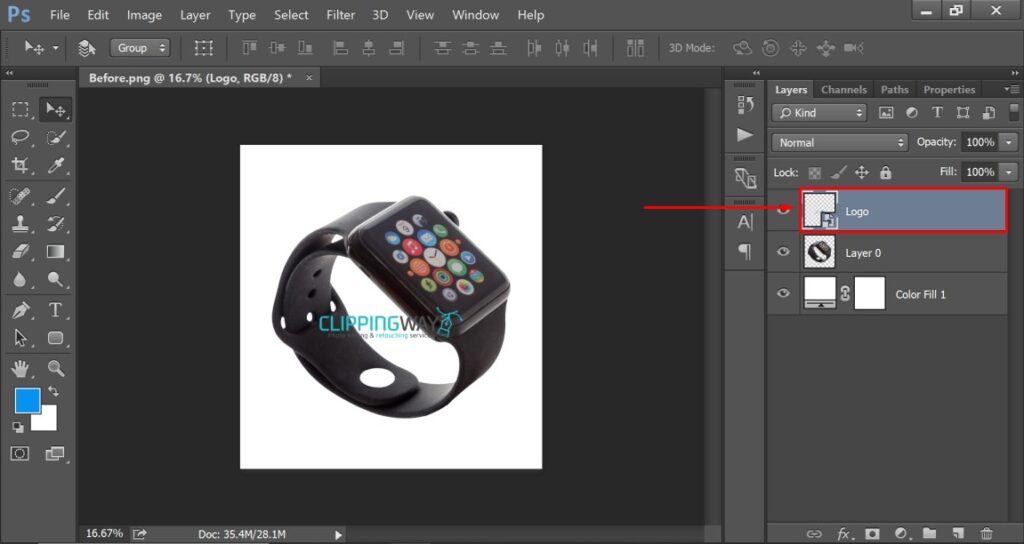
Make sure that you have selected the layer of that logo. After that, you have to press “CTRL + T” to turn on the free transform option for the logo. It will make the logo look like this one.
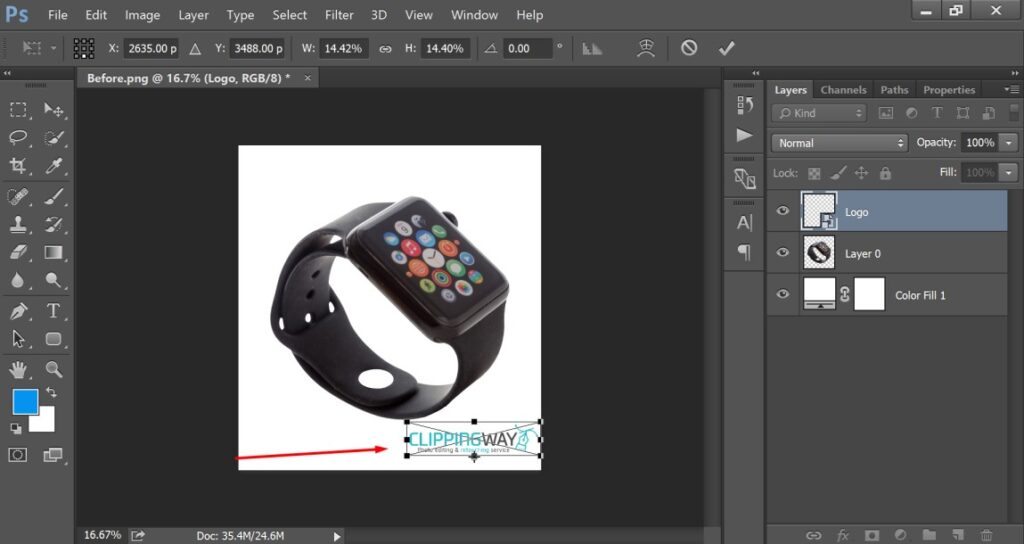
You can use the arrow key to change the position of the logo. You can rotate the logo in Photoshop by pressing the round icon on the rectangle.
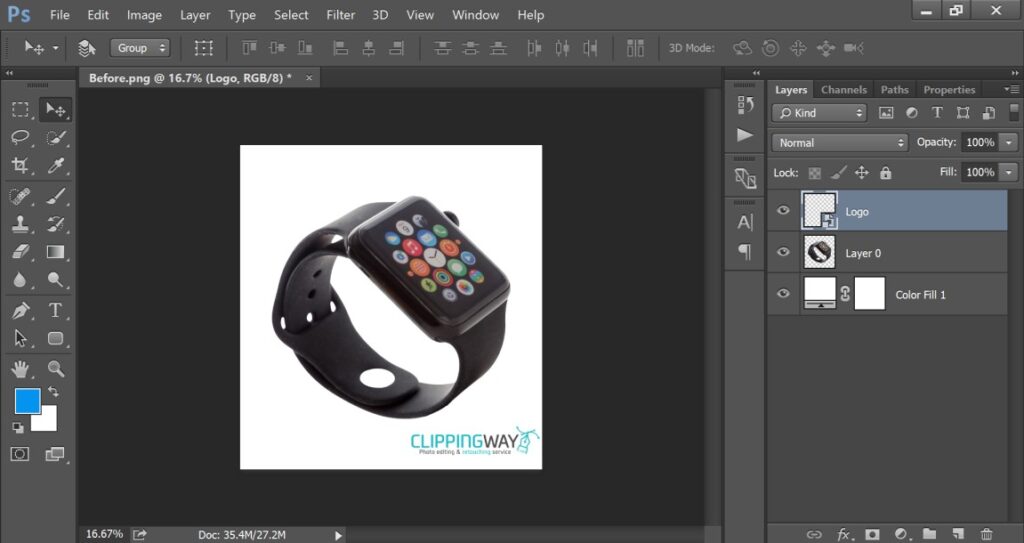
I am okay with that position and angle. So, I am going to keep it like this one. You have to press the enter key to save the changes.
Sum Up
This is the process of how to rotate a layer in Photoshop. Using the above method, you can easily rotate a single layer or rotate an image in Photoshop.
FAQ’s
How do i rotate only one layer?
You have to select that layer and enable the free transform option for that layer. You can enable it by pressing CTRL + T.
How do i rotate an image layer?
You can do it from the “Edit” section by choosing “Free Transform”. Using that option, you can rotate an image layer in Photoshop.
