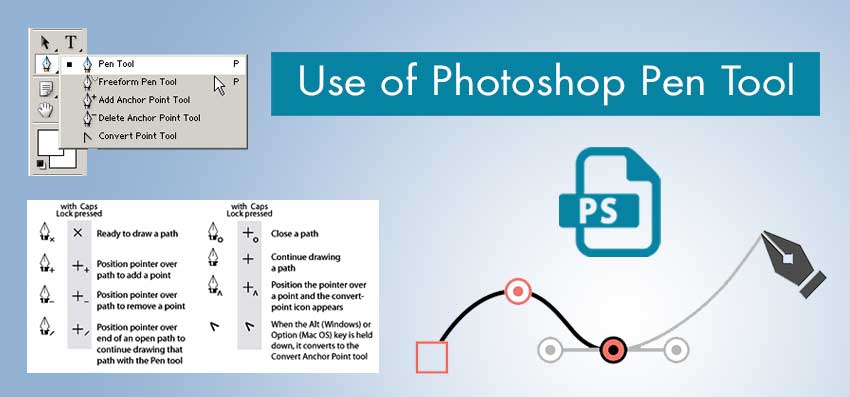
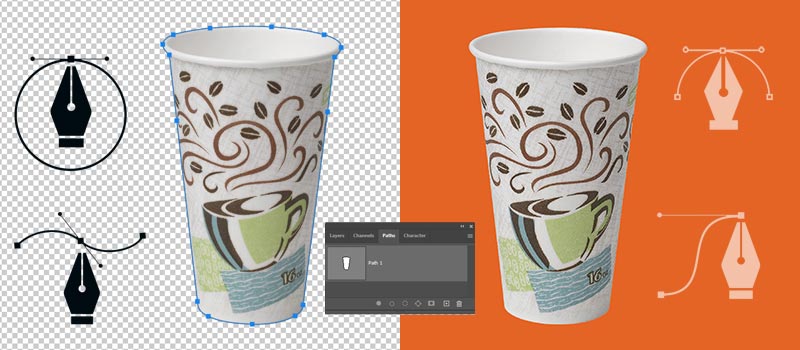
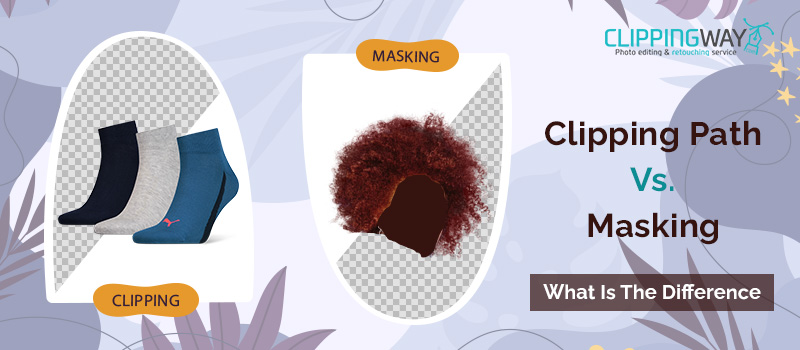
Clipping Mask is an essential Photoshop feature for controlling the partial visibility of a layer. Within a while, you will be able to do that with your images.
If you want to insert your image in a frame or want to present your image within specific shapes, the clipping mask will be the best option.
You can represent your image in a rectangular shape, circular shape, elliptical shape, or so on. In this article, we will show you how to make a clipping mask in Photoshop.
Also, you will learn how to make a clipping mask for text in Photoshop. You just need to follow the simple steps below.
What is A Clipping Mask?
In simple words, a clipping mask is a method to control a layer’s visibility according to the pixels of the layer below it. You might be thinking what is clipping path then?
You might get confused about clipping masks when you’re applying them for the first time. I promise that you will get over the confusion after reading the tutorial sections.
In Clipping Mask, two layers perform two different roles. The top layer shows the object and the bottom layer controls the transparency. When you make the top layer transparent, it will hide the content of the clipped layer.
Now, it’s the time to do that practically. Let me show you how you can easily create Clipping Mask in Photoshop.
How to Make A Clipping Mask in Photoshop? – A to Z Explained
You can follow the tutorial using Photoshop CC, Photoshop CS5, Photoshop CS 6, and any recent version such as Photoshop 2020 and Photoshop 2021.
Step 1: Set up your image
First of all, you have to begin with opening your image in Photoshop. You can directly drag your image in Photoshop or you can choose the image from “Open” option from the “File”. I have selected that image to make a clipping mask in Photoshop.
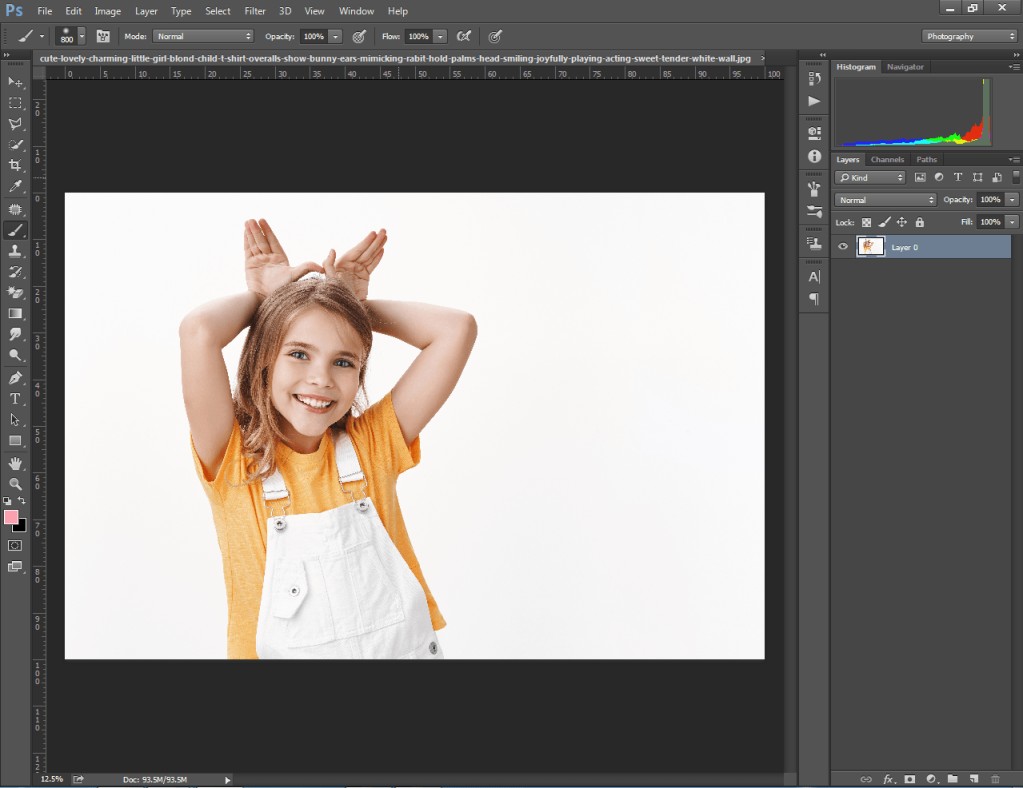
When you open your image, you will get the image in a locked layer. Click on the lock icon on the layer to unlock it. Unlocking the layer enables transparency to that layer.
Step 2: Select color range
Now, we are going to remove white background and make the background transparent. The color range selection will be better to apply for this image.
Considering the shape and complexity of your object, you can use any Photoshop selection tool that you feel is convenient. Here’s the color range option.
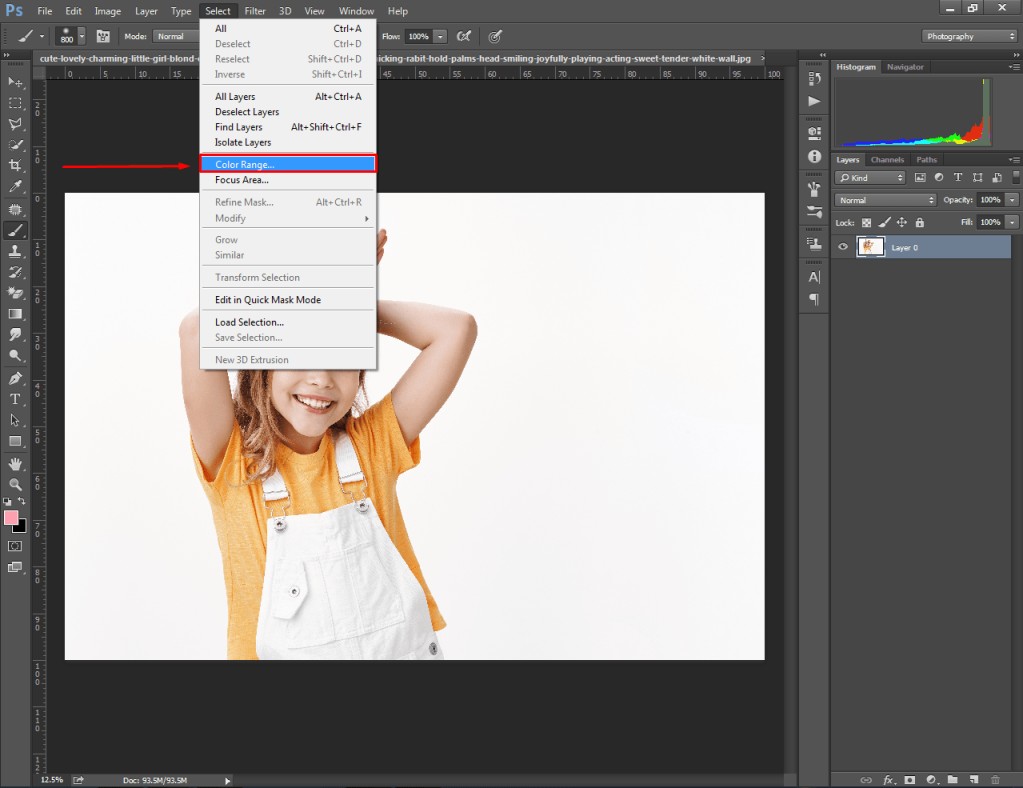
Using that tool, we can make a selection based on specific colors. After selecting the color range option, click on multiple selection icons from the middle to reduce the fuzziness. Then, click on the background to make it white and keep the object black.
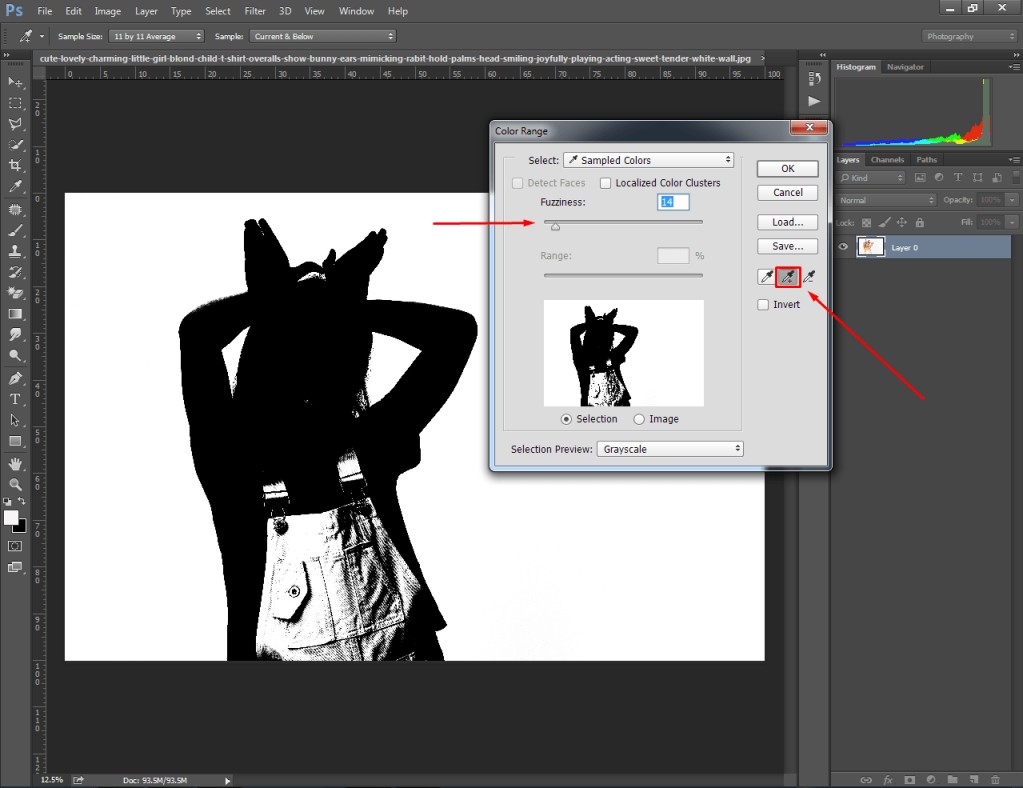
At this point, the object is still white in some portions. Press “Enter” to apply the selection. Now, we have to fill that portion as black.
Step 3: Add layer mask
After applying the color range option, we have to add a layer mask to modify the selection in image masking mode. All you need to do is click on the layer mask icon from the bottom of the layer panel. After that, you hold the “CTRL” key and click on the mask icon from the layer.
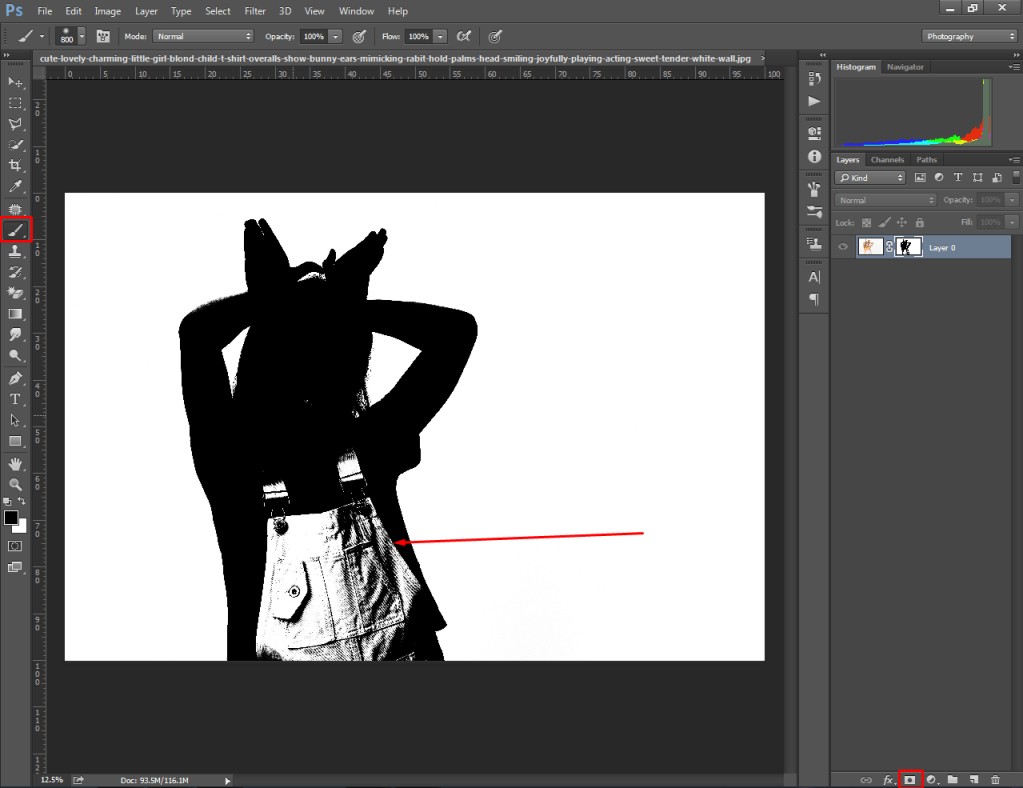
Then, select the brush tool from the left panel and paint black on the object. Make sure that the entire object is covered in Black and the background will be white. Next to that, double-click on the layer and select “invert” from the properties.
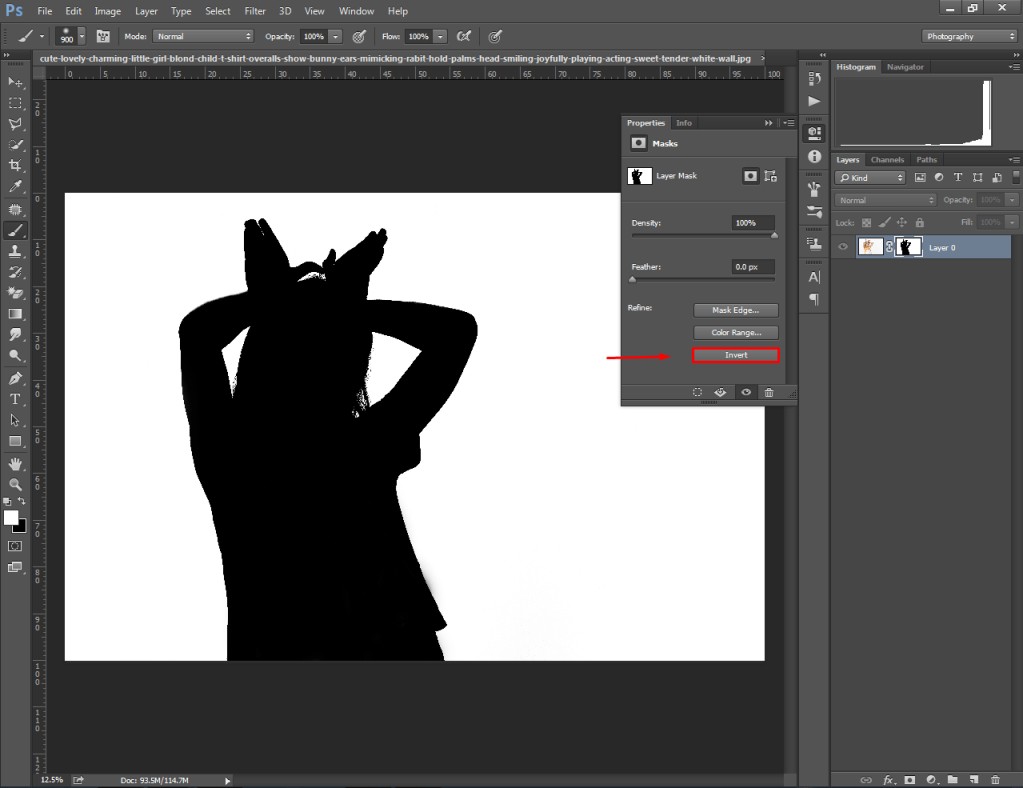
It will make the background transparent. Now, the image is ready to apply the Photoshop clipping mask effect.
Step 04: Pick the ellipse tool
At this point, you have got your image with a transparent background. Here’s the image after removing the background.
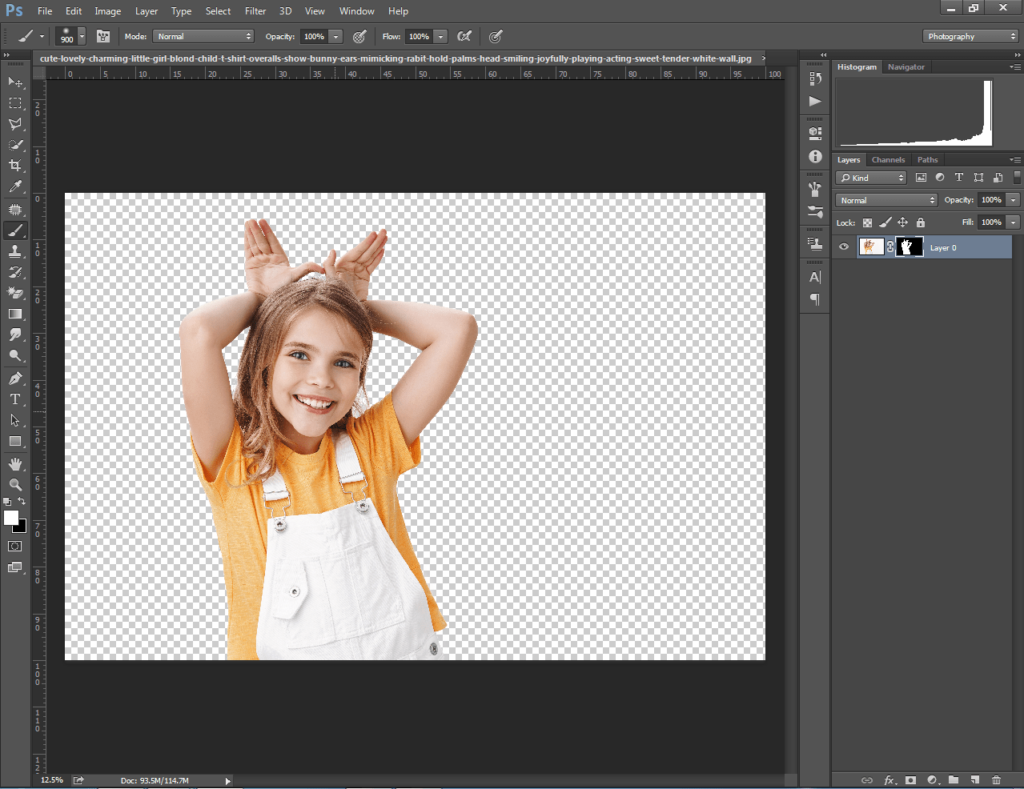
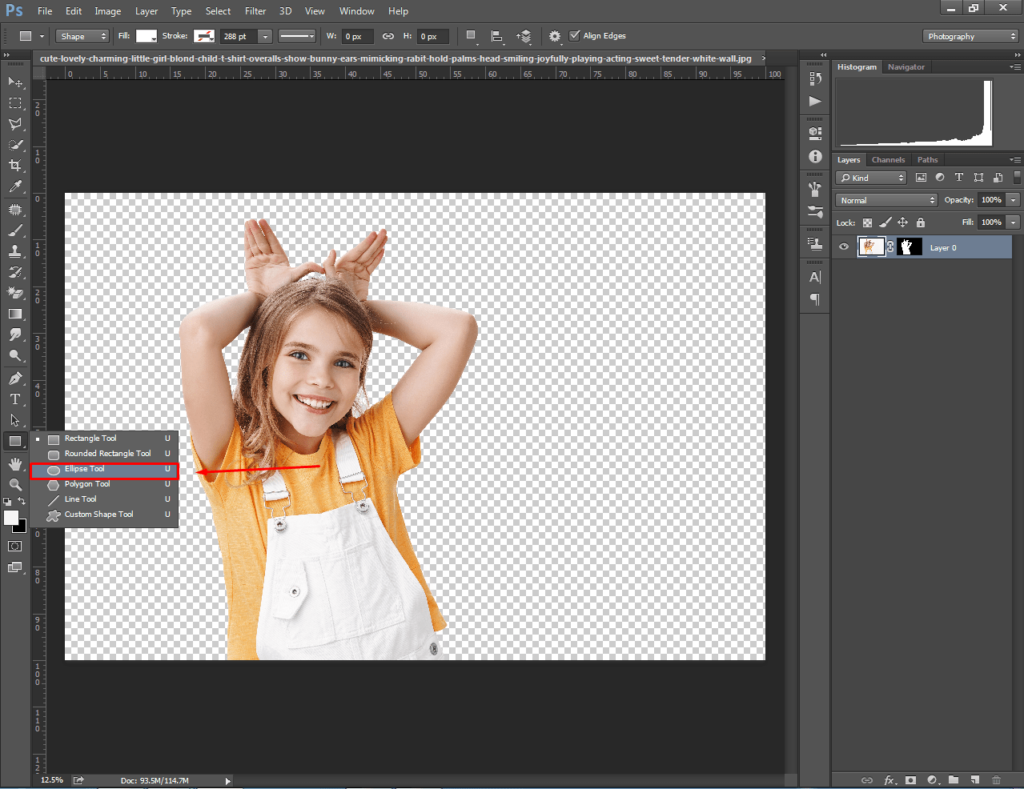
Now, you have to pick the “Ellipse tool” and draw a circle on the object. Press and hold the shift key while dragging the mouse over the object to draw a circle.
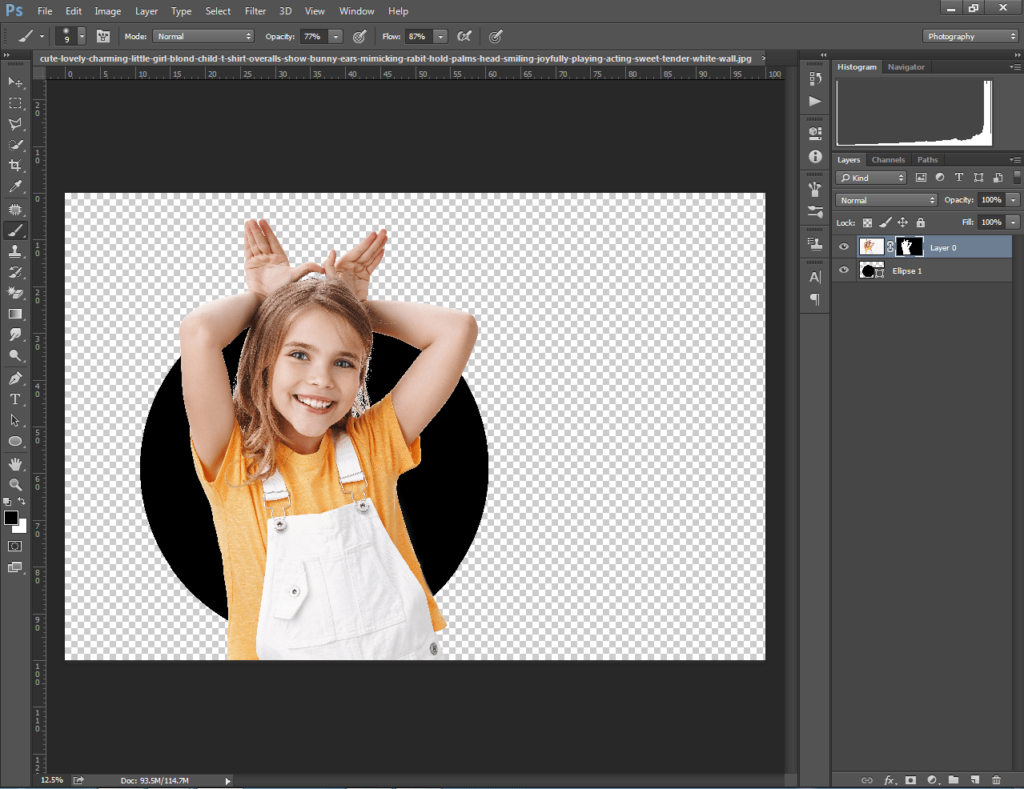
After drawing the circle, you have to place the ellipse layer below the primary layer. I have placed the circle in that position.
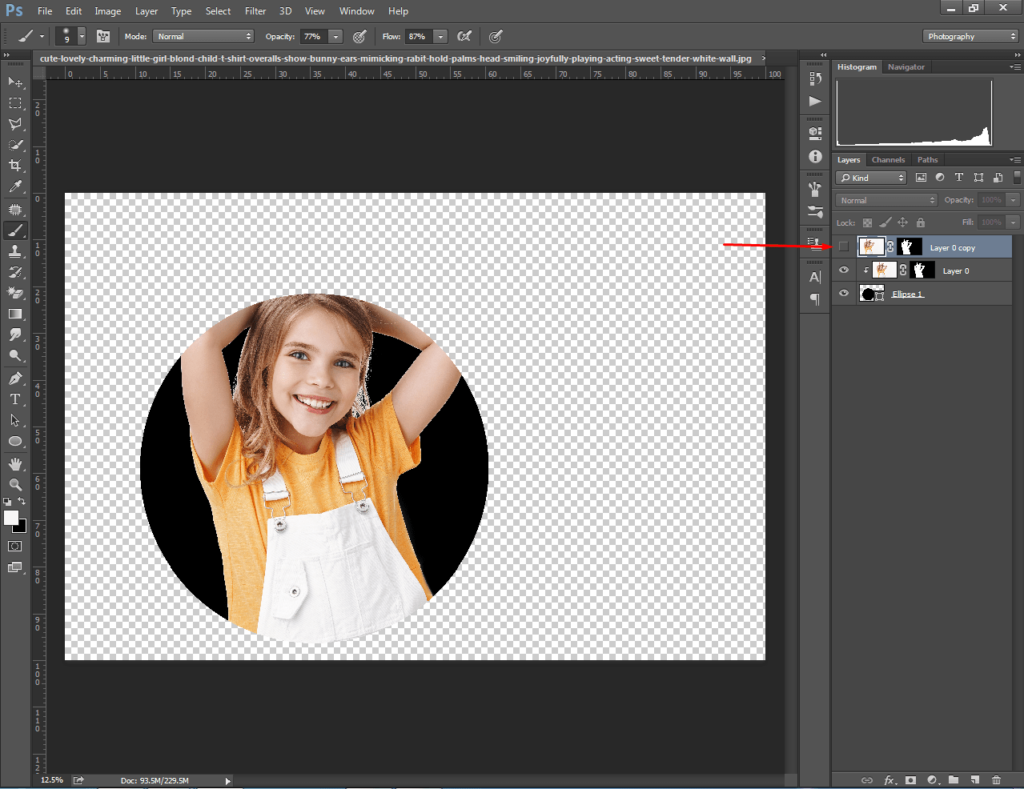
Next to that, press “CTRL + J” to copy the primary layer. Hide the copied layer and keep the remaining two layers visible.
Step 5: Create a clipping mask
Ultimately, we’re going to create a clipping mask in Photoshop. At this point, you have to single click on the primary layer. Then, go to the layer option from the top and select “Create Clipping Mask” from the options.
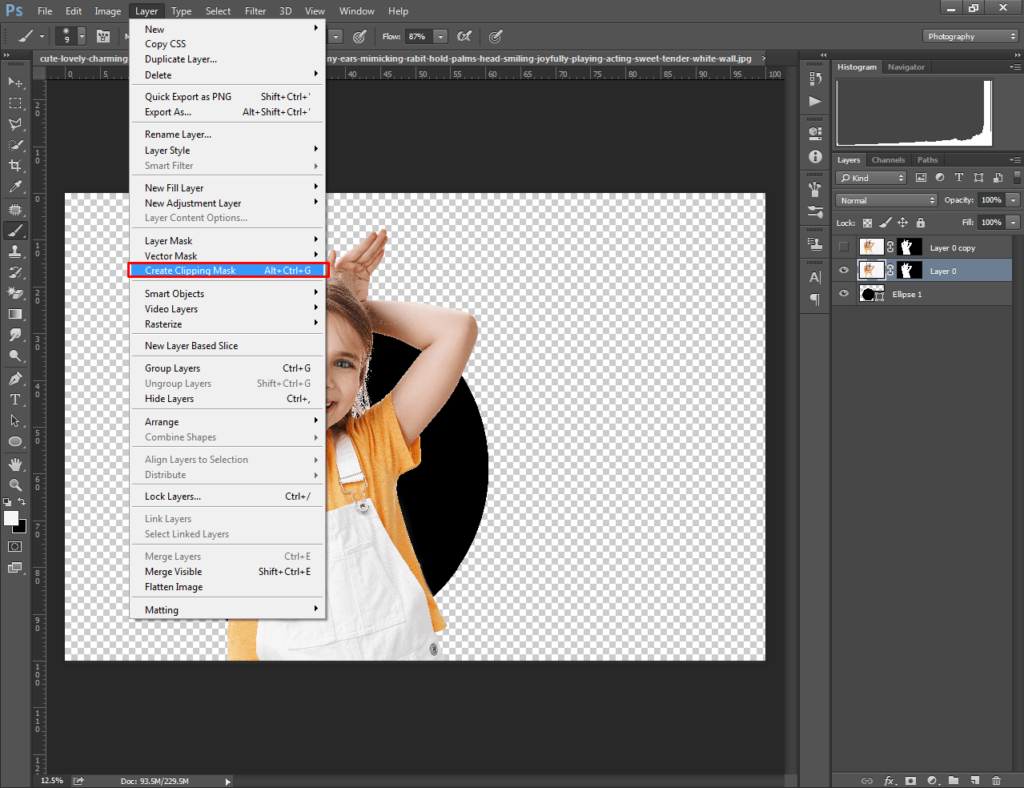
It will hide everything outside the circle as you can see in the below picture. You have to enable the top layer and pick the brush tool from the editing panel.
Then, click on the mask icon and you have to erase the below part of the circle. Paint on the below portion with the brush and it will get removed. It should look like the object is coming out of the circle.
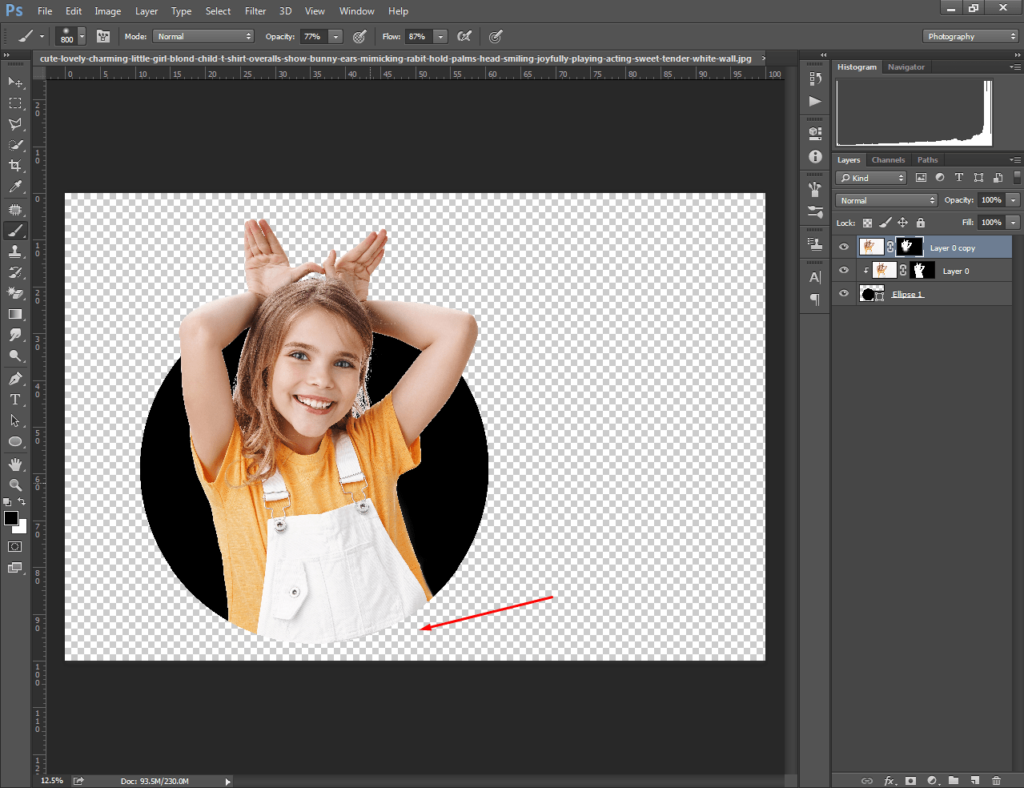
Now, we are going to modify the circle to make it look more beautiful.
Step 6: Change circle background color
Double click on the ellipse layer and you will see the color-changing option of the circle. You have to click on that and a color picker box will appear. From that box, you can choose any color you like.
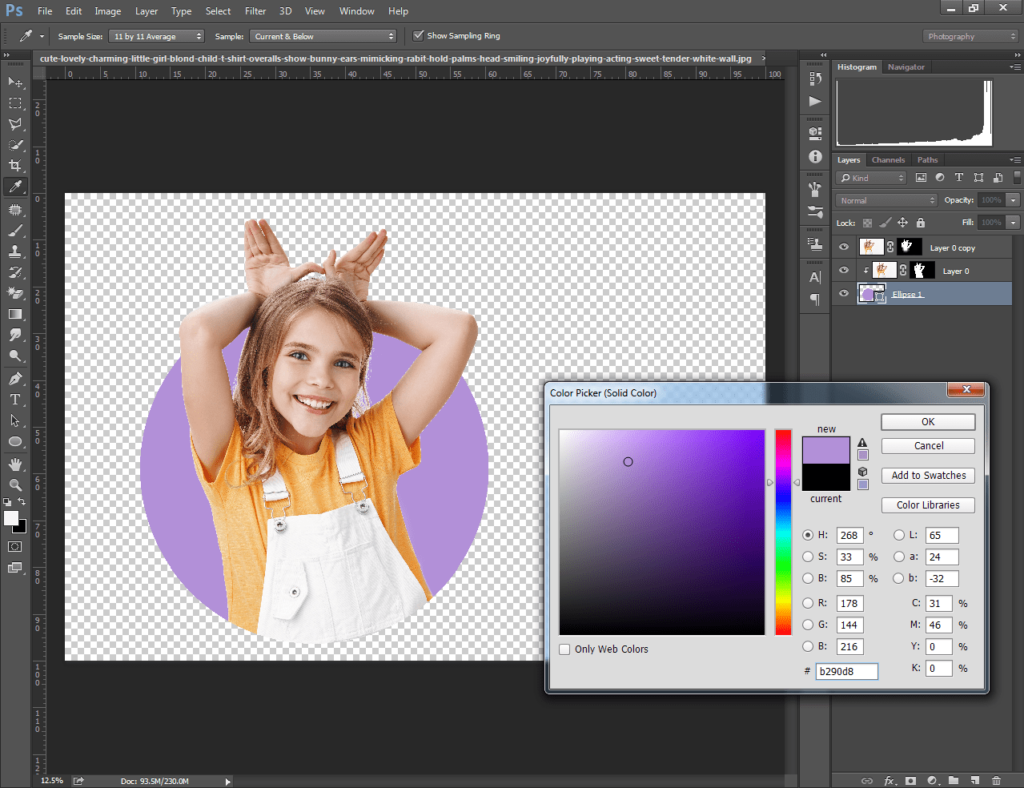
After setting the color, we’re going to add a border to the circle to make the appearance more attractive. Go to the top and set the stroke to 100px. At the top, you will see the option to change the border color.
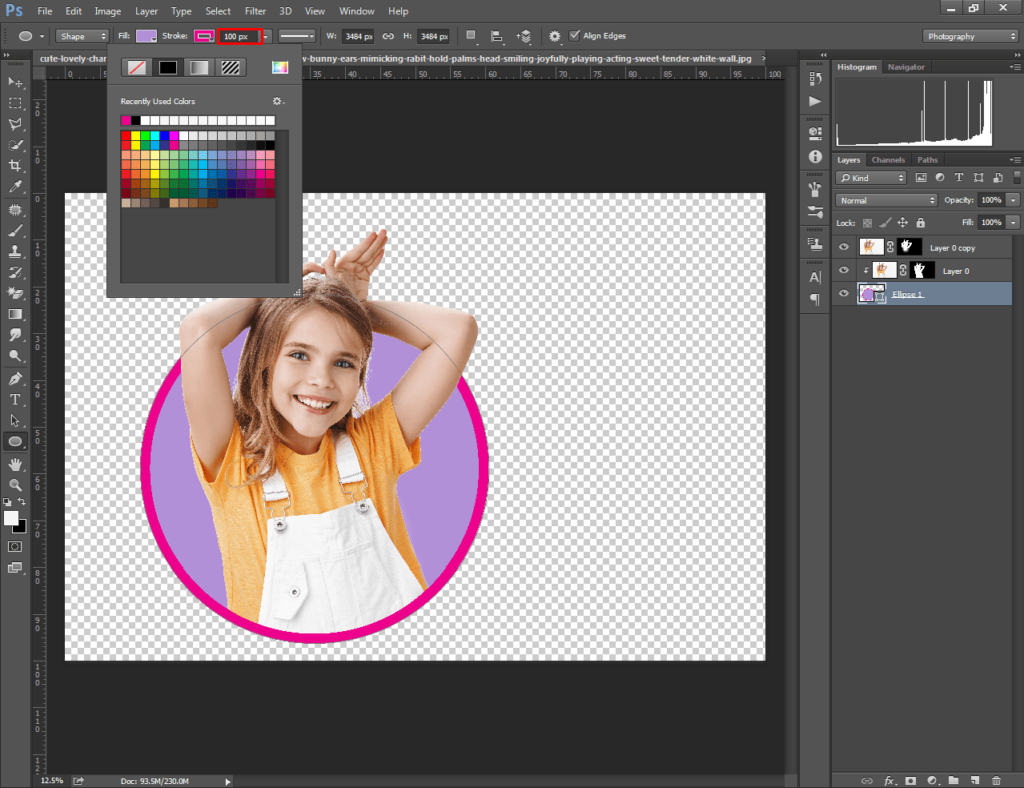
Finally, we got this image after applying a clipping mask in Photoshop.
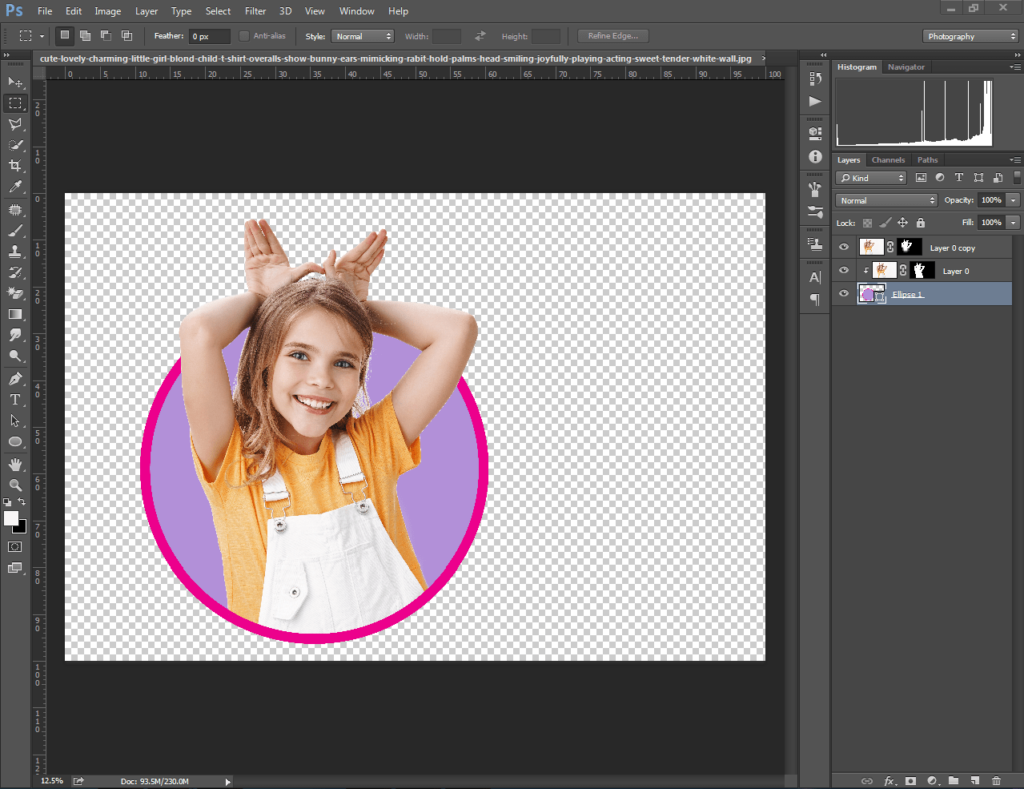
Go to the “File” option to save the image. Would you like to keep the background transparent? Then, you have to save it in “PNG” format.
Now, you know how to do a clipping mask in Photoshop. It’s time to apply the technique to a text. In this method, you can insert any image within a text.
How to Make A Clipping Mask for Text in Photoshop?
Step 1: Create a blank canvas
First of all, open your Photoshop and go to the file option from the top. Then, click on the “New” option and set up a new document.
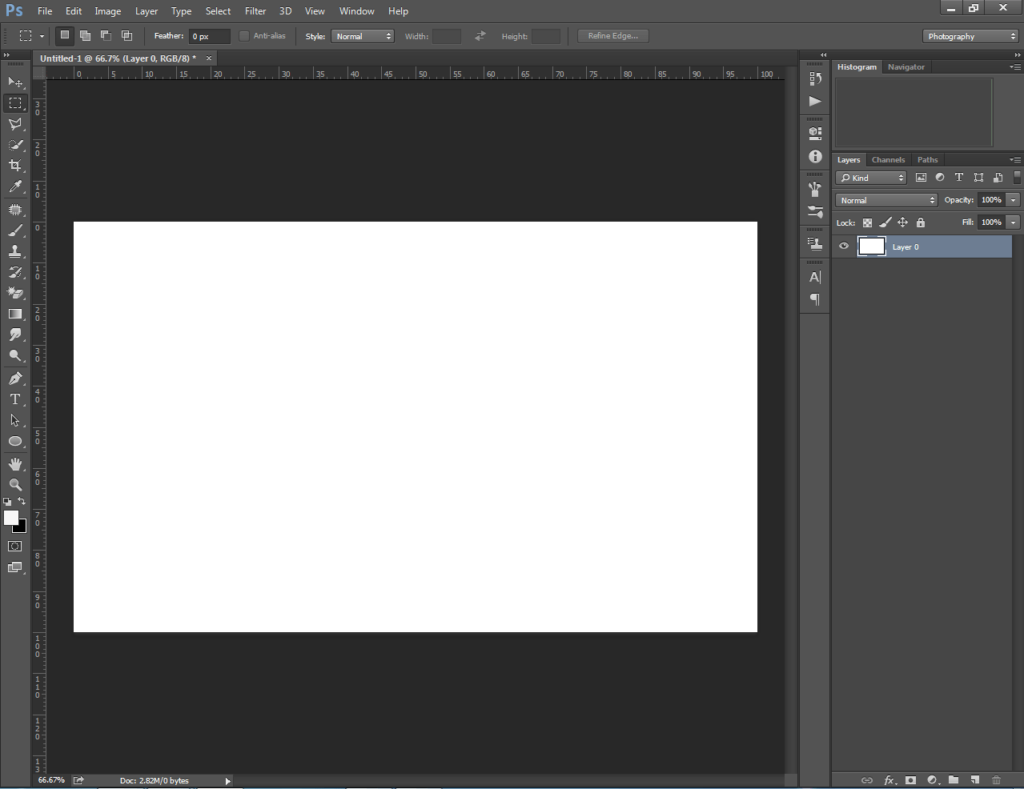
Keep the background color “White” so that your text will be visible clearly.
Step 2: Type any text
In the second step, you have to type the text for applying a clipping mask. Click on the text icon from the left side to enable typing mode.
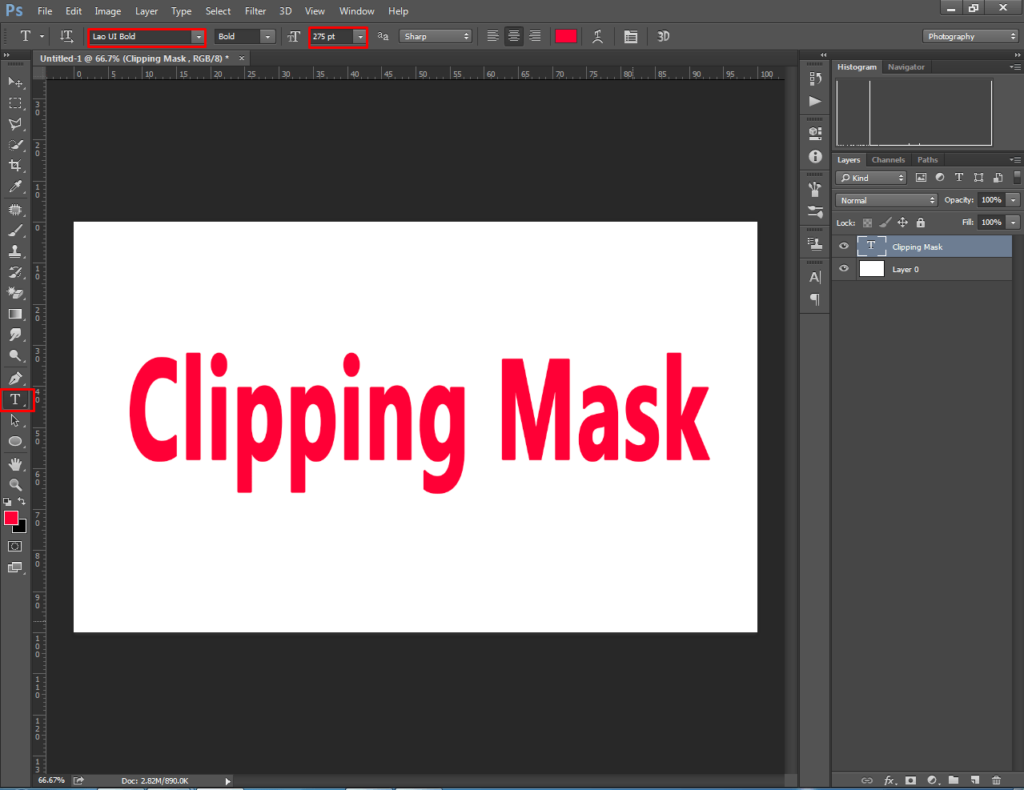
Set the text size around 275pt, bigger texts look more beautiful after inserting a picture in them. You can also change the text color from the top.
Step 3: Open image to insert within text
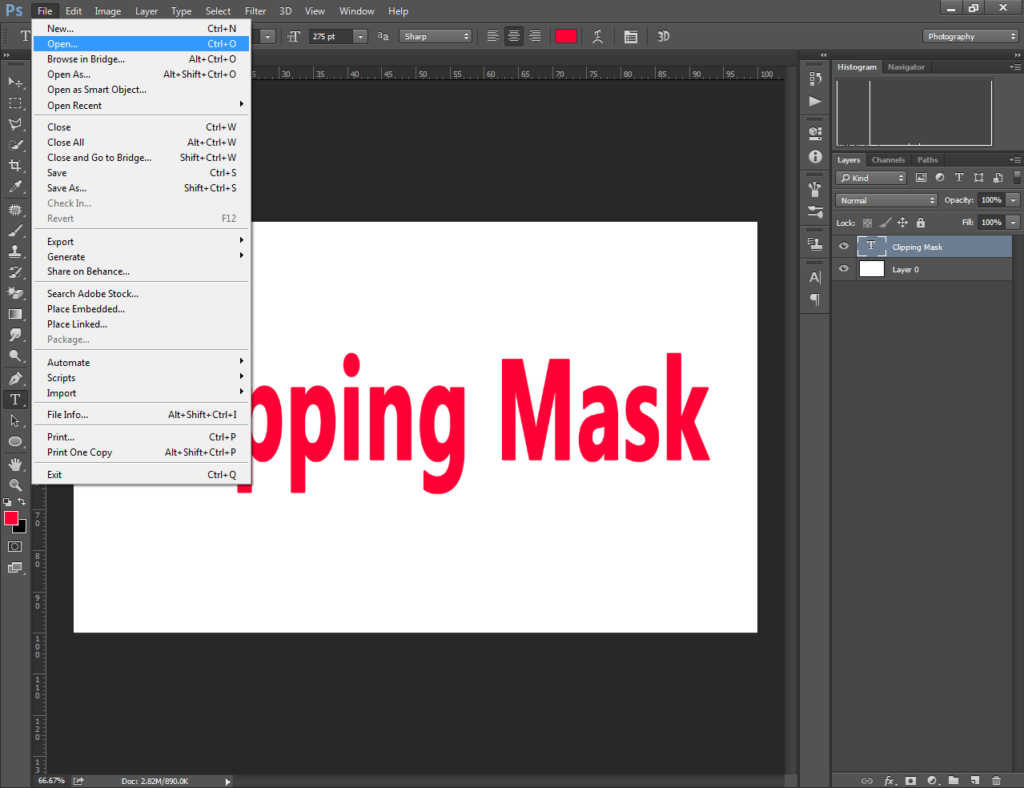
Now, go to the “File” option from the top and select “Open”. After that, open your preferred image and unlock the layer of that image.
Then, you have to click on the arrow icon from the top and drag this photo to the text. You need to place this layer on top of the other two layers. Here you can see it.
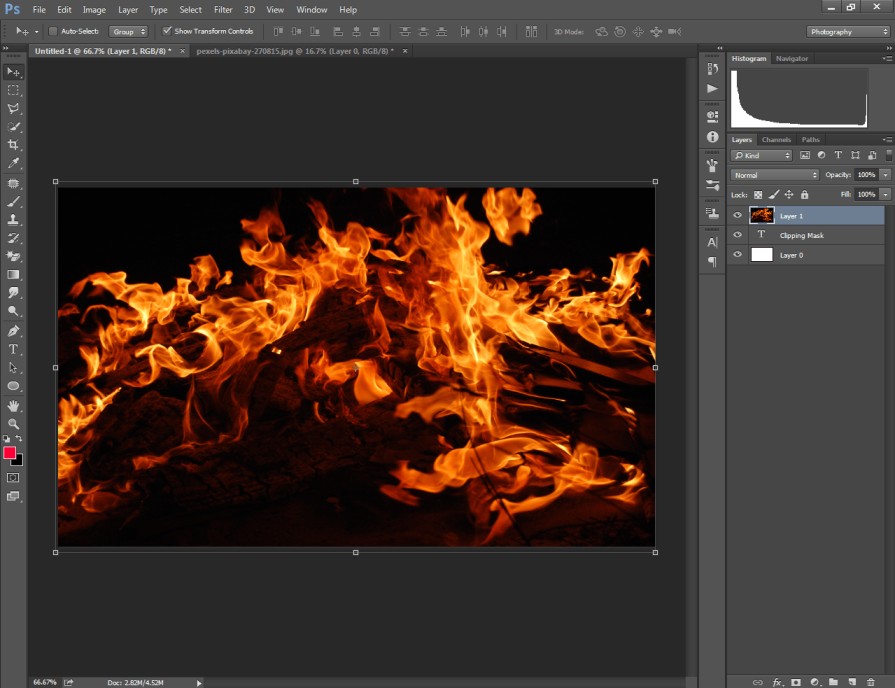
Now, we are going to apply a clipping mask to the text.
Step 4: Create clipping mask
Then, we need to right-click on the image that we want to insert within the text. You will see lots of options there. Click on the “Create Clipping Mask”.
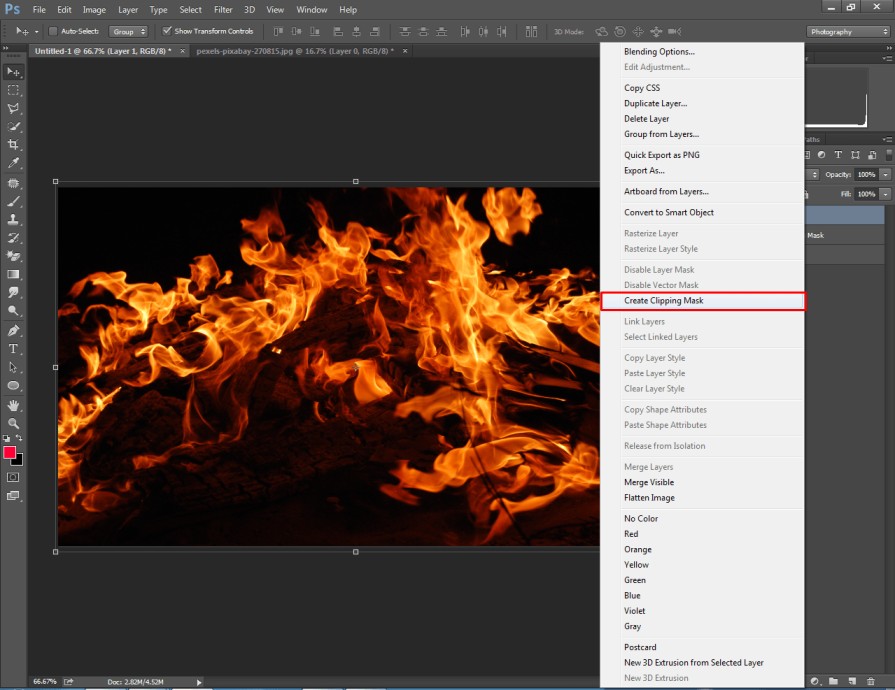
After that, you will see these changes in your text. The image will be inserted within your text like the below image.
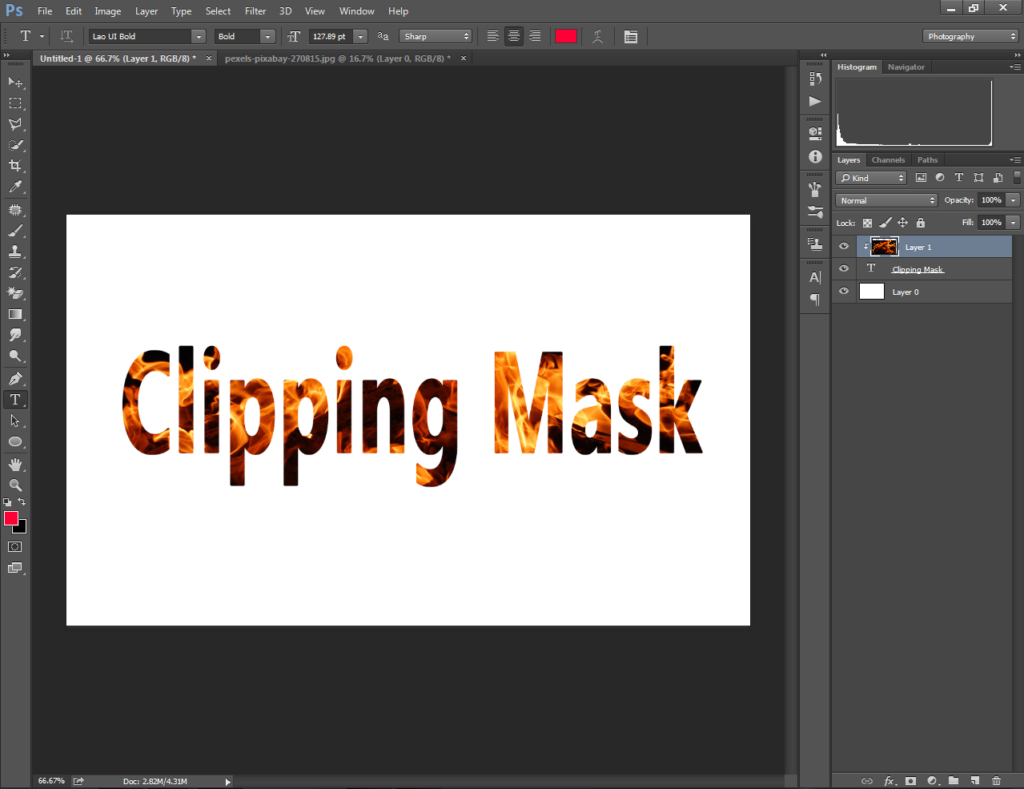
The image is ready now for saving. Following this simple trick, you can insert any image inside any text. Those types of text look more noticeable and attractive. Using that text effect in Photoshop, you can attract more viewers to your text or image.
5 Essential Tips on How to Make Clipping Mask in Photoshop
Here are 5 essential tips to make your clipping mask more accurate. Also, it will make the process easier for you.
1. Move object freely within Photoshop clipping mask
Sometimes, you may have to move anything while creating a clipping mask in Photoshop. In that case, you can use the move tool. You will see an arrow icon right at the top of the editing tool panel. You can also use the shortcut “V” to select the tool.
2. Resize an image without losing shape
You can resize an image without losing its original shape using the free transform option. You can find it in the “Edit” menu. Also, you can use the shortcut “CTRL + T” to enable this cool feature. Remember that, you have to hold the “SHIFT” key while resizing an image.
3. Release clipping mask
This tip will help you to remove a clipping mask in Photoshop. Go to the layer option from the top and you will find “Release Clipping Mask”. To remove the clipping mask from a layer, you just need to hit on this option.
4. Add a solid color background
When you’re working on a transparent background, you can add a solid color background to change the background color with a single click. Click on the “create new fill or adjustment layer” option from below and select “Solid Color”. Then, a color picker box will appear to set the background color.
5. Add mask to the layer
While making a selection, try to select in image masking mode. To do that, click on “Add A Mask” from the bottom of the layer panel. It will keep your editing work non-destructive. As a result, you get more precise control over the layer and its element.
Layer Mask Vs Clipping Mask: Key Differences
Some people get confused thinking that layer masks and clipping masks have similar features. But those two have totally different features. When you’re working on a layer mask, you can control the visibility of that layer depending on black & white marks. White marked areas remain visible and black marked areas become invisible.
On the other side, clipping masks control the visibility between a pair of layers. To be more specific, the bottom layer decides the visibility of the above layer based on pixels. Hopefully, you won’t get confused with that anymore.
Final Words
At this stage, you have learned how to make a Clipping Mask in Photoshop. Besides, we’ve shared the easy process of how to make a Clipping Mask for text in Photoshop. Above mentioned 5 tips will make your clipping mask-creating process even easier.
Overall, you have got the ultimate guideline for Photoshop clipping masks. Now, you can make the best use of it to present your images with a better appearance. If you have any more queries, feel free to ask.
FAQ’s
What is the shortcut key to apply a clipping mask in Photoshop?
For Windows users, “CTRL + ALT + G” is the shortcut key for applying a clipping mask. Mac users have to press “Command + Option + G” to do a clipping mask.
Why is the clipping mask option not applicable in my Photoshop?
Perhaps you’re working on a single layer. To apply a clipping mask you must need to have at least two layers. You can duplicate your layer or add a blank layer to try it.
Can i add multiple clipping masks on an image?
Yes, Photoshop has the option to add several clipping masks for an image. You don’t need to remove the clipping mask from a layer for that.
What is the use of a clipping mask in Photoshop?
Clipping Mask is used for masking two layers together without merging. The bottom layer controls the visibility of the above layer.

