Shoe photography is a bit more challenging compared to other genres of photography. A little mistake can ruin the appearance of the shoe. Particularly, if you are going to sell your shoes online, you need to maintain a high standard in shoe photography.
Through this article, we are going to share how to photograph shoes like a pro. We are going to take you through the step-by-step process. Along with this, we will inform you of some bonus tips to enhance your footwear photography. Here you go.
Necessary Equipment to Photograph Shoes
Are you wondering how to position shoes for pictures? First things first, you need to start with the proper equipment. You can do footwear photography with either a DSLR or a Smartphone. Along with the camera, you also need to have a lens with low aperture.
If you want to shoot with a Smartphone, it should have a portrait mode to blur the background if needed. However, you can also change the background of a picture in photo post-processing.
When you are going to upload pictures on an E-commerce platform like Amazon or eBay, you should use a DSLR camera to photograph shoes. To avoid shaking, you need to purchase a tripod. Also, it will assist you in maintaining consistent height while photographing shoes.
How To Photograph Shoes?
Step 1: Choose A Suitable Background
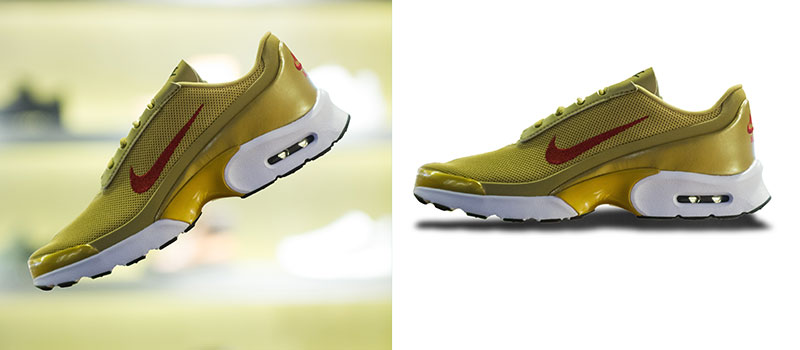
First of all, you need to choose a suitable background to get high-quality shoe photos. You can place the shoe on the wooden floor. Also, you can put the shoe on a plain carpet or on top of the table. The background should be white. Cause white background is easy to remove in post-processing.
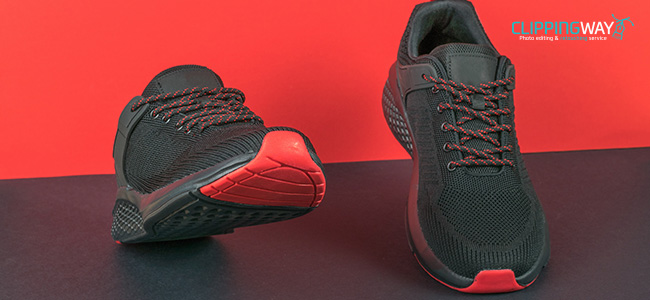
If you don’t find such a background, you can continue your photoshoot in any background. Later on, you can use the background removal service to get rid of the unsuitable background. Clipping Way is highly recommended for you to do this task.
Step 2: Ensure Proper Light
Proper lighting is the key to getting good-looking footwear photography. Without proper lighting, the actual color of the shoes won’t be expressed properly. Natural light will be the best option to use. On that note, you should capture images when the weather is not cloudy.
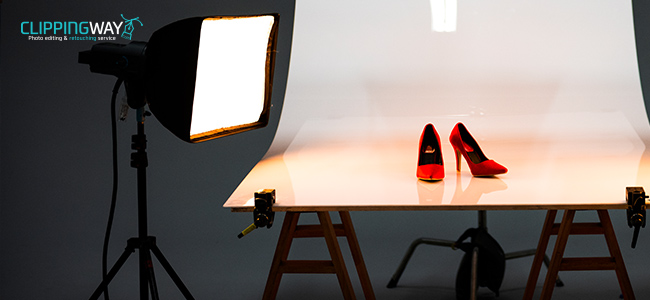
Sometimes, you may have to capture images when the natural light isn’t sufficient enough. In that case, you can use a table lamp. You need to make sure that there are no unnecessary shadows on the shoes.
It can be a cause of distraction for the viewers. Using the camera flash isn’t a good option to photograph shoes to sell.
Step 3: Position Shoes For Pictures
Beginner photographers are mostly confused about how to pose shoes for a picture. Let me clarify this. While photographing shoes, you need to think from a buyer’s perspective.
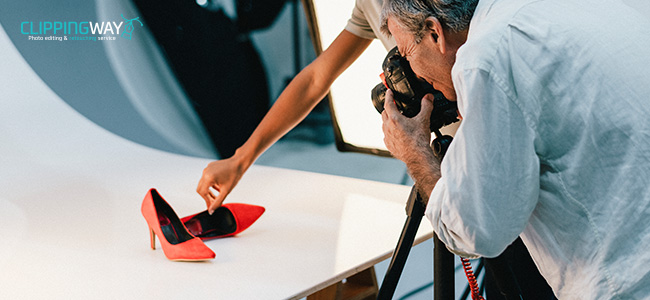
As a buyer, you would like to see the shoes from different angles. Therefore, you should capture the shoes from different angles.
So there will be no confusion in buyers’ minds about the appearance. Basically, you should position the show at a flat position for the primary image.
For optional images, you capture them from down and side angles. In the below section, we will inform you more about how to display shoes for pictures.
Step 4: Focus On Details
If you’re shooting branded shoes, don’t forget to highlight the logo through your shoe photography. You can even focus on lace or sole to attract viewers. Anything that seems to be interesting for you, you should express that through your imagery.
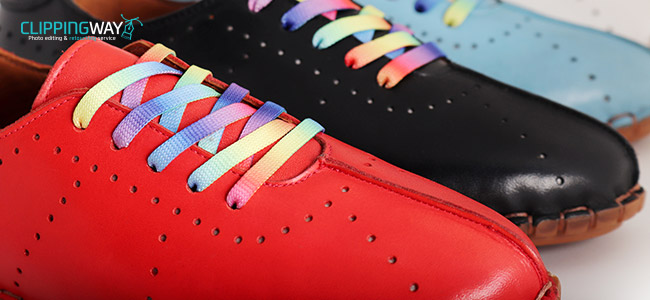
Surprisingly, it can create a difference between ordinary and appealing shoe photography. Particularly, functional details like zips and velcro should be properly visible in the image.
You can also highlight the country of origin. When you are photographing a leather-made shoe, you can take a close-up shot of its leather.
Step 5: Shoe Photo Editing
This is the ultimate step to getting perfect-looking shoe photography. Without applying this post-processing step, your shoe photography will never look professional.
You might be wondering which photo editing software to use for shoe photo editing. Well, Adobe Photoshop is the best choice for that.
Professional Photographers and online sellers have to go through a busy working schedule. During that time, it becomes too difficult to spend time on photo editing.
So, what could be the best solution for photographers? You can rely on Ecommerce Photo Editing by Clipping Way. You can start with a free trial without paying any charge.
By following the above five steps, you can photograph shoes like a pro. When you are going to upload shoe photos on E-commerce websites, you have to upload 5-6 images per shoe. How should you pose the shoe to get the best impression? Let me answer this.
How to Display Shoes for Pictures?
Flattering Angle From The Front
You need to use this position for the primary image. To get the best view, you need to keep the shoe slightly bent compared to a 90-degree straight angle. The toe side of the shoe should be visible a bit.
Front View From The Above
To capture from this angle, you need to place the camera nearly 3-4 feet higher than the ground. Keep the pair of shoes in a 90-degree straight position. This angle is pretty suitable for high heel shoes.
Close-Up Shots From Front and Behind
You need to place a shoe horizontally on the ground to capture this position. This appearance will be suitable for use in additional image slots. You should consider putting something like tissue paper inside the shoe so it looks plump.
Feature Details
You need to keep the shoes in a position where you can capture their logo, size, manufactured information, etc. This is essential to showcase in the additional images. It makes viewers more interested in the product.
At this stage, you should not have any doubt about how to position shoes for pictures. Now, I am going to inform you of some bonus tips that will improve your shoe photography instantly.
Bonus Tips
- Use manual camera settings according to the light condition.
- Choose a camera lens with a low aperture.
- Place artificial light in a position that doesn’t create a shadow on the shoe.
- Clean shoes before starting the photoshoot.
Common Mistakes
- Do not use a flashlight and strong light.
- Don’t apply blur on the shoe.
- Do not put unnecessary objects in the frame.
- Do not choose a busy background.
Final Thoughts
After reading this article, you should get a better idea of how to photograph shoes. Now, you have to follow the above steps and start capturing your shoes. You also need to stay away from those common mistakes that we have mentioned.
To achieve the best look for your photographs, you should try our photo editing services. We are available 24/7 to assist you with any image editing requirements.
FAQ’s
What is the best lighting setup for shoe photography?
Natural light is ideal for capturing the true colors and textures of shoes. If you are shooting indoors, you should position your subject near a large window.
How can I make my shoe photos look more appealing?
You should pay attention to the composition and styling. You can experiment with angles, props, and backgrounds to create visually interesting images.
Should I use a tripod for shoe photography?
It’s not always necessary to use a tripod for shoe photography. However, the tripod ensures a steady grip to avoid blur.
How do I capture details of shoes in photos?
You can use macro photography techniques to showcase the details. You need to ensure sharp focus so that the shoe doesn’t look blurry.
How can I eliminate unwanted reflections in shoe photos?
To reduce reflections, you have to avoid shooting in areas with glossy or reflective surfaces. You can also use a polarizing filter on your camera lens.
How can I enhance shoe photos in post-processing?
You can use Adobe Photoshop to adjust brightness, contrast, and color balance. Also, you need to sharpen the image to enhance details and remove any dust.
