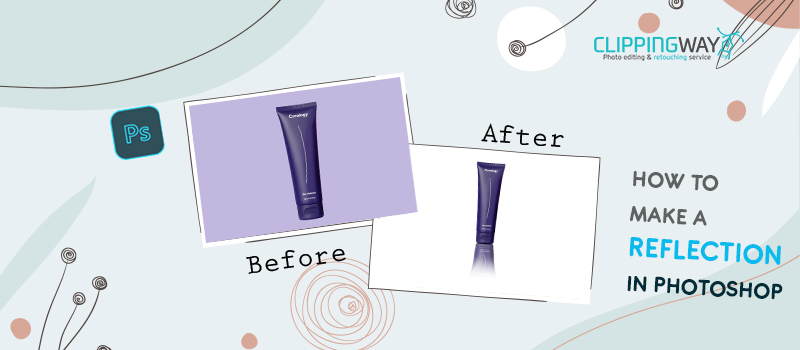
Reflection is such a thing that makes any object more realistic. You can add more depth to an image through reflection. Also, it assists to attract viewers towards the target object. In this article, we are going to show you how to make a reflection in Photoshop with some simple steps.
Most people assume it’s a hard process to create a reflection in Photoshop. Through this article, we are going to reveal the myth. Even a beginner can make a reflection in Photoshop by following these easy step-by-step guidelines.
How to Make A Realistic Reflection in Photoshop?
Step 1: Open picture in Photoshop to make a reflection
First of all, you have to start by opening the picture in Photoshop that you want to create a reflection. We are going to use the below object for this Photoshop reflection-making tutorial.

After that, you need to press CTRL + J to copy the layer. Then, you need to disable the original layer by clicking on the eye icon beside the layer. Click on the copied layer to proceed forward.
Step 2: Pick a selection tool
In this step, we have to select the object in the picture. To make a realistic shadow, we need to change the background. It will make the appearance of the product look eye-catching. To do it precisely, we are going to use the Photoshop Pen Tool.
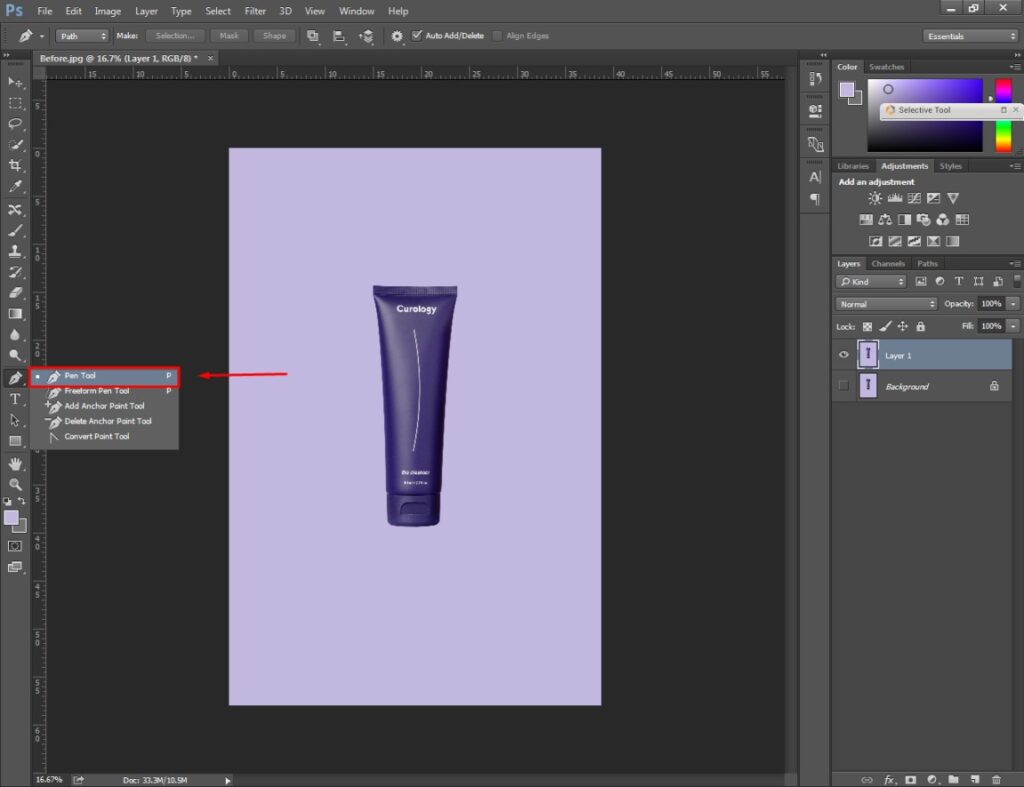
You have to create paths using that tool. Zoom in on the picture before you start creating paths. You can use “CTRL +” and “CTRL -” commands to control the zoom option. You have to click on the boundary area of an object to create paths.
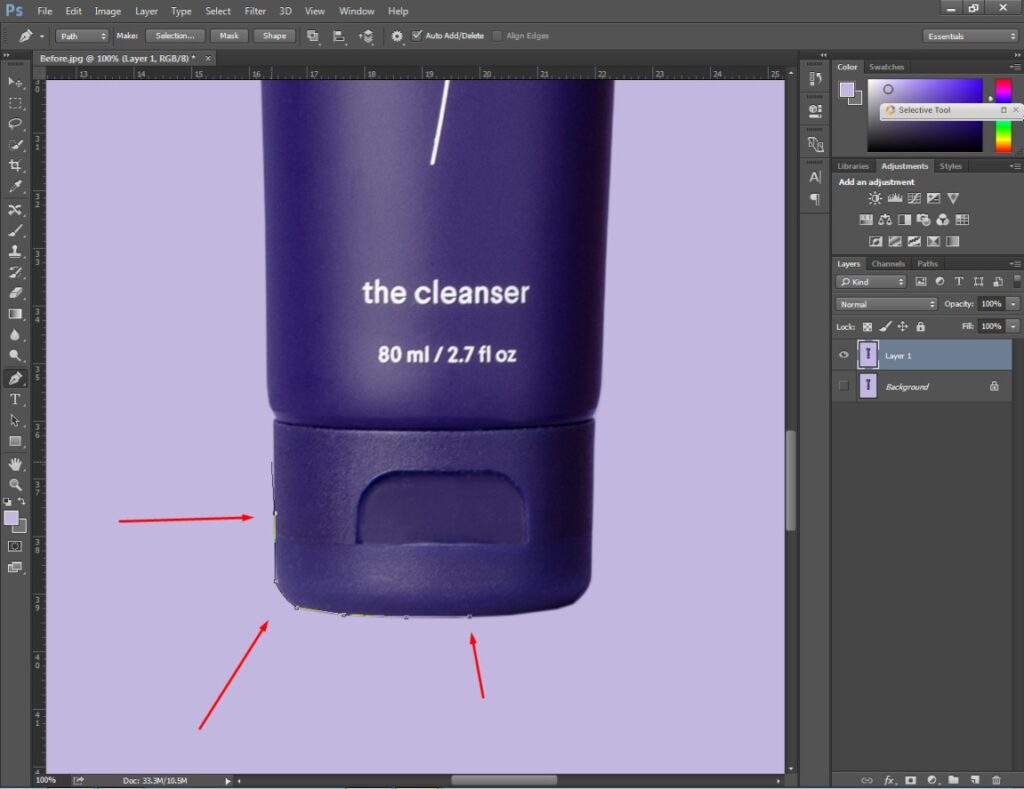
In that method, you have to cover the entire object
Step 3: Select the entire object
You have to drag the mouse and move it around to create curved lines. If the vector path goes in the wrong direction, you can delete it by pressing ALT + Left Mouse Key on the anchor point.
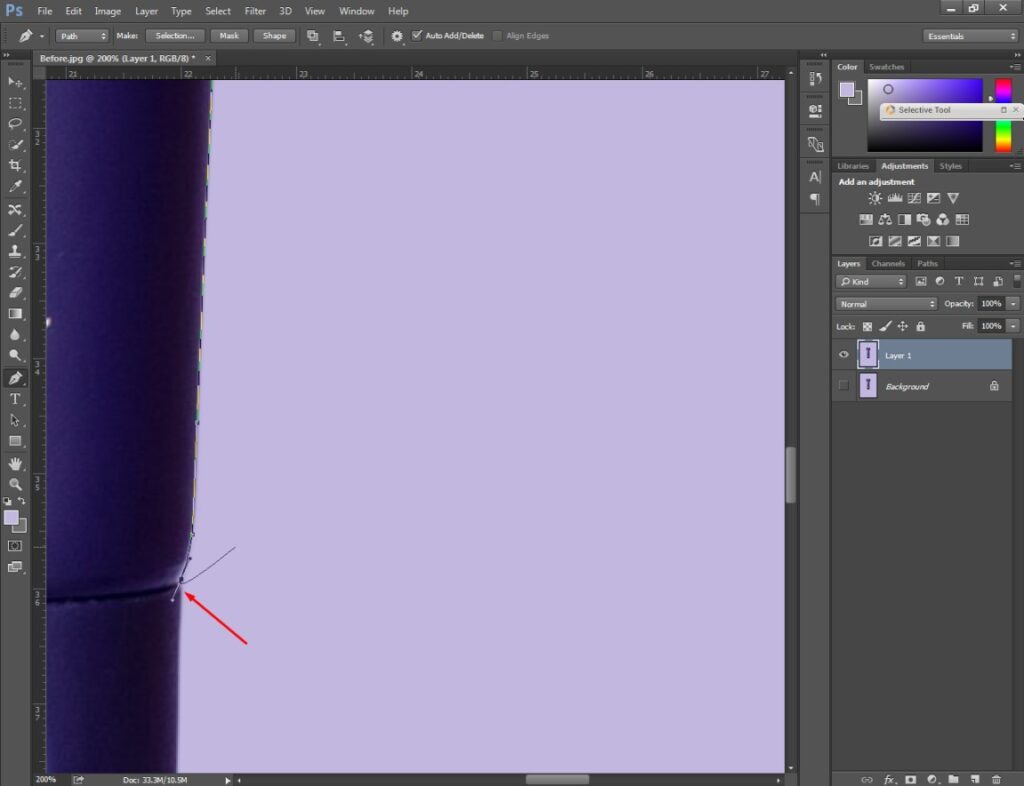
Once you finish creating paths around the object, you have to finish the final anchor point at the starting point.
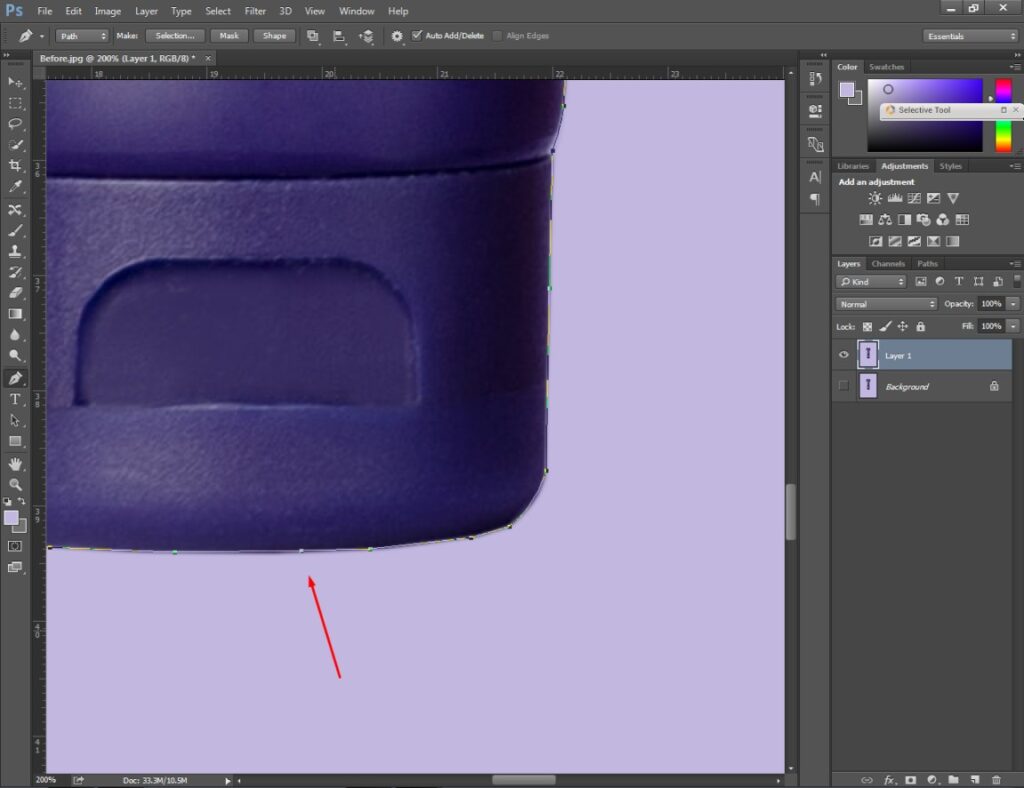
Have you completed creating paths around your object? It’s time to move on to the selection steps.
Step 4: Convert path into selection
After selecting the object, you just need to right-click on the object and click on “Make Selection”.
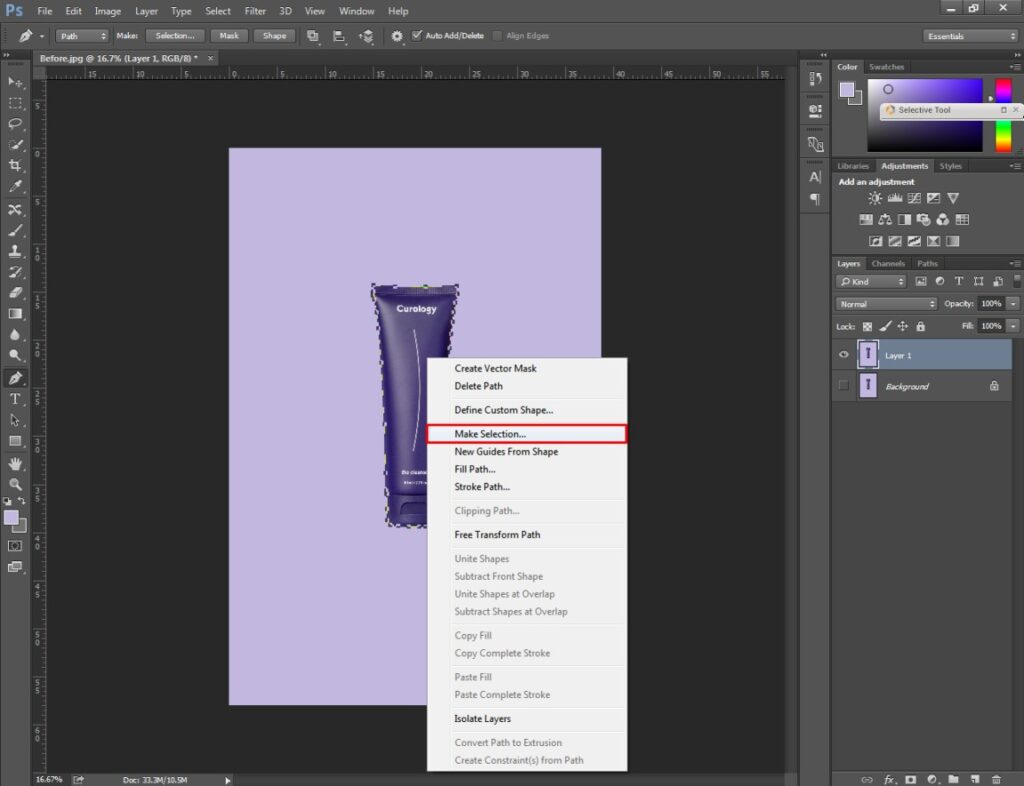
After that, you have to press the Enter key for confirmation. Next to that, your object will be selected. You have to press CTRL + SHIFT + I together to reverse the selection to the background. Then, simply press the Delete key.

It will present your object on a transparent background. Now, we can easily set any background and make a reflection in Photoshop.
Step 5: Add a solid color background
In this step, we need to make a copy of Layer 1 to create the reflection. You can do it by pressing CTRL + J. Here you can see it.
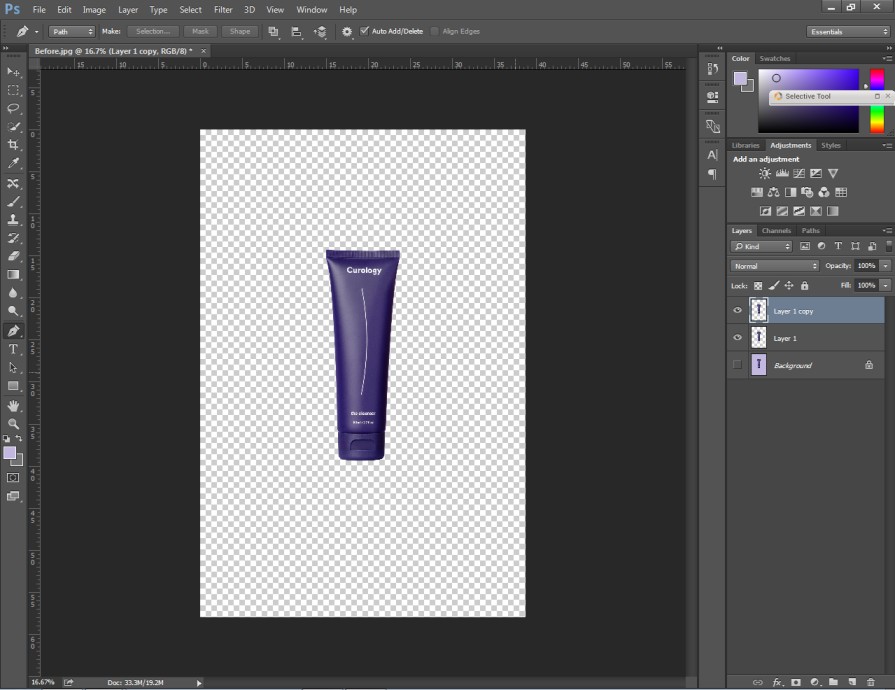
Now, we are going to add a solid color background to enhance the appearance of the product. To do that, you have to click on the adjustment layer option below.
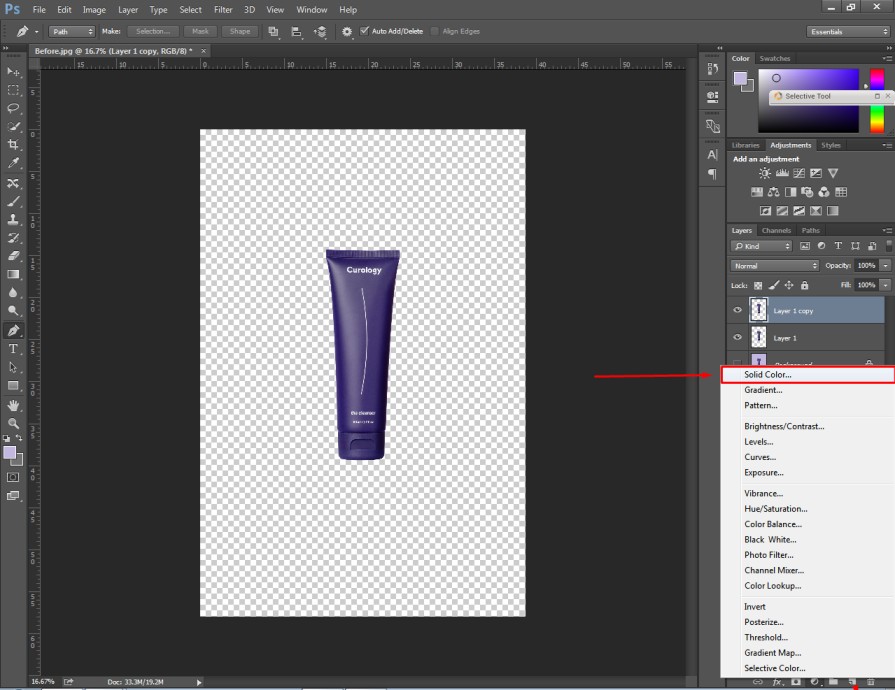
Next to that, you will get the color-picking option for your image background. You have to pick the white color.
Step 6: Apply free Transform
At this stage, we are going to make a reflection in Photoshop for the product. We need to place the solid color background the below Layer 1 and Layer 1 Copy. After that, we have to press “CTRL + T”. It is the shortcut command to enable the free transform option.
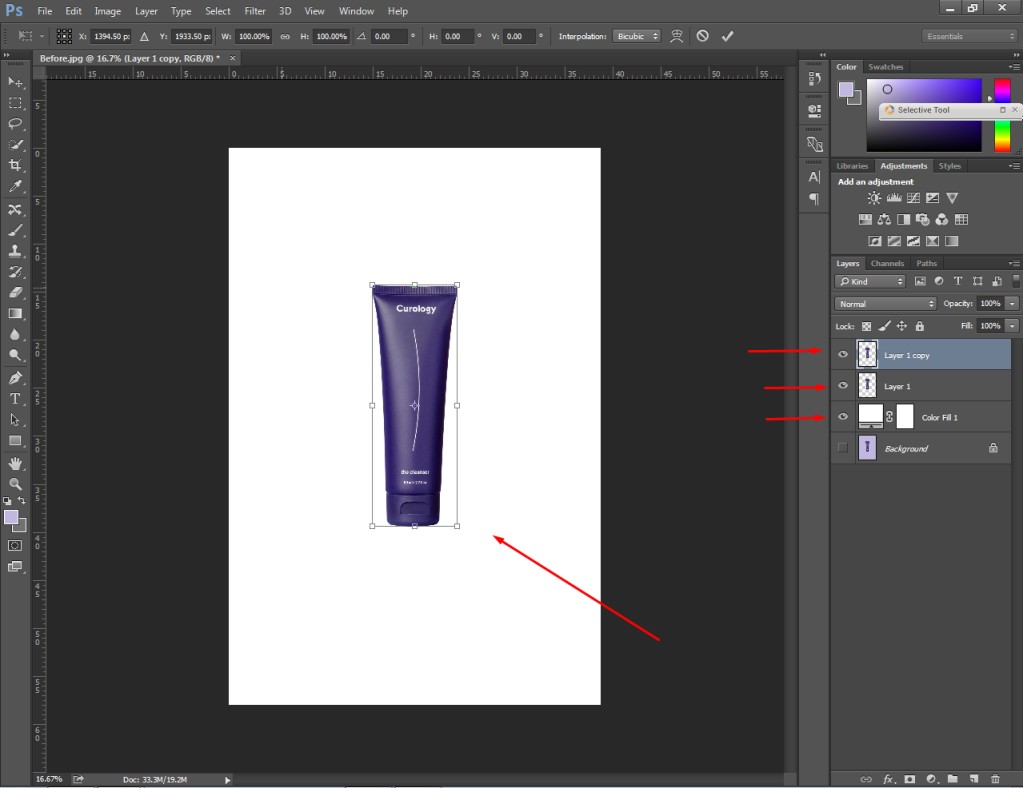
Make sure that you have selected the copied layer. Then, you have to hold the shift key and drag your product downwards. Looking for an example?
Here you go.
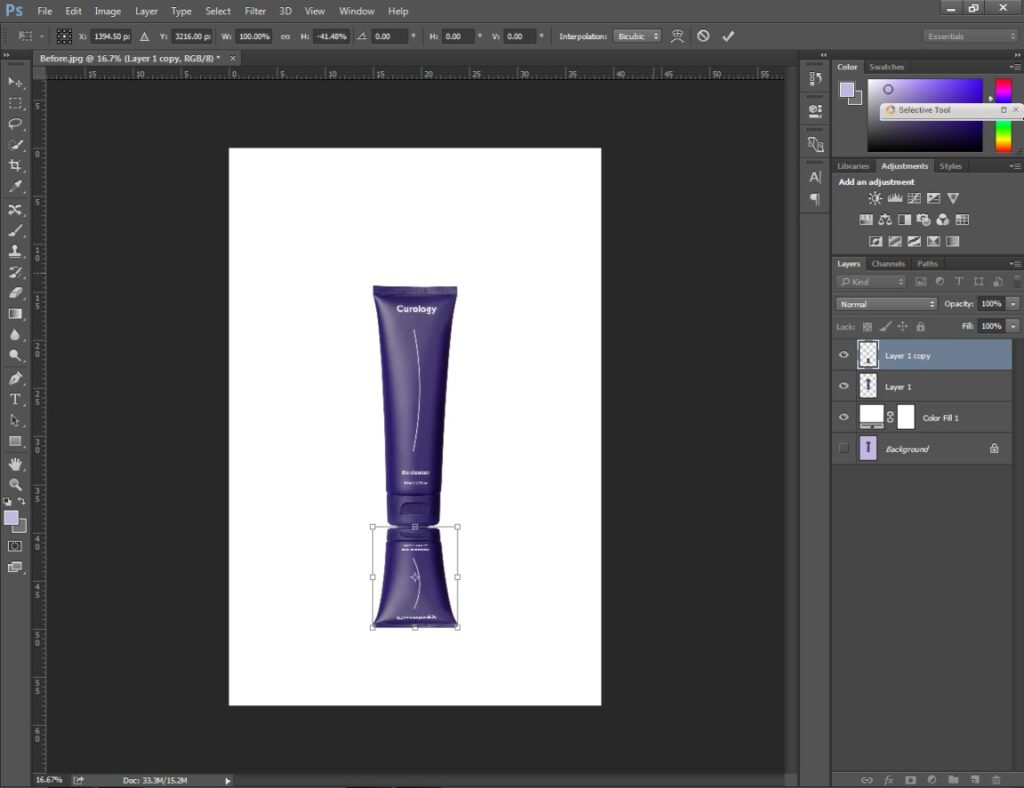
Now, we are going to make it look like a realistic reflection.
Step 7: Make a reflection with the Gradient Tool
You have to click on the “add a mask” icon from the bottom of the layer panel. It will add a new layer mask to the layer 1 copy. Then, you have to select the gradient tool from the right side.
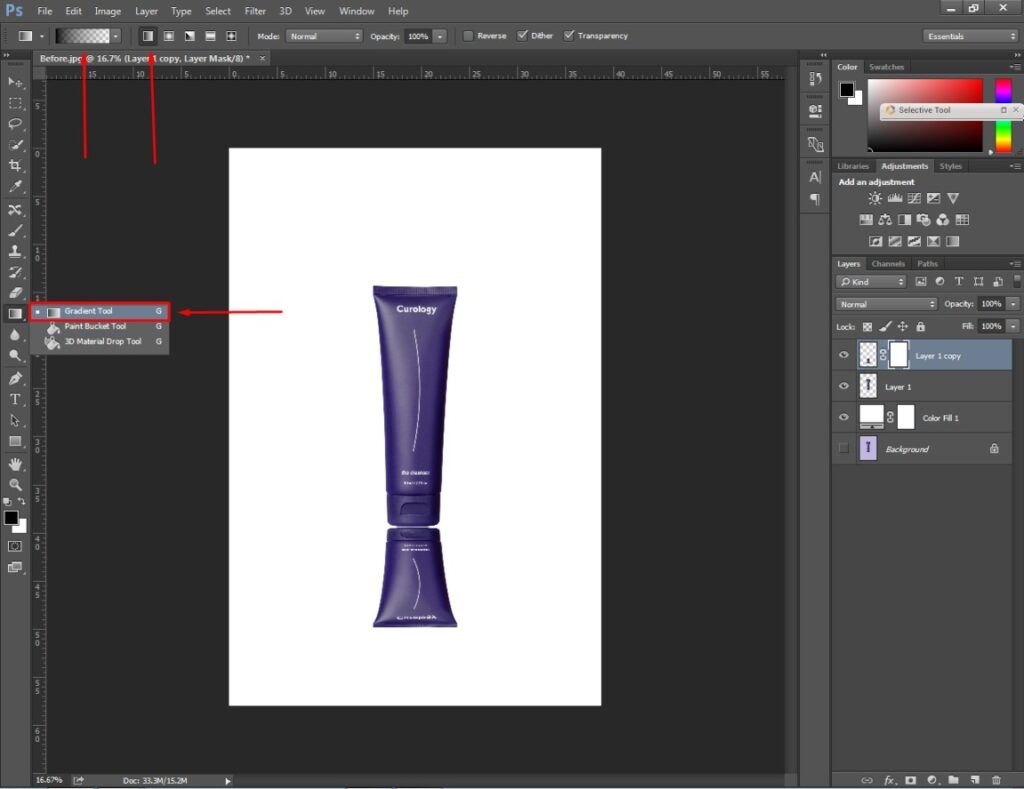
Make sure that you have selected the linear gradient option from the top. Then click on the gradient icon located beside it. You have to choose the “Foreground to transparent option”.
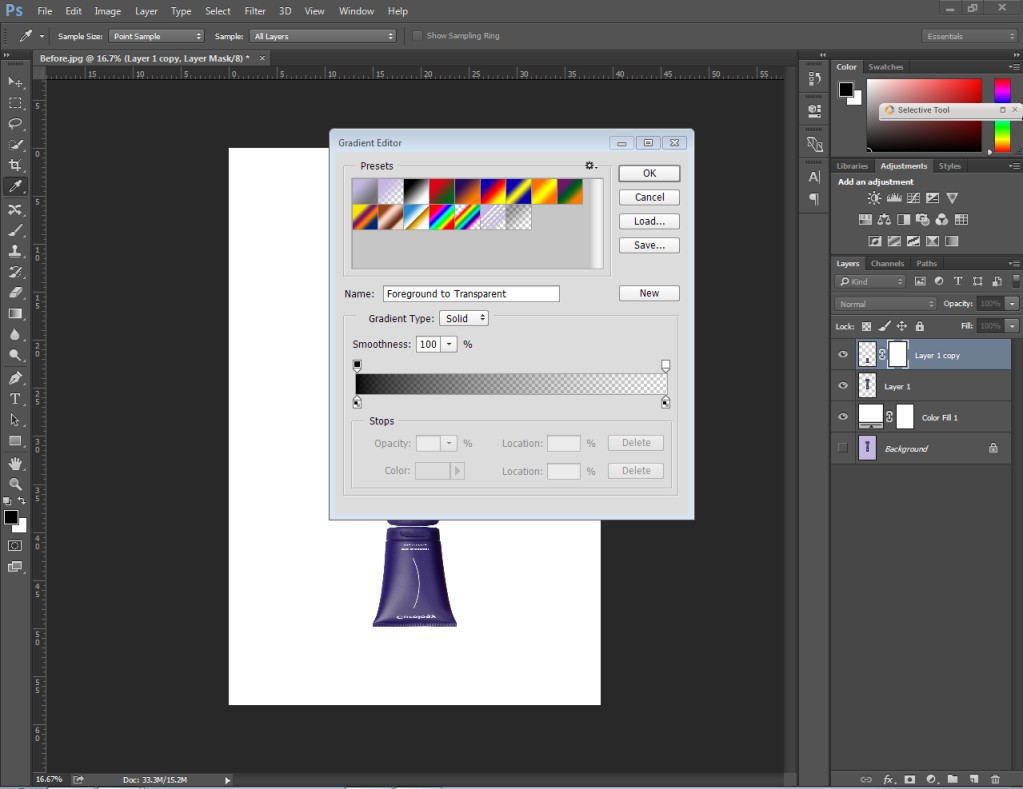
Then, you need to press ok to confirm the command. After that, you just need to move the mouse from downward to upward. It will add a reflective effect to your image. Then, you have to decrease the opacity to 75% of this layer.
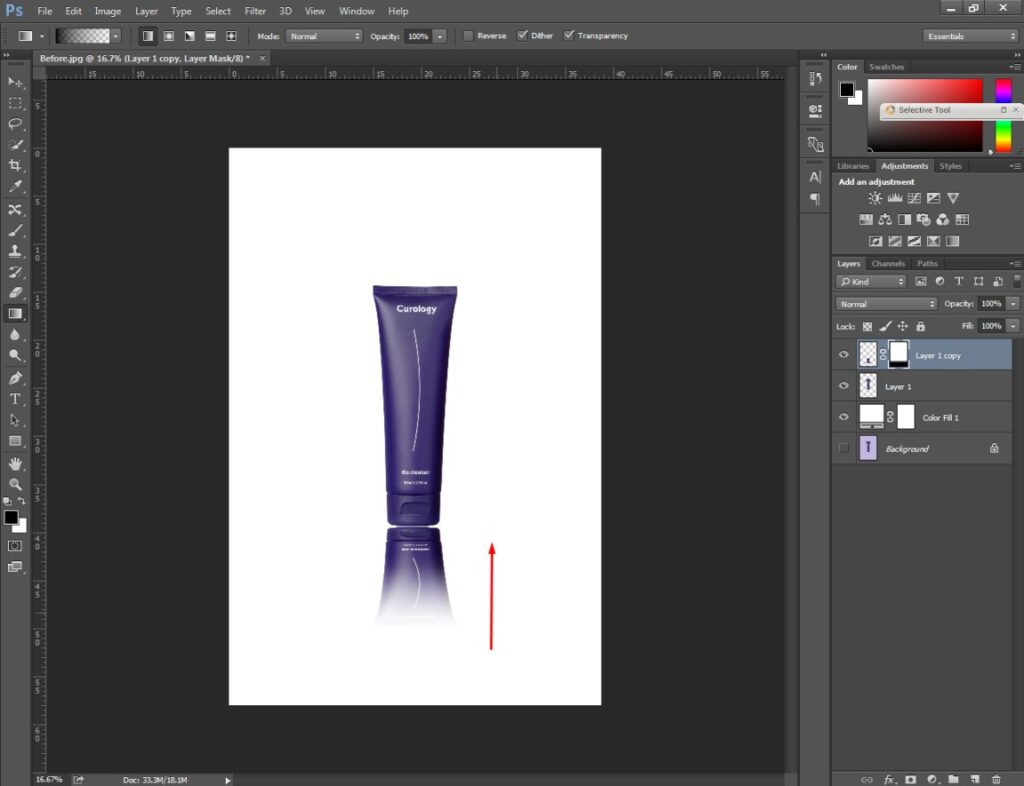
At this stage, we just need to work a bit on the reflection to make it look more appealing.
Step 8: Add a drop shadow
In this step, we are going to create a drop shadow to make a realistic reflection in Photoshop. We need to create a new layer and place the layer below the reflection layer.
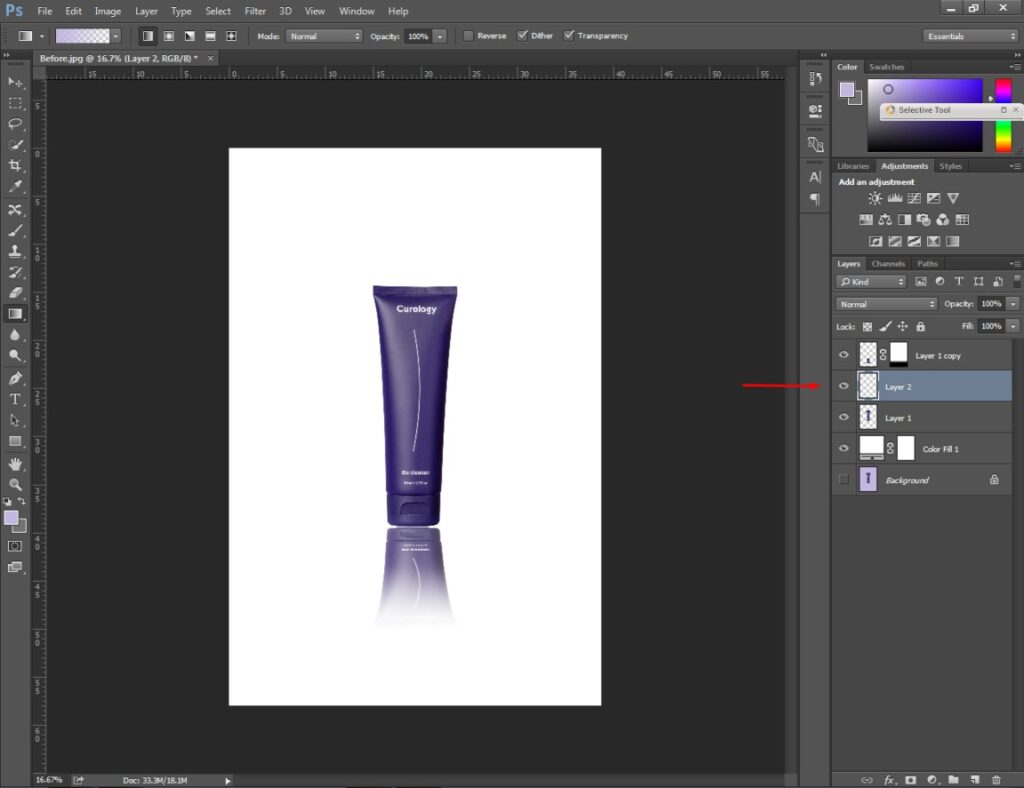
After that, you have to select the brush tool and click anywhere on the background. You can do it like this one.
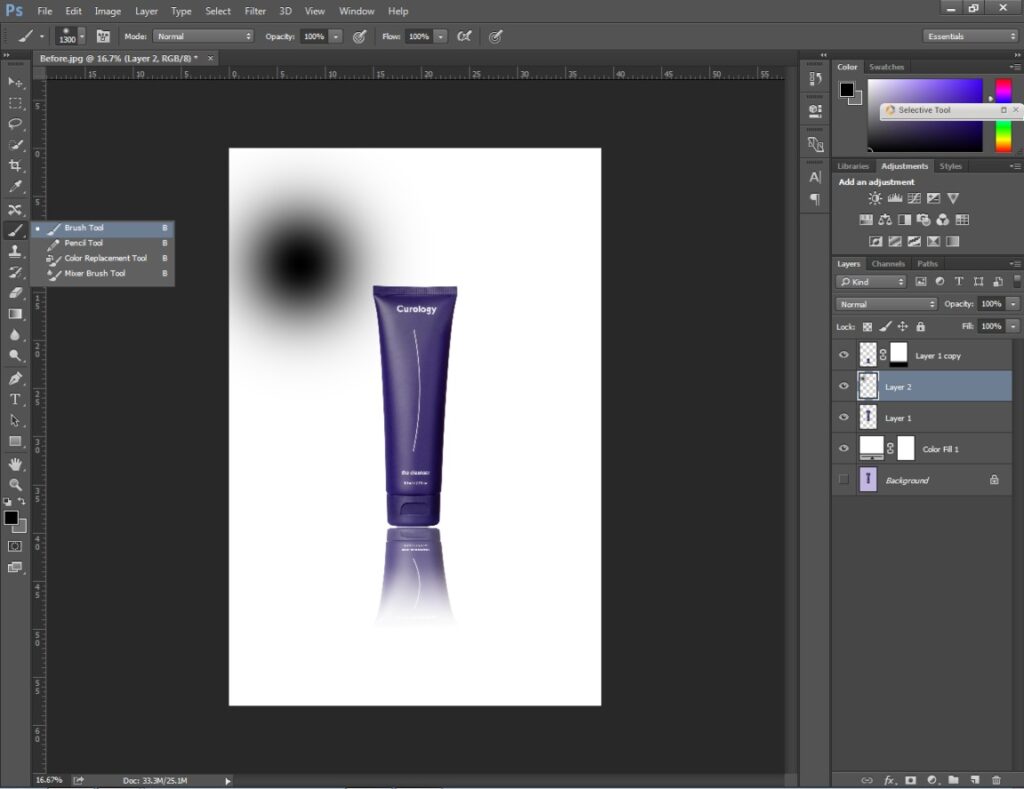
Later on, you have to enable the free transform option once again. Then, make the black portion look like a shadow. You have to make it flat. Next to that, you should place it between the object and the reflection.
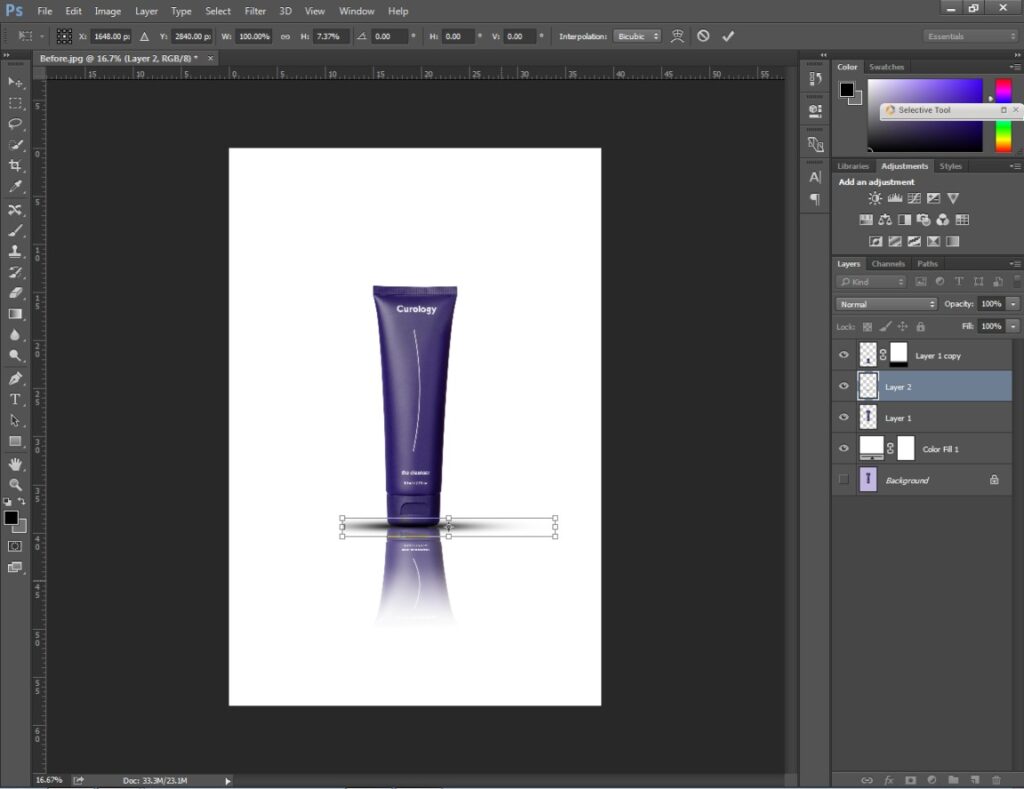
We are just one step away from getting the final polished look.
Step 9: Erase additional portions
At this stage, you have to pick the eraser tool from the left side.
You can find it here.
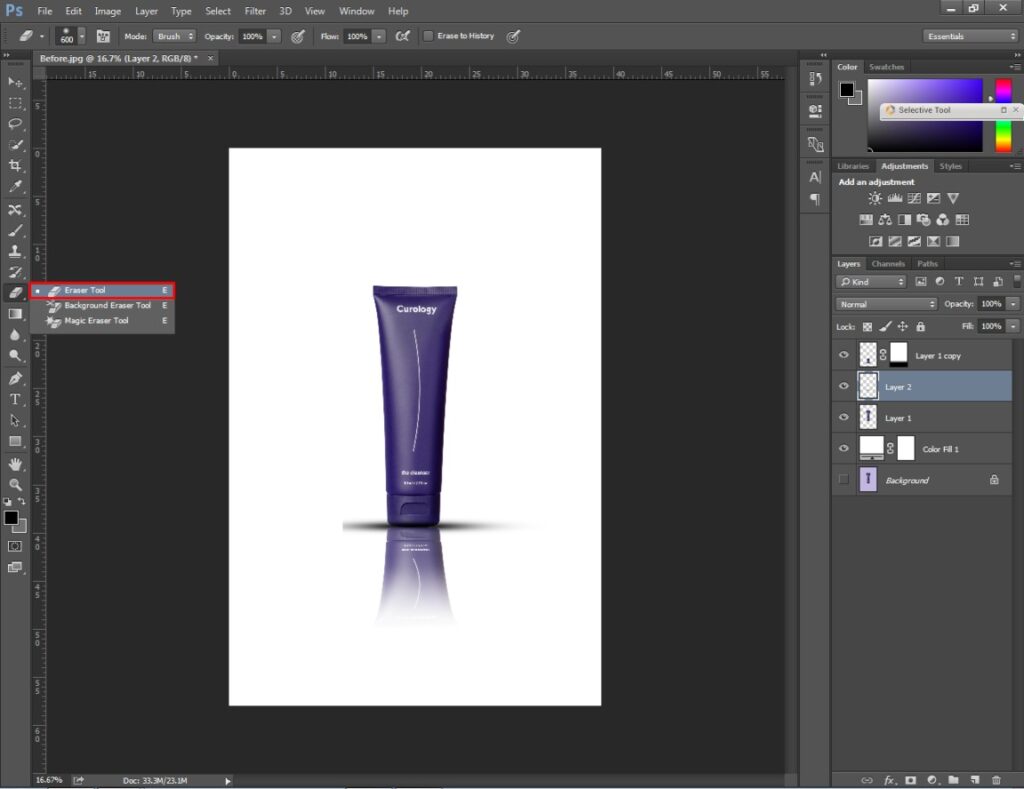
Then, you have to zoom in on the shadow and erase unnecessary portions from the shadow. You should keep it as minimal as the below picture.
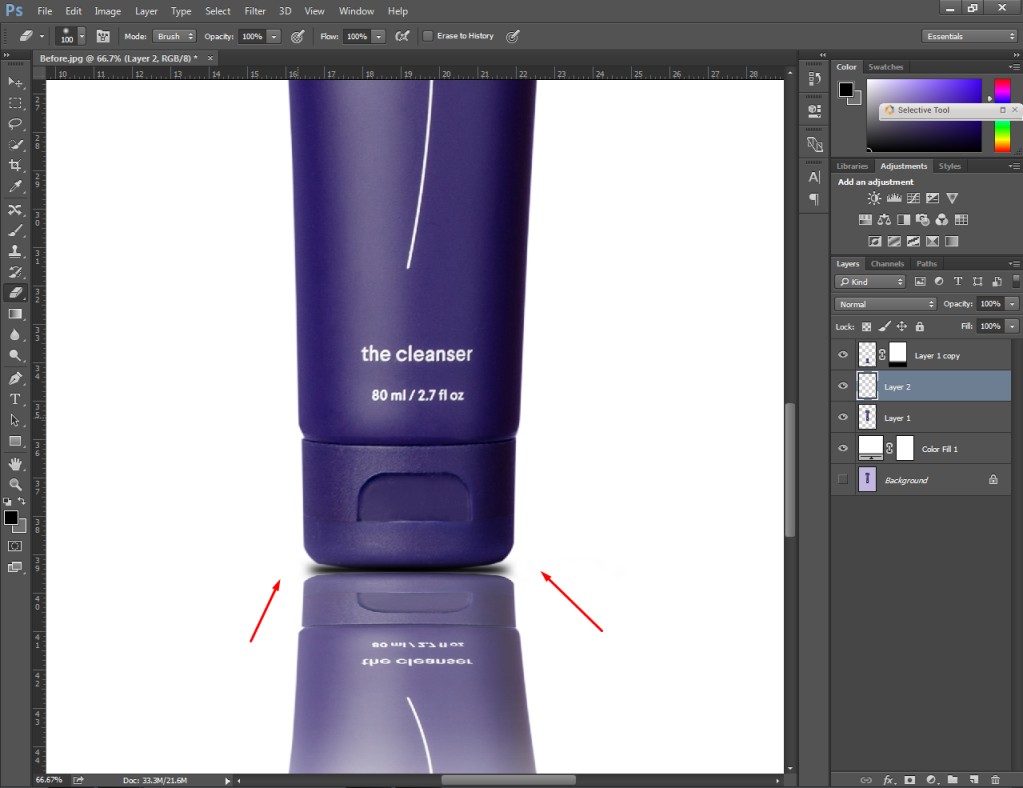
This is the final look of our object.
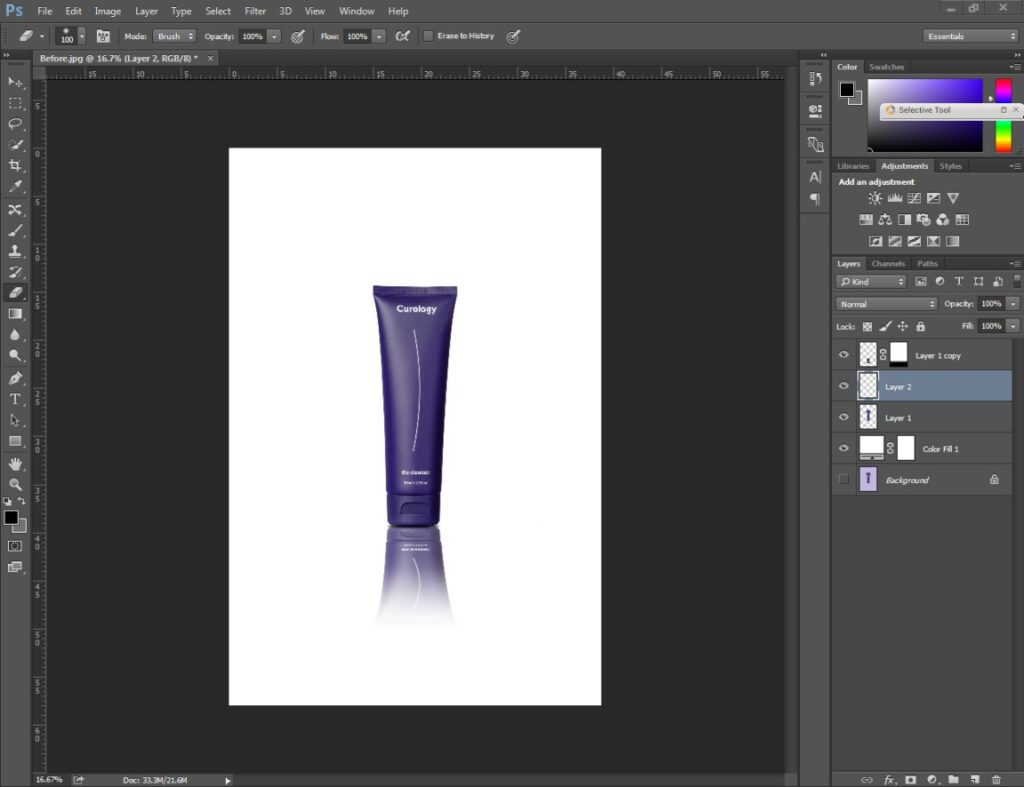
Now, you can save the image from the file option followed by “Save as”.
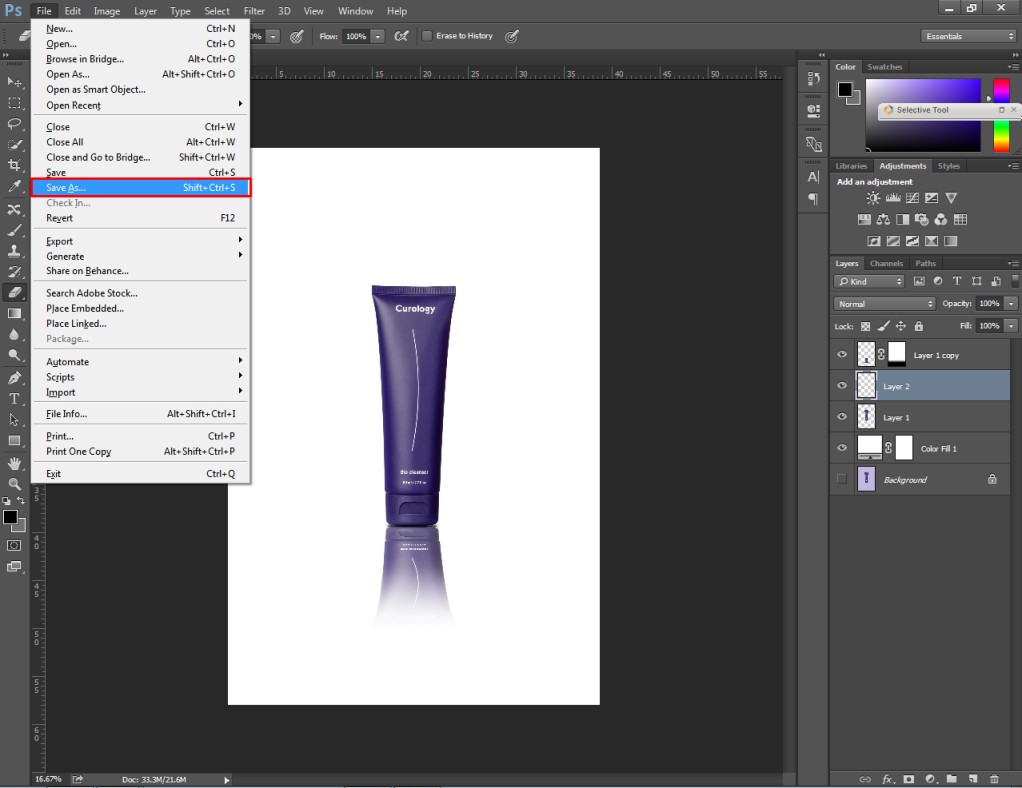
At this point, the object is looking highly appealing, realistic, and trustworthy. Now, we are going to inform you of some bonus tips for your photo editing enhancement.
3 Tips To Follow
- Always copy the original layer for the reference.
- Hold the SHIFT key while making reflection and Gradient Effect.
- Pick the eraser tool with 0 Hardness
3 Mistakes To Avoid
- Don’t apply the gradient tool without adding a mask to the layer.
- Don’t pick the radial gradient option from the top.
- Don’t place the drop shadow layer at the top.
Final Thoughts
By following the above 9 steps, you can easily make a reflection in Photoshop. This trick will make your objects more attention-grabbing. In Particular, you can enhance your product photography by adding a reflection with it.
Are you looking for Professional Photo Editors for Ecommerce Image Editing? Clipping Way is the best option for photographers and E-commerce owners to get top-notch image editing services. You can judge the quality now with a free trial.
FAQ’s
How can i adjust the opacity of the reflection?
You can lower the opacity of the reflection from the layer panel. It will blend the reflection seamlessly with the original image.
How to add a realistic ripple effect to the reflection?
You can use the distortion tools and filters to add a ripple effect using Photoshop.
How can i create reflections for objects with irregular shapes?
You can use the Pen Tool to precisely select any objects. Then, you can easily create reflections for objects with irregular shapes.
How to create reflections for multiple objects in a single image?
You just need to select multiple objects and copy them in different layers. Then, you can create reflections for multiple objects.
