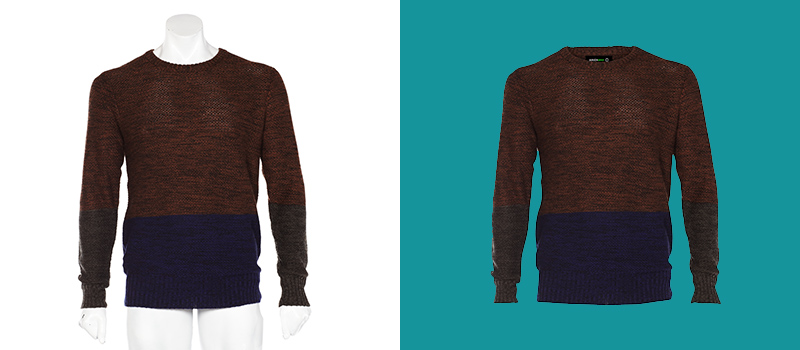
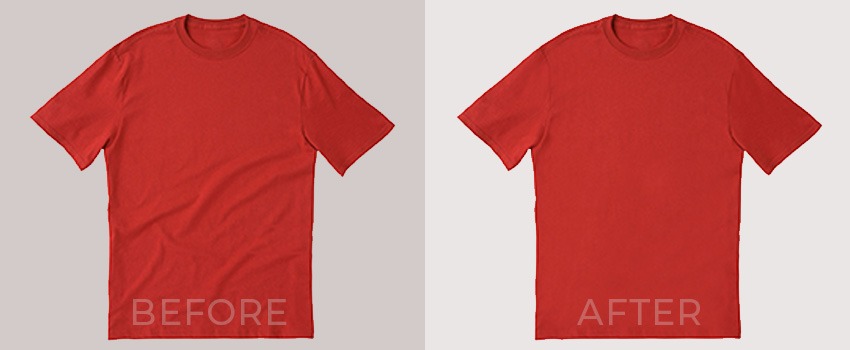
Top-rated clothing item sellers prefer to use the ghost mannequin effect for their clothing photography. It improves the outlook of a dress and provides realistic vibes.
As the technique is effective, garment product sellers and photographs are keen to apply the technique to their clothing imagery. It seems like you are also one of those.
Thankfully, you can also apply the ghost mannequin or neck joint effect to your photography. Are you wondering how? Well, within a few minutes you will learn how to create ghost mannequin effect in Photoshop.
Moreover, you don’t need to have superior knowledge in Photoshop to follow the technique. You can bring a Ghost Mannequin effect to your photos by following some easy steps.
Without wasting any time, let’s open Photoshop and follow our step-by-step guidelines.
How to Create Ghost Mannequin Effect in Photoshop
Step 1: Open front view image of your clothe
First of all, you need to start with opening the image of the front view. Basically, you ought to have the front view and back view image of your garments product.
Open both of the images in Photoshop and start working on the first image. You might be confused about the way you should capture the dress. Here’s the sample image.
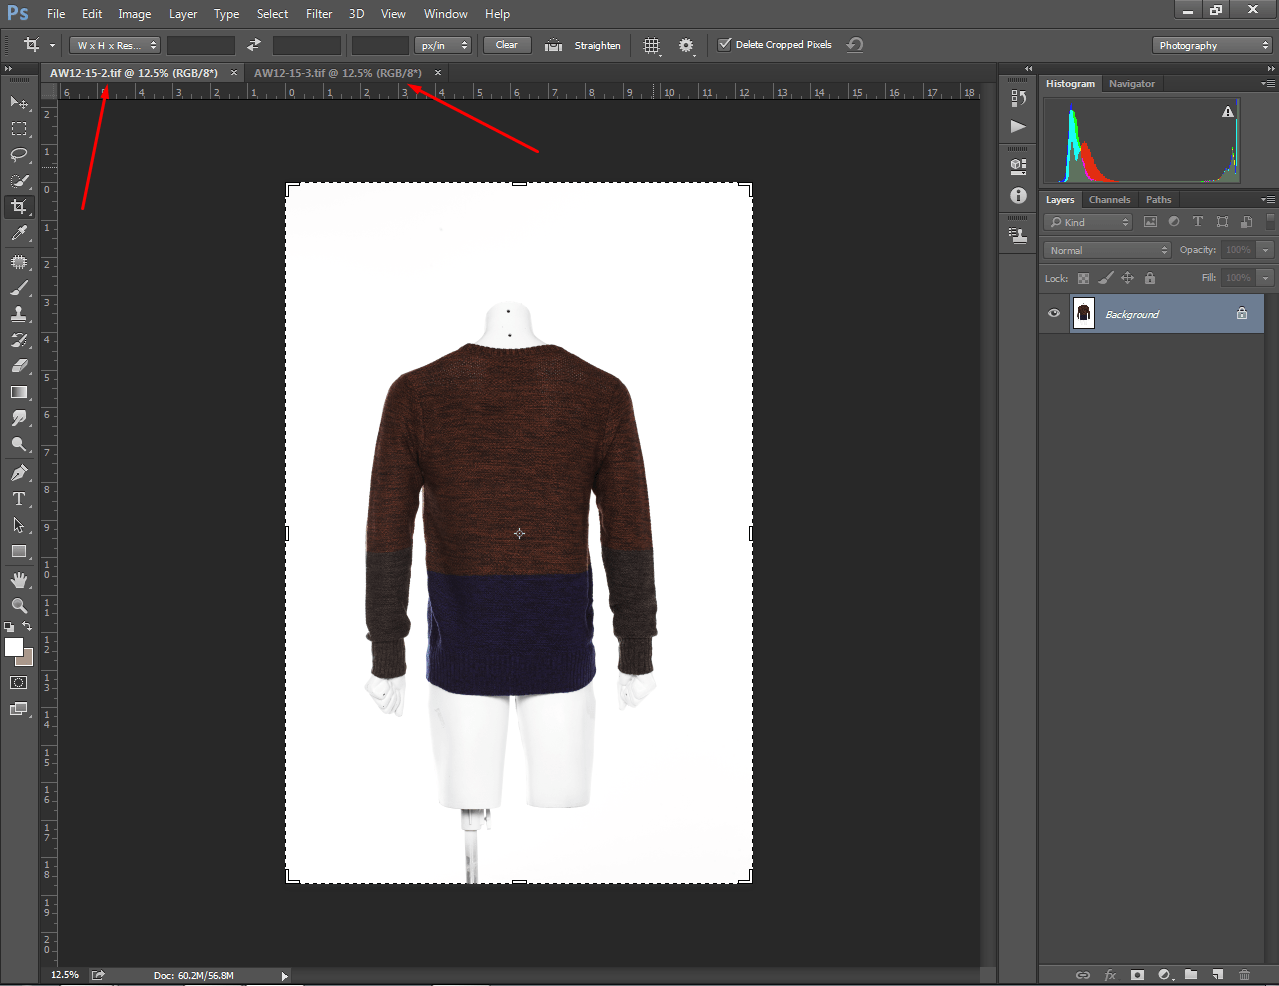
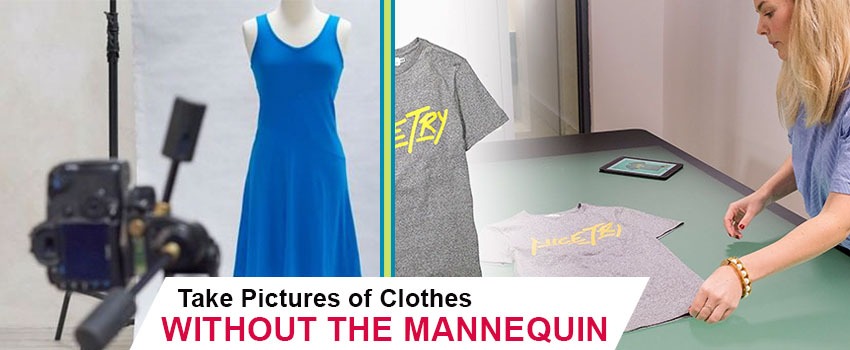
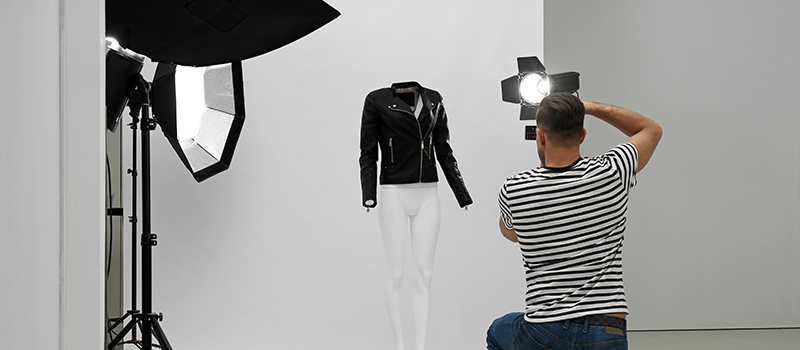
You can use a mannequin and capture your product in that style. If you don’t have a mannequin, you can also use a hanger to capture the image. However, I have opened two images of the dress.
As you can see in the picture, that is the front side. Now, let me show you how to eliminate the mannequin and create a ghost mannequin effect on it.
Step 2: Copy background layer
Copying the background layer will allow you to have a look at the original image while editing. You have to click on the background layer and press “CTRL + J” to make a copy of the original layer.
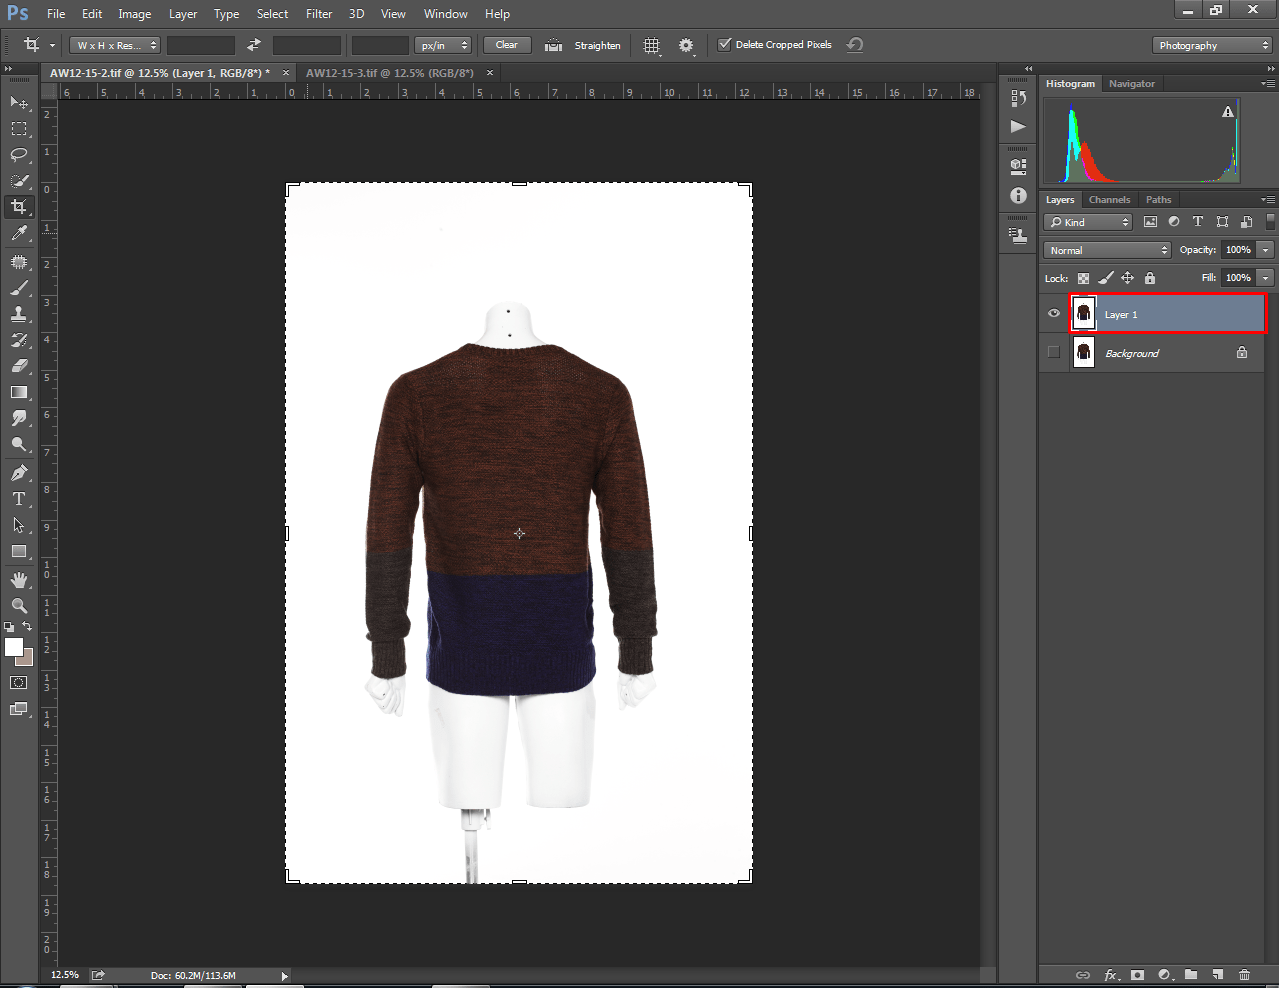
Next to that, you can disable the original layer by clicking on the eye icon. Can you assume what to do now? Yes, we are going to select the dress so that we can apply the neck joint effect on it.
Step 3: Select Pen Tool and create path
In the third step, you have to click on the Pen Tool from the left side icon.
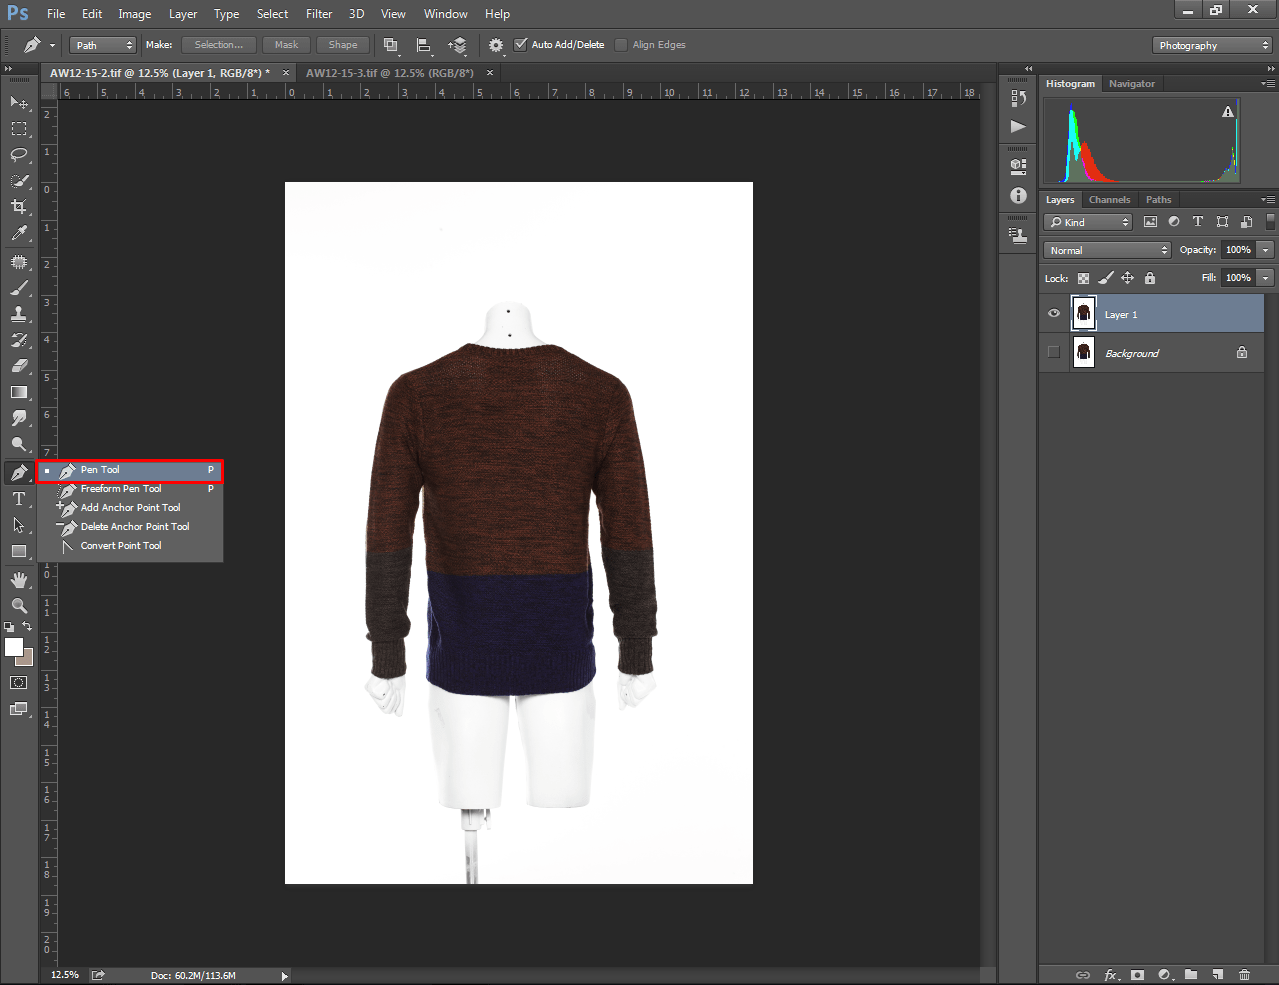
Have you ever used the tool before? Well, you need to zoom in the image by pressing the “CTRL and +” key.
After zooming in, you can move with the spacebar. Go to the below section of your dress and click on the boundary line to create a path.
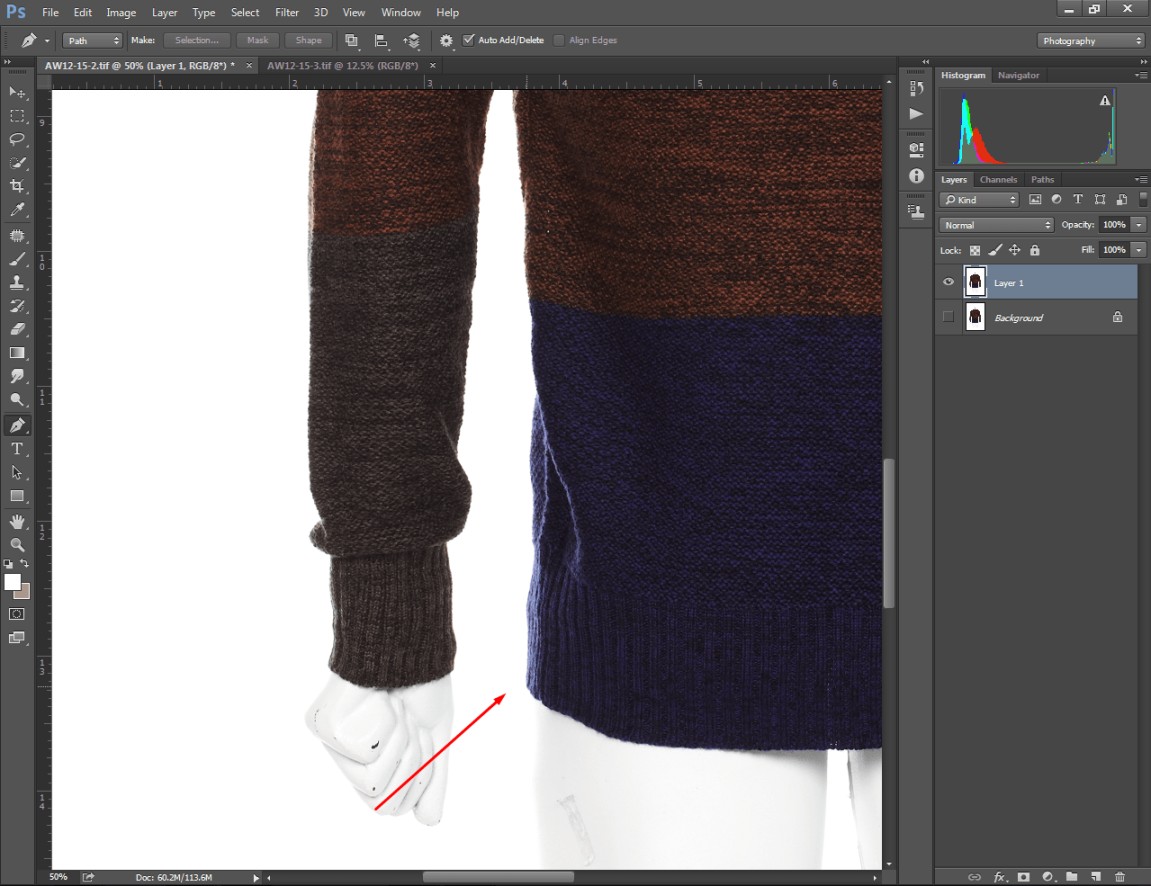
You just need to click on the left key of your mouse to create a path on it.
Step 4: Isolate entire dress with Clipping Path
This is the most important step. You have to create clipping paths exactly surrounding the boundary line of your cloth to isolate the dress perfectly.
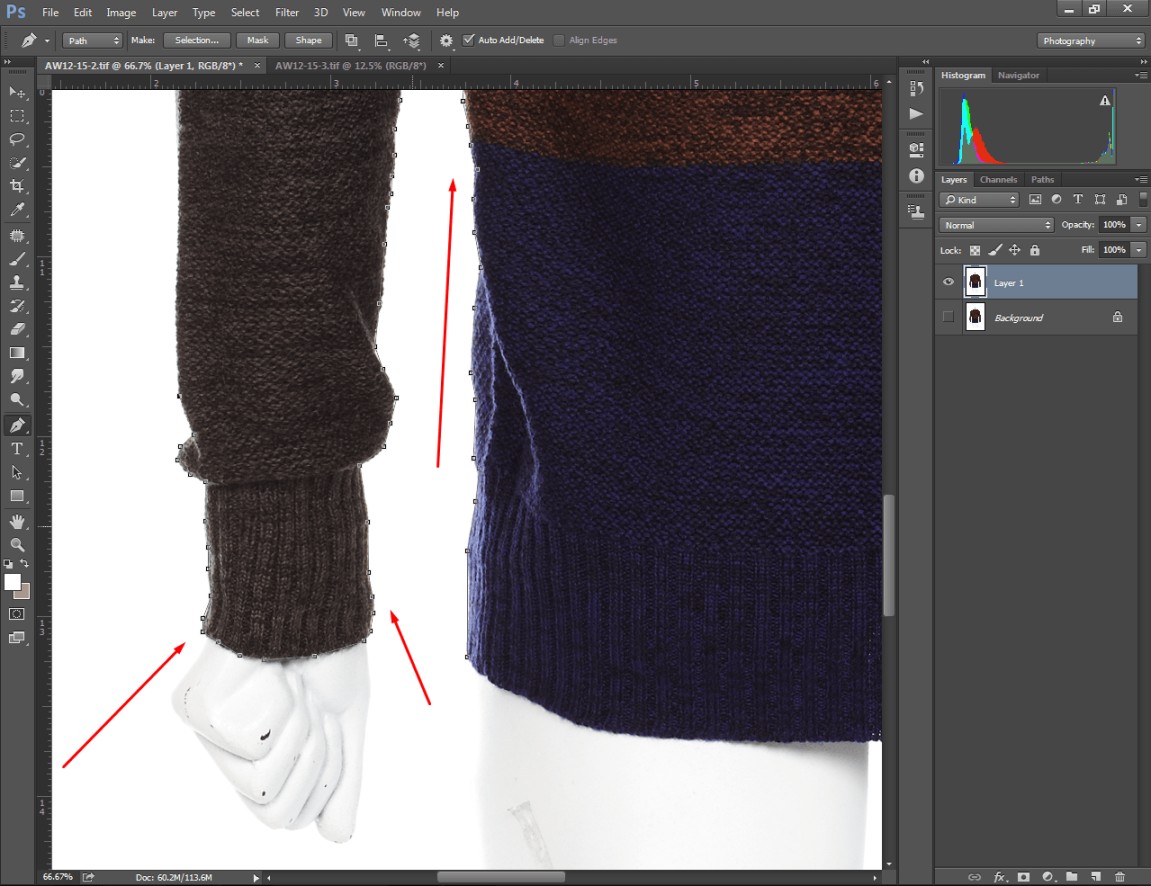
While working on the body and sleeve, make sure that you have covered the dress with anchor points. Also, you need to be careful about not creating paths in the background area.
You may get confused while creating paths on the neck area. An example will make it crystal clear.
Here you go.
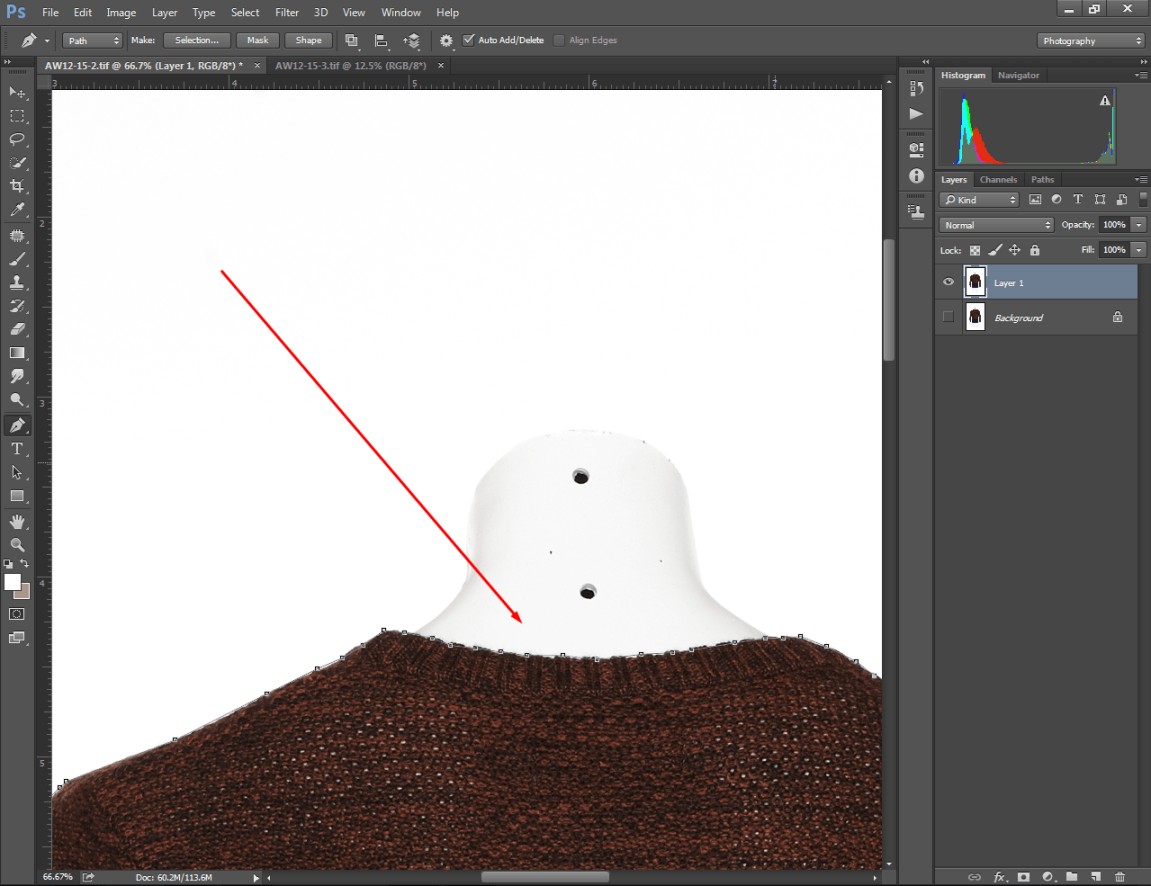
The main theme is you have to cover the targeted object with path creation. Have you done that? Alright, you have to finish on the starting anchor point.
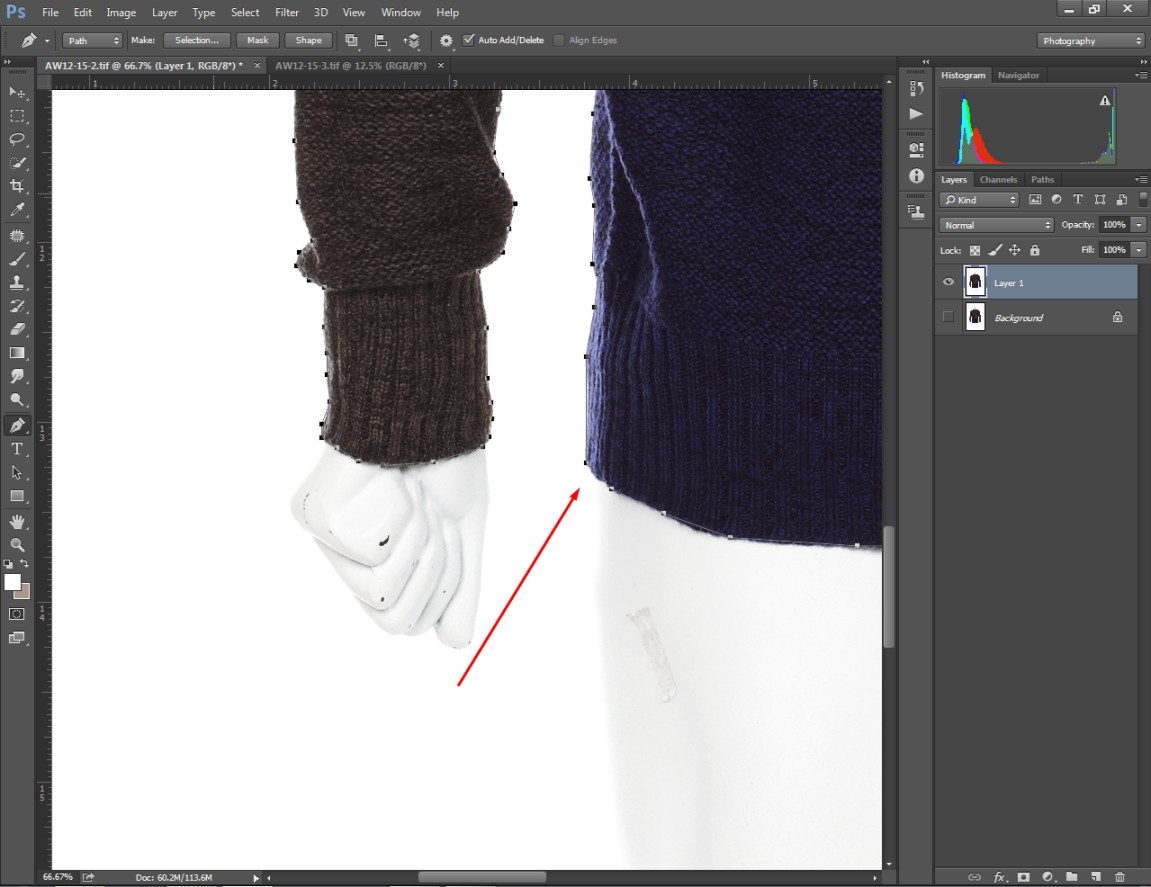
At this point, our task is to get rid of the background. Let’s do that.
Step 5: Make selection and bring a transparent background
After covering your product with anchor points, you will get the dress in that type of view.
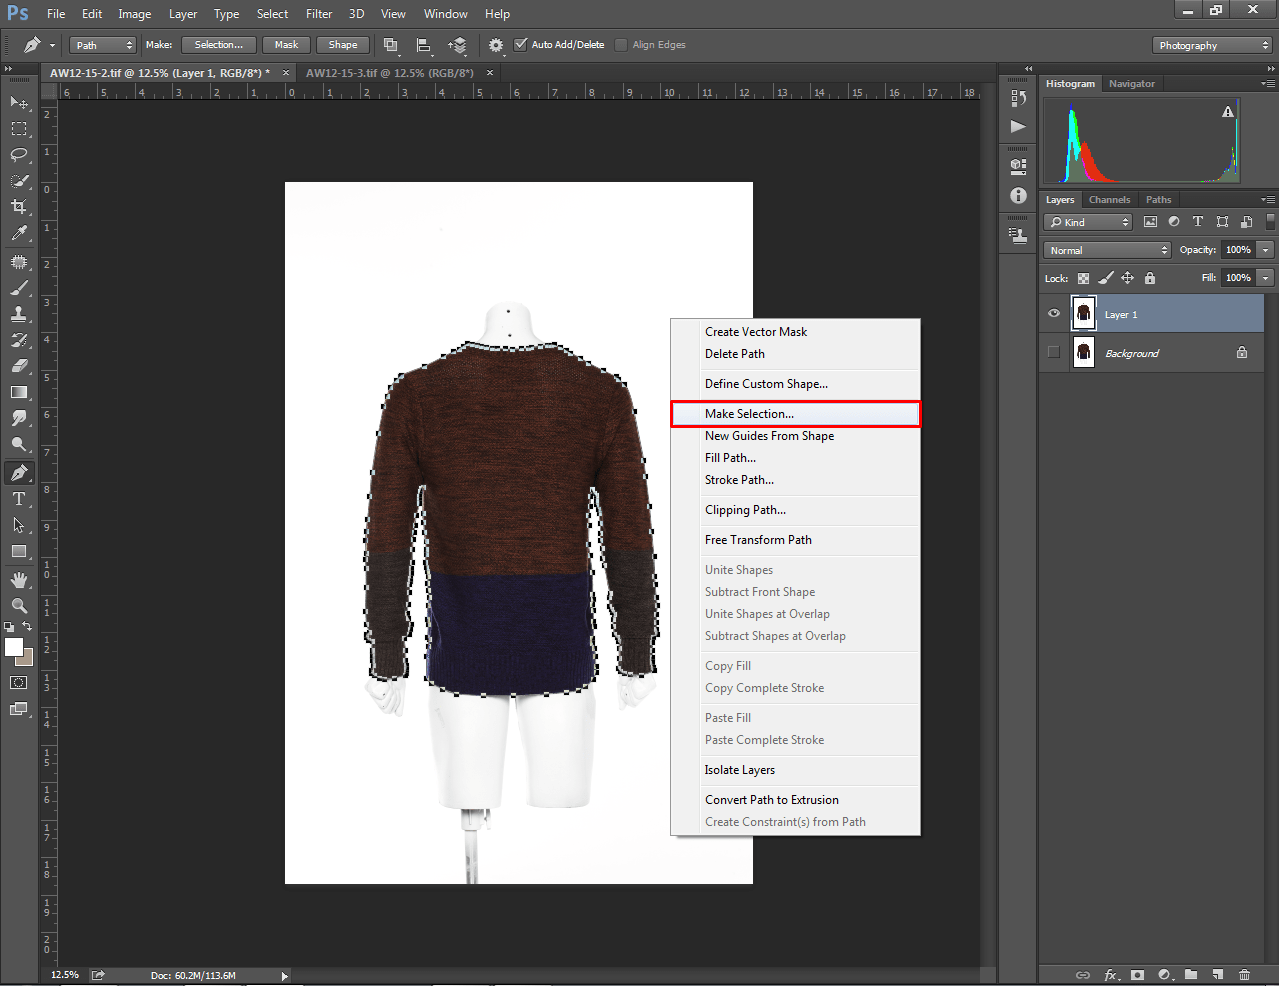
You will get the “Make Selection” option by clicking on the right key of your mouse. After that, click on that and you will see dotted lines around the dress.
To shift the selection to the background, you have to select “CTRL + SHIFT + I”. Next to that, you can make the background transparent by pressing the “Delete” key.
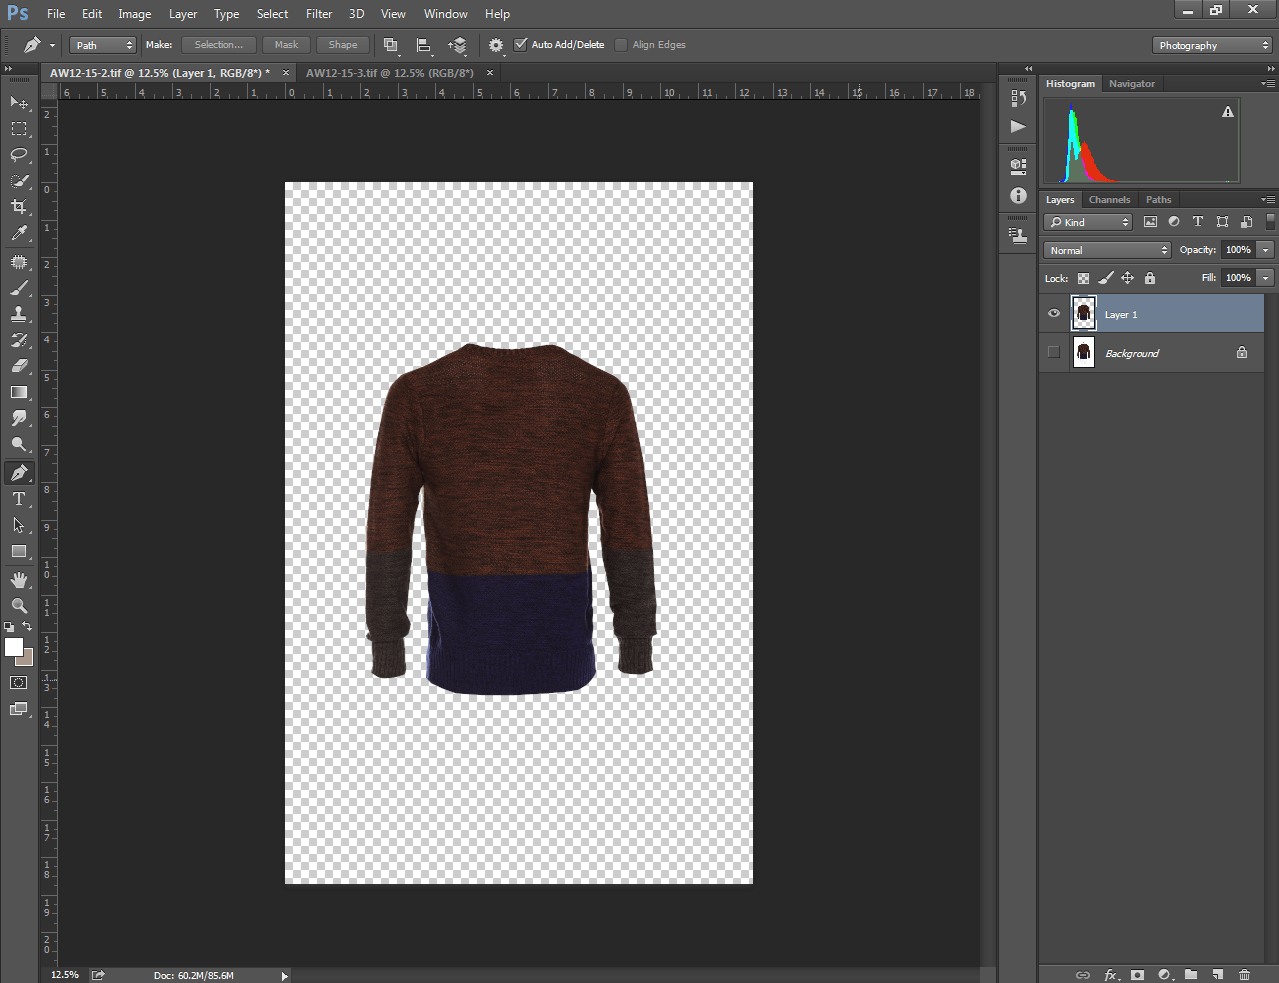
You might see visible lines surrounding your product. You can hide those lines with the shortcut “CTRL + D”. Using the shortcut key, you can hide any selection in Photoshop.
At this point, we have got our dress with the frontal view. To create ghost mannequin effect, we need to join the neck area and merge it with this layer. Are you feeling curious about that? Let’s do it.
Step 6: Trip neck section from the back
As I have mentioned earlier, you have to capture your dress both from the front and back. Here’s the inner view of the dress.
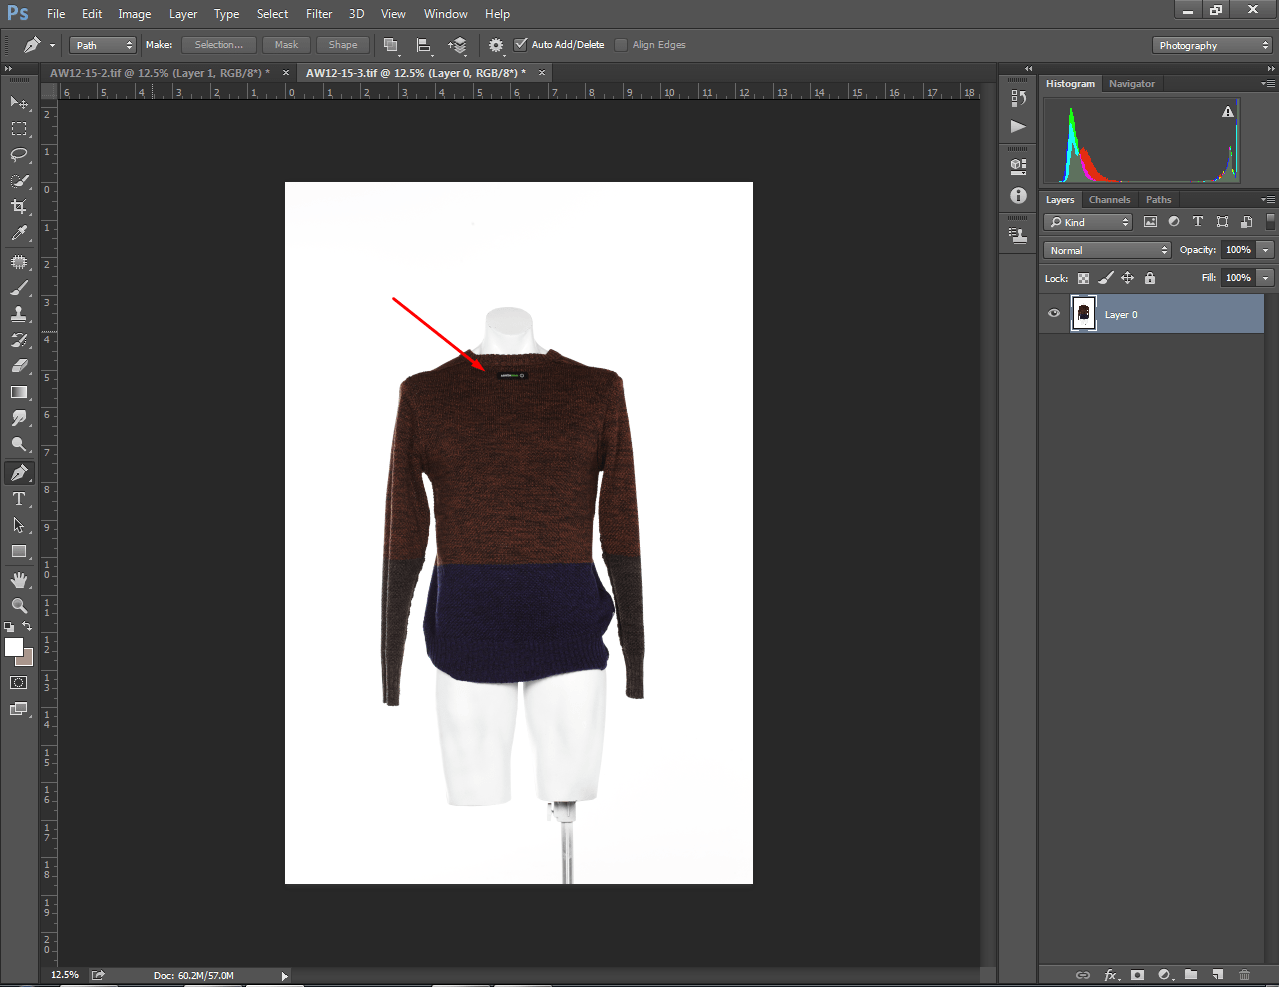
We have to trip the neck area and merge it with the front view. You need to pick the pen tool once again and trim the neck area. To do that, you ought to cover the neck area with vector lines and select “Make Selection”.
After that, you have to press “CTRL + C” to copy that particular section. Later on, go back to the previous image and paste the section on it. “CTRL + V” is the shortcut key to paste copied elements.
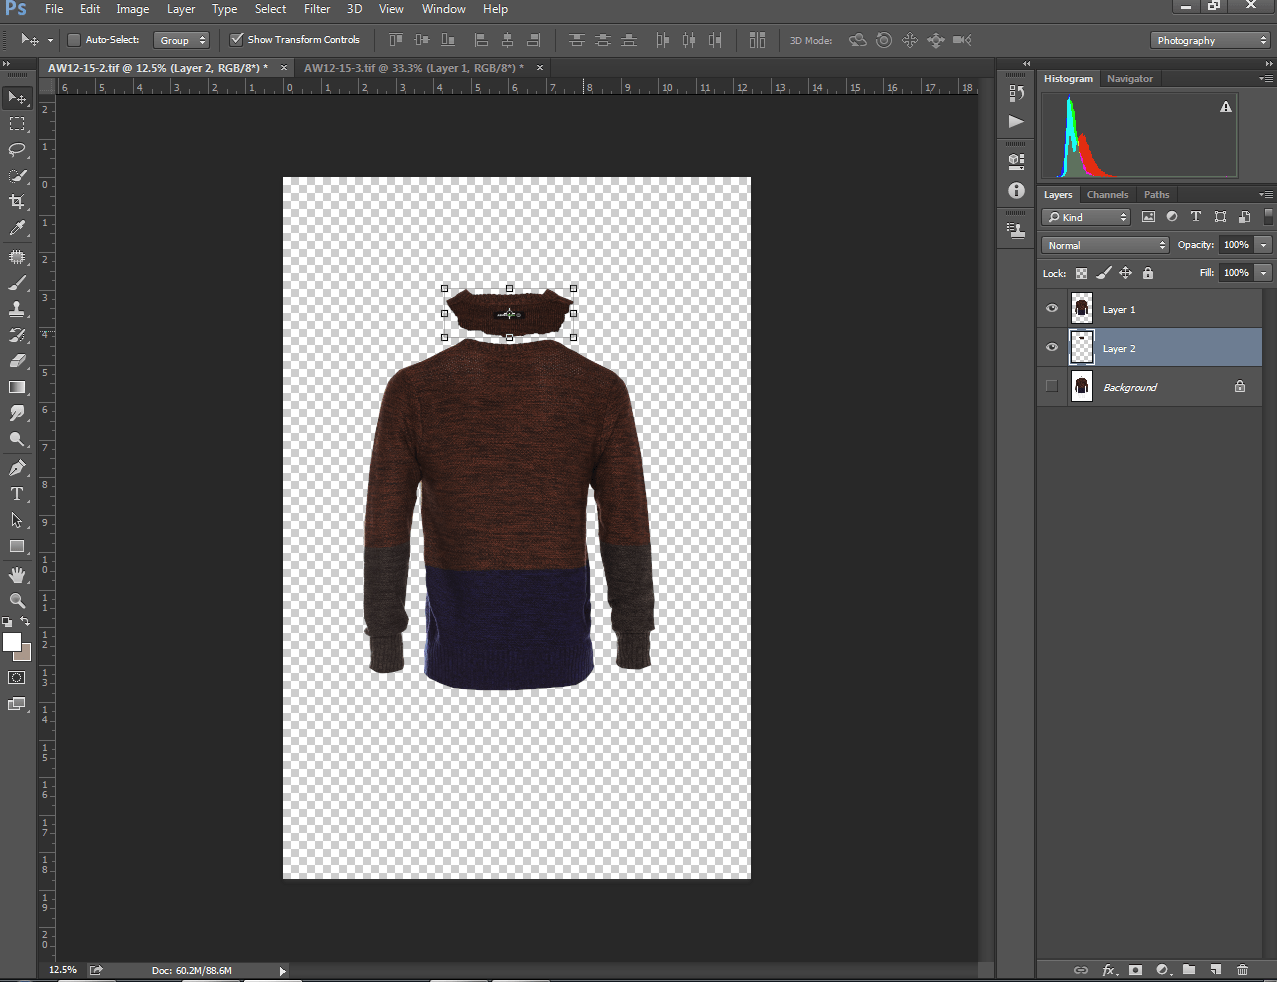
Now, we have to make some adjustments with the neck section to replace it perfectly with the front view. To move the neck area freely, you can enable the arrow tool from the top of the left. Would you like to transform it freely?
You can do that with help of the free transform option. The shortcut key to enable free transform is “CTRL + T”. Place the “layer 2” down to the “layer 1”. Here you can see how you should replace that.
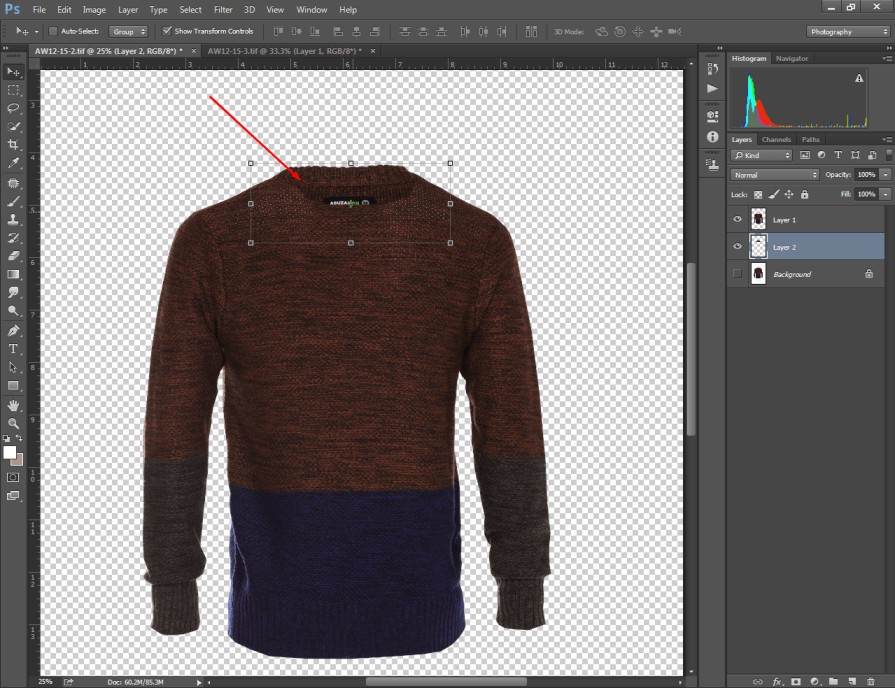
Is there any additional area that you want to trim out? You can use the pen tool and quick selection tool to select that additional element. Then, you can remove it with the delete key. Also, you can delete it with the Eraser Tool. Have you already done that? Let’s move to the next step.
Step 7: Merge layers and fix visible edges
We are only one step away from getting the final result of the ghost mannequin effect. In the seventh step, we have to select “Layer 1” and “Layer 2”. Later on, click the right key and select “Merge Layer” from the long list.
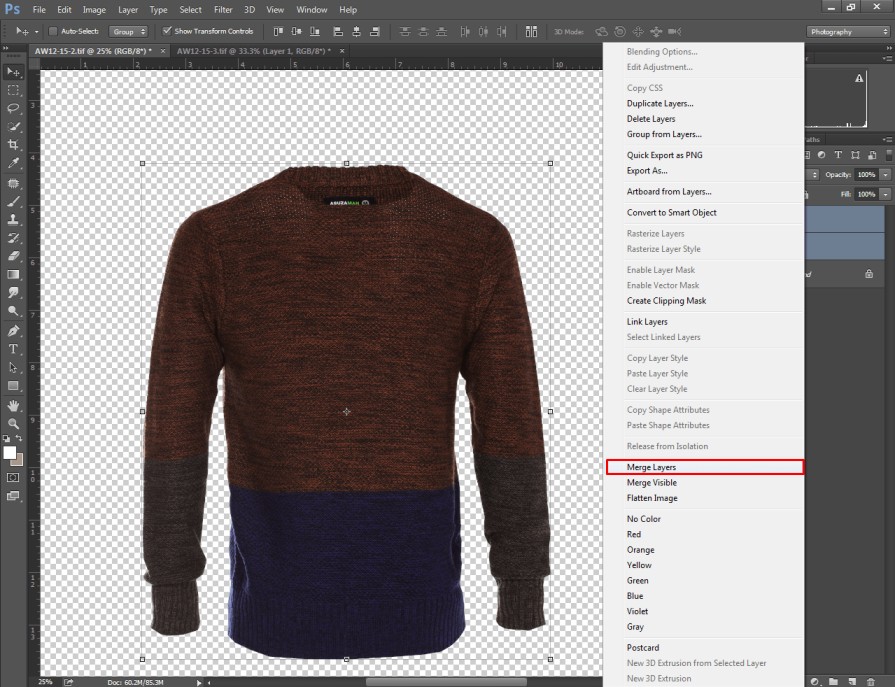
It will combine Layer 1 and Layer 2 into a single Layer. After that, you may notice some edge on the neck area as you have combined multiple layers.
We can fix those visible edges with help of the “Clone Stamp Tool”. Where to find the tool? Let’s have a look here.
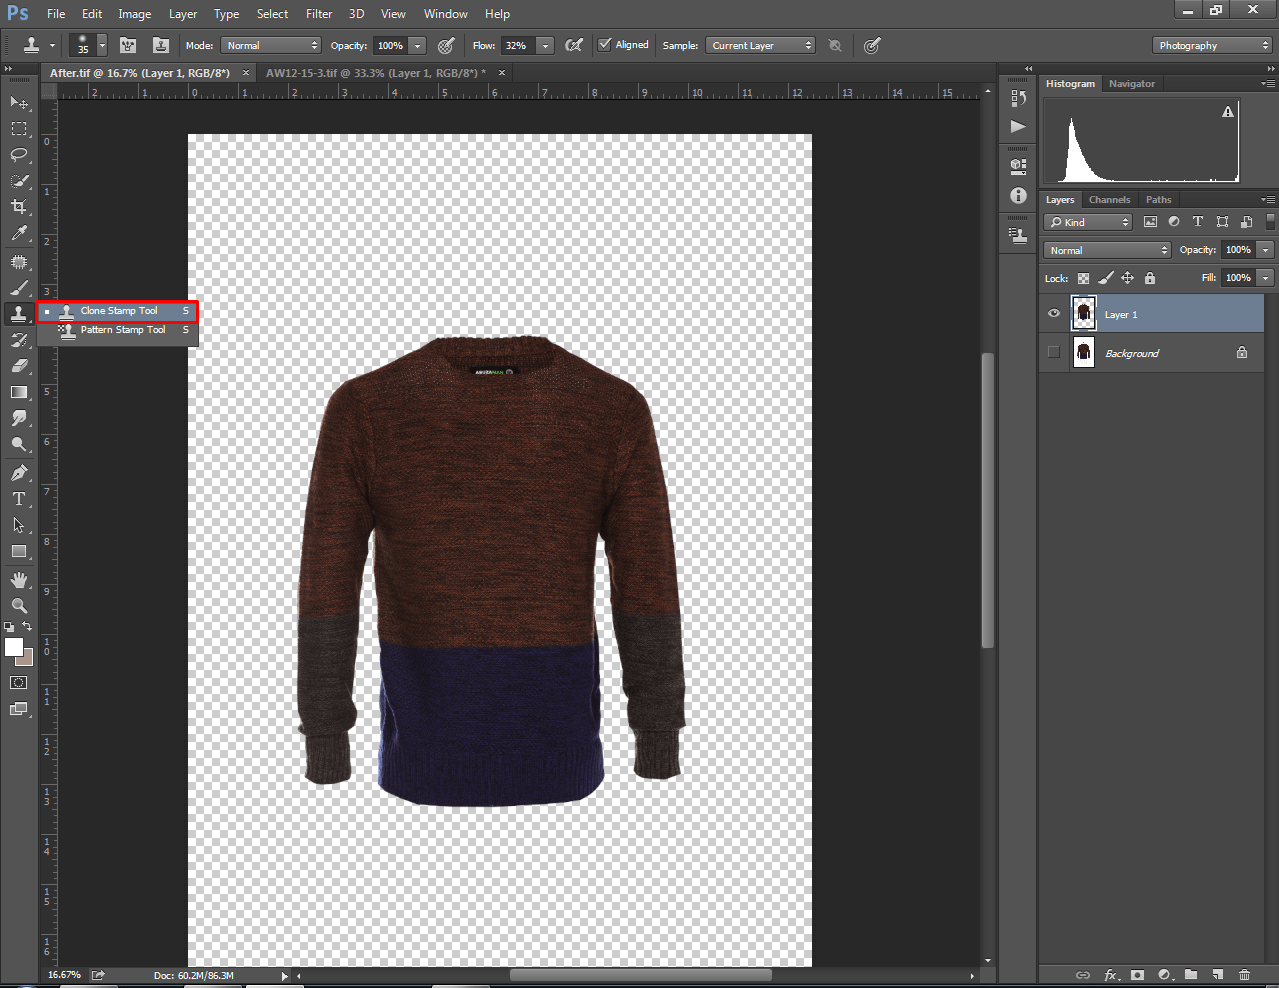
Do you know how to use the Clone Stamp Tool? Press ALT to pick a sample area and click on the edges to refill those areas. To undo any step you can press “CTRL + Z”. Hopefully, after trying several times you will get it right.
Step 8: Save image
Finally, our image is ready to save and upload online. Photoshop allows you to save a file in different formats. Go to the File option from the top and choose “Save As” from the list.
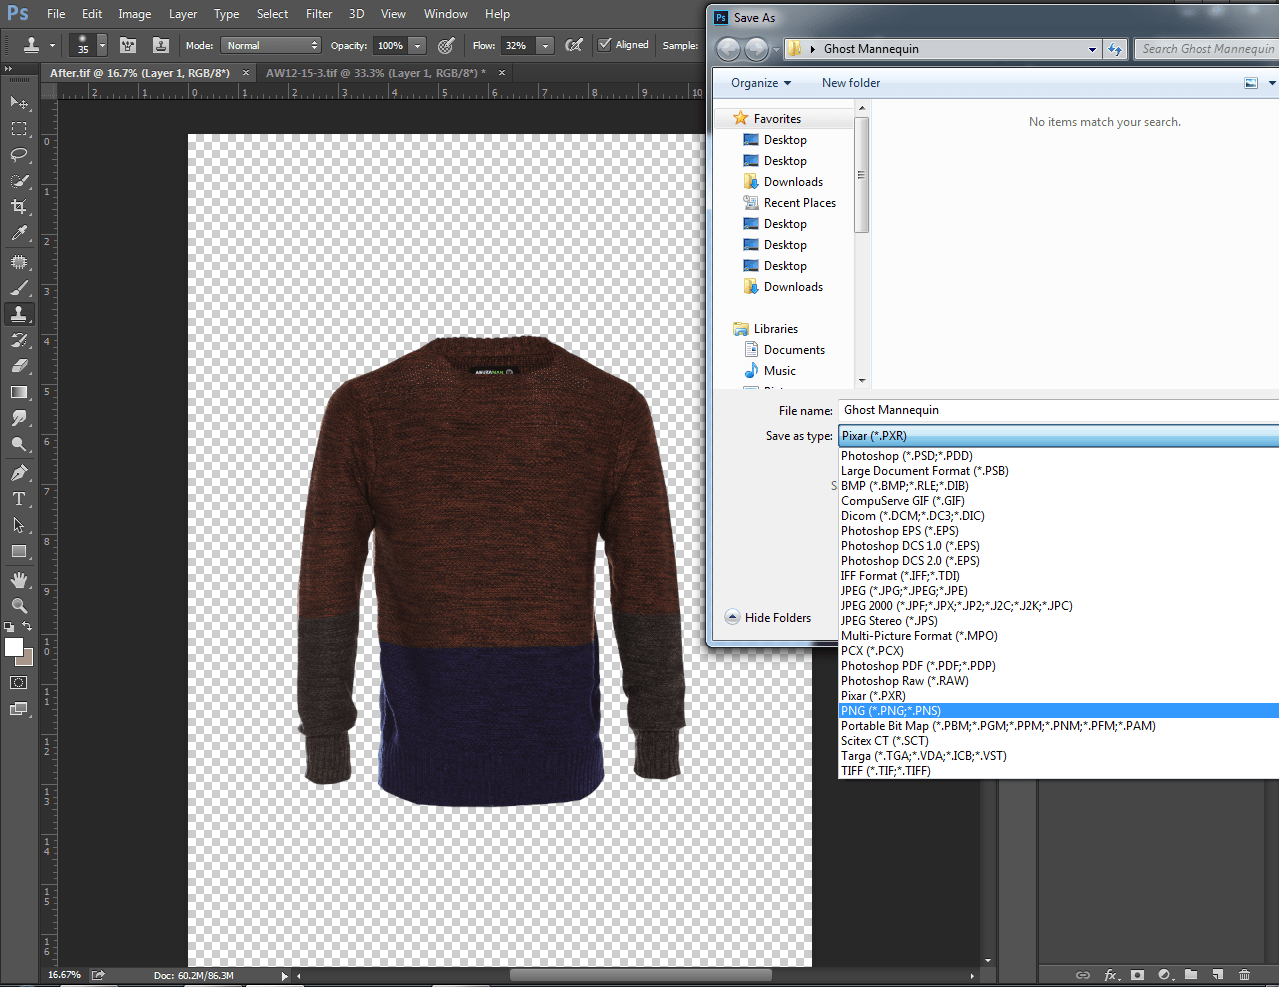
For saving images with a transparent background, the PNG format is mostly preferred. Do you want to edit the image again in Photoshop? In that case, you can save the file in TIFF format.
You might be wondering, why is JPG not preferable for transparent backgrounds? Well, JPG Images doesn’t support transparency and it shows the transparent background as white.
That was the step-by-step explanation of how to create a ghost mannequin effect in Photoshop. Is there anything more that you would like to know about the Neck Joint or Ghost Mannequin?
Feel free to ask our photo editing experts about it. You can email or call us anytime with your queries. However, it can be challenging for beginner photographers to apply the technique.
I have figured out some common mistakes that beginners typically made while editing clothing photography. If you know about those mistakes, you will be able to avoid those mistakes.
5 Common Mistakes While Creating Ghost Mannequin Effect (And How To Avoid)
# Choose mannequin that doesn’t fit the dress
Do you use the same mannequin for capturing all of your dresses? If you are doing that, then you won’t get the best outcomes. Let me explain to you why. The ultimate goal of using Ghost mannequin technique is to promote your clothing pictures with an enhanced look.
If you put your dress on a different size mannequin the dress won’t reflect its proper shape. As a result, it will not be able to impress viewers. Therefore, you should choose a mannequin that looks suitable when it comes to size and shape. Also, you can use pins or tape for tightening the shape.
# Keeping mannequin hands in wrong position
That’s another common mistake that most beginners make. When you are going to create ghost mannequin effect, you should keep the mannequin hand in straight shape. Particularly, you should not keep the hand touching the body. Otherwise, it will be tougher to make it look perfect after editing.
The same rule is applicable when you are using models for the Photoshoot. Ask your model to keep their hand in a straight shape and tie up their hair. Ultimately, the dress should be visible properly with small details too.
# Do not fix edges after merging layers
I have seen some beginner editors do not fix edges after merging the primary and copied layer. Unfortunately, that can affect the ultimate outcomes with visible rough edges. As a result, viewers won’t be much interested in purchasing the product. You should not repeat this mistake.
Take a few minutes to perform it. If the dress has a random color, you have to take a sample several times. Otherwise, the result won’t be perfect. Also, you can use the brush tool for the adjustment.
# Keeping busy background
It will be more difficult to isolate a dress from the background if you keep a random color background. You should keep the background white or any other plain color background. Whenever taking pictures in the studio, you should keep the background white or green.
# Keeping wrinkles and unwanted marks
Wrinkles and unwanted marks can drive away from the attention of viewers. Obviously, you should fix wrinkles before you capture the image. If you notice wrinkles after capturing a photo, you can fix them with the clone stamp tool. Also, you need to ensure that there are no unwanted marks.
Designers can use the brush tool to fix unwanted marks. Are you wondering how to fix wrinkles before a photoshoot? Iron can assist you with that. It will be better to fix wrinkles before capturing photos. That will make the post-production work easier.
Conclusion
At this stage, you have learned how to create ghost mannequin effect in photoshop. From now on, it won’t be a concerning task for you. However, it’s challenging for photographers to edit too many photos due to work pressure.
In that case, Ghost Mannequin Service by Clipping Way will be helpful for you. Would you like to try it now? Let’s start with a free trial. We are available 24/7. We will offer you special discounts on bulk orders.
FAQ’s
How do you make a ghost mannequin shot?
You need to put the dress on a mannequin with proper shape. Then, capture the photo from a decent angle from the front and inner side.
How can i model clothes without a mannequin?
Flat lay photography is a preferable option in that case. Also, you can use a hanger.
How do you take 3D pictures of clothes?
Ghost mannequin effect can assist you to promote clothing pictures with a 3d look.
How do you take invisible mannequin pictures?
With the help of neck joint service, you can get invisible mannequin pictures.
