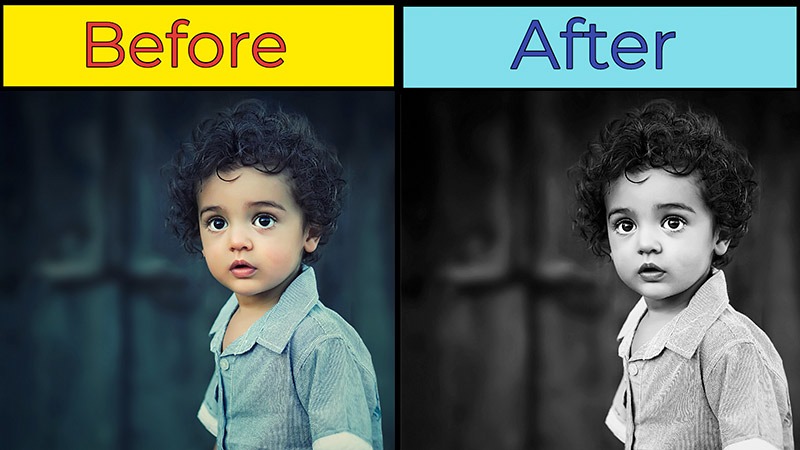
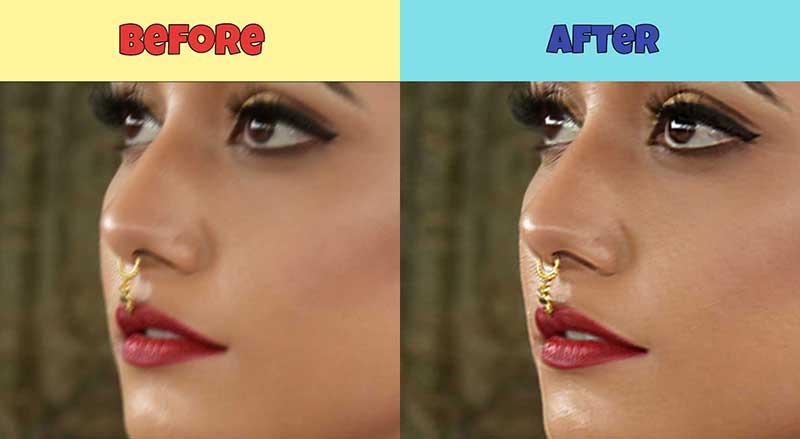
Can you remember those days of Black and White Photos? Nowadays, Technology and Camera both have been upgraded. We are used to colorizing photos.
Still, sometimes we feel the necessity for Black and white photos. B&W photos keep the attention of the viewers towards its object. There is no chance to get distracted by colors.
Do we need to have an old version camera to get Black and White Photos? Photo Retouching Service can do that for you.
With the help of Photoshop, you can easily convert your colorized photo into B&W Photo. Want to learn the process?
In this article, I’m going to share with you how to make Black and White Photos in Photoshop. .
This black-and-white conversion technique is really awesome. So, without wasting any time let’s jump into the tutorial.
How to Make Black and White Photos in Photoshop
Step 1: Open the picture
At the very first, you have to open the image in Photoshop that you want to make Black and White. You can directly drag the photo on Photoshop. Or, you can also choose File> Open and pick your image.
For this tutorial, I am going to make an image black.
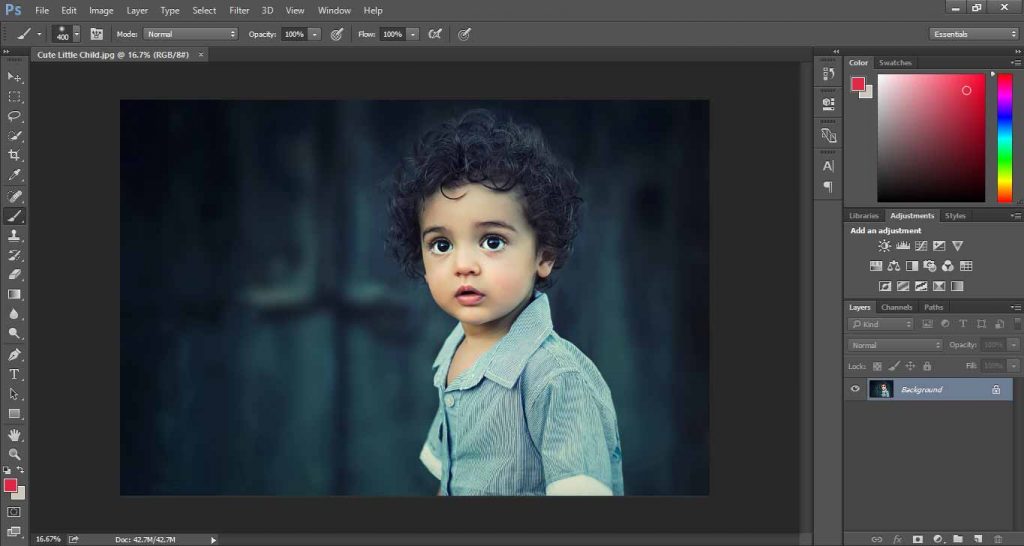
Step 2: Go to calculation
In Photoshop, there are numerous image black and white in photoshop conversions techniques are available. I am going to show you the coolest one. Go to the Image option from the top and choose Calculation.
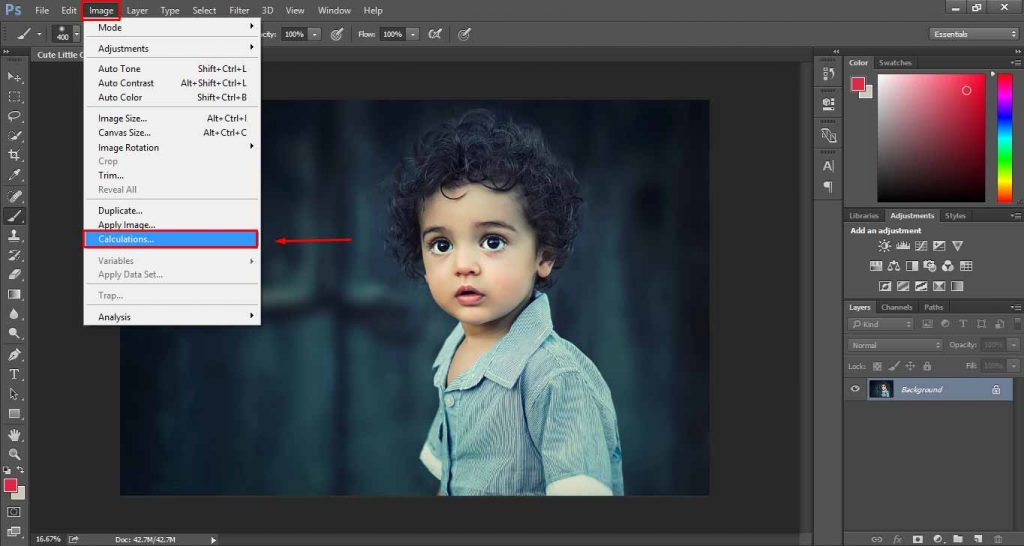
Now, you have to ensure that the same file is selected on Source 1 and Source 2. Let’s have a look at this image.
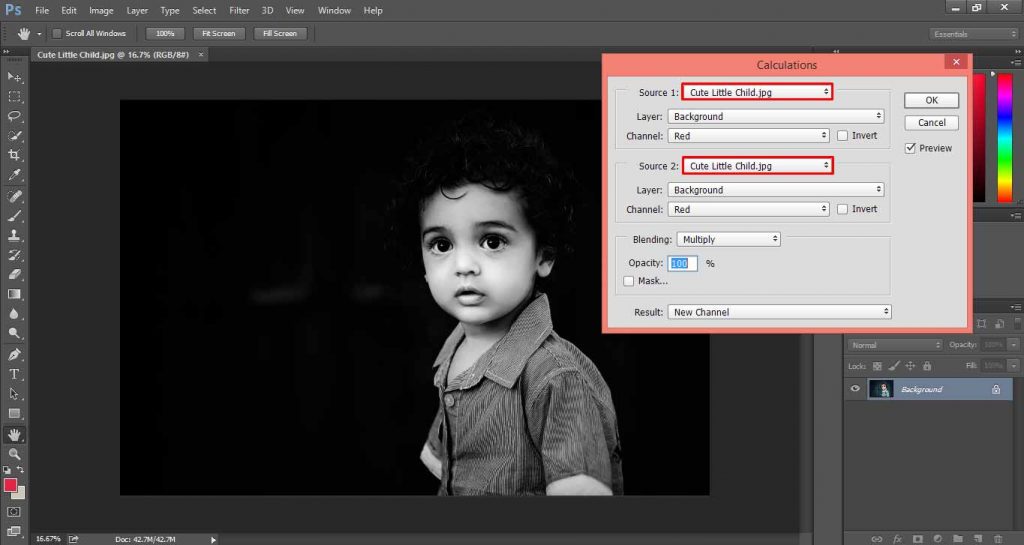
We have got Photoshop black white adjustment layer effects. Still, it is not looking natural. Keep following my steps; I am going to make it natural, smooth, and realistic.
Know More: Essential Amazon Product Photography (Complete Guideline)
Step 3: Choose Blending Mode and Channel
In the 3rd step, we have to choose the blending mode. Click on the blending and you will get lots of blending modes.
You can try by clicking on those which one suits better with the picture. I am pretty happy with the Hard Light mode. So, I will select that one.
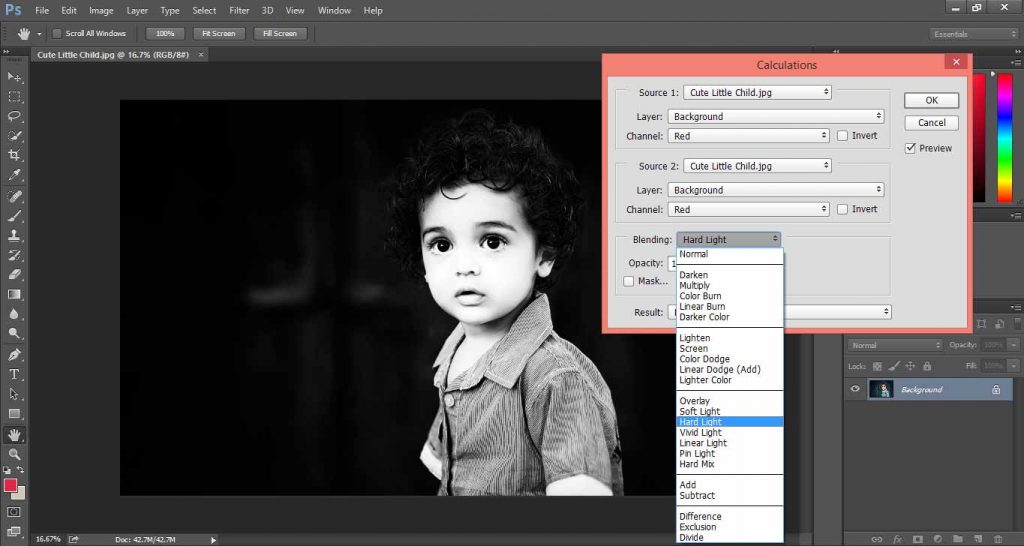
After this, decrease the opacity a little bit as the picture is looking harsh. My recommendation is to set on 80%.
It can differ according to the contrast and color of the picture. If you find that 80% opacity are not bringing good results, try increasing and decreasing the value.
Step 4: Select Channels
At this step, we have to select channels of Source 1 and Source 2. You can find the channel option below to the Layer. There will be three different options- Red, Green, and Blue.
You should start with Source 1. Click on each channel and inspect which one gives a better view. For this picture, Blue Channel is giving a good Black and White effect. So, I am keeping the Channel as Blue.
Know More: How to Center Text in Photoshop | How to Deselect in Photoshop within 5 minutes
Follow the same procedure for Source 2. Click on each channel and pick the suitable one.
Here, Green seems to be good for source 2. It can differ according to the color of the picture. Allow me to show the condition of the sample picture.
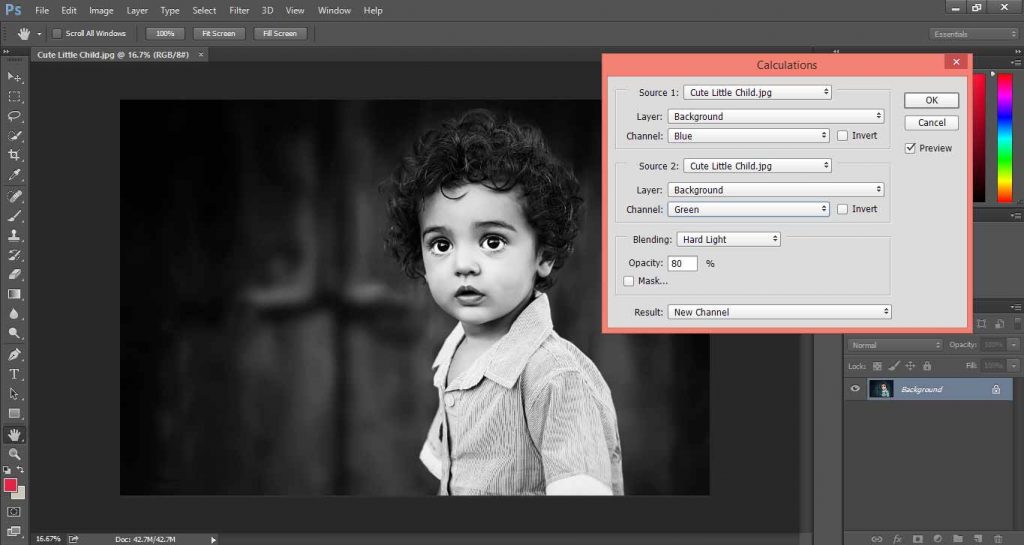
It is looking pretty, isn’t it? Now, Select the New Channel Option from the box and click on Ok.
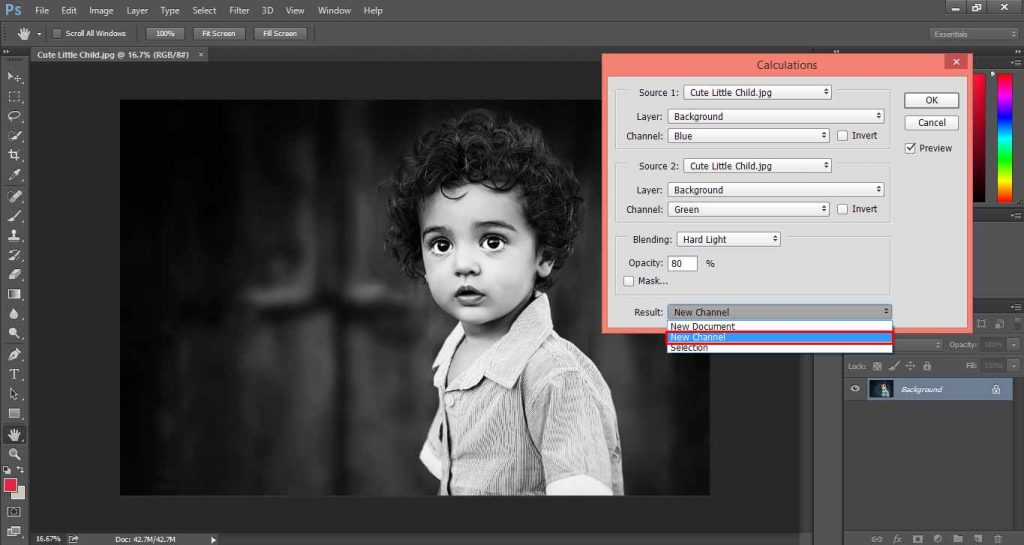
Step 5: Copy the Channel as layer
In the Channel Panel, there will be a new alpha channel that one you created from Calculation.
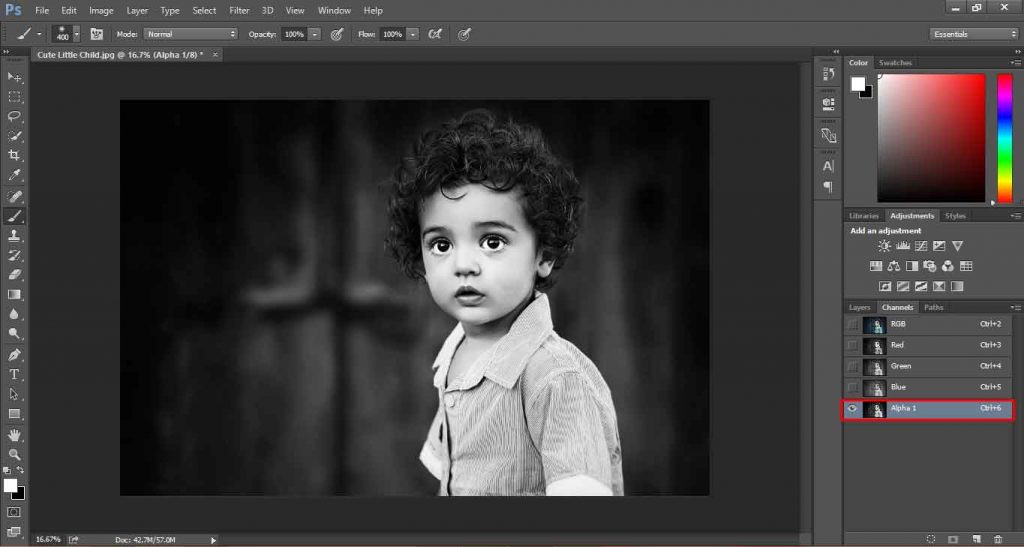
Click on that Channel, press CTRL + A, and CTRL + C. It will copy the entire channel. Then, go back to the layer panel and take a new layer by clicking on the New Layer icon from the below.
After this, click on the layer and press CTRL + V. Then you will find that the channel has been copied into the new layer. Just like that one.
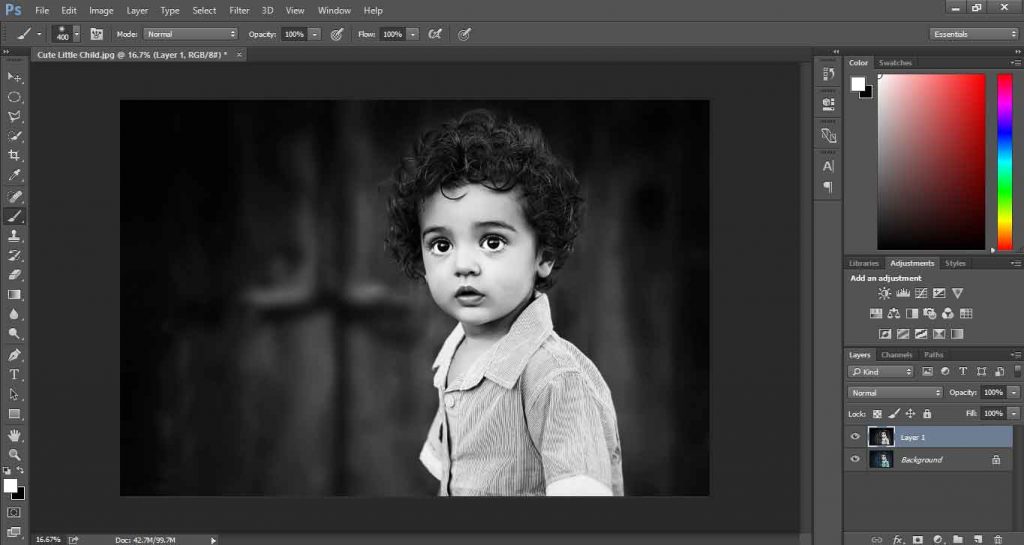
Though it is looking good, I think the eyes area needs to be corrected. Let me fix it.
Step 6: Making correction of eyes
In Black and White Photos, the eyes of the subject are very important. To make correct of eyes, take a new blank layer & zoom in the picture. Select the Elliptical Marquee Tool and create a circle inside the eye.
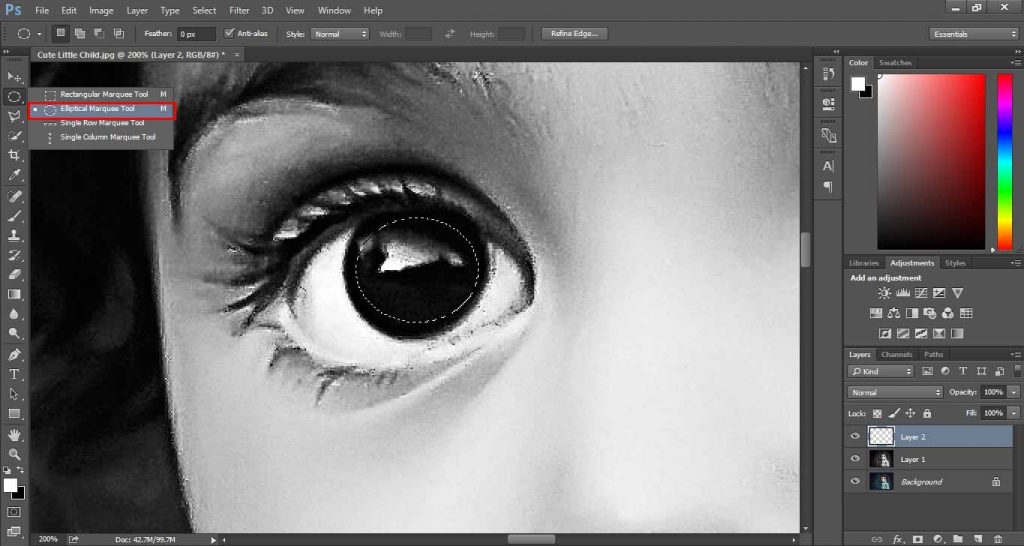
Then choose the Lasso tool. Press & Hold ALT, subtract half of the circle. After that, again pick up the Lasso Tool and subtract the Eyeball portion. Next to this, pick up the brush tool and fill that area with white.
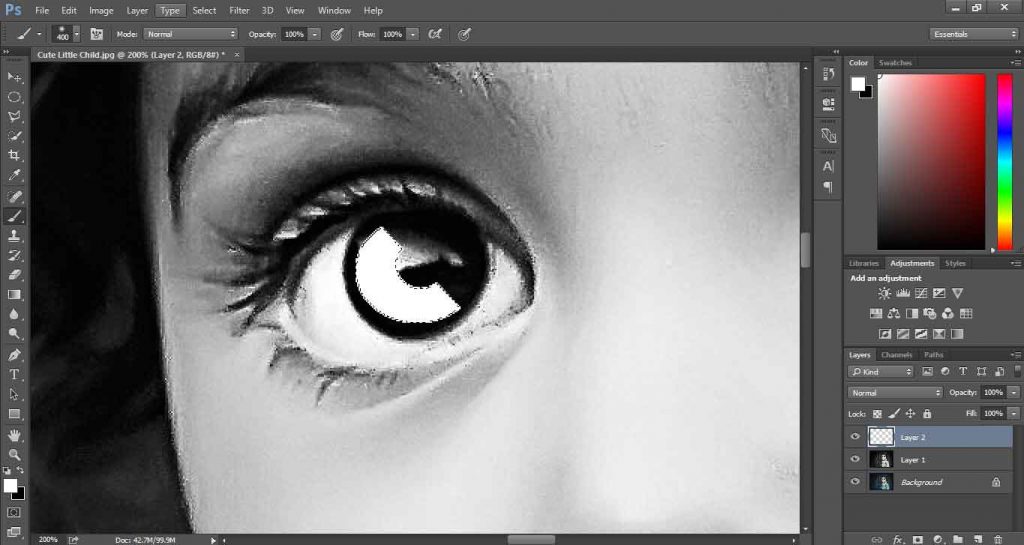
Go to the blending mode of the Layer 2 and select Overlay.
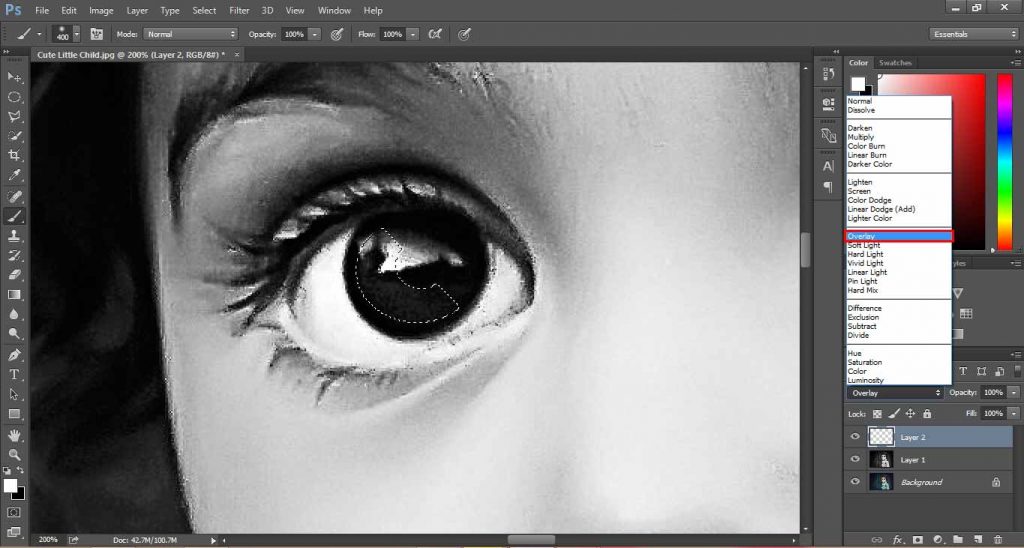
We have to make the portion brighter. To do that, simply press CTRL + J to copy the layer. It will make the eye portion brighter.
Then, select both layers and press CTRL + G to make a group. Then again Press CTRL + J to create a new copy of that group.
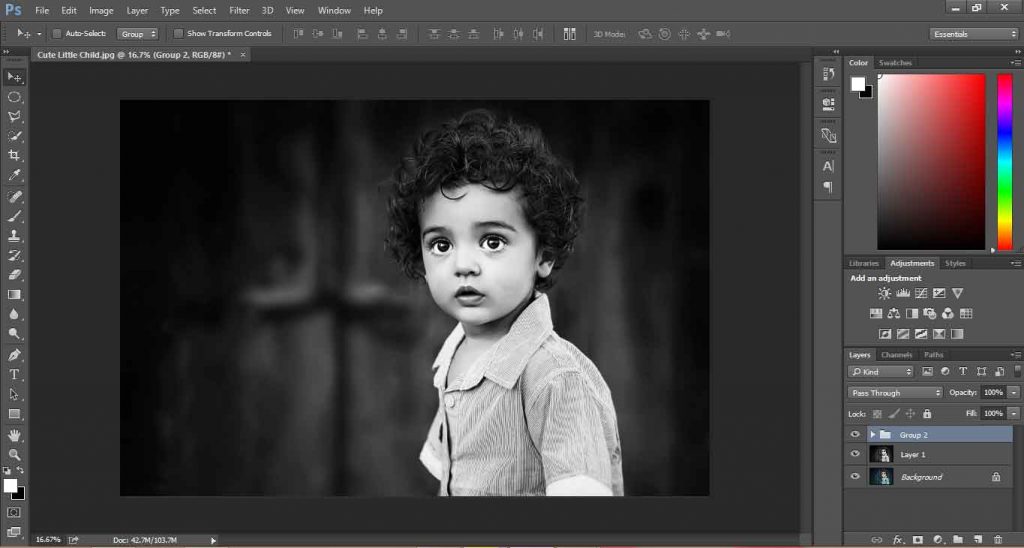
Pick the arrow from the top of the left toolbar, move and replace the Eye Portion to another eye. This is the last stage of making black and white photos in Photoshop.
Select both of the layers by pressing CTRL + Left Click on the layer. Then, right-click and select Merge Groups to combine this pair of groups into a single group. Finally, this is the result.
Conclusion
This is the perfect Black and white conversions technique, isn’t it?
I hope you have enjoyed the tutorial on how to make an image black and white photos in Photoshop. From now on, you should be able to easily to convert any image into Black and white.
Particularly when you want to catch the attention of the viewers, using Black and White photos is one of the safest options. It also expresses a different type of emotion. That’s it.
We are just at the end part of this article. Keep in touch with us to get more awesome Photoshop tutorials. Thanks, everyone. If you need a bulk amount photo editing outsourcing service, then you can consider clipping way, the Best photo Editing provider.
