Transform Apparel Photography into Perfection
Get maximum attention through appealing apparel photography by bringing them to perfection. But how to make apparel photos look perfect? Apparel Photo Editing is the one and only solution to get perfect-looking clothing photography. Through Professional Clothing Photo Editing Techniques, remove major and minor imperfections in your imagery.
It will instantly improve the look of your apparel products. Most likely, it will influence the targeted audience to focus on your clothing photography. Let me inform you about professional apparel image editing.
Unleash the Potential of Apparel Through Professional Editing
When purchasing clothing products, an appealing look is the ultimate factor that inspires online buyers to choose the dress. Nowadays, millions of apparel products are available online. The garments item that you are selling might be pretty similar to other products of a different seller.
The apparel photo is the only option that can assist you to stand out from others. The image that you are using should visualize the perfect reflection of your products. Outsource Image Editing Service by Clipping Way can do it for you.
Apparel Photo Editing Add Charmingness to Your Photography
Raw Photography never looks perfect until you apply post-processing methods properly. If you are not editing your apparel photographs, you are keeping yourself behind others. It will allow your competitors to overtake you as they upload the enhanced version of their photography.
Through Apparel and Fashion Photo Editing Services, you are going to add charmingness to your Photography. It will boost engagement and reduce the possibility of distraction. It will connect your audience through highly appealing photography. Ask for a quote now to get a Professional Apparel Photo Editing Service.
Get Seamless Enhancement of Your Garments Product & Fashion Photos
7 out of 10 online buyers give the garment item image the most priority to making a purchase. It indicates that you can lose 70% of your possible buyers if you don’t use high-quality photos. Ghost Mannequin Service will assist your imagery to get seamless enhancements.
It will lead your clothing and fashion photos to reach their full potential. At the same time, it will have a positive impact on your overall brand value and trustworthiness. Reputed Fashion Brands always stay focused on enhancing their photograph quality. This is the key reason behind that.
At this point, you might be wondering about the actual definition of apparel image editing. The next section will clarify that.
What is Apparel Photo Editing?
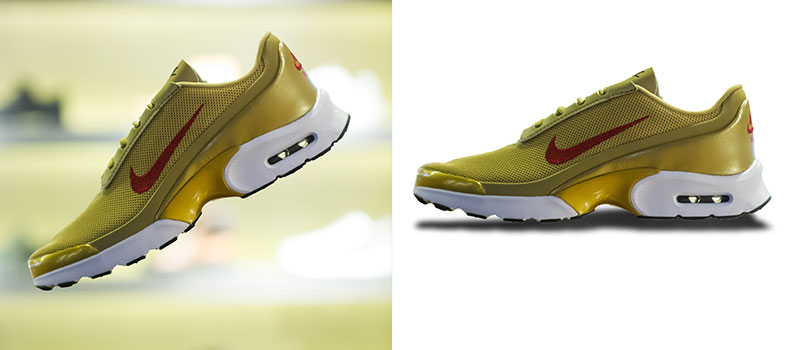
Apparel photo editing is a specified photo editing method related to enhancement techniques for apparel items. Without apparel photo editing, the garment’s product never looks perfect with the appearance.
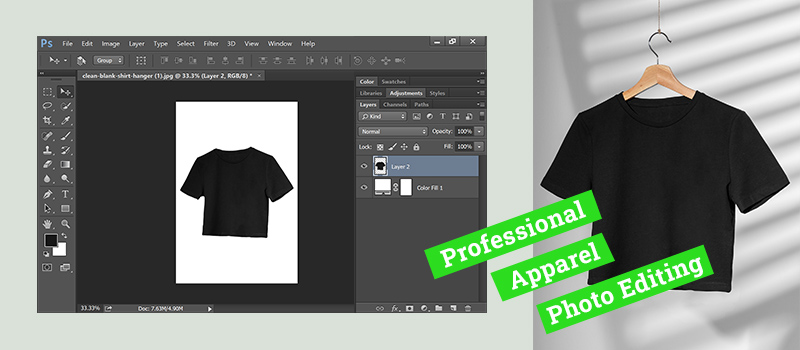
Adobe Photoshop and Adobe Lightroom are two popular applications that are used for editing clothing photos.
Importance of Apparel Photo Editing for Ecommerce
In eCommerce businesses, professional product photo is the key to creating a strong brand identity. If you use ordinary-looking apparel photos, it will create a negative impression in viewers’ minds about your brand. Eventually, you are going to lose probable sales and potential customers.
As there are lots of other sellers available, they are going to switch the tab. But professionally captured and edited apparel photos will hook customers’ attention at first sight. That will bring more positivity to an eCommerce business. The same thing is applicable to individual online sellers.
How to Edit Apparel Photos?
Go to the file option from the top and choose the apparel image that you want to edit. We are going to work on the below image.
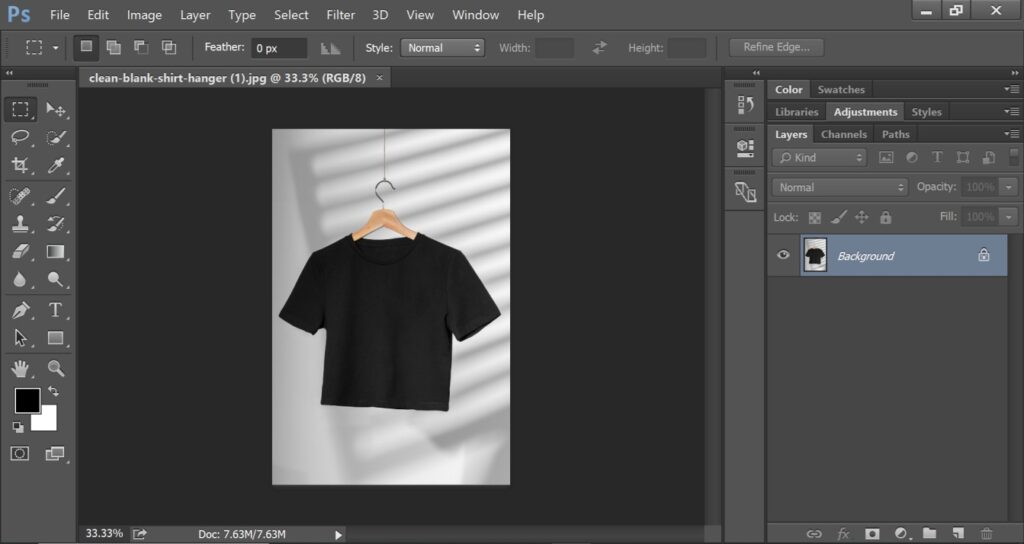
Our first task is to select the apparel product so that we can separate it. We are going to do that using the Quick Selection Tool.
Step 2: Select the apparel
You need to pick the quick selection tool from the left side to make a selection of the apparel item.
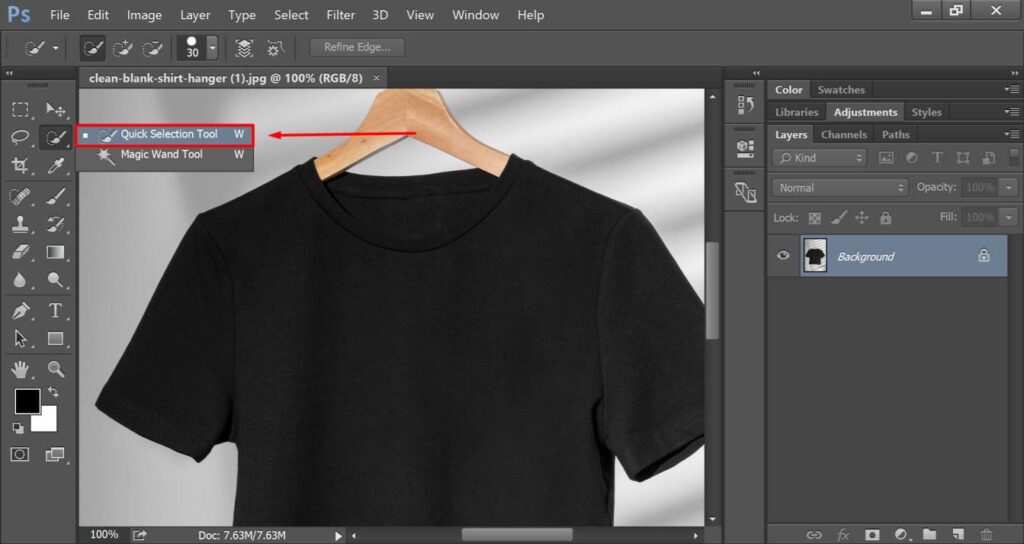
Make sure that you also include the hanger in the selection so that we can work on this area.
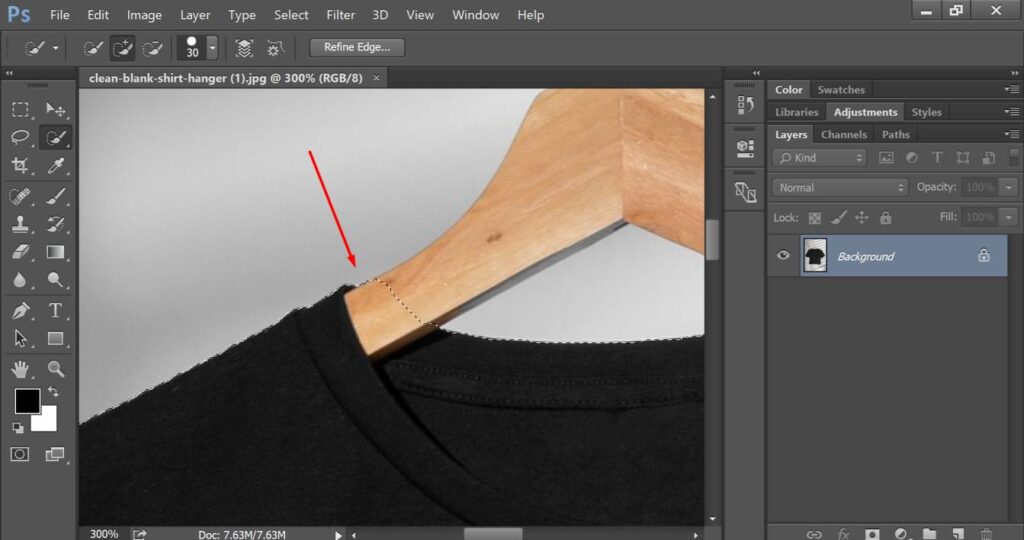
So, you have to select the entire apparel and make sure that nothing from the background is included in the selection.
Step 3: Get rid of the background
You have to press CTRL + SHIFT+ I to reverse the selection from product to background.
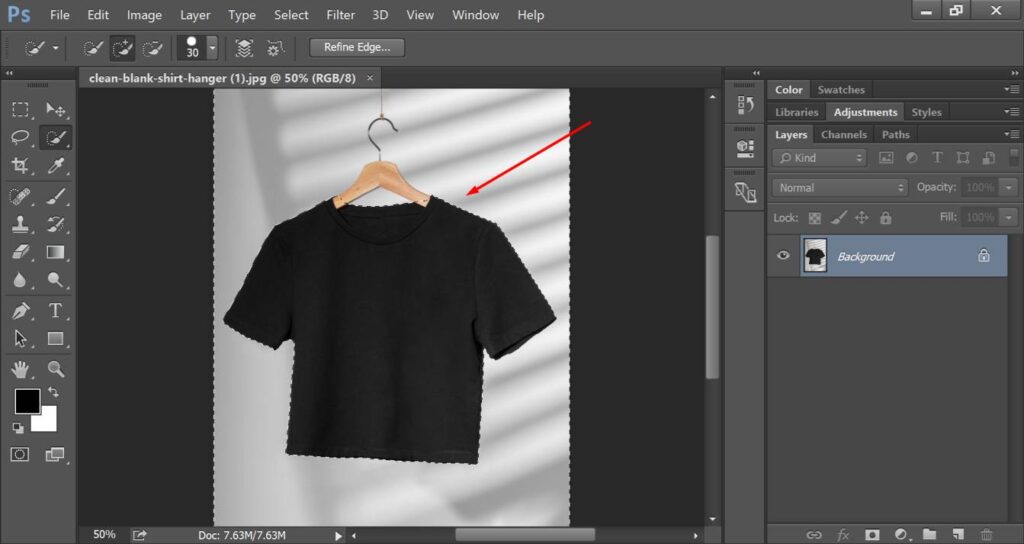
If you haven’t unlocked the background layer, you have to double-click on the background layer to unlock it. Next to that, you should click on the “Delete” key to get rid of the background.
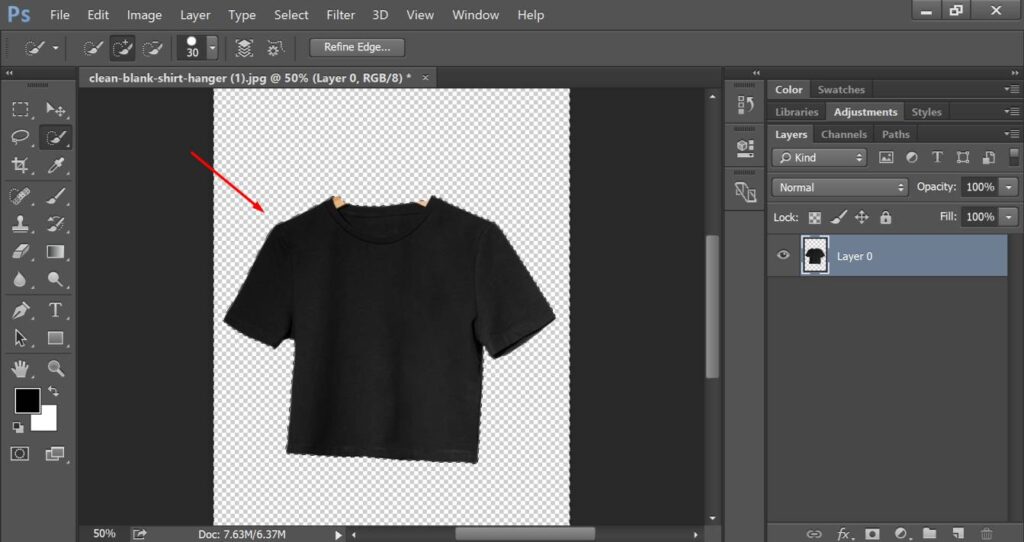
Now, we have to remove the remaining hanger’s part from the neck. Let’s do it.
Step 4: Replace the Hanger
You have to pick the pen tool and create paths to replace the hanger. You need to make a selection like this one.
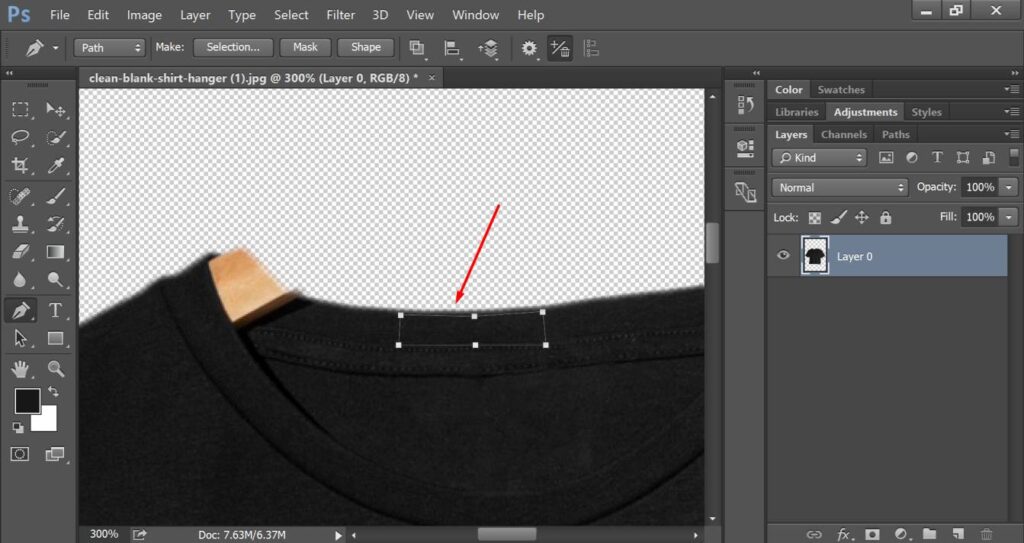
After that, Press “CTRL + J” to copy the selection into a new layer. Then, you can use the move tool and replace it on the hanger’s portion. Use “CTRL + T” to enable the free transform option for that selected area.
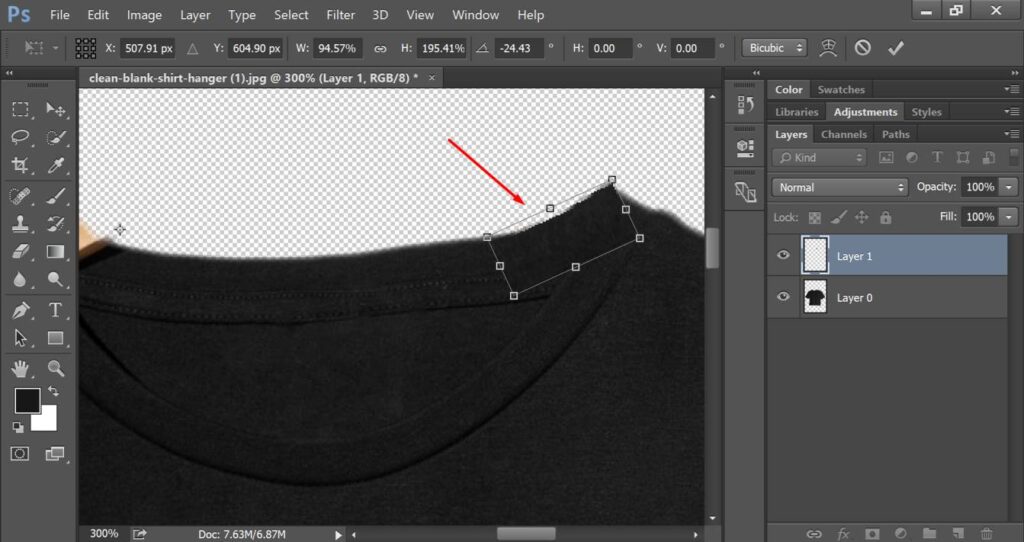
Next to that, you have to pick the eraser and delete the extra portion so that it looks natural.
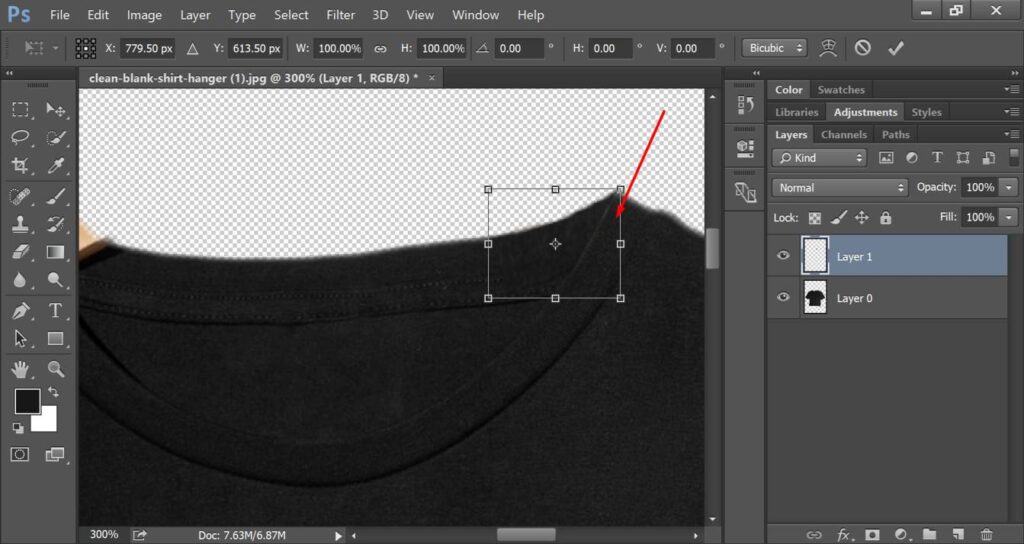
At this point, you have to select both layers by pressing the ALT key and clicking on the layer. Then, right-click on the layer and select “Merge Layers”.
Step 5: Fix other side of the neck
Now, we are going to copy the right side portion and replace it with the left side.
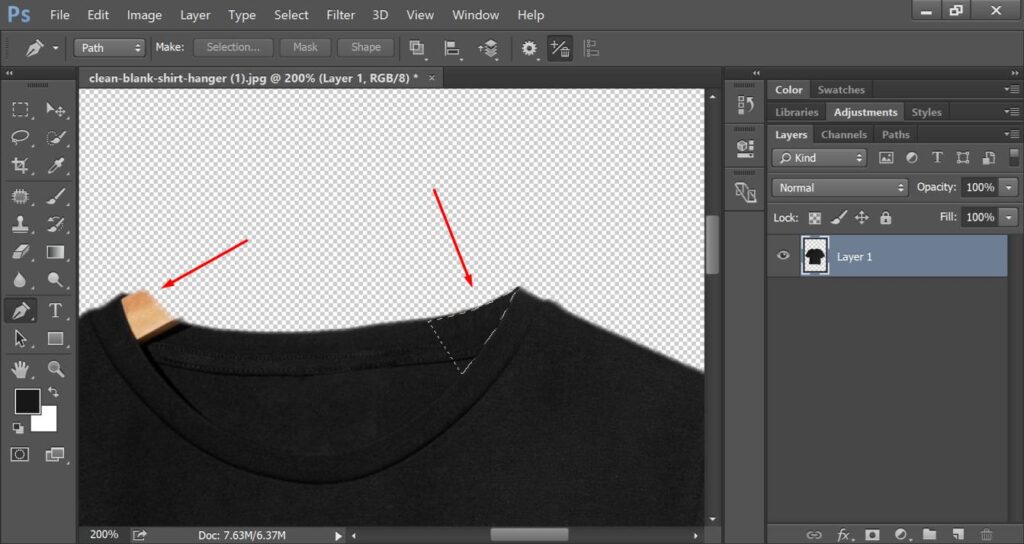
To do that, you have to pick the pen tool once again and make a selection of the corrected portion. Later on, you need to press CTRL + J to copy that portion. You can use the free transform option and arrow key to do it with perfection.
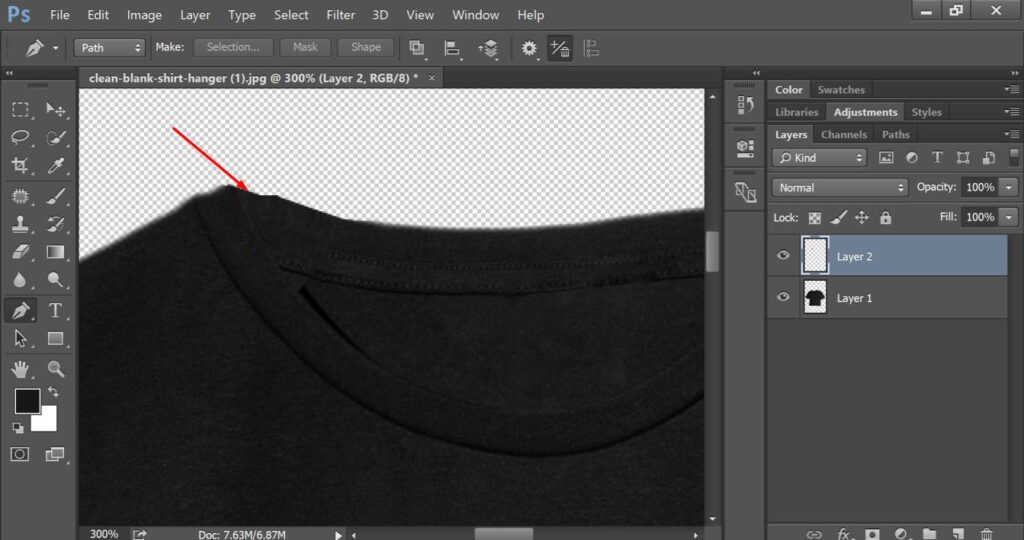
You can apply the healing brush tool and clone stamp tool to make it even better.
Step 6: Fix Wrinkles
Now, you have to pick the Spot Healing Brush Tool from the left side and click on the visible wrinkles.
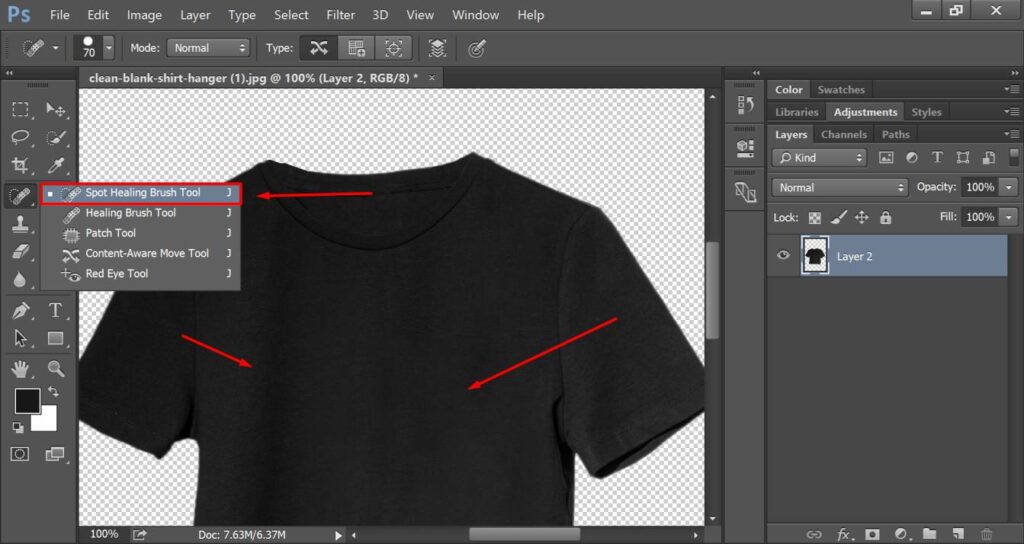
It will fix the wrinkles and bring your apparel photo in perfect shape. Now, it’s looking pretty much perfect. We just need to add a background.
Step 7: Add a solid color background
Click on the adjustment layer from below and choose the first option “Solid Color”.
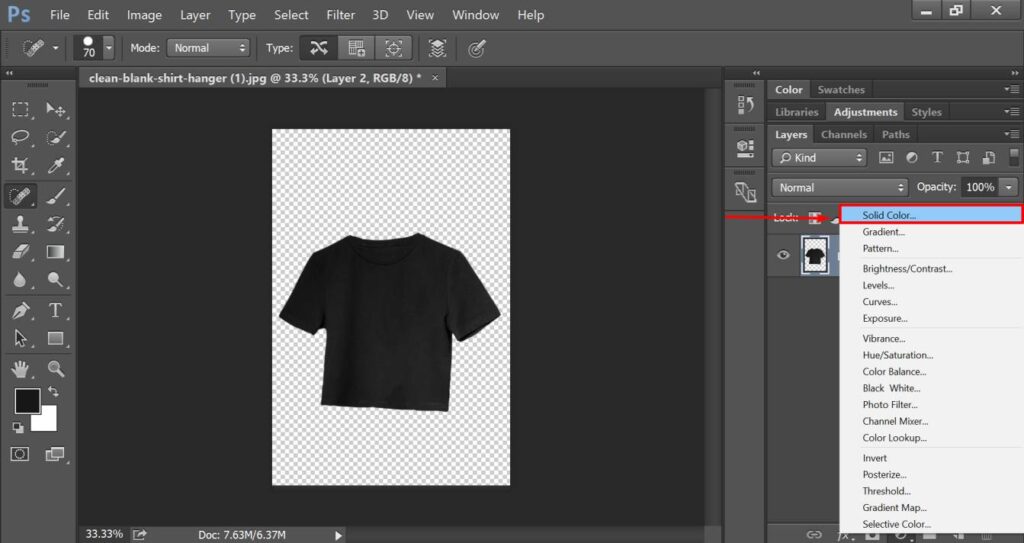
After that, you can choose the background color. For professional-looking apparel photos, you can choose a white background.
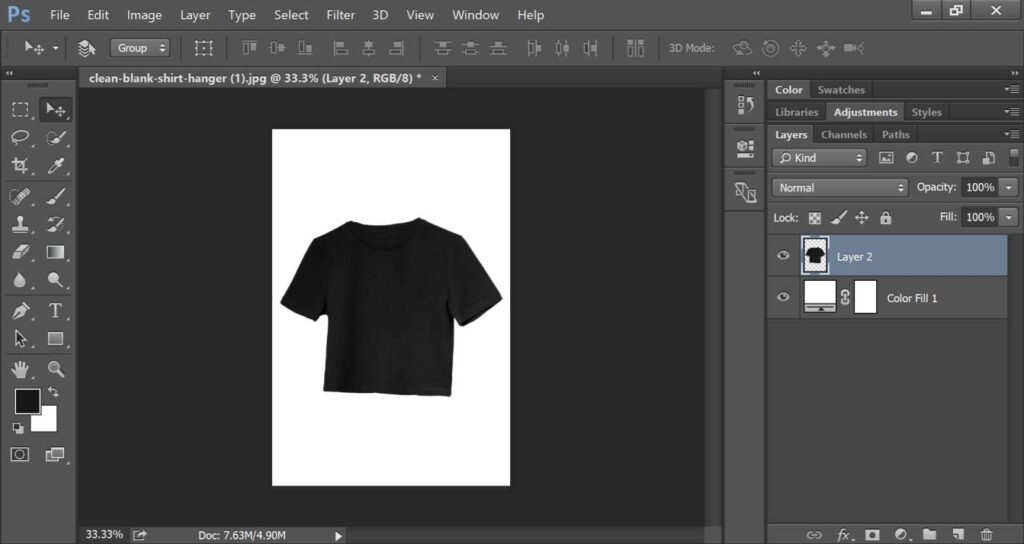
You can use the arrow tool to fix the position of the product. After doing that, you can go to the File option from the top and save the image.
3 Golden Tips
- Use flat lay photography technique to reduce the post-processing effort.
- Fix the wrinkle while shooting your apparel so you don’t need to do it later.
- Choose a solid color background that doesn’t conflict with the apparel color.
3 Common Mistakes
- Don’t forget to merge the copied layer after fixing the neck portion.
- Don’t forget to rotate the neck portion horizontally when replacing the other side.
- Do not use the quick selection tool in busy backgrounds to make sharp selections.
Who Can Be Beneficial Through Apparel Photo Editing?
- Photographers
- Clothing Sellers
- Fashion Brands
- Advertisers
- Garments Owner
- Amazon & eBay Sellers
- Clothing Photographer
- Fashion Photographers
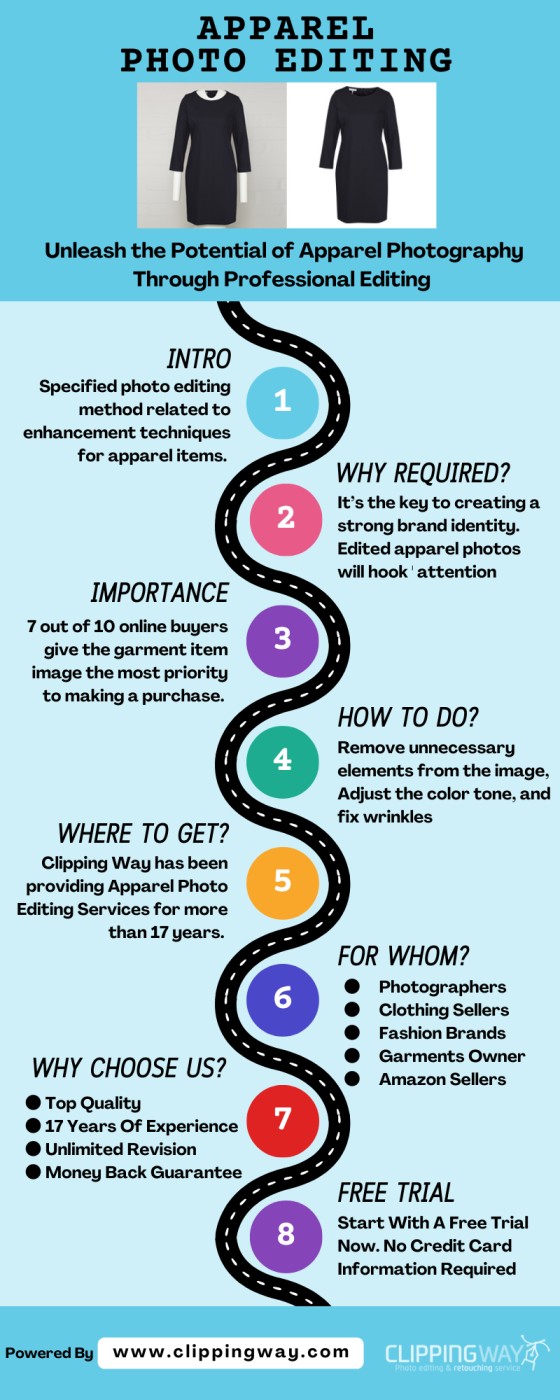
Why To Choose Clipping Way For Your Apparel Photo Editing?
While choosing a Photo Editing Service Provider for apparel photos, you need to consider the quality, experience, turnaround time, and portfolio of their work.
Clipping Way is a leading Photo Editing Company that has been providing image editing services for more than 17 years. They have got experience working with popular fashion brands like Gucci, Prada, Louis Vuitton, Ralph Lauren Corporation, Fendi, and Armani.
Having vast experience in this field, Clipping Way understands the requirements of fashion brands and clothing products. They have a capable team of skilled designers to fulfill the requirements to showcase apparel photos in the best possible ways.
100+ Highly qualified graphic designers make sure that you always receive delivery on time. Apart from that, a 24/7 image editing service is available to maintain tight deadlines and urgent delivery.
If you don’t feel satisfied with the image post-processing result, you can ask for unlimited revision. Alongside this, Clipping Way offers a 100% money-back guarantee.
So, you have to pay only when you are fully satisfied with the result. A free trial is available for you to have an overview of their apparel photo editing quality. You can start now with a free trial.
Wrap Up
At this point, we have discussed every essential aspect of Apparel Photo Editing. Now, you have to execute the above-mentioned tips on your appeal photography to get those benefits.
Clipping Way can assist you with that to achieve your photo editing requirements. Get a quote now and start your journey with us to improve and enhance your imagery.
FAQ’s
How can i edit clothes in a photo?
You need to open the clothes photo in Photoshop and remove unnecessary elements from the image. After that, change the unsuitable background and adjust the color tone. Also, fix the brightness and contrast to provide the finishing touch.
What is fashion photo editing?
Fashion Photo editing technique is used for fashion photography to improve the image appearance, color tone adjustment, brightness, and shadow control. It removes unwanted elements from the image.
How do fashion photographers edit their photos?
Fashion Photographers use Adobe Photoshop and Lightroom for the post-processing method of your image photos. Most of the time, they outsource their image to a professional image editing company such as Clipping Way to do the task.
How can i edit my clothes online?
You can choose an online image editor like Fotor or Canva to edit your clothes online. But they don’t have comprehensive features. You should use Photoshop to edit clothing photos professionally.
