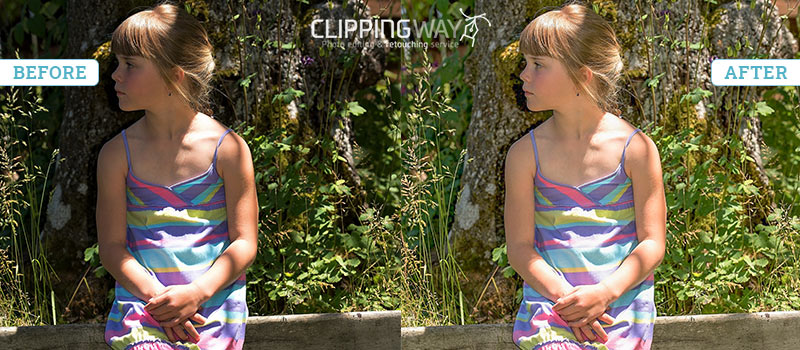
When you are shooting photos in daylight, harsh shadows can damage your photography. On many occasions, visible harsh shadows ruin the entire image. While shooting outdoors, you can’t control the shadows. Thankfully, you can fix that in post-processing steps.
In this article, we are going to show you how to remove shadows in Lightroom. After reading this article, you can fix those of your photographs that are ruined by harsh shadows. This article is going to assist those photographers who are used to shooting outdoors.
Why Do You Need to Remove Shadows from Images?
Suppose you’ve captured a perfect picture with the perfect alignment of the subject. Everything is just perfect apart from some unwanted shadows in it.
It will interrupt the details you are willing to showcase. This is where Ecommerce Product Photo Editing becomes more than essential. By removing those unwanted shadows, you can make your image look more professional, eye-catching and attention-grabbing.
For any type of Photographer, crystal-clear images are mandatory to impress viewers. Removing unnecessary shadows will take your image to a new level.
As a result, you will be able to produce more engaging images. Eventually, you will be able to get more clients and generate more revenue as a professional photographer.
Remove Background Shadows in Lightroom: Harsh Shadow Removal
Step 1: Open your photograph in Lightroom’s develop mode
First of all, you have to start by opening your image in Lightroom’s develop mode. We are going to use the below image for this tutorial.

As you can see, there are lots of unwanted shadows in the image that are ruining the beauty of this beautiful picture.
Let me show you, shadows in lightroom removing without losing any details about the image?
Step 2: Expand basic correction
In this step, we have to click on the “Basic” option from the right side to expand the basic menu.

Basically, we have to adjust the Exposure, Contrast, Shadows, and Highlight to remove shadows from faces. You have to start from the shadows. To fix the shadows, you need to increase the shadows value to the highest +100.
After that, you have to adjust the highlight. You can decree the highlight around -50 to -70 considering the picture type.
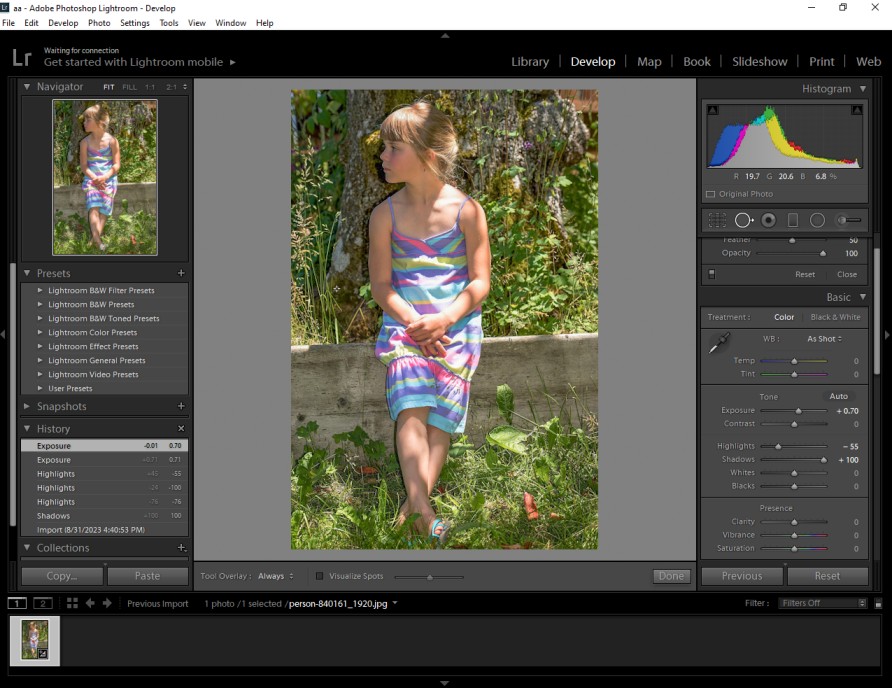
For this image, I have set it to -55. If you have a sky in the background of your image, you should not decrease the value too much. It will make the image look darker.
Next to that, you have to fix the exposure. You can set it around +0.70. Last but not the least, You have to make some adjustments to the contrast. Don’t decrease it too much. Otherwise, it will negatively affect your image.
Step 3: Click on adjustment Brush
In this step, you have to click on the adjustment brush option from the right side. You can get the option from here.
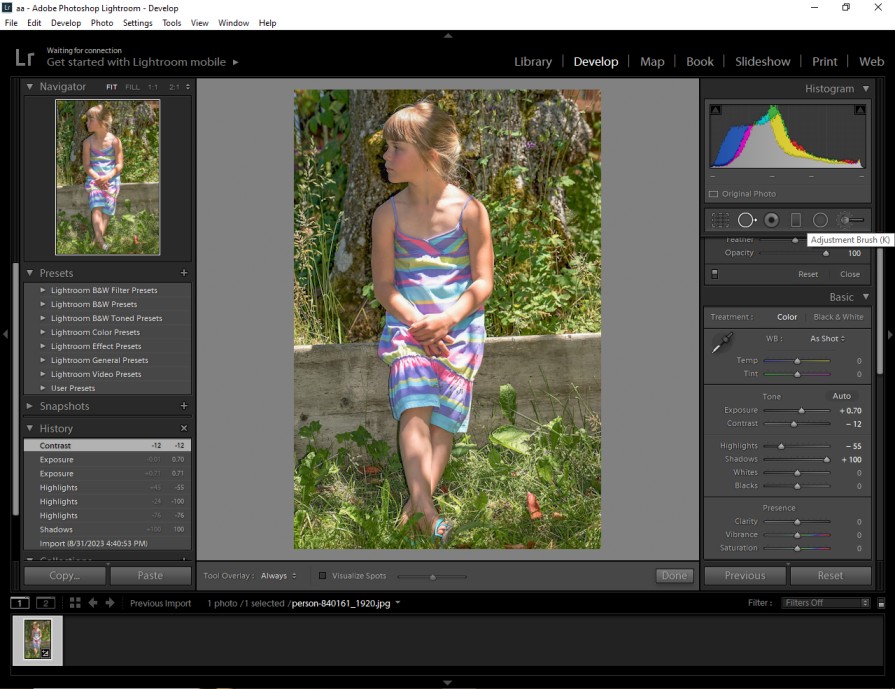
Then, zoom in on the image and enable the overlay option. You just need to click on the “O” from the keyboard to enable overlay. The command is similar for both Windows and MAC.
Next to that, you have to enable the “Auto Mask” option by scrolling down from the right side.
You can get it from here.
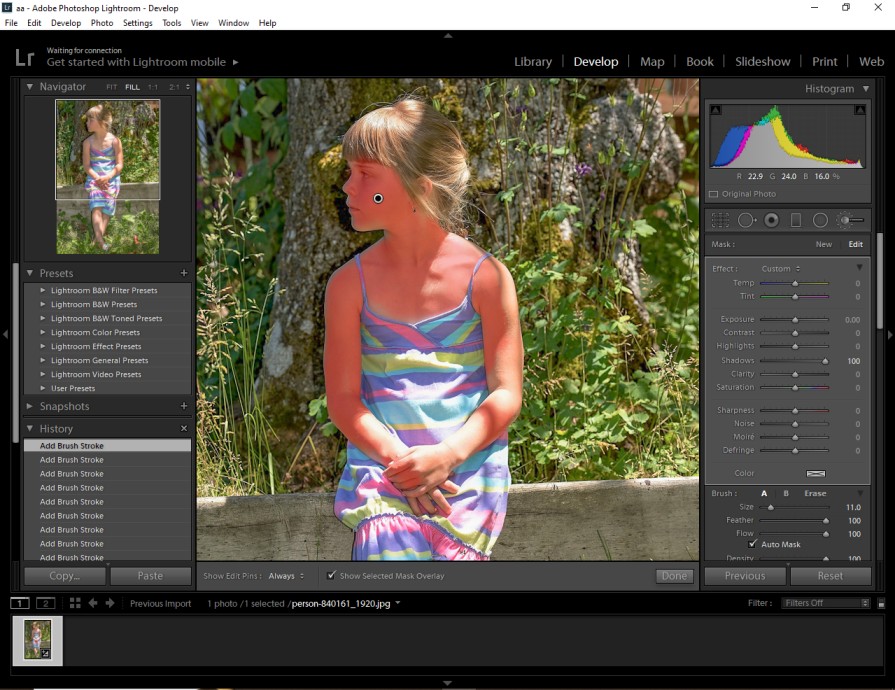
After that, you have to brush on your subject from where you want to remove the shadows. You need to be careful about not marking the bright area. After that, you have to disable the overlay and click on the “Turn Off Tone Curve Adjustment” from the right side.
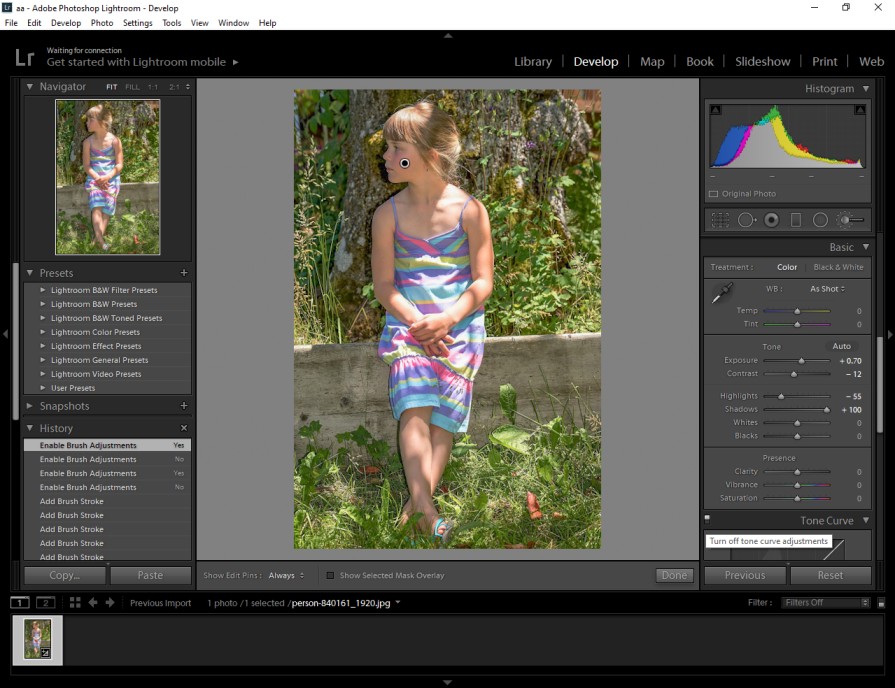
Now, we are just one step away from getting the final result.
Step 4: Add Warmth
Finally, we have to click on the color option once again and increase the Temperature just a bit. If you increase the temperature too much, it won’t match with the original tone. So, you have to adjust it considering the type of photos that you are working on.
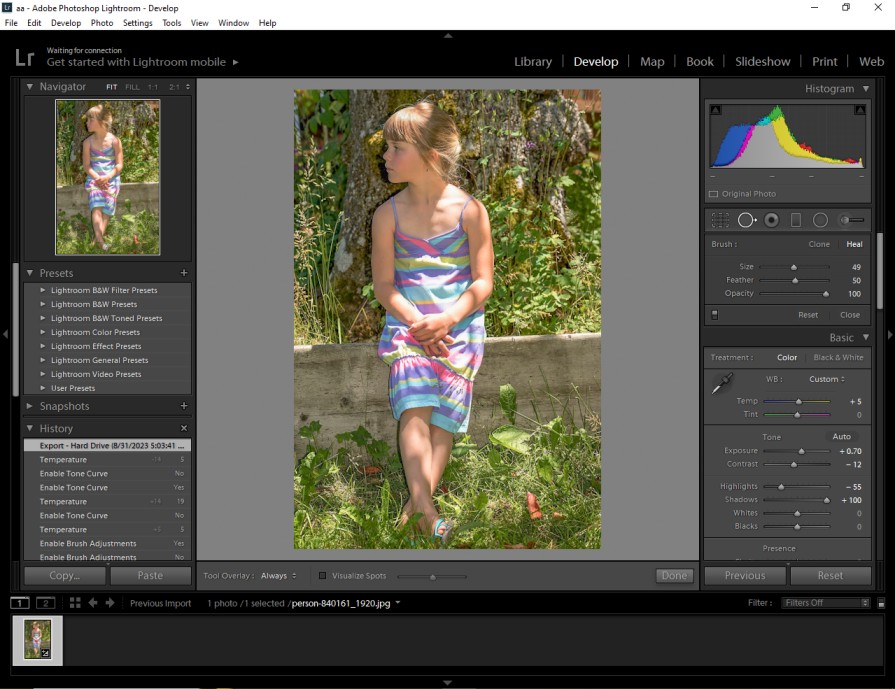
As you can see, the image looks much better compared to the previous one. Now, you just need to go to the export option to save the image.
How was your experience about following this Lightroom Shadow removal tutorial? Hopefully, you have also been able to fix the unwanted shadows in your photos.
3 Tips
- Always increase the shadow value from basic shadow correction and adjustment brush shadow correction.
- While masking the image in Overlay mode, zoom in on the image from Navigator to get a better view of the shadows.
- Change the temperature in the last step based on the color tone and weather condition of your photograph.
3 Mistakes
- Don’t decrease the contrast by a big margin otherwise, it will make the image look burned out.
- Don’t decrease the highlights too much when you are working with a sky background.
- Don’t add the brush stroke to a corrected area. If you have done that, remove it using the erase option.
Summary
That’s all about how to remove shadows from an image. Hopefully, you have received in-depth knowledge of how to fix shadows using Lightroom presets.
Once you get to know about the basics of shadow correction, you will be able to fix any type of harsh and soft shadows. Now, you have to practice more and more to perform the process in the best possible way.
If you feel the need for Professional Photo Editing Services to enhance your photographs, don’t hesitate to try our service. We are available 24/7 to assist you.
You can start now with a free trial without any charge. Also, you can ask for a quote now to get special customized pricing for your image editing tasks.
FAQ’s
How do you remove shadows from photos in Lightroom?
You can use the adjustment brush tool and add warmth to the image to remove shadows in Lightroom.
How do i remove unwanted shadows from photos
Open the image in Lightroom’s develop mode. Then, apply the adjustment brush tool on the object to remove unwanted shadows from your imagery.
How do i remove shadows in Lightroom iPhone?
You can use the image adjustment and highlight option to remove unwanted shadows in Lightroom mobile using an iPhone.
How do i turn off shadows and highlights in Lightroom?
You need to go to the shadows slider from the basic panel to reduce or turn off shadows in Lightroom. Highlights options are also available within the basic correction.
Can Lightroom effectively remove shadows from my photos?
Yes, Lightroom offers powerful tools to eliminate shadows. It will enhance the overall visibility of your images.
How can i access the shadow adjustment tools in Lightroom?
In the Develop module, you can find the “Tone” section. You can adjust shadows using the “Shadows” slider to remove shadows from your images.
How does the “Black” slider impact shadows in Lightroom?
The “Black” slider adjusts the darkest tones in your photo. If you increase the value, it will add contrast to the image.
Can i target specific areas for shadow adjustment?
Yes, you can use the Adjustment Brush tool to selectively brighten shadows in specific parts of your photograph. You can also use the overlay option.
Will removing shadows affect other aspects of my image?
If you adjust shadows from the basic correction menu, it will impact the overall contrast and tone of your picture. Therefore, you need to focus on finding a balance that maintains a natural look.
How can i avoid losing detail in the shadows?
You need to monitor your adjustments. At the same time, you should avoid pushing sliders to extreme levels. It will prevent loss of details while editing images in Lightroom.
