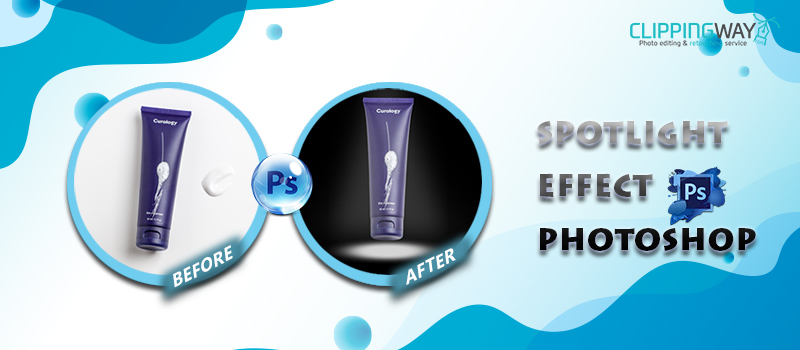
When you want to highlight a particular object, using a spotlight is the best method to do that. It is the perfect way to grab viewers’ attention. Photographers can also use this trick to attract viewers toward a specific object in a picture. You don’t need to have a real spotlight for that.
Using Photoshop, you can easily create a spotlight effect. You can apply this method for portrait photography and product photography. In this article, you are going to learn the two best methods to create spotlight effect Photoshop.
You can follow this tutorial to create a spotlight effect without having superior knowledge of Photoshop. Here’s the first method.
How to Create Spotlight Effect Photoshop for Portrait Photography
Step 1: Open image in Photoshop to create spotlight
First of all, we are going to start with creating a spotlight effect in Photoshop for portrait photography. To do that, we should open the image in Photoshop. Then, press CTRL + J to copy the entire image in a new layer.
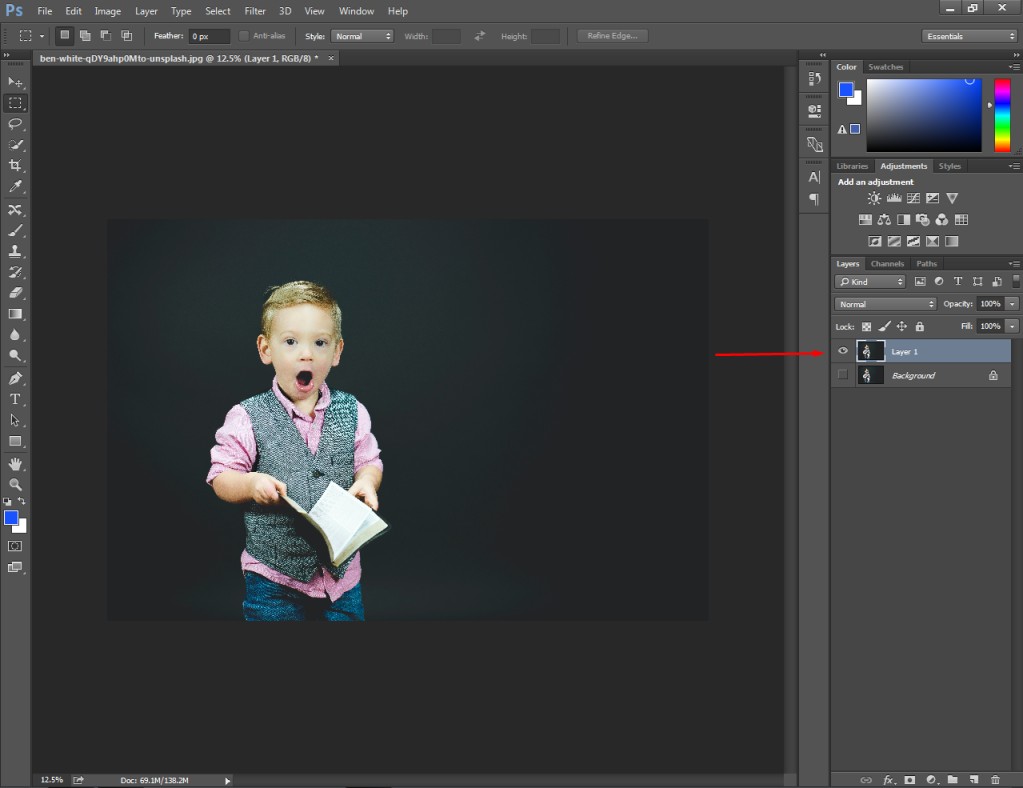
Then, we have to disable the original layer by clicking on the eye icon beside the layer. You need to select the copied layer and proceed forward.
Step 2: Take a solid color background
You have to click on the adjustment layer option from the layer panel to begin the spotlight effect creation process in Photoshop. There will be lots of options. You have to click on the first one “solid color”.
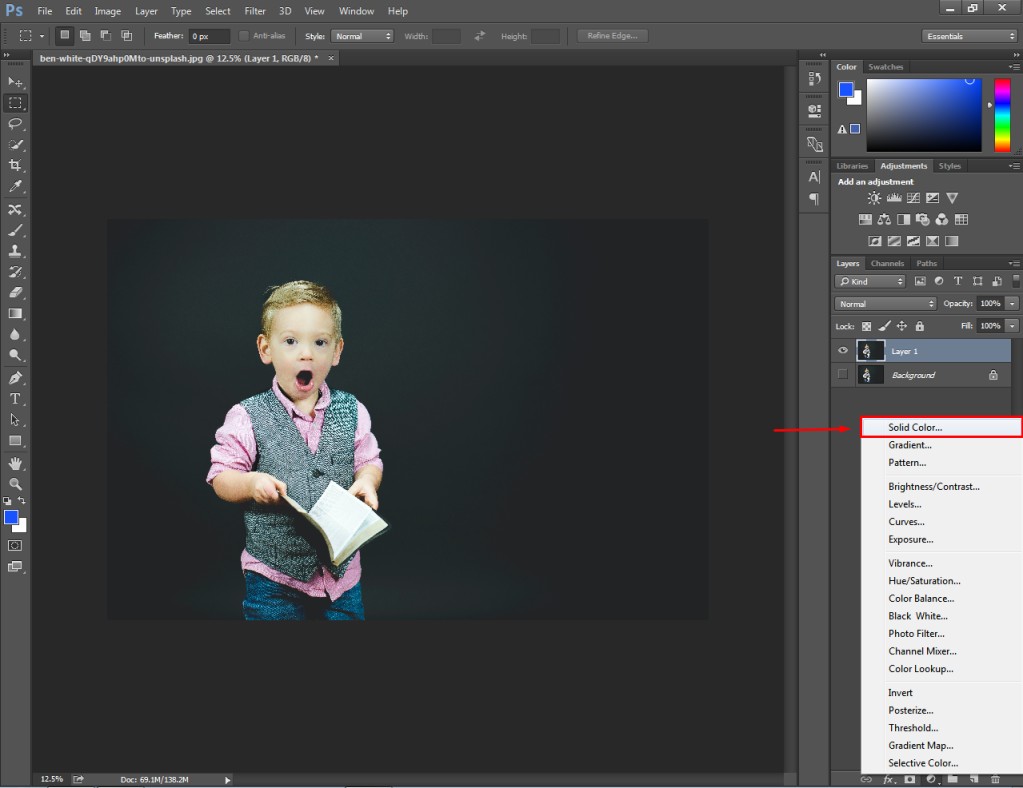
You will get the color picker option for the solid color background. You need to choose a Black color. Then, you can place the solid color background layer at the top.
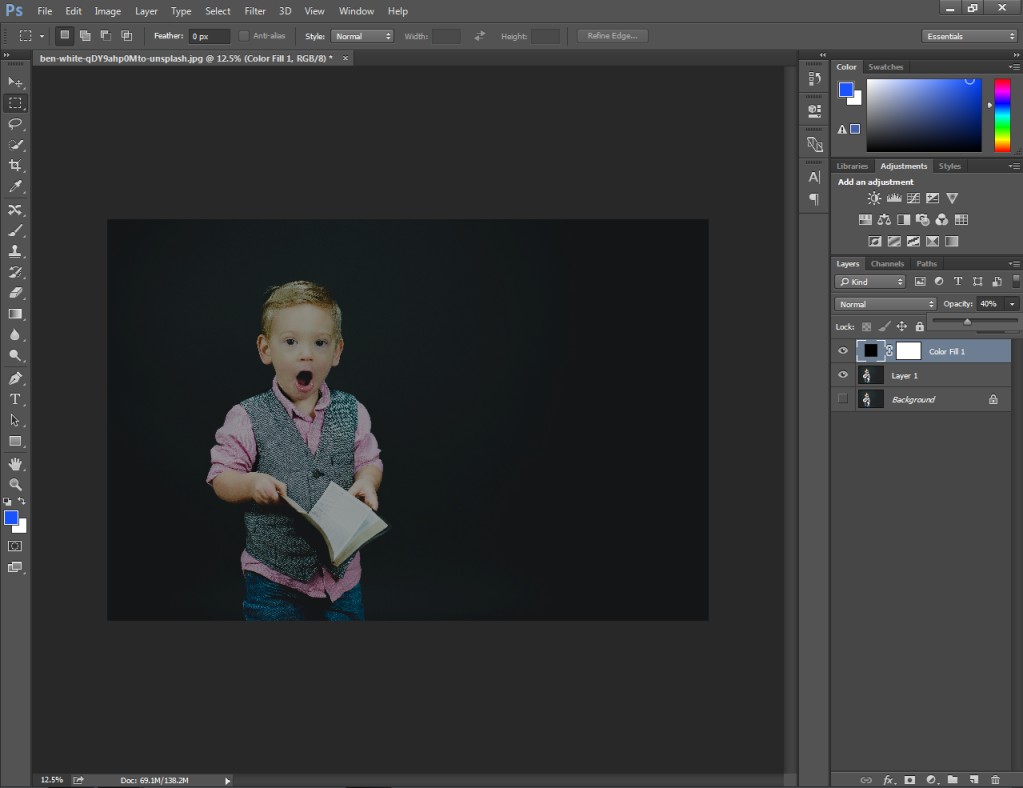
Now, we should move to the next step.
Step 3: Take a Selection Tool for spotlight
In this step, we are going to create a selection for the spotlight. We are going to do that with the Elliptical Marquee Tool. This tool is a suitable option to create a circle shape selection.
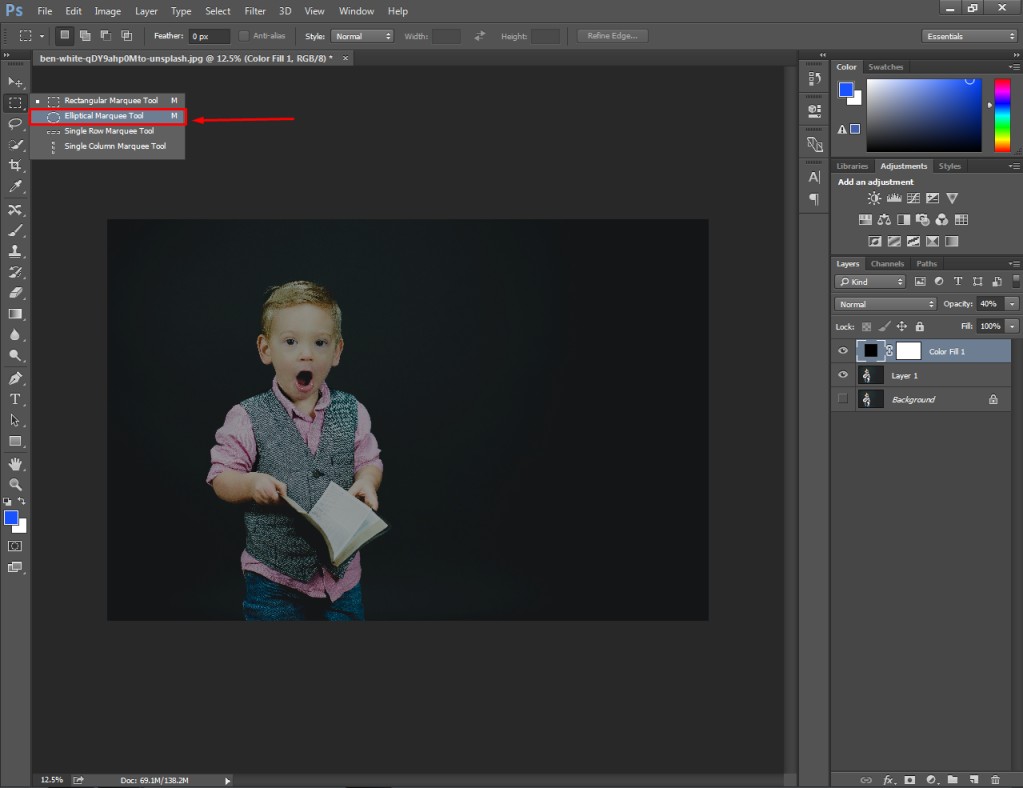
After picking the tool, we have to create a round shape and place it on the object where we want to highlight.
You can create the round shape with the marquee tool by clicking on the left key and dragging the mouse to the bottom.

As we want to highlight the face, we have placed it there.
Step 4: Select mask and apply Brush Tool
Click on the mask icon of the color fill layer. White and black colors should be selected on the left side. Here you can see the sample.
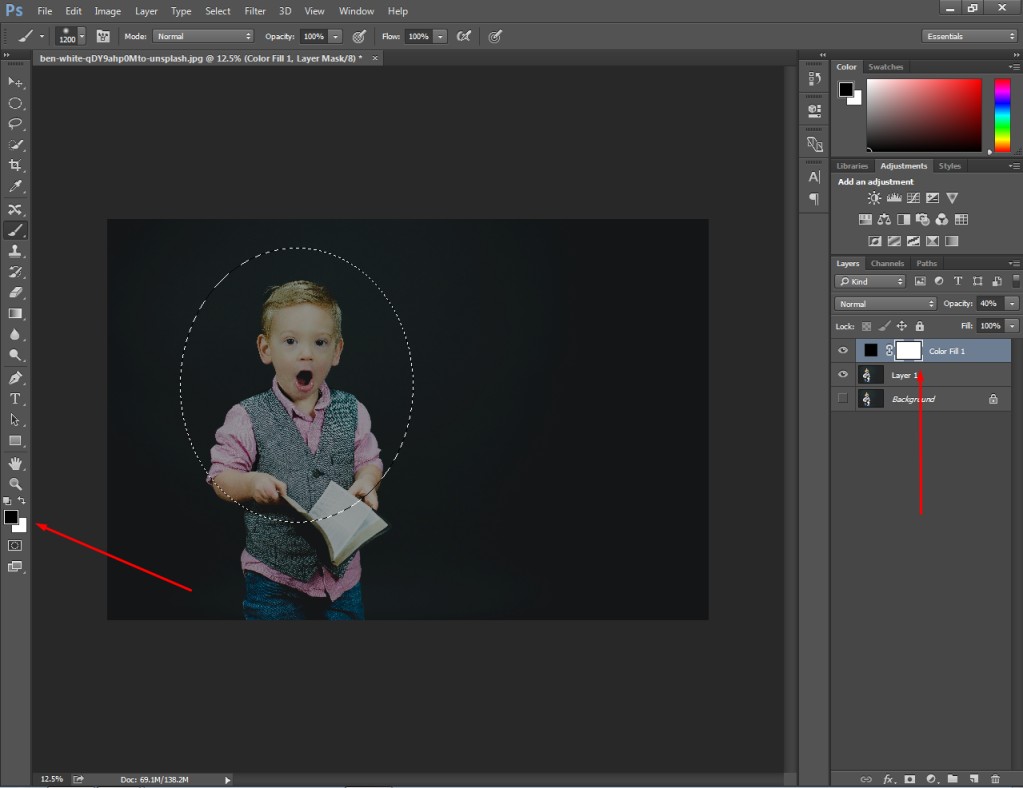
After that, you have to select the brush tool from the toolbar. You will get it here.
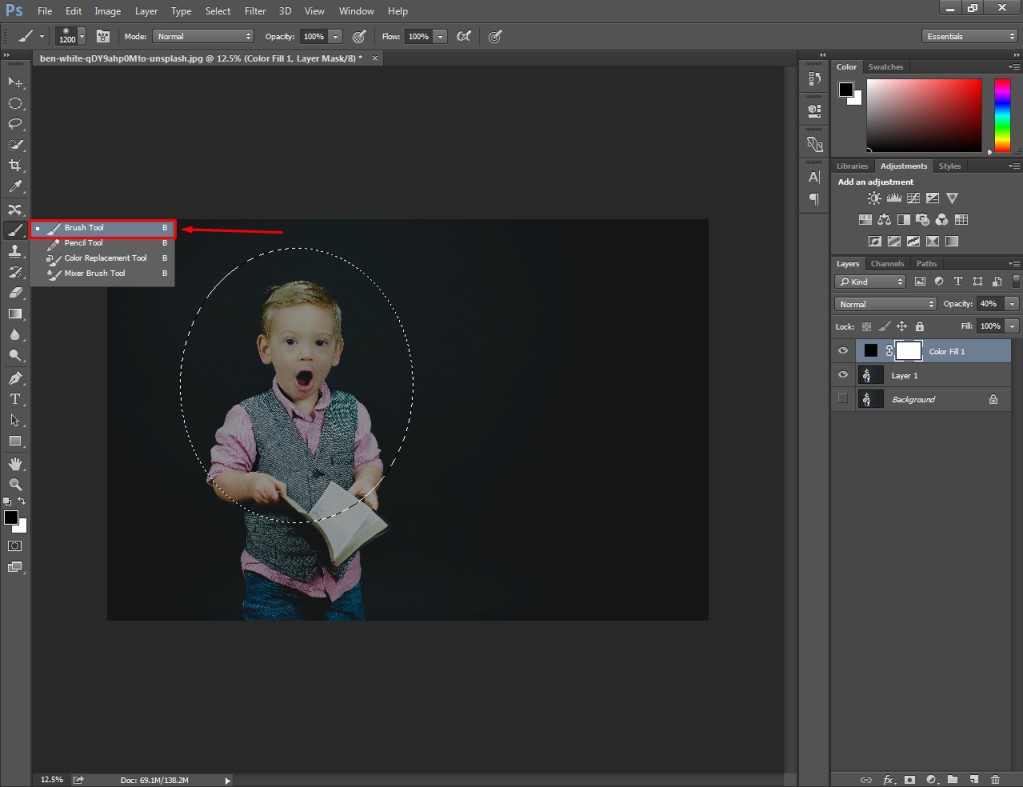
Next to that, you just need to left-click on the mouse and paint over the selected area. It will highlight the selected areas as you can see in the below image.
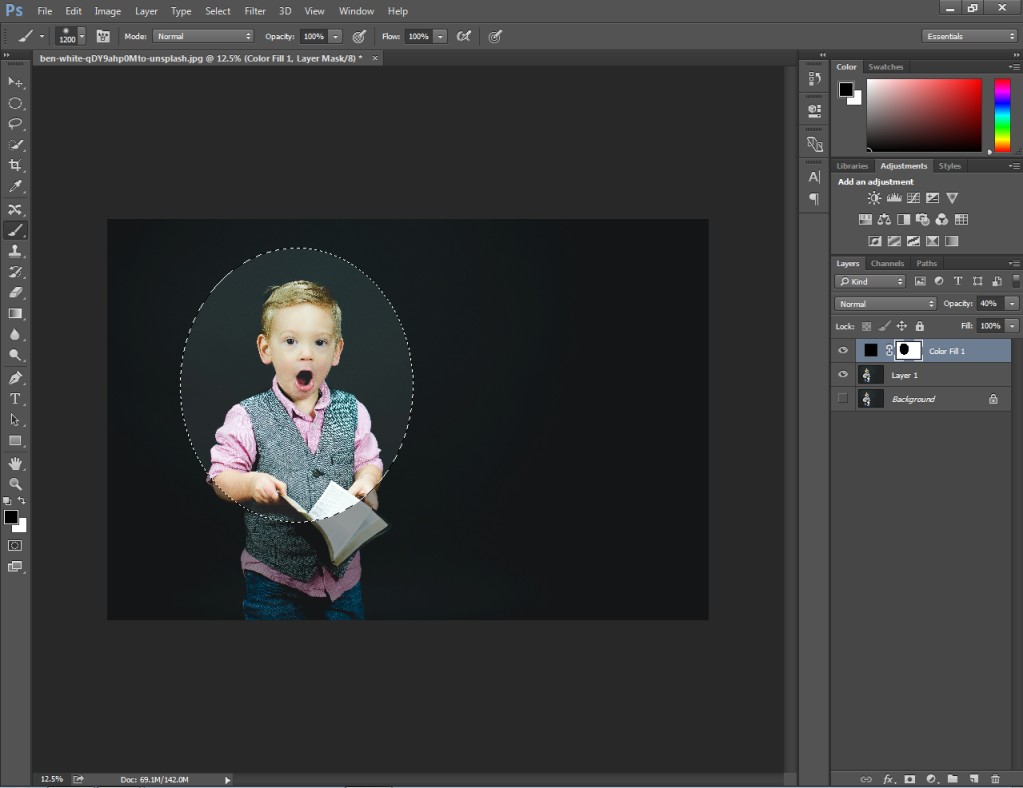
Now, the image is almost ready.
Step 5: Hide Selection and Save the Image
You just need to press CTRL + D to hide the moving dotted lines.

Finally, we have successfully created a spotlight effect in Photoshop. Now, the object is highlighted to get the viewer’s attention. Using this Photoshop step-by-step spotlight creation tutorial, you can also attract viewers to your photography.
Now, let me show you how to create an attractive spotlight effect in Photoshop for product photography. It will be highly beneficial for product photographers and online sellers.
How to Create Spotlight Effect Photoshop for Product Photography
Step 1: Open product photo to create spotlight
First things first, you need to begin by opening your product picture in Photoshop. We are going to use the below image for this tutorial.
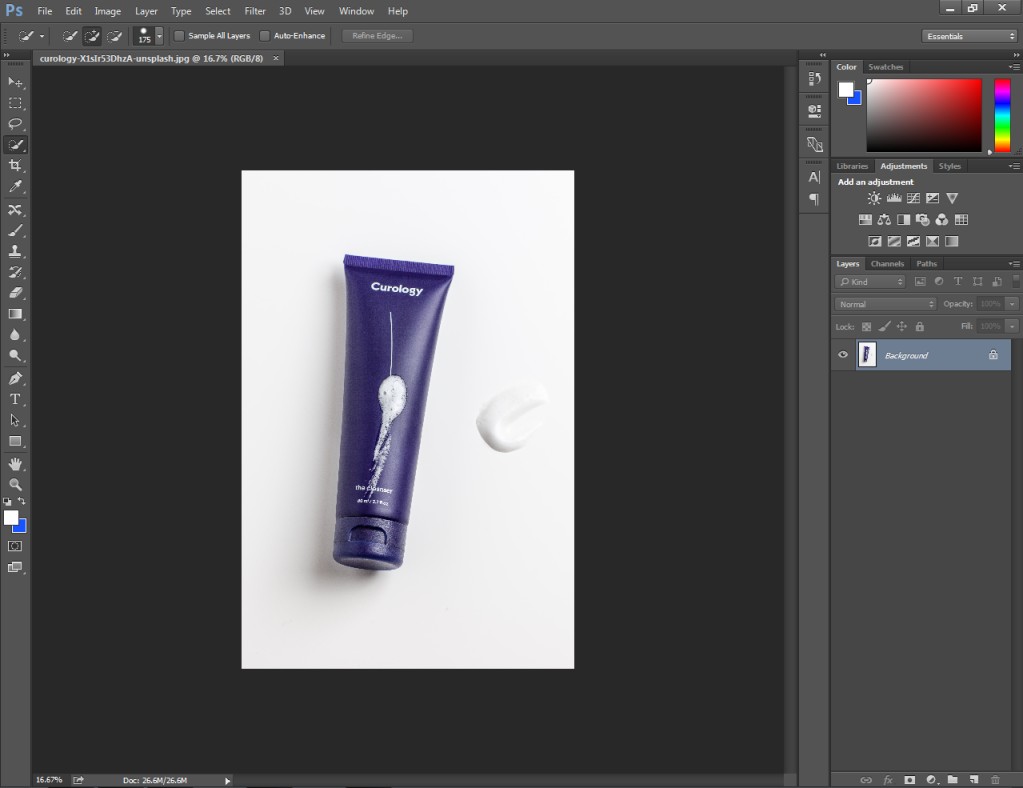
Then, you have to unlock this layer. To do that, simply select the lock icon located on the layer.
Step 2: Separate product from background
To create spotlight effects for E-commerce products, you need to separate the product from its background. So, we have to select the product. We are going to use the quick selection tool for this one.
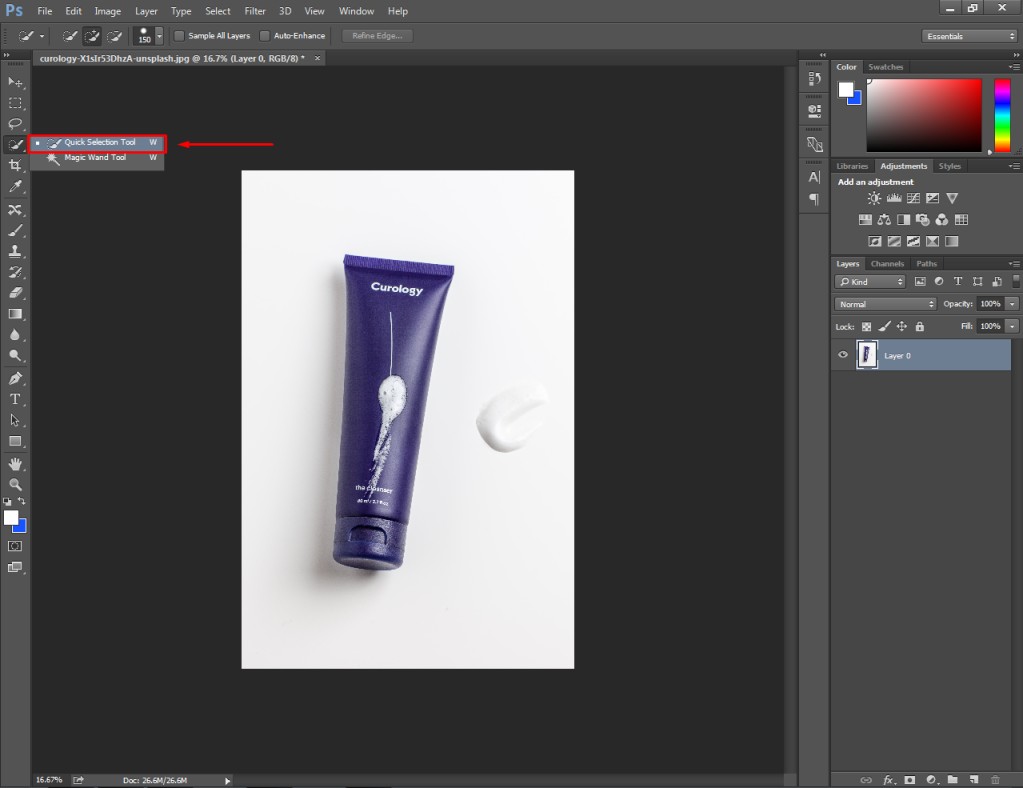
After picking the tool, you need to hold the left mouse key and move the mouse over the product. Once you select the product, you have to press “CTRL + SHIFT + I” to reverse the selection. Then, press the “delete” key to remove the background.
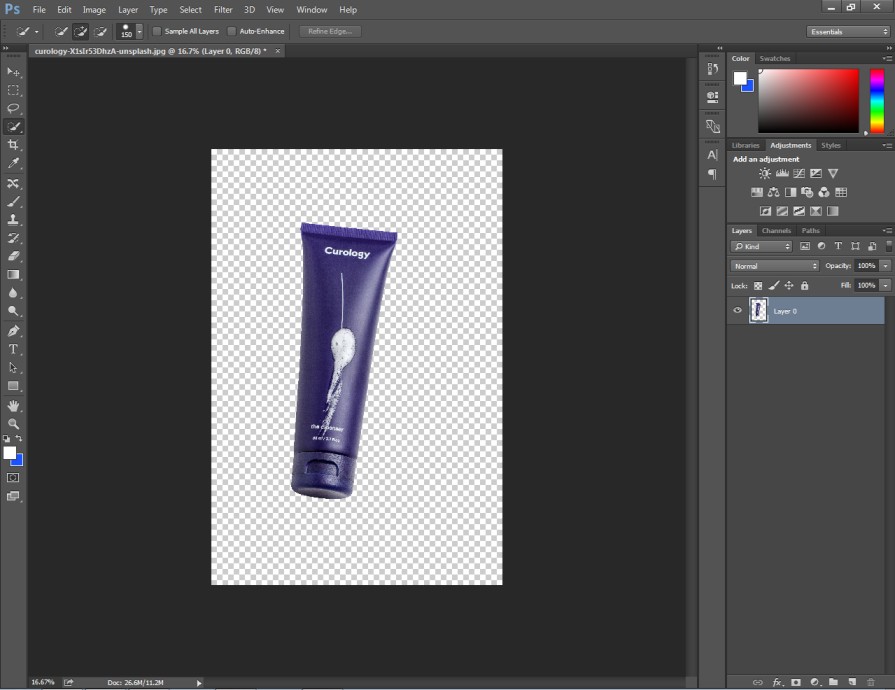
Now, jump to the next step.
Step 3: Reposition the object
To create a perfect spotlight effect, we have to place the product right in the middle. You can press CTRL + T to start the free transform effect. Then, you need to reposition the object in the center.
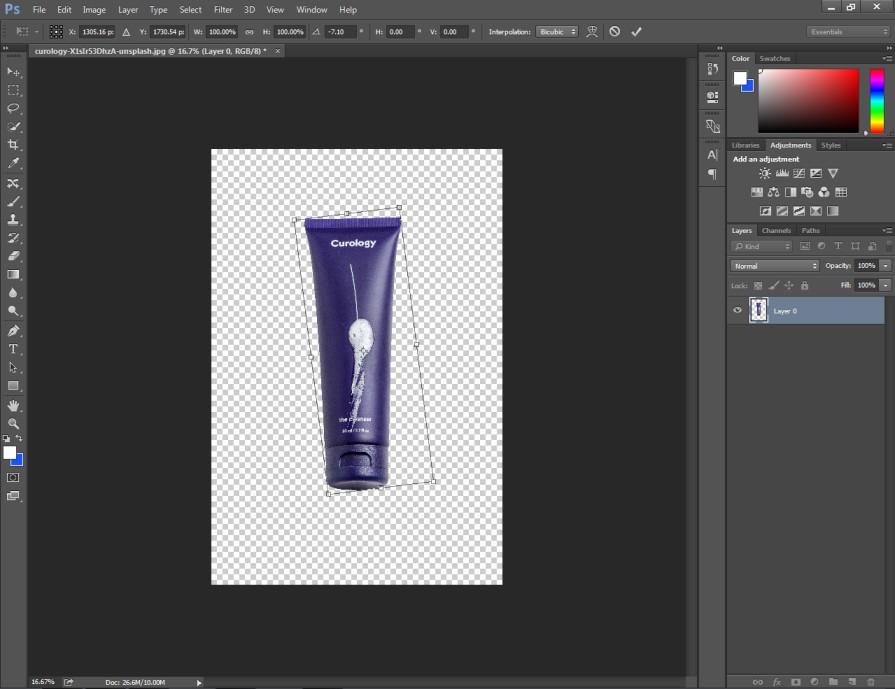
When you are okay with the placement, press the Enter key to confirm the changes.
Step 4: Add a black background
Black is the most suitable color to create the realistic spotlight effect. Click on the solid color option from the adjustment layer options.
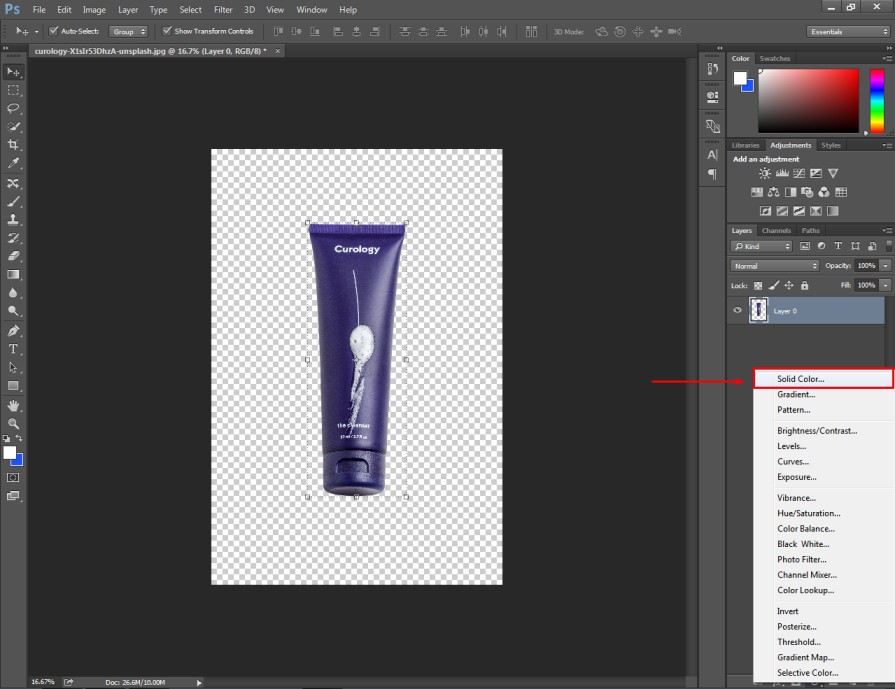
Then, you have to choose black from the color-picking box. You will get your image in this form.
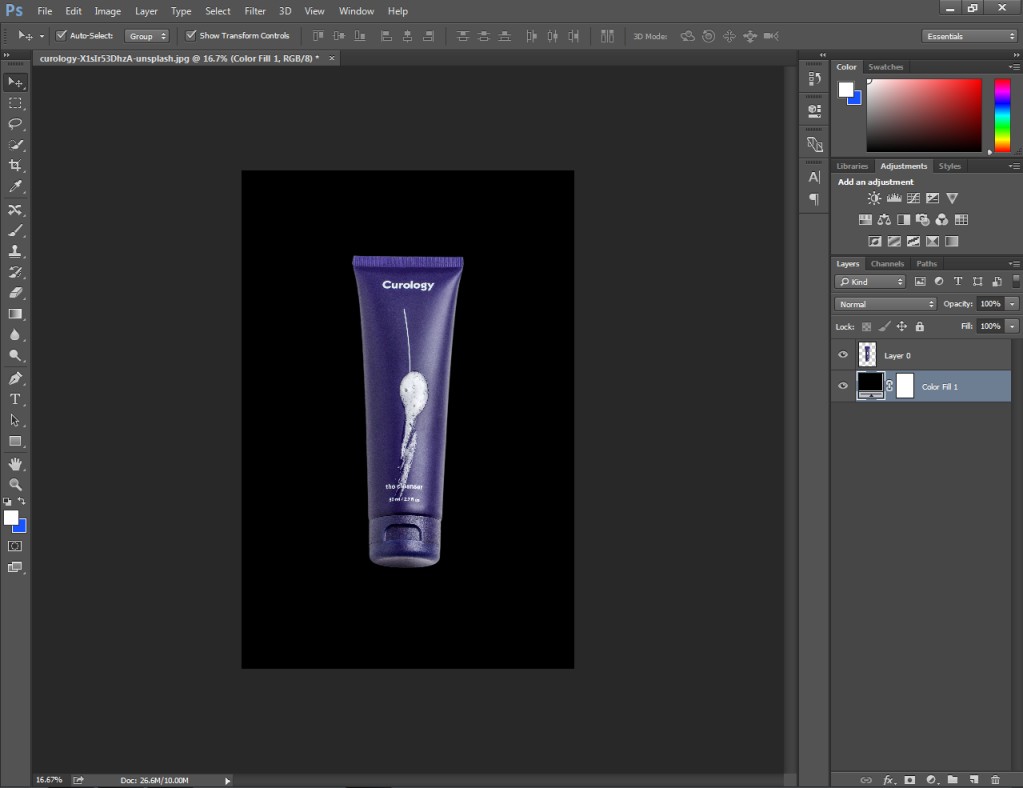
Now, we are going to create the spotlight effect.
Step 5: Highlight the product
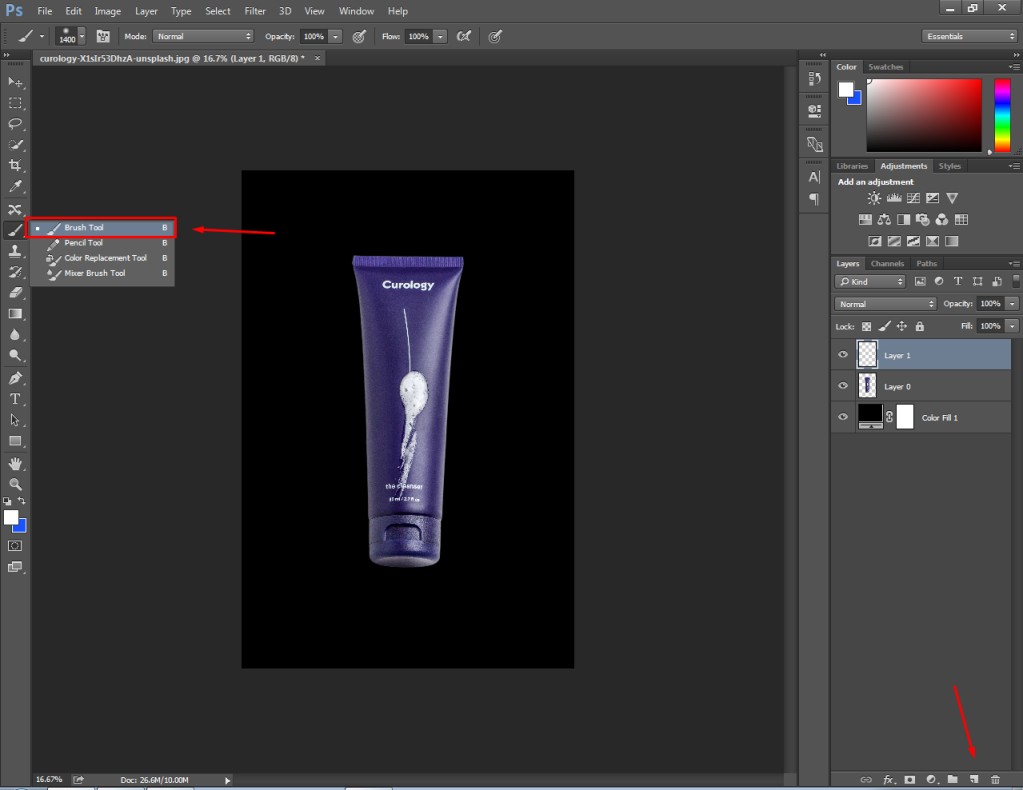
You need to click on the “Create a new layer” option from the layer panel. It will create a blank layer with a transparent background. Then, select the brush tool from the left side and increase the size of the brush.
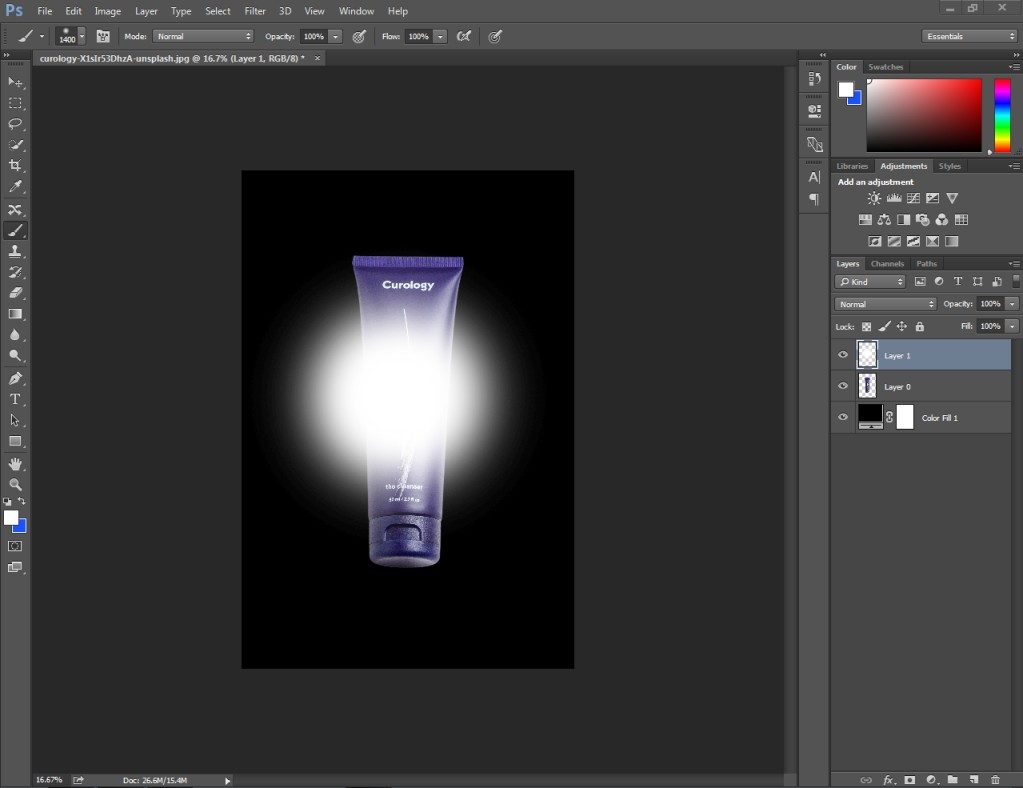
Then, we have to select the white color and click on the middle of your photo just like this one.
Then, once again you have to enable the free transform option. Then, compress the white portion and place it at the bottom of your product. It should look like this.
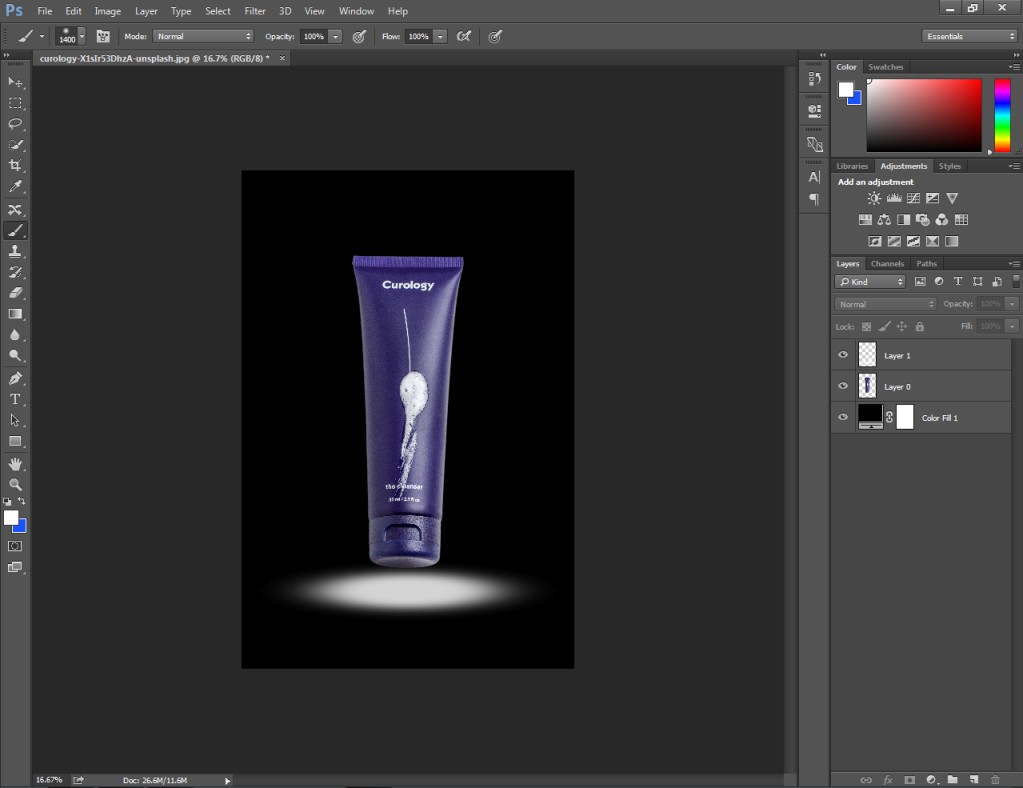
It enhances the overall appearance of the product.
Step 6: Create spotlight using the Pen Tool
Once again, you need to create a new blank later. Now, you have to pick the pen tool from the left side. Pick it from here.
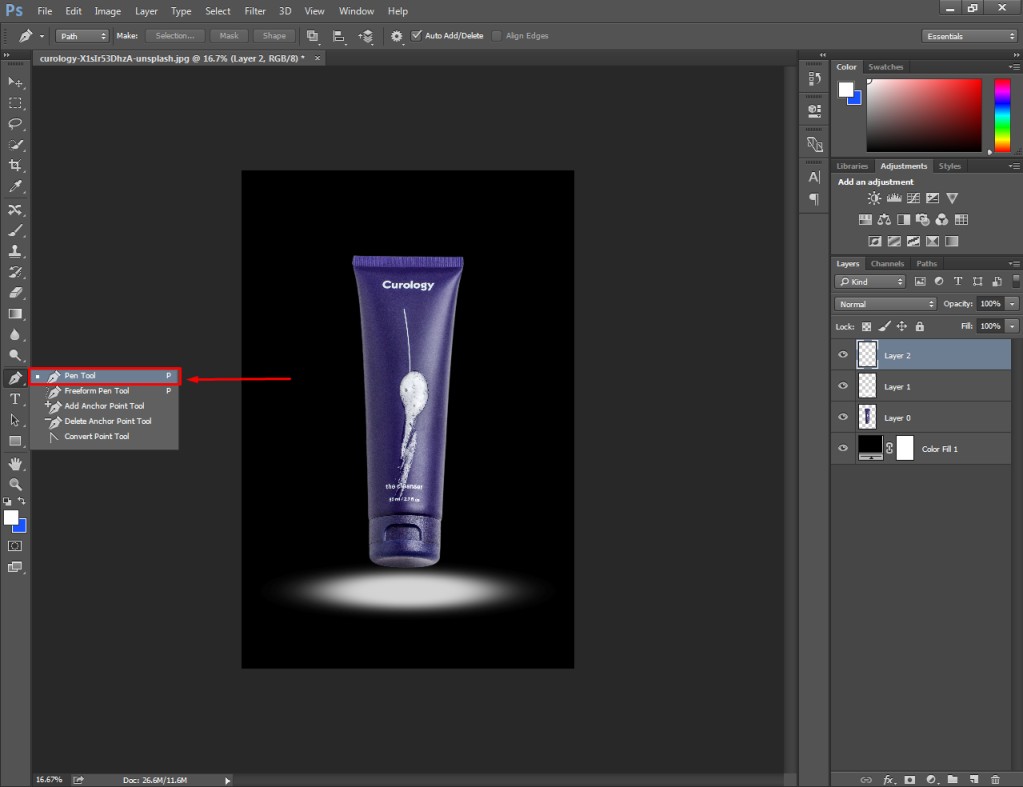
At this stage, you need to create a triangle shape using the pen tool. You will get the shape option at the top.
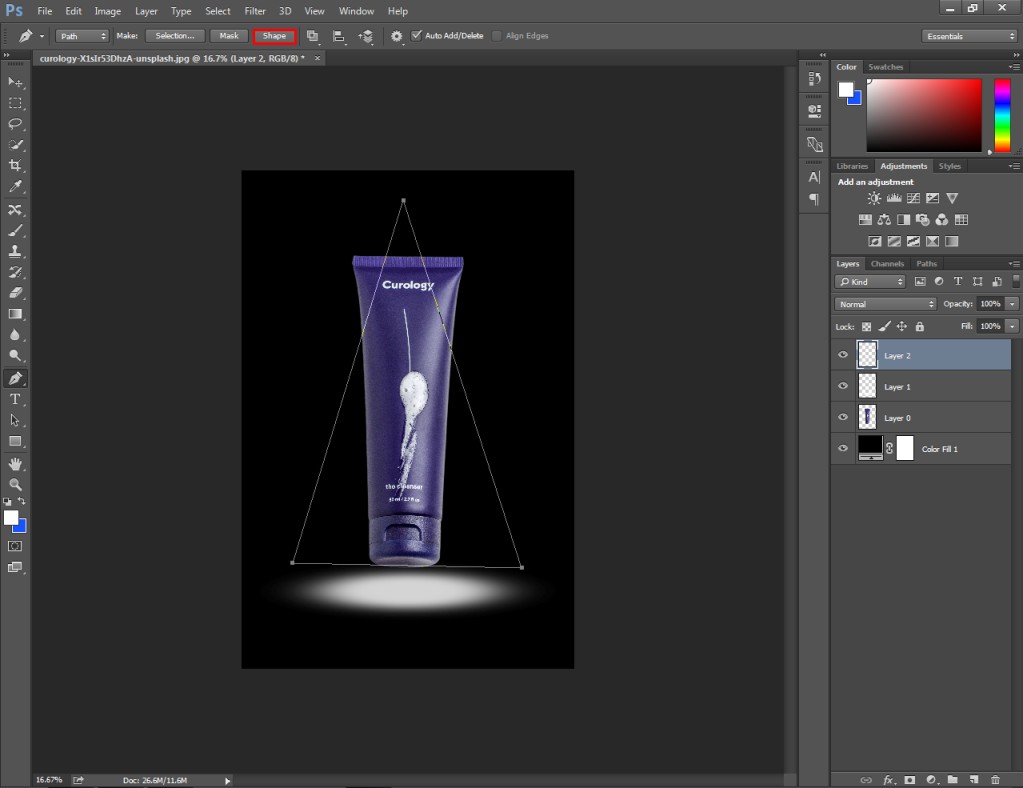
Step 7: Add Gaussian Blur
Now, it’s time to add Gaussian blur. It will make the triangle look like a realistic spotlight.
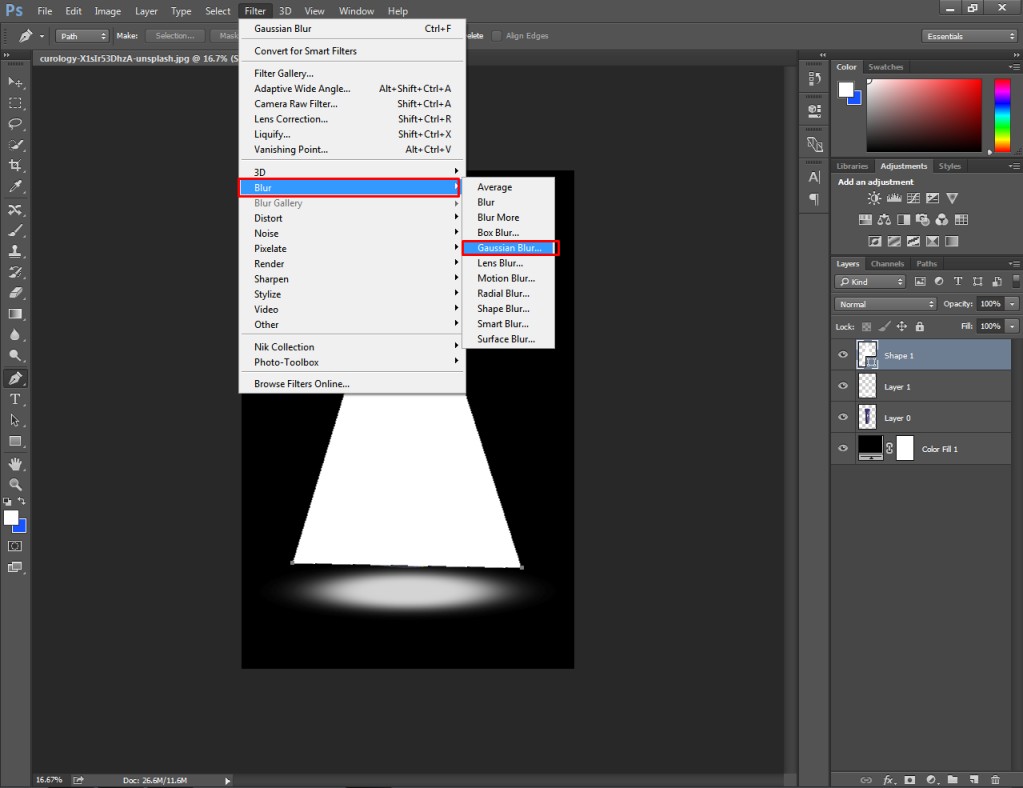
You have to set the Gaussian blur around 350 pixels.
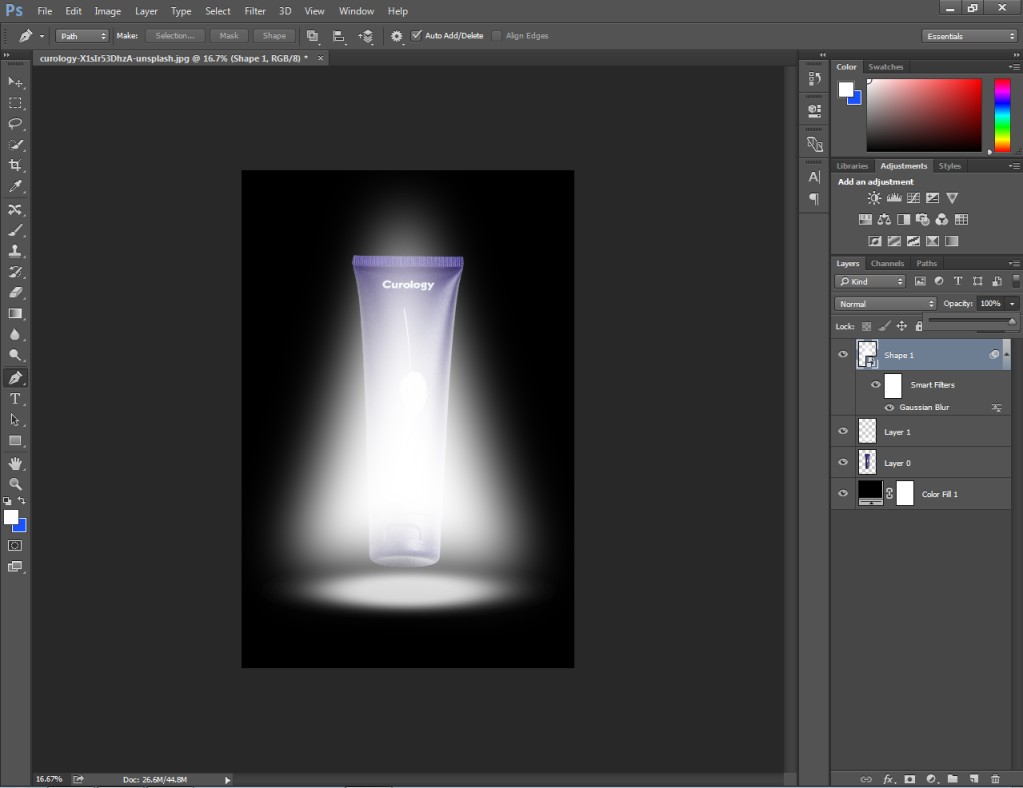
Now, we just need to reduce the opacity of the layer.
That’s it.
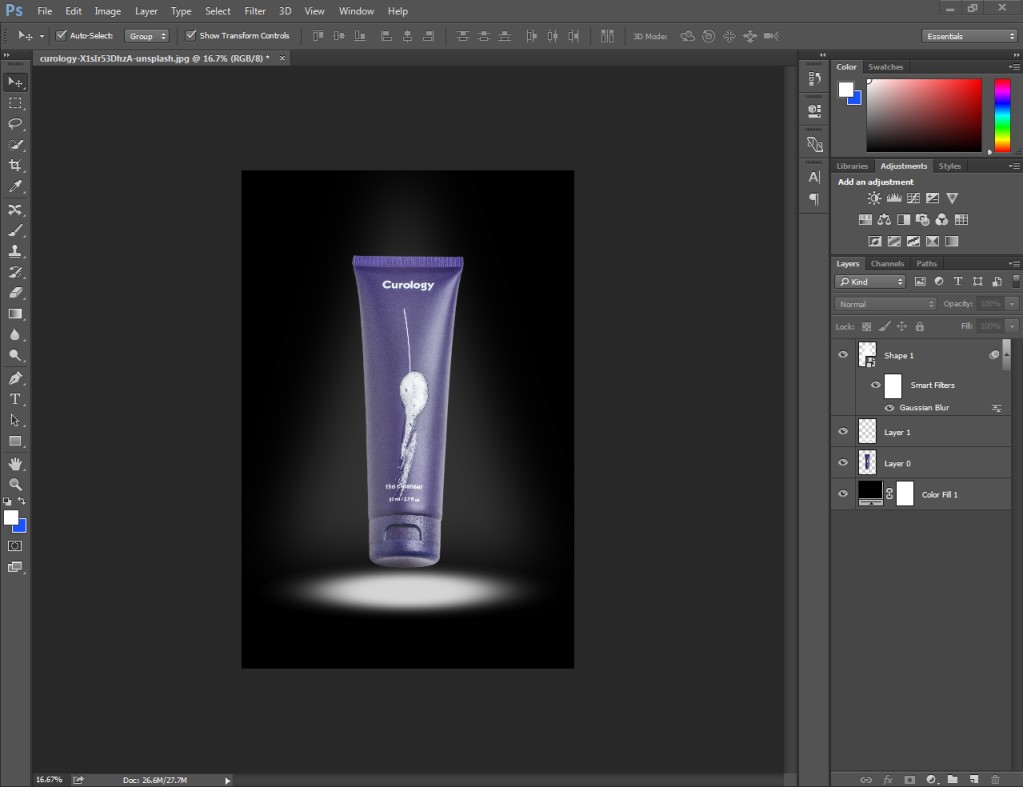
Ultimately, you should get a perfect spotlight effect for your image. Now, you can start creating highlight effects for any pictures. Here are some bonus tips to enhance your Ecommerce Image Editing.
3 Tips To Follow
- Pick the selection tool according to the object’s shape.
- Take a separate layer to highlight the product.
- Create a triangle with the pen tool on a new layer.
3 Mistakes To Avoid
- Do not apply the brush tool without selecting the spotlight area.
- Do not set high opacity after applying a Gaussian blur.
- Do not apply the spotlight effect without removing the background.
Conclusion
We have come to the final section of how to create a spotlight effect in Photoshop for any picture. Now, you can get the effect both for portrait photography and product photography. Hopefully, our bonus tips will make your image editing even better.
However, if you feel the need for assistance from Professional Photo Editors, don’t hesitate to contact us. Clipping Way will assist you get the best version of your imagery.
FAQ’s
Can i customize the shape of the spotlight in Photoshop?
Yes, you can customize the shape of the spotlight effect using the pen tool. You just need to create different shapes using the tool before you apply the Gaussian blur.
Are there any pre-made spotlight effect presets in Photoshop?
No, there is no built-in spotlight effect preset available in Photoshop. But following the above tutorial you can easily create a spotlight effect in Photoshop.
How can i add color to the spotlight effect in Photoshop?
You can add different colors to the spotlight effect using the brush tool. In that case, you need to create a new transparent layer to add color.
Is it possible to create multiple spotlights for an image using?
Surely, you can create several spotlights for an image in Photoshop. On that note, you have to create multiple shapes with the pen tool.
