When it comes to the best application for image post-production, Adobe Photoshop is right at the top. Photoshop comes with hundreds of photo edition tools with exciting features.
Professional photographers and online vendors use Photoshop to make their product photography ready to upload online.
One of the most common requirements of professional photographers is Background Removal Service. According to the stats, more than 65% of online buyers get attracted to a product that doesn’t have any busy background.
It seems like you are willing to remove backgrounds using Photoshop. This article is going to assist you with that.
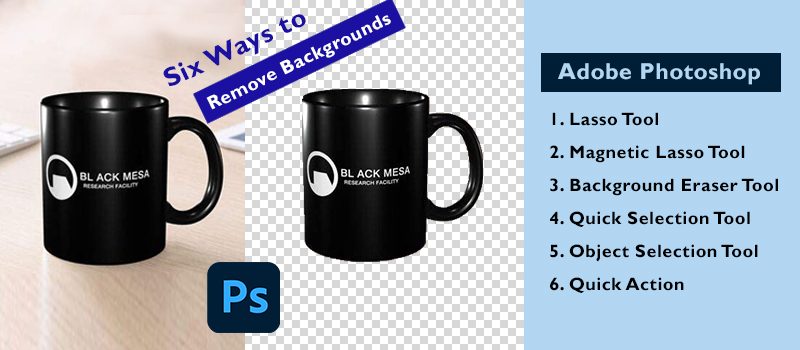
After reading this article, you will learn six ways to remove backgrounds in Photoshop 2025. It doesn’t matter which version of Photoshop you’re using. Surely, you can apply any of those methods in any Photoshop. Without making any more delay, let’s jump forward to the first method.
Method 1: How to Use Lasso Tool in Photoshop to Remove Background

Step 1: Open your image
To start the background removal process, you have to open your image in Photoshop. For this method, I am going to use the Lasso tool.
Basically, three types of lasso tools are available in Photoshop. To be more specific, we will utilize the Polygonal Lasso Tool to remove the background.
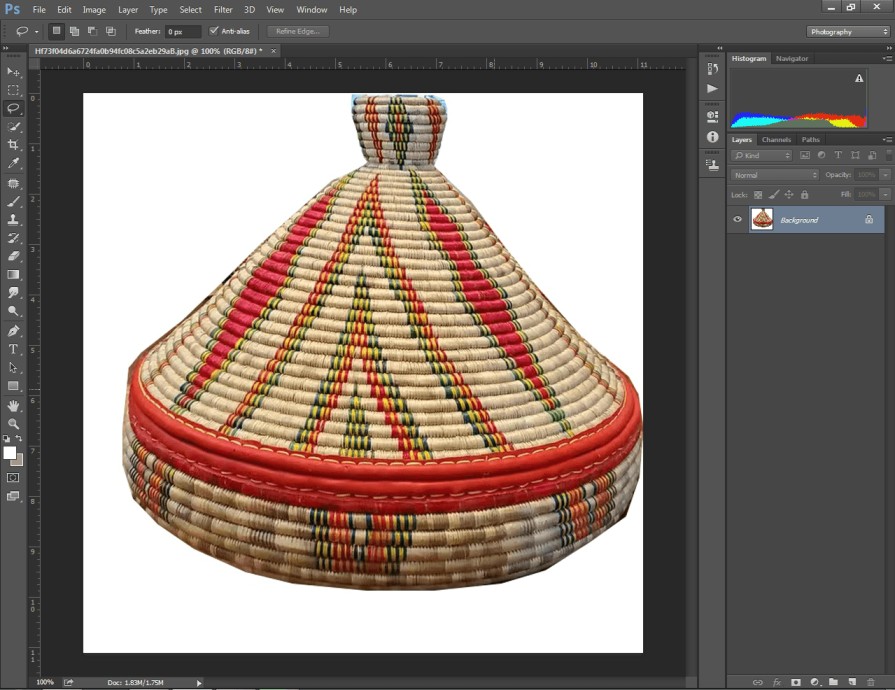
Using the above image, I am going to explain to you the process. If your product doesn’t have too many curved shapes, the polygonal lasso tool is a suitable and convenient option to choose.
Step 2: Pick Polygonal Lasso Tool
In the 2nd step, you have to click on the Lasso tool from the left side to get three different options. Also, you have to click on the “lock” icon from the layer to unlock the background layer. Here’s an example.
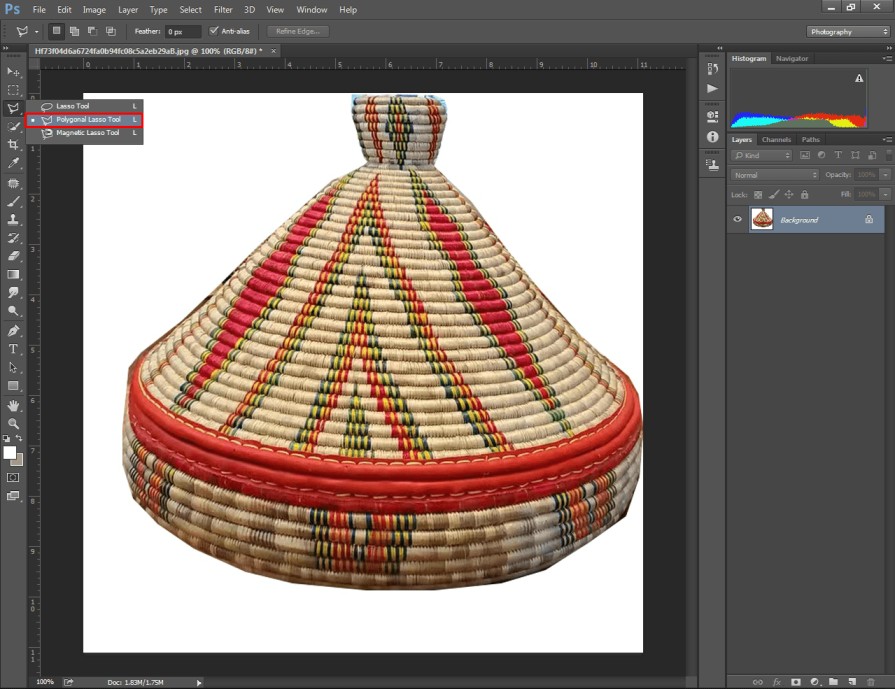
You have to pick the “Polygonal Lasso Tool” from the middle. After that, you need to zoom on the image and cover the object by creating lines around the product.
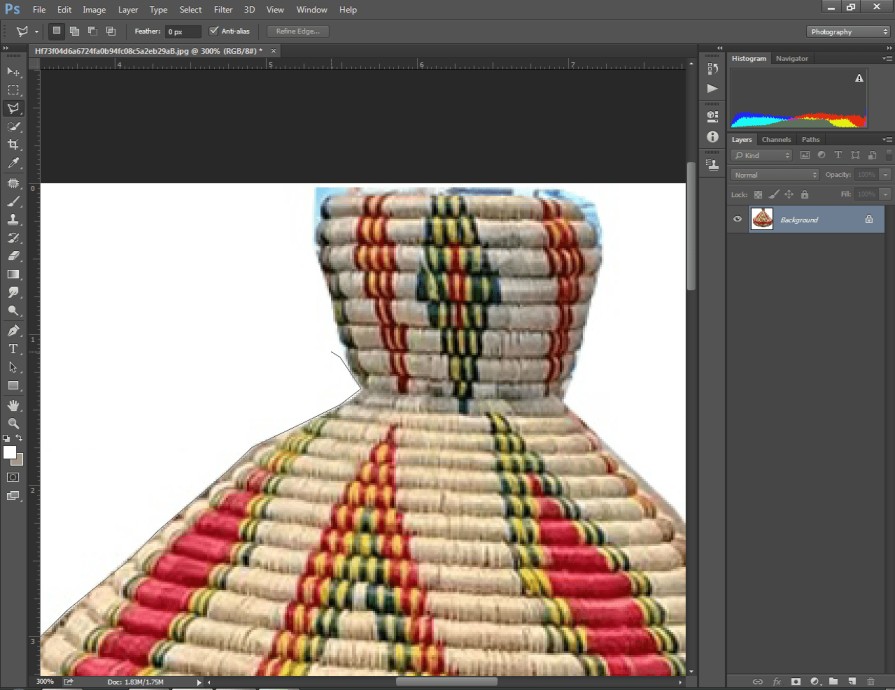
You can zoom in your picture in Photoshop by pressing “CTRL & +” together.
Step 3: Cover entire product with lines
You need to start from a specific point and cover the entire product with lines. Are you thinking about how to create lines around the subject? Well, you just need to left-click on a point and there will be a line.
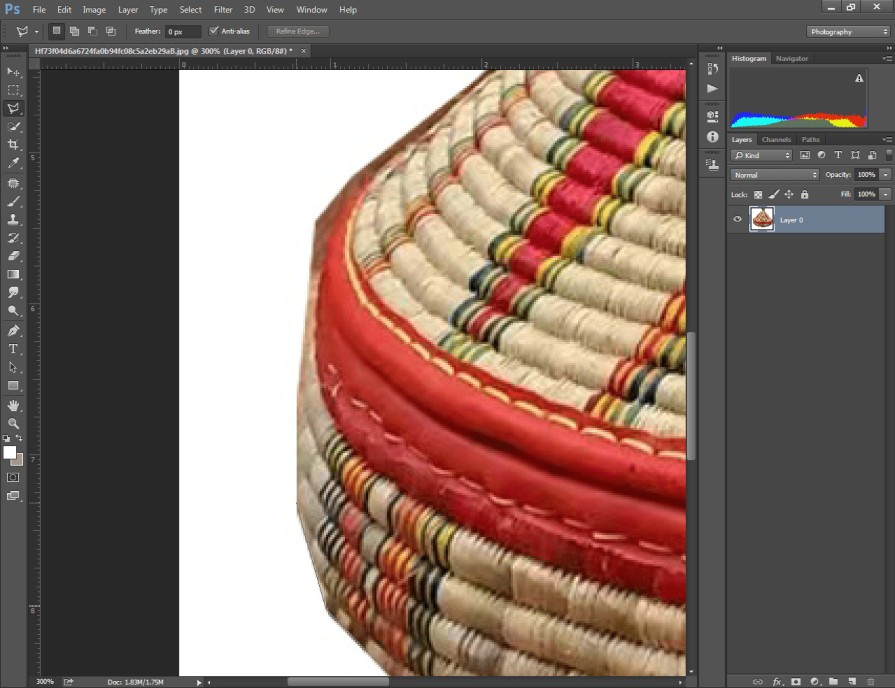
For curved areas like this, you to click the left key several times and drag the mouse to create a bend line. Hopefully, you will master the technique after trying it several times.
Step 4: Remove background from image
This is the last step to eliminate the background. To do that, you have to make sure that you have covered the object with vector lines and it has converted it to the selection.
Let me remind you that, once you finish the selection, it will turn into selection automatically.
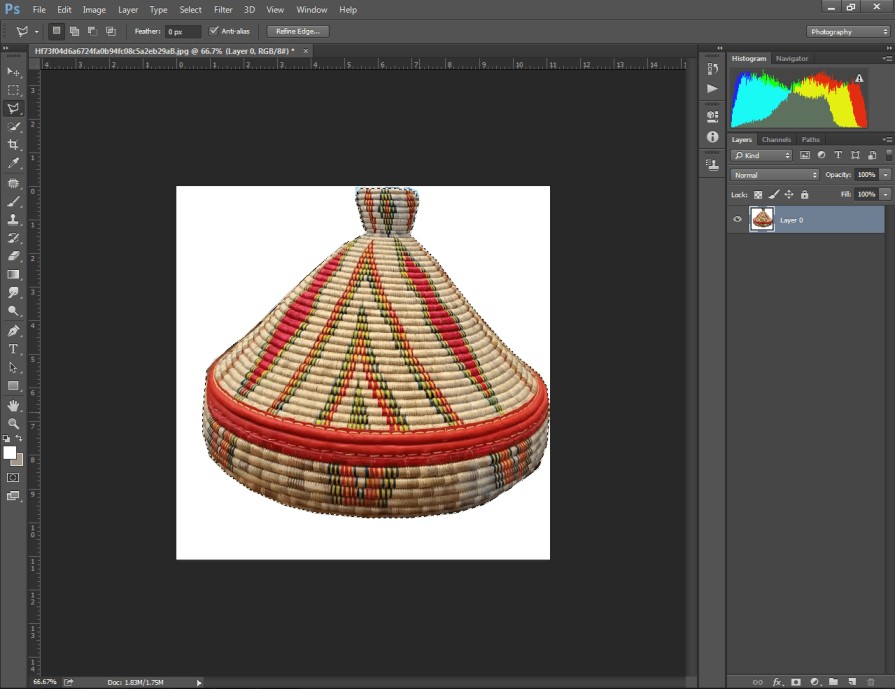
You ought to use the shortcut CTRL +SHIFT + I to get reverse selection. Have you applied that to your image? Fine, you have to press the “Delete” key and see the changes here.
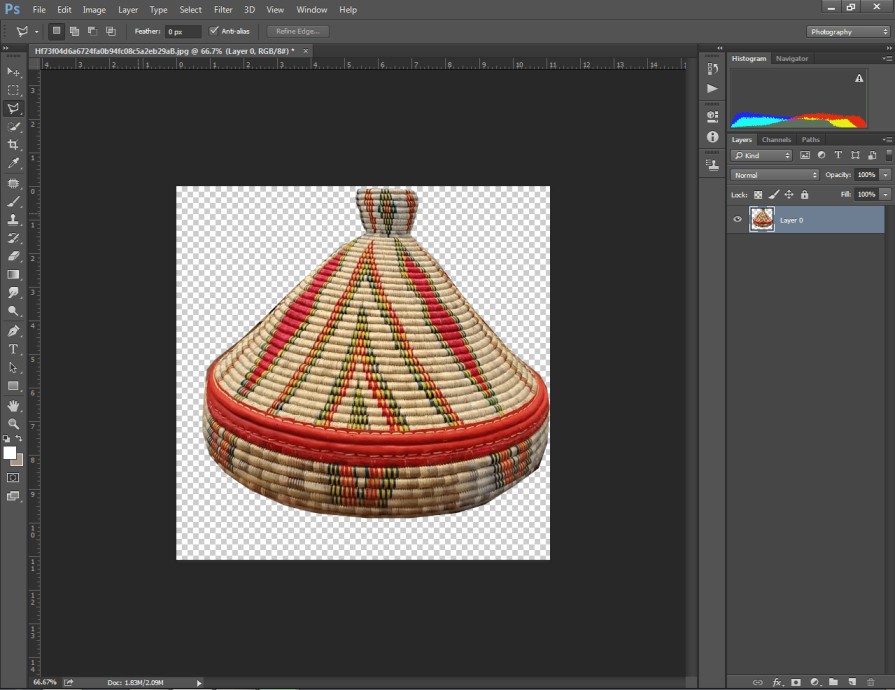
Literally, we have removed background in Photoshop using the Lasso Tool. Have you enjoyed the technique? I hope so. As I have mentioned in the intro, I have found 6 ways to remove backgrounds in Photoshop.
Now, we are going to move to the second method.
Method 2: Remove A background in Photoshop with the Magnetic Lasso Tool

Step 1: Open image in Photoshop
To start the process, you have to start with opening the picture in Photoshop. You can apply the method to Photoshop CC, Photoshop CS5, Photoshop CS6, and other versions of Photoshop.

After that, we are going to pick the tool. Let me show you how to do that.
Step 2: Select Magnetic Lasso Tool
At this point, we are going to select “Magnetic Lasso Tool” to select the object with it. The tool is positioned here.

This tool worked a bit differently from the previous one. You just need to move the mouse near to the outer area of your object. Photoshop will automatically pick anchor points covering your main product. I would like to present it with an example.
Here you go.

In that way, you have to create anchor points around your targeted object and finish the path at the starting point. Ultimately, that will also get converted into selection.
However, there might be some inner space covering the background. We have to exclude that area.
Step 3: Exclude inner space
After covering your product from the outside area, there might be holes or blank areas inside your product. This is the perfect example of this.

To exclude that area, we need to click on “Subtract From Selection” from the top of the left side. Next to that, you have to select that inner space using the lasso tool. After following that trick, your image’s background will be ready to get removed.
Step 4: Delete the background
At this point, you have to apply the reverse selection shortcut. You can do that by typing “CTRL + SHIFT + I”. Then, you can erase the background by pressing “Delete”
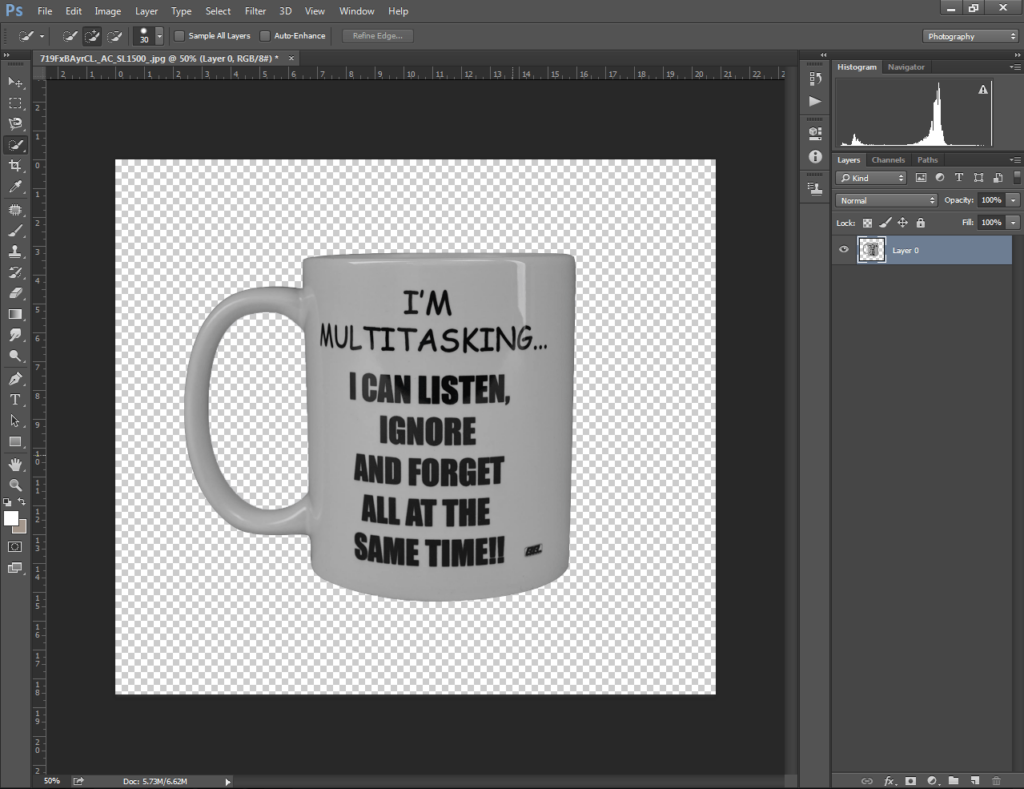
You will find your object without having any background. Also, you can reposition the object using the Arrow key right at the top.
Step 5: Save file
To save your image with transparency, you have to save the image file as PNG’ or “Tiff”. Are you wondering what will happen if you save the file as JPG? It will convert the transparent area into white. To keep your image in the best quality, you can choose the “TIFF” format.
Now, let’s make a dive into the third method. This method will be much easier and you are going to like it. Beginner photo editors are going to love the method.
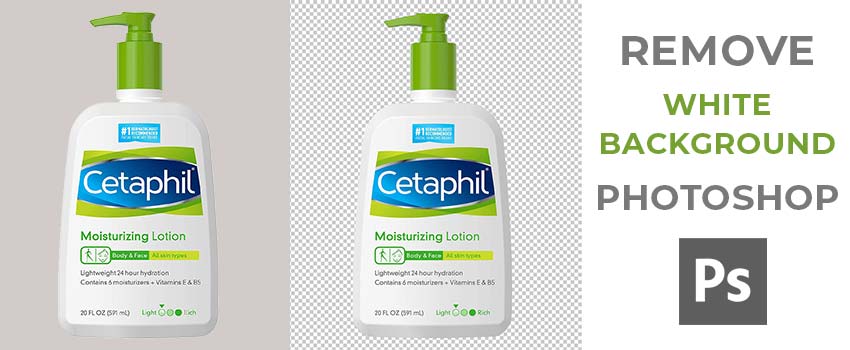
Read More: Remove White Background Photoshop
Method 3: Remove A background in Photoshop with the Background Eraser Tool

Step 1: Open your selected image
I am going to show you how to remove a background in Photoshop using this picture.
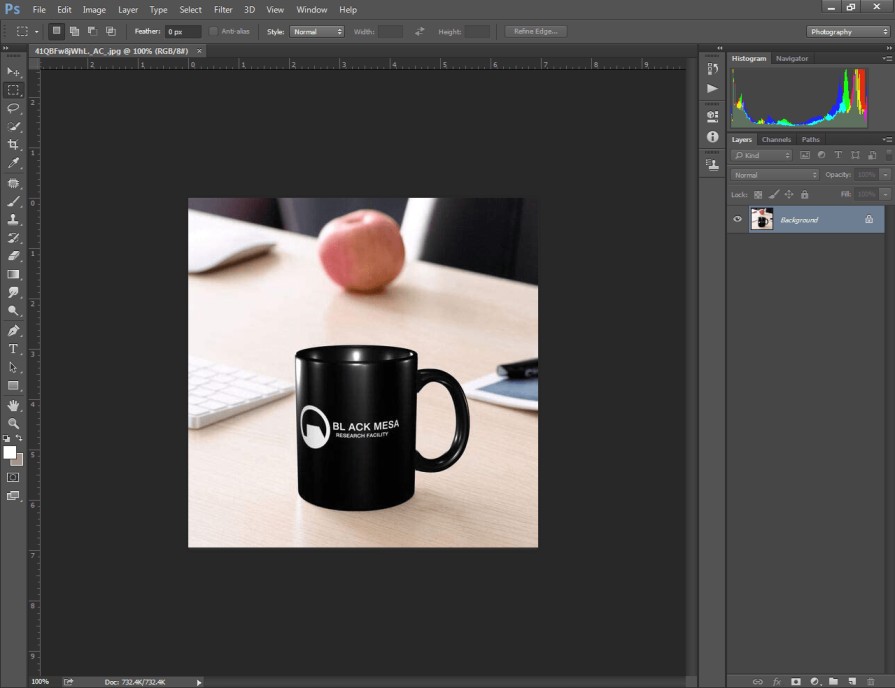
Photoshop has different types of tools for providing its users the best ever photo editing experience. The background eraser tool is one of those tools that makes photo post-production much easier.
Particularly, if your object has a simple shape, you can remove the background without spending too much time on it. Allow me to show you the process step-by-step.
Step 2: Click on background Eraser Tool
You can find the option by clicking on the eraser icon. Basically, there will be three types of eraser tools. You need to pick the “Background Eraser Tool”.
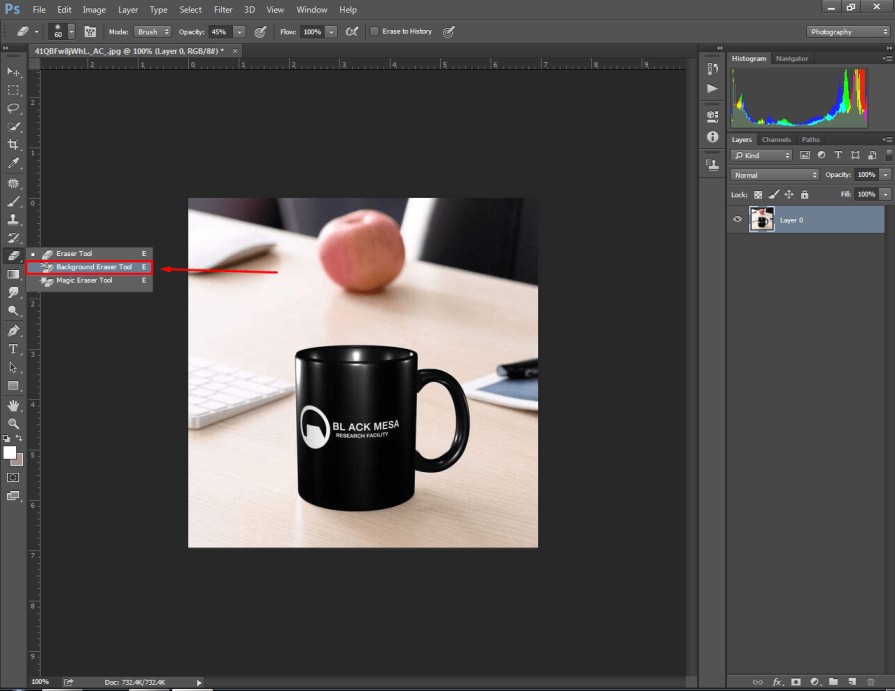
After that, you can adjust the brush size by pressing the ‘[‘and ‘]’. Press ‘[’ to increase the brush size and ‘]’ to decrease the brush size. When you click on the image, the background of that area will be eliminated.
Step 3: Customize Limits and Tolerance
You can find “Limits” and “Tolerance” options at the top. Firstly, you need to set the limit option to “Find Edges”.
After that, you have to customize the tolerance option considering the type of your background density. You can keep it somewhere from 15 to 50.
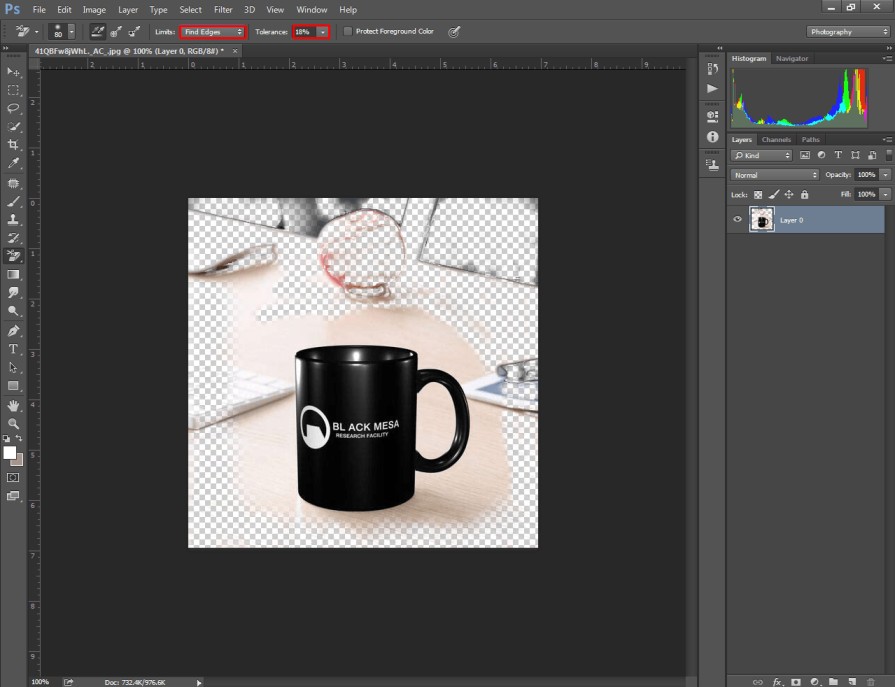
Next to that, drag the mouse over the background area to delete those areas. When you are working on the edges of your product, you should zoom in the image to do it with perfection.
If you delete any portion of your product, then you can recover it using the “History Brush Tool”.
Step 4: Place the object at the Center
You may not get the product right in the middle. The arrow key will give you the option to rearrange the position. After removing the background, you can change the position of the product with this key.
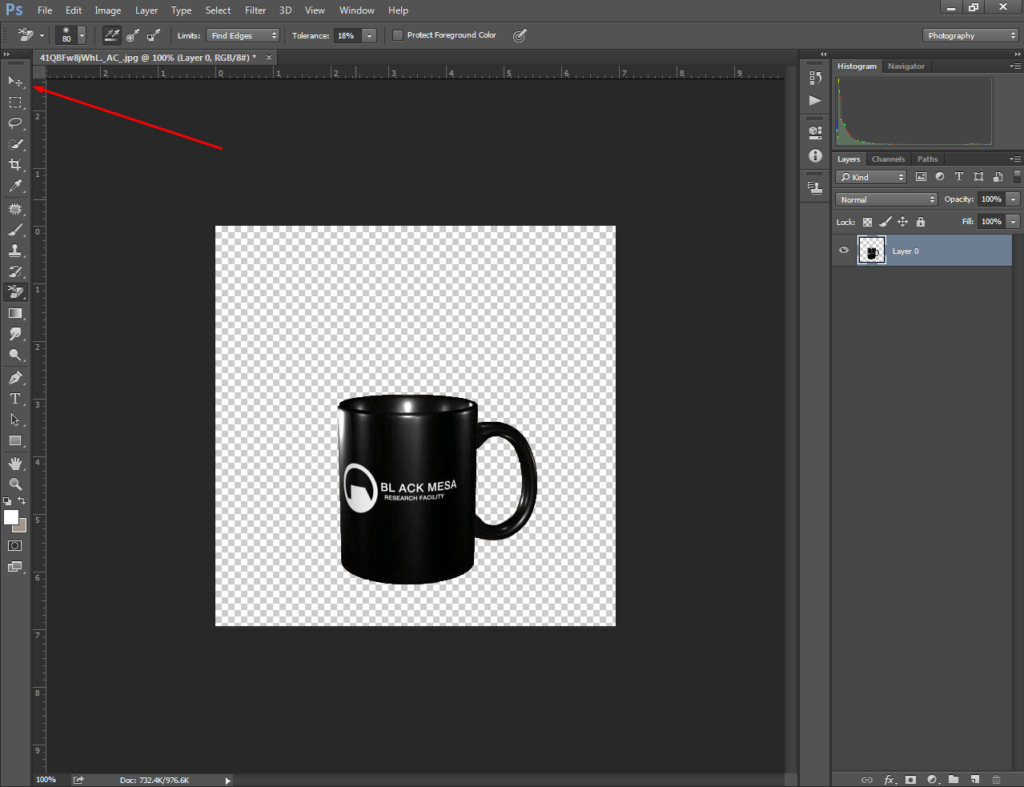
It will allow you to move it freely. When you feel okay with everything, you can save the image as PNG or TIFF. Do you want to make the shape smaller or bigger? In that case, you have to enable the “Free Transform” option. “CTRL + T” is the shortcut key for this.
Do you have any queries about Photoshop Background Removal? Feel free to ask our expert about that. You can call us anytime as we are available 24/7.
However, there are three more ways that you are going to learn about how to remove backgrounds in Photoshop in 2022. Let’s move to the 4th method.
Method 4: Remove A Background in Photoshop with the Quick Selection tool

Step 1: Open image through Photoshop
Are you connected with apparel photography? This method is suitable for product photography and garment item imagery. I am going to show you the process with this clothing photo.
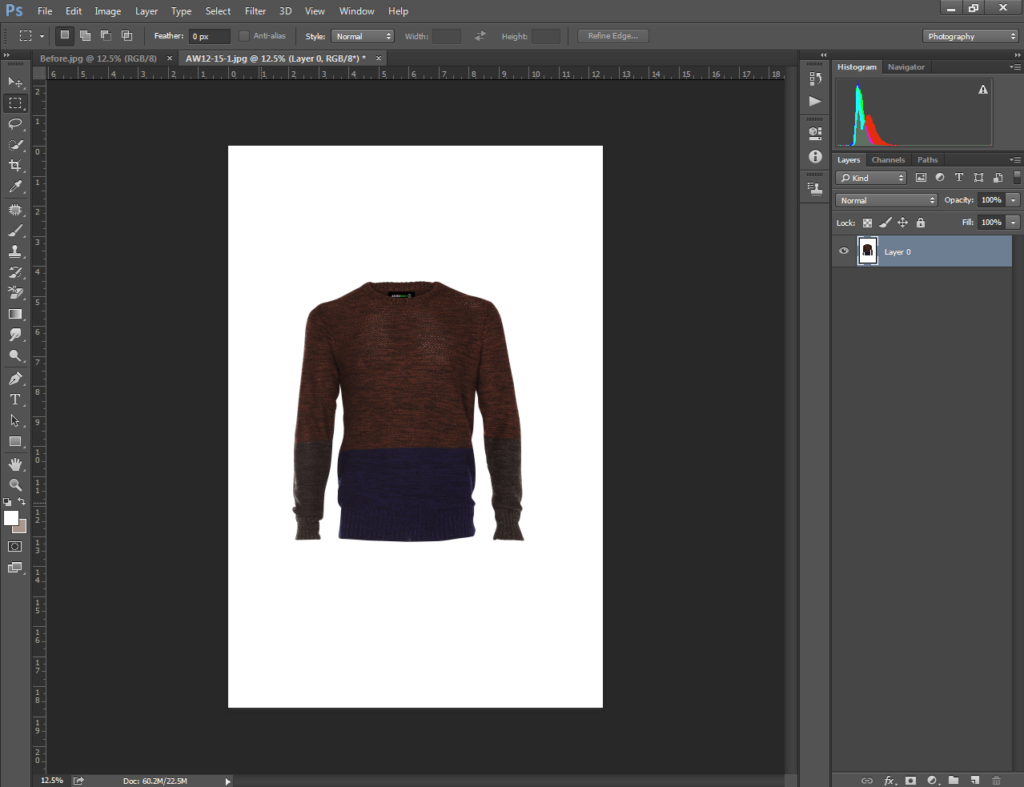
You also need to open your image through Photoshop and follow the instructions. Now, we need to make the selection. For this method, we will use the quick selection tool.
Step 2: Select Quick Selection Tool
Unlike other background removal methods in Photoshop, this method will offer you more flexibility to select an object with any shape. Here you can get the tool.
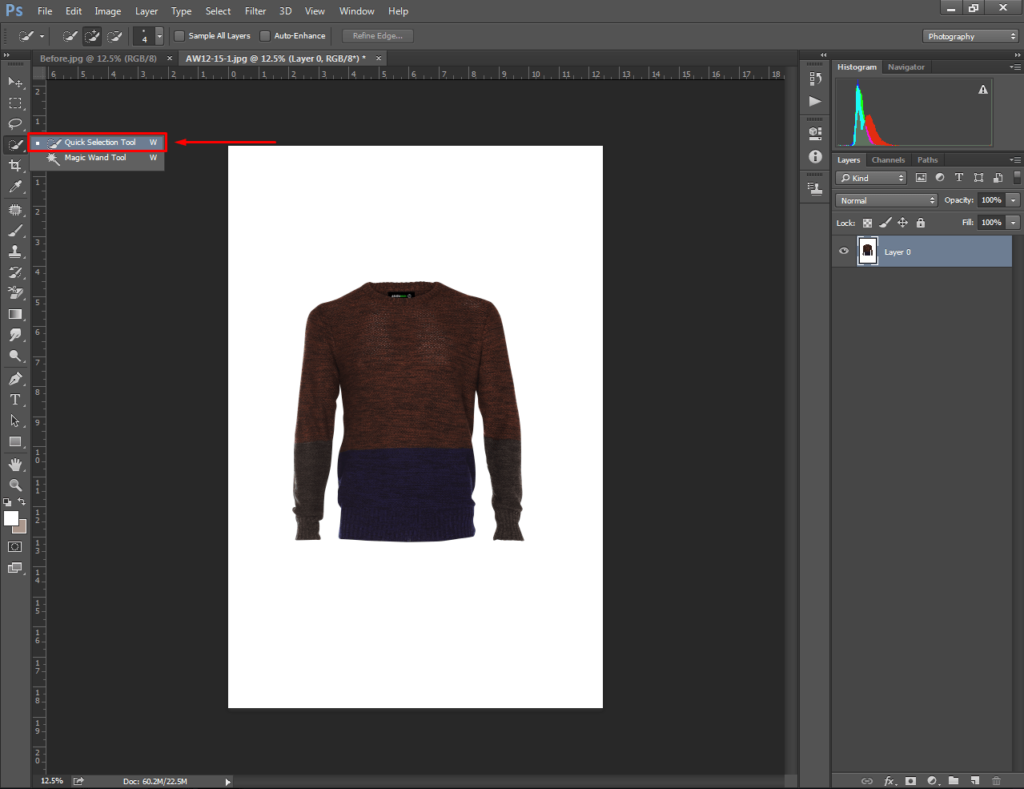
Now, let me tell you how to utilize this tool for making selections. All you need to do is to move the mouse over the main object. You will see that Photoshop will create selections based on those areas.
You can manually customize the selection to include and exclude anything from the selection. A perfect selection should look like this.
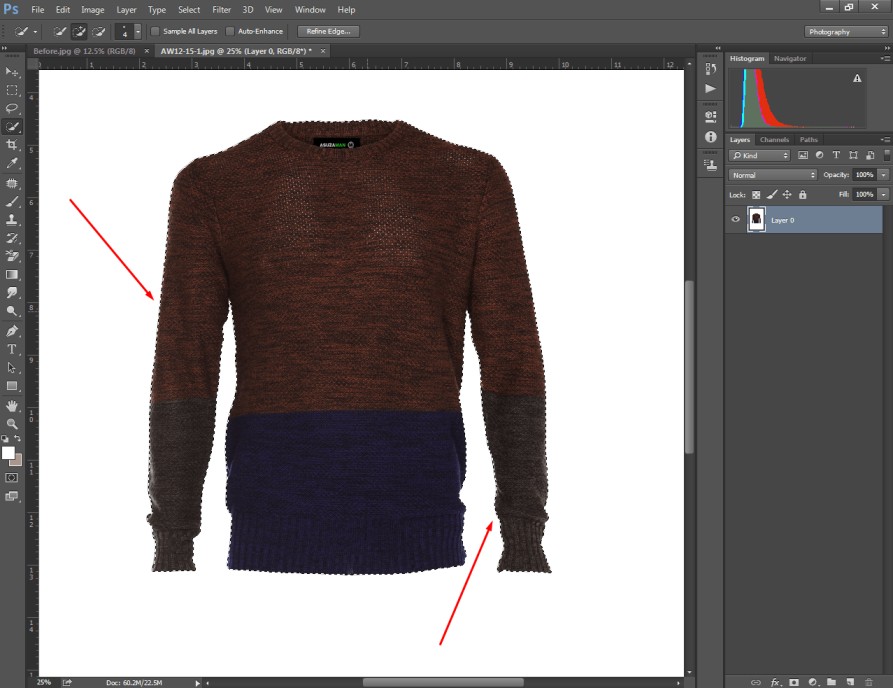
Press the “ALT + LEFT key” to exclude something from the selection. The main theme is you ought to keep the targeted object covered with black and white lines.
Step 3: Inverse Selection
Have you got your product selected? Now, you need to apply the inverse selection procedure so that the background gets selected.
To do that, you have to press “CTRL + SHIFT + I”. You can also select “Inverse” from the selection options available at the top.

You will notice that the moving lines have shifted towards the background. That means if you are going to change anything that will be applied to those areas.
Let’s move to the final step and complete the photo post-production task of your image.
Step 4: Remove background in Photoshop
Can we assume what to do now? Perhaps, you have guessed it right. You just need to hit “Delete” from your keyboard. That will present your image in this form.
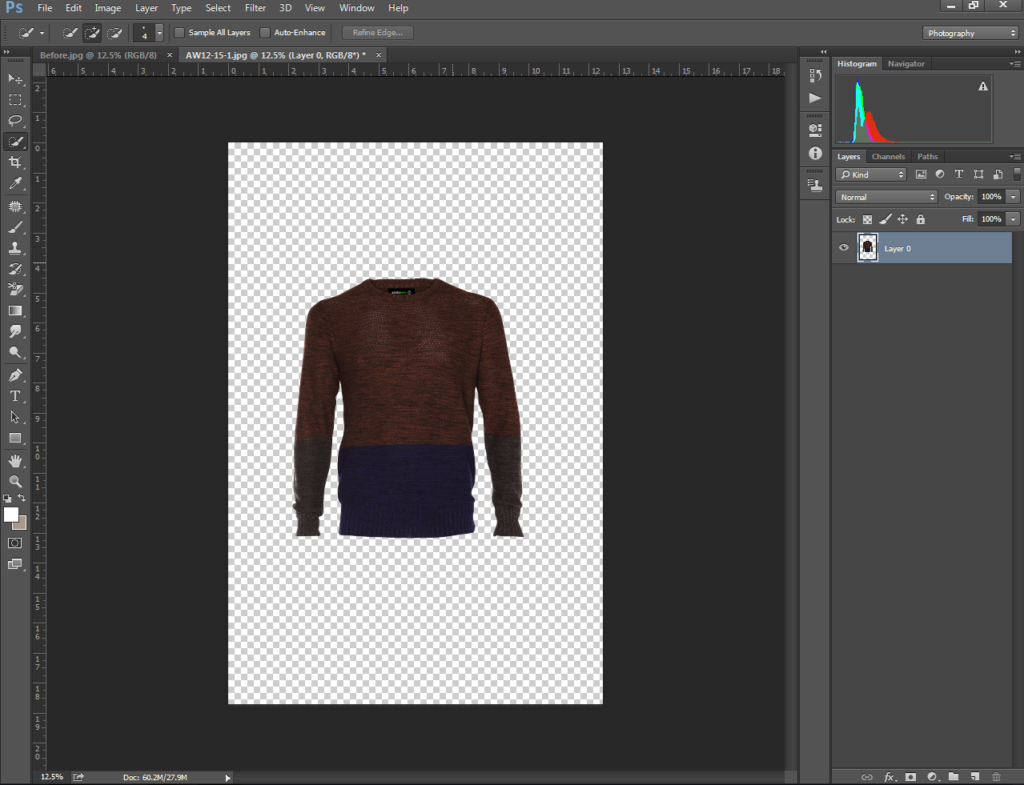
Do you want to make any further adjustments to the size or shape? As I have mentioned earlier, you can do it with the free transform option. If your product is not at the center position, you can move it to the middle.
Overall, it should look attractive and realistic. Also, you have to be cautious about not erasing any portion of the main object.
At this point, you know about 4 ways to remove backgrounds in Photoshop in 2022. Still, there are two more ways left. Are you excited to jump on the 5th method? I think so. Let’s continue.
Method 5: Remove A background in Photoshop with the Object Selection Tool
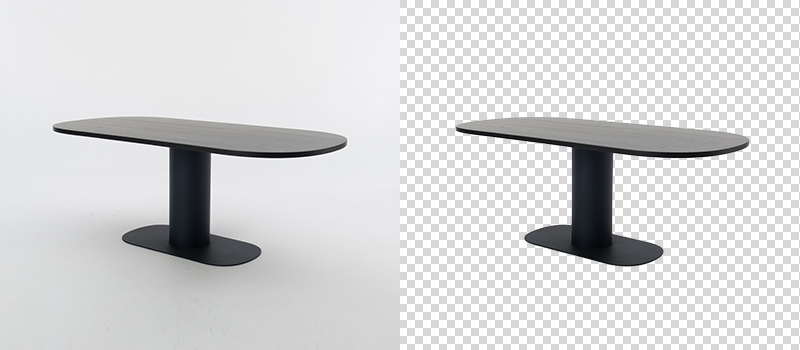
Step 1: Open your image in Photoshop cc Latest Version
Let me inform you that you can apply this method on Photoshop CC 2020 or upgrade versions. This method isn’t applicable for older versions of Photoshop.
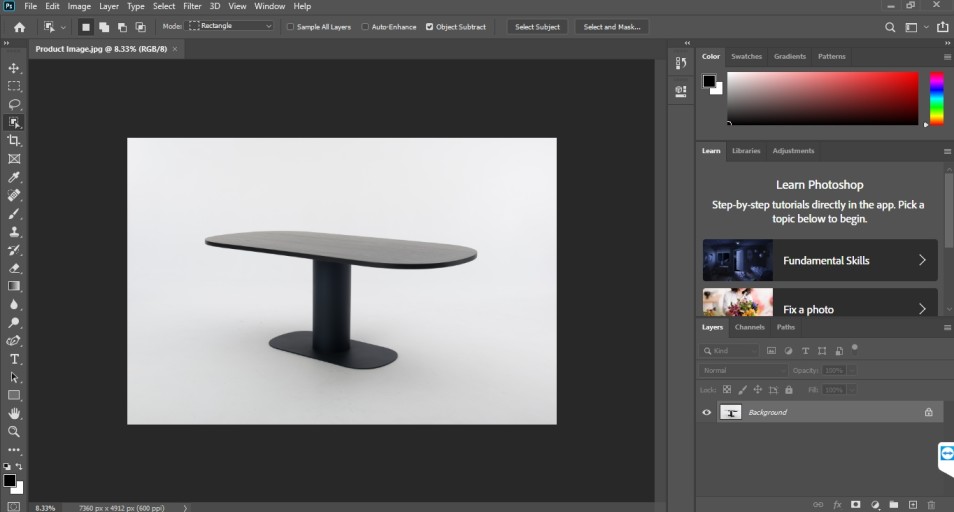
To start the procedure, you have to open your image in Photoshop CC 2020 or other latest versions like Photoshop 2022.
Step 2: Customize object selection tool
The Object Selection Tool is available in Photoshop 2020 and other latest versions from that date. That tool was introduced by Photoshop to make the selection task easier.
Using that tool, even beginners can select an object with ease. You will get the option in the same options of the Quick Selection tool.
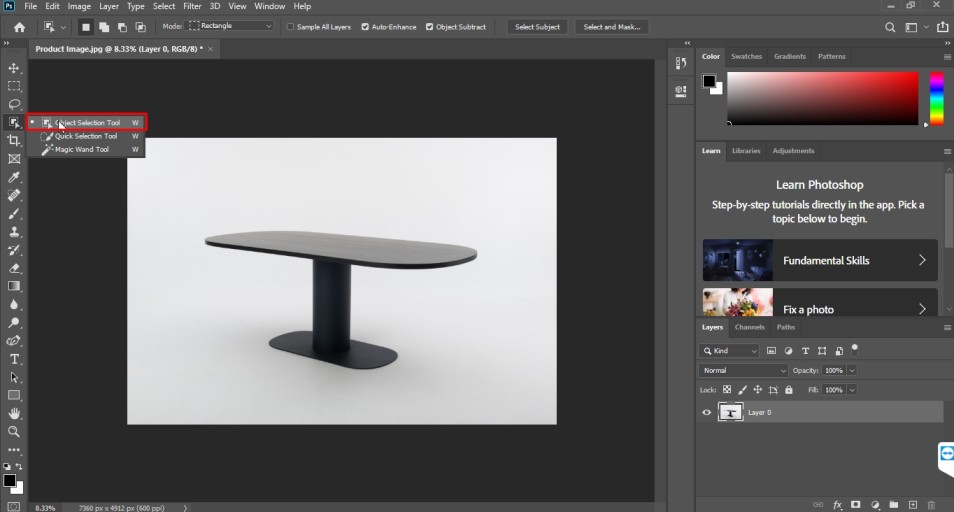
You need to click on that tool to enable it. Using this improved selection tool, you can select using Rectangle and Lasso mode. Also, you will get the option “Sample All Layers” at the top. If you’re working on several layers, you can enable this feature to sample all layers.
Next to that, you will find the “Auto enhance” option. You can enable this option to make your selection more enhanced and precise.
Step 3: Select object with object selection tool
This is the easiest way to select an object in Photoshop. You just need to create a rectangle covering your product. Within a few seconds, Photoshop will create a selection covering your object.
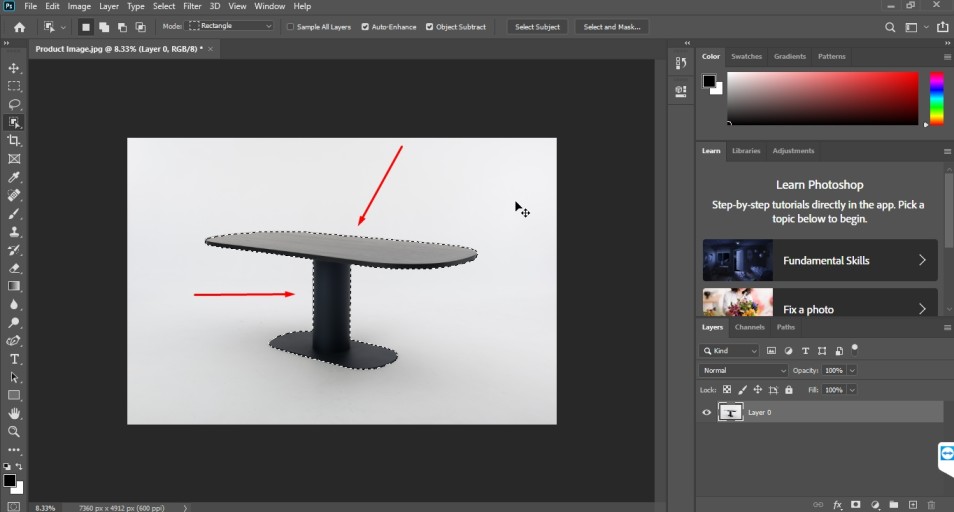
How was your experience when you tried this for the first time? I think it would be superb. However, if you feel like you would like to extract something from the selection, you can use the object subtract option from the top.
Now, we are going to delete the background in Photoshop and replace it with a transparent background. Let’s jump to the 4th step.
Step 4: Create a new mask layer
For this method, we are going to apply a new method to remove the background. You just need to click on the mask icon to apply a mask to the background layer.
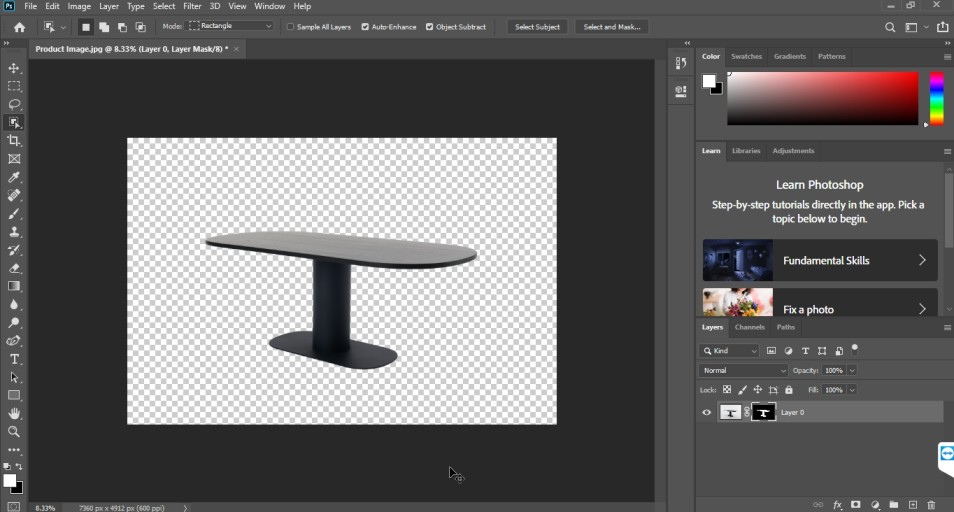
That will remove the background. You are going to get your object on a new transparent background. So, that’s the method of how to remove a background in Photoshop with the object selection tool. Go to the File option from the top and save it as a suitable format. Your image will be ready to upload online.
Now, we are all set to dive into the 6th method to Remove backgrounds in Photoshop in 2022. Permit me to continue.
Method 6: Remove A background in Photoshop with Quick Action
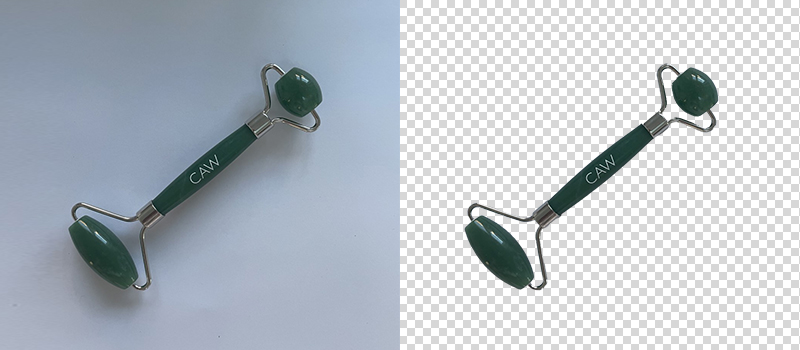
Step 1: Load your image in Photoshop
You have to begin with opening your picture in Photoshop. After that, right-click on the layer and select “Layer From Background” to unlock the background layer.
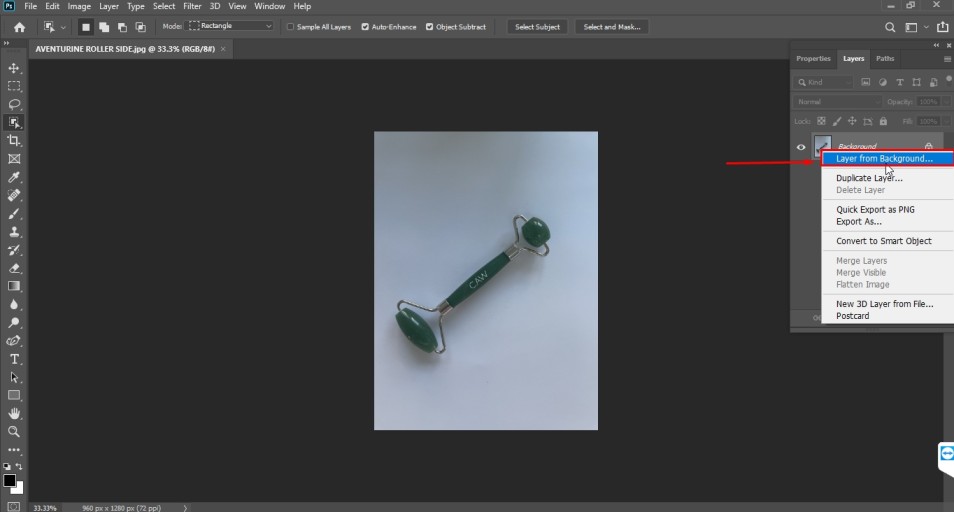
Let me remind you that this method won’t work on the older versions of Photoshop. Photoshop CC is the minimum requirement to apply this method. Have you loaded your image? Alright, let’s move to the second step.
Step 2: Select “Remove Background” from quick action
Click on the Properties Panel and you will find a “Quick Action” window. There will be two options: “Remove Background” and “Select Object”. You have to select the “Remove Background” feature.
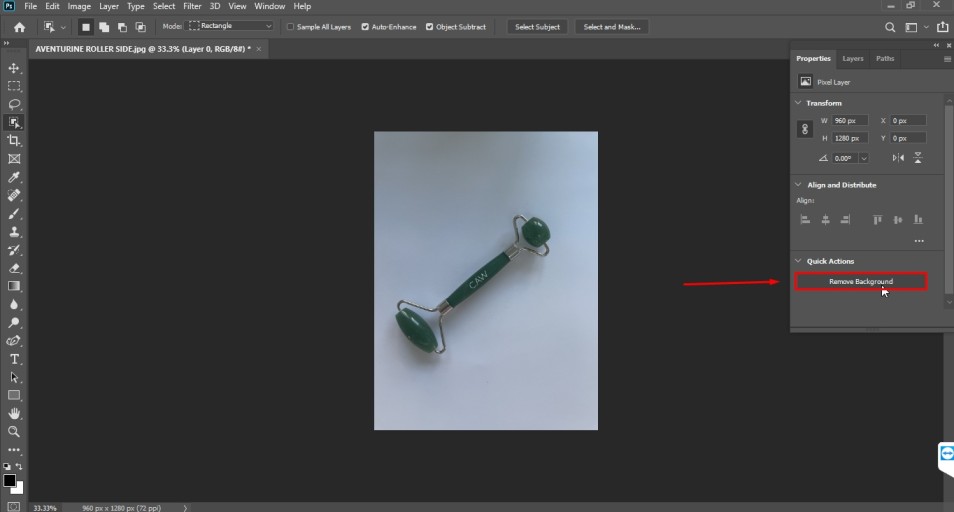
Next to that, you just need to wait for a few seconds. Later on, your image background will be deleted automatically by Photoshop.
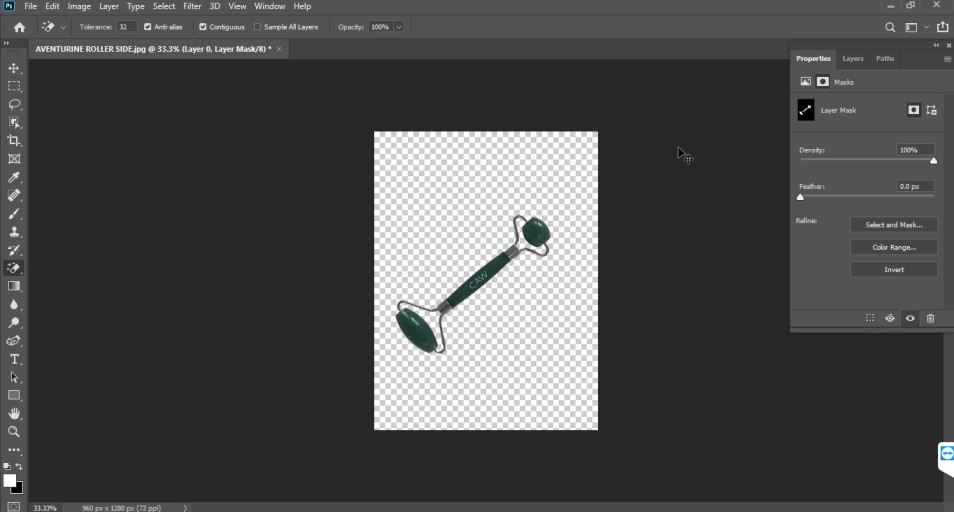
For simple objects, you will get almost perfect background removal. For medium, complex, and super complex objects, you may not get a 1000% accurate result in this method.
Step 3: Make manual correction
You can also make further manual corrections using other Photoshop tools. In that case, my recommendation is to use the eraser tool. You need to pick the Background Eraser tool and apply the tool to the unsuitable areas.
When you are satisfied with the outcome, you can save the image as PNG Or TIFF. If you want to edit the picture again, you should save the image as TIFF.
Conclusion
At this point, we have come to the conclusion of this article. From this article, you have learned six ways to remove backgrounds in Photoshop in 2023. By applying those methods, you can remove the background from any pictures. That sounds superb, doesn’t it?
However, it can be difficult for you if you have got bulk pictures to remove background from images. You can try our Background Removal Services to get satisfactory results with a 100% money-back guarantee.
