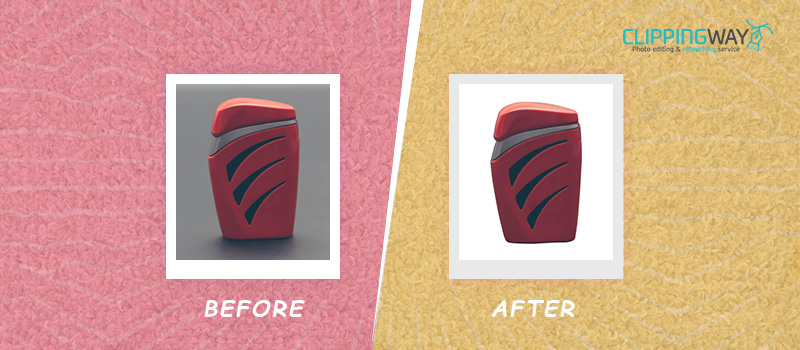
Sometimes the background of a picture makes the appearance of its target object look unsuitable.
In that case, you can make the picture suitable by taking the background out of that picture. But you need to know the proper technique to do it accurately.
Are you thinking about learning it? You are just on the right page. Through this article, you will learn how to take the white background out of a picture using Adobe Photoshop.
Photoshop has several tools to do that editing task. We are going to inform you of the 3 best methods of Background Removal.
Method 1: Take the White Background out of A Picture With Photoshop Quick Selection Tool
Step 1: Open white background picture in Photoshop
First things first, you have to start by opening your white background image in Photoshop. You can use any recent version of Photoshop to follow this tutorial.
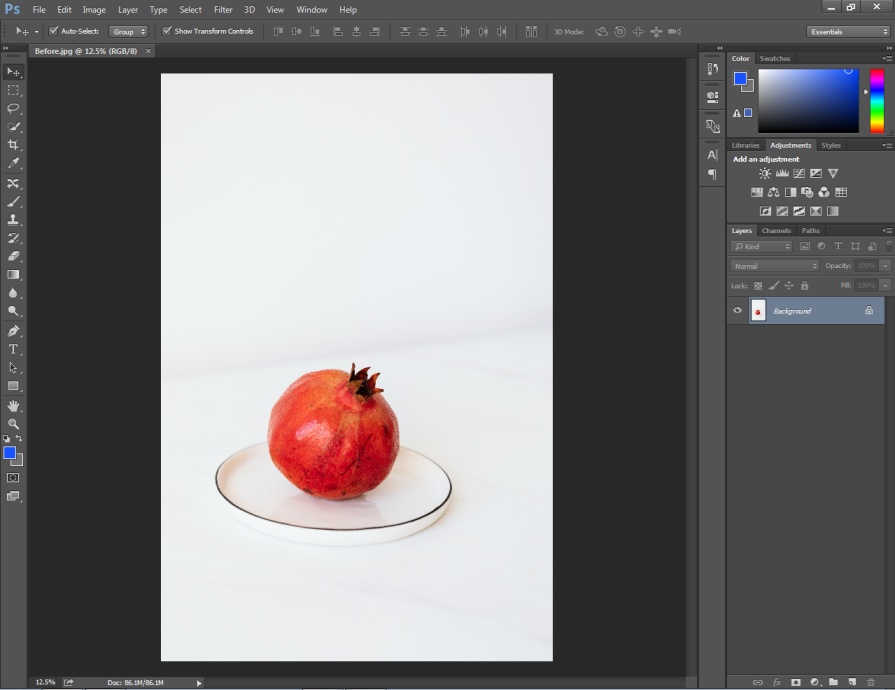
As you can see, there is a lock icon on the layer. You have to click on the icon to unlock the layer. It enables transparency in the image.
Step 2: Select the Quick Selection Tool
Now, you have to make a selection of your object using the quick selection tool. You can pick the tool from here.
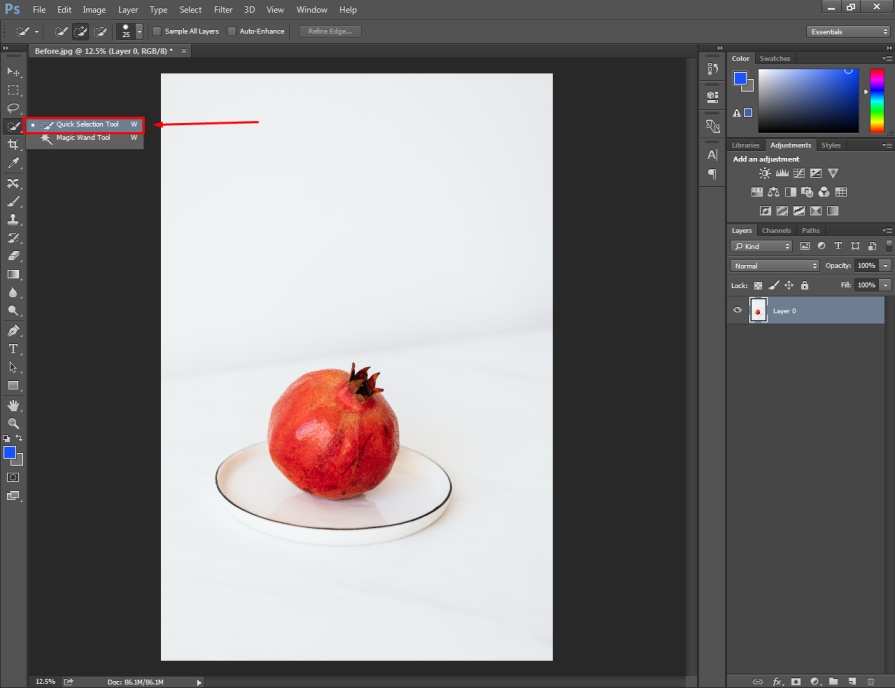
After that, you have to zoom in on the object. You can do that by pressing CTRL + Z. Then, hold the left mouse key and move it over the object.
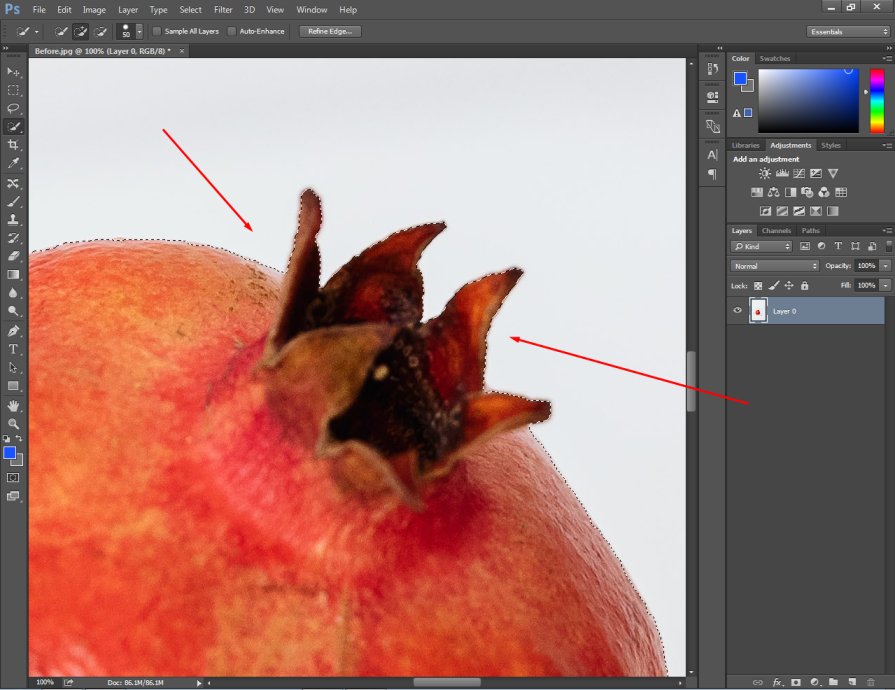
It will automatically make a selection of the object. If the selection goes outside the object, you need to hold the “ALT” key and operate the mouse over the selection to subtract those areas.
You need to select the entire object properly.
Here’s an example.
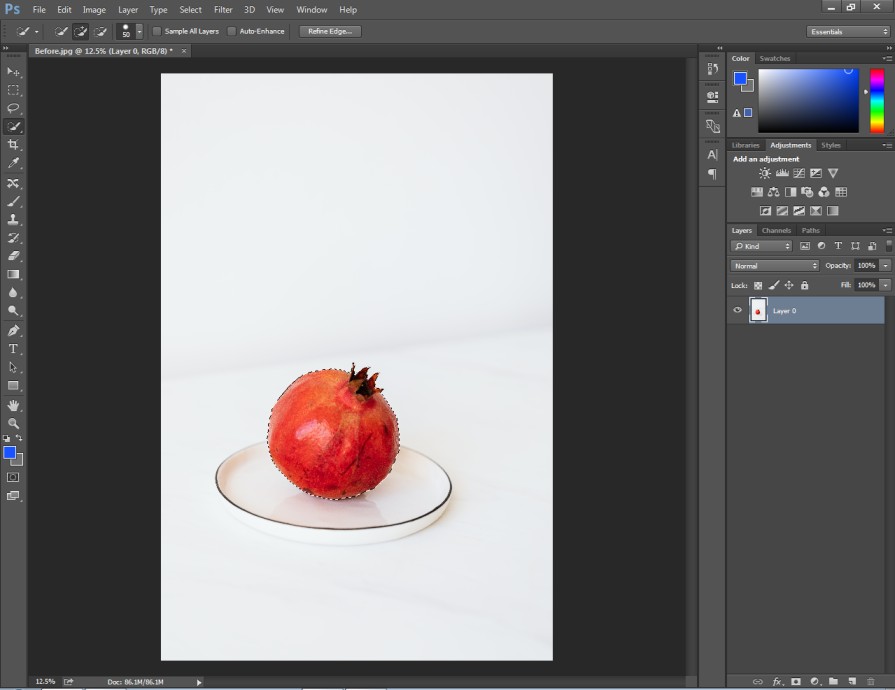
The object should be covered apart from the background.
Step 3: Take the background out
At this stage, you should go to the Select option from the top and choose “Inverse Selection”. It will shift the selection over the background.
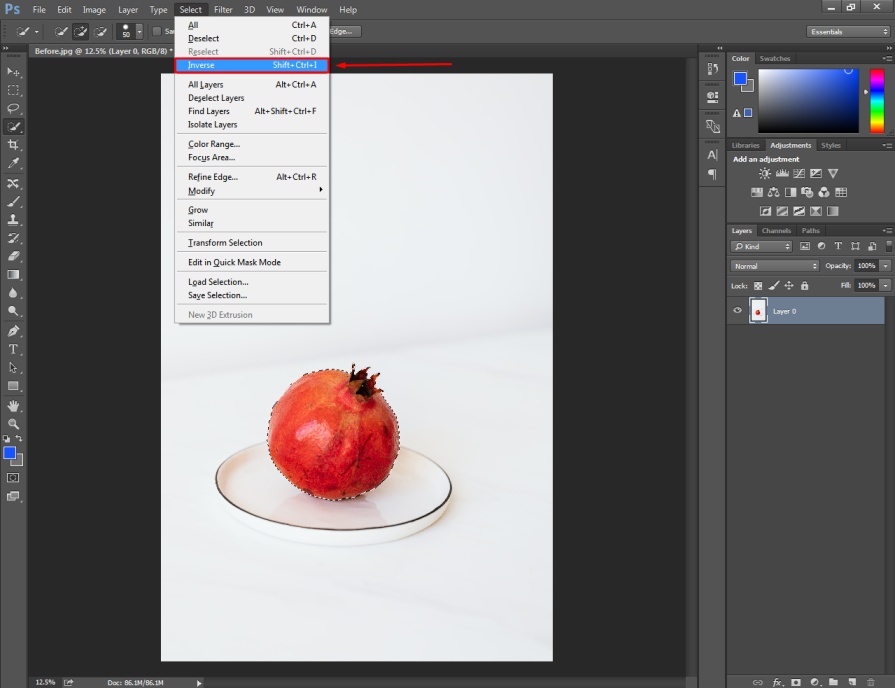
Then, you just need to press the “Delete” key on your keyboard. That’s it. It will take away the white background from your picture. You can see that here.
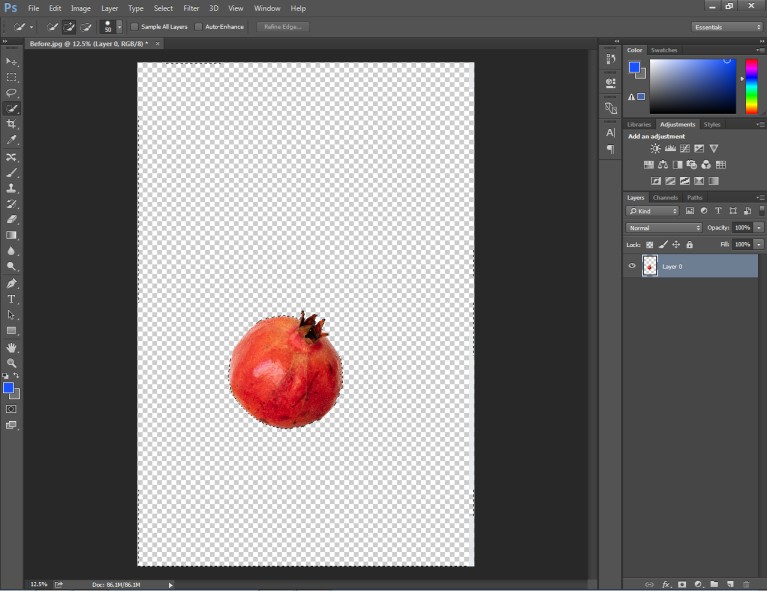
After that, you can use the arrow key to reposition the object in the middle. Press CTRL + D to hide the selection. This is the final look of the picture.
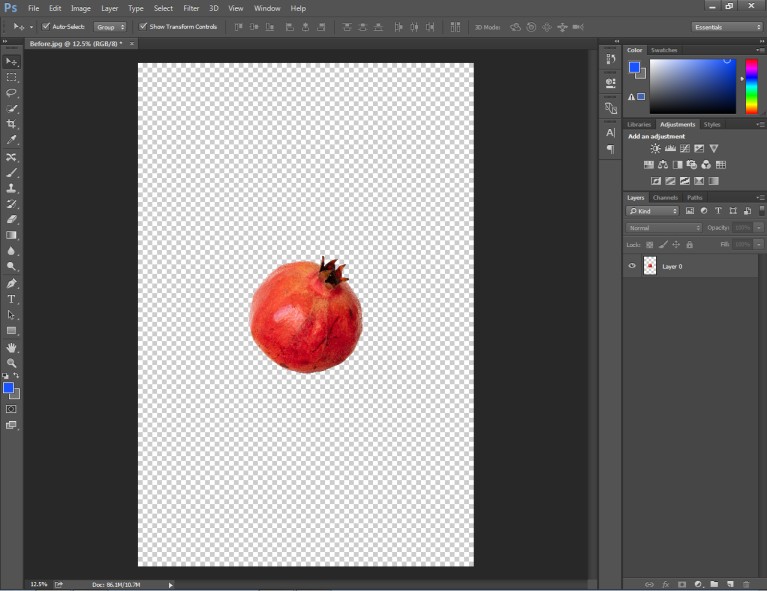
At this stage, you should get your object on a transparent background. Now, you can easily replace it with any suitable background. You can save the image from the “File>Save As” options.
Do you want to remove the white background from a picture precisely? Then, you should follow our 2nd method to take away the white background. Here are the step-by-step guidelines.
Method 2: Remove the White Background of A Picture With the Photoshop Pen Tool
Step 1: Open white background photograph in Photoshop
Launch Photoshop and open your photograph to remove the white background from it. Then, you have to unlock the layer. Simply click on this icon to do it.
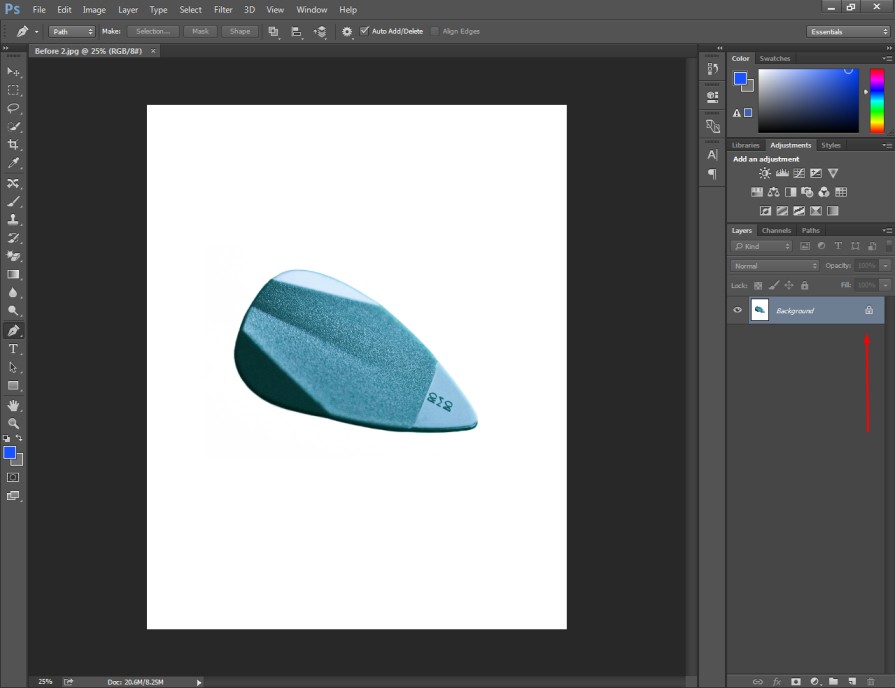
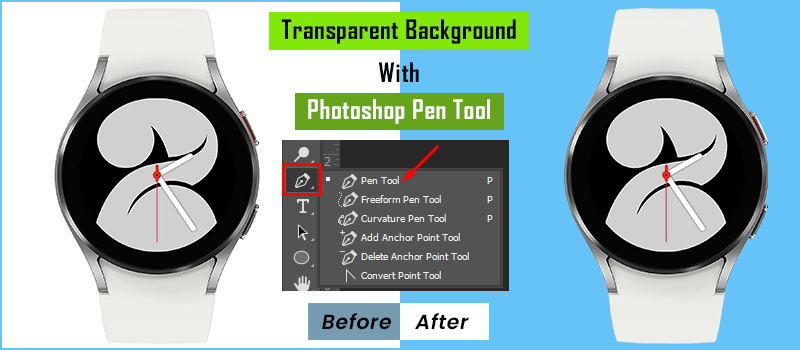
For this method, we are going to use the Pen tool. This is the most accurate selection tool available in Photoshop.
Step 2: Enable the Pen Tool
From the left editing toolbar, you can enable the pen tool. Also, you can use the shortcut “P” to get the tool.
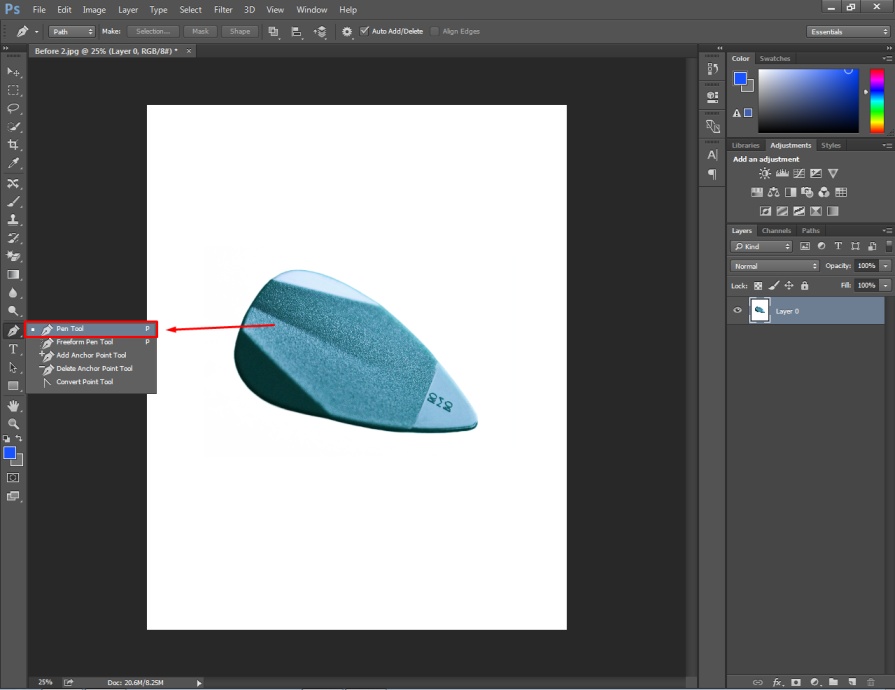
Then, we have to zoom in on the object to start making the selection. To make a selection with the pen tool, we have to create vector paths around the object.
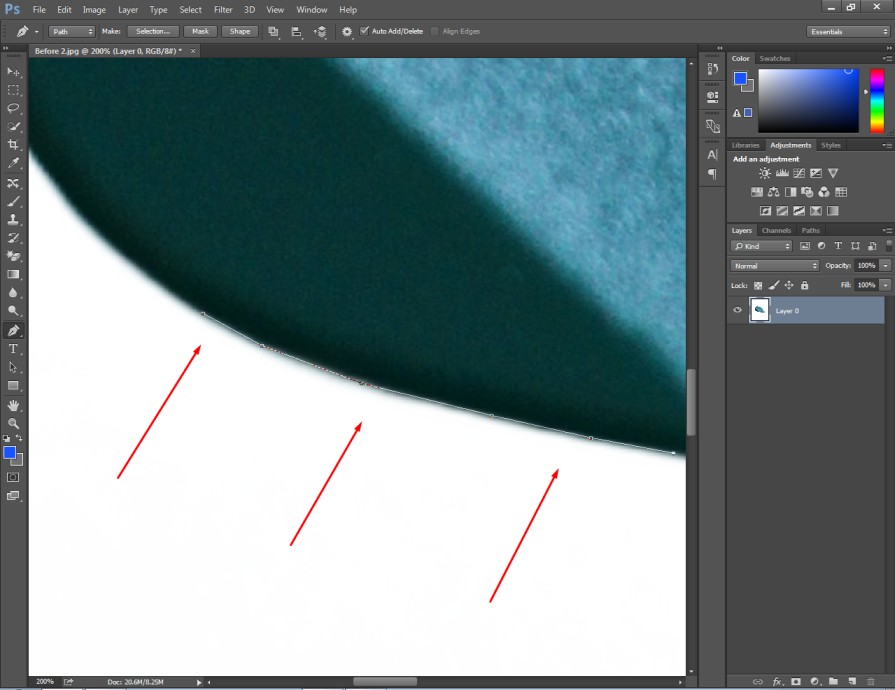
You can create those lines by clicking on the left mouse key.
Step 3: Covering the object with paths
You have to make sure that the vector lines don’t cross the object’s outside area or go to the inner side.
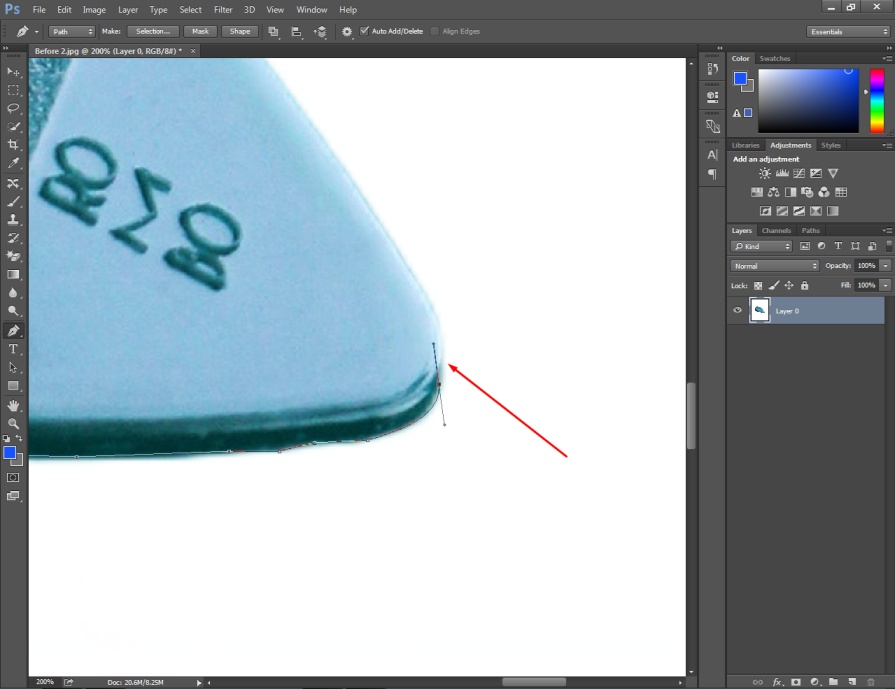
You can delete that additional path with ALT + left-click on the path. To undo any step, you have to press “CTRL + Z”. Do you want to undo several steps? In that case, you have to press “CTRL + ALT + Z”.
You need to cover the entire object with paths and finish the final anchor to the starting point.
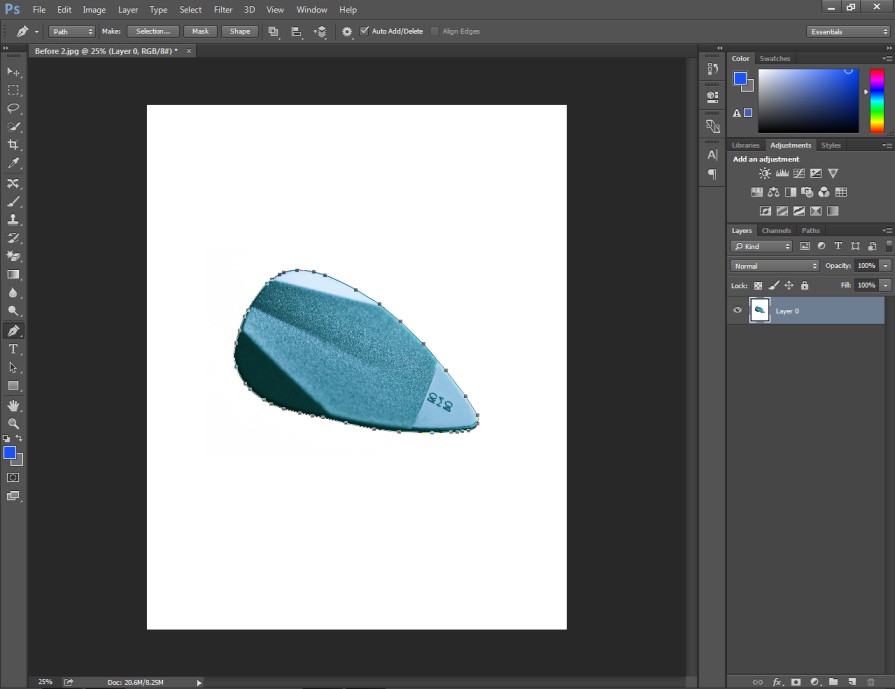
Step 4: Take away the background
This is the final step. You have to right-click on the object and select “Make Selection”.
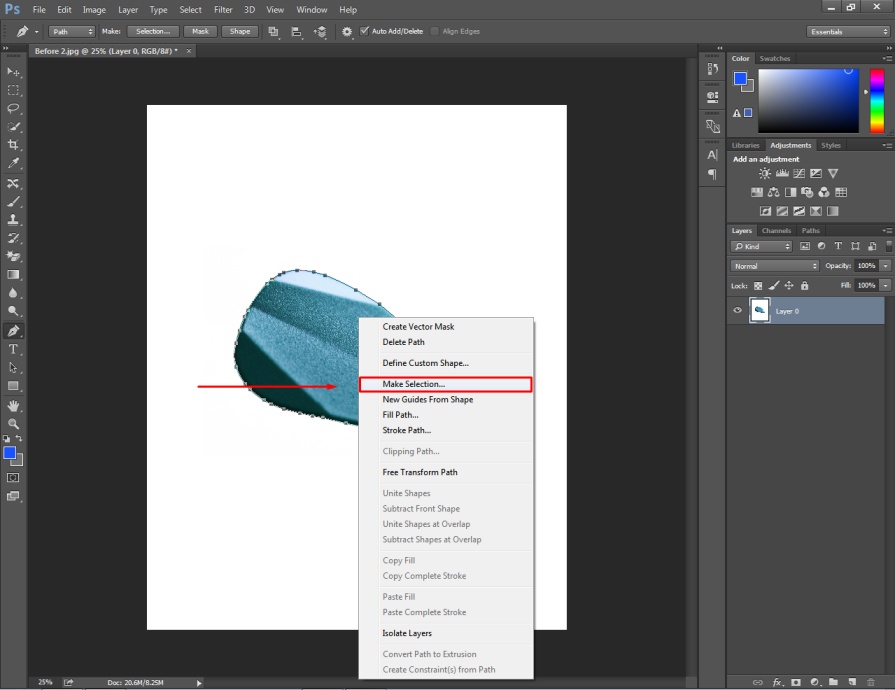
After that, press the Enter key to make a selection. Once you get moving dotted lines, it indicates the selection for the object. At this point, the selection is on the object. We need to shift the selection to the background. You should press “CTRL + SHIFT + I” to do it.
Then, you have to press the “Delete” key.
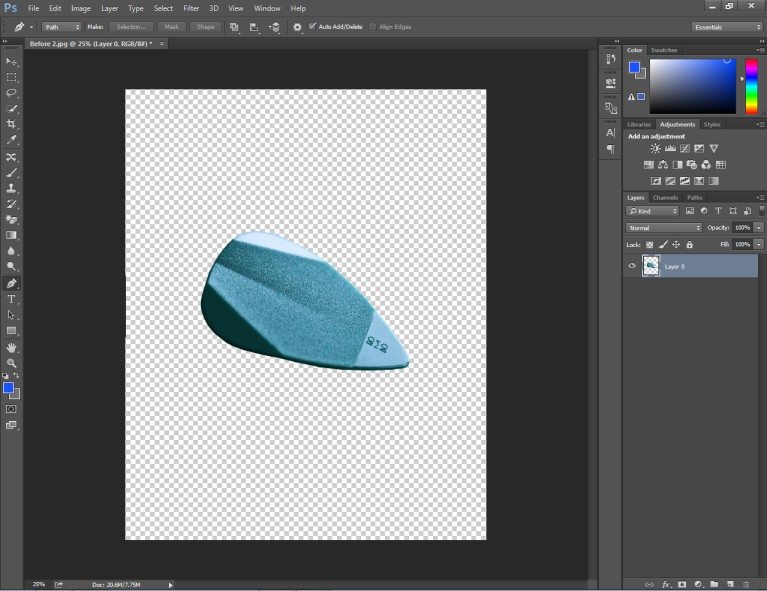
So, we have successfully taken the white background out of the picture. Go to the file option to save the image.
Following the above steps, you can also remove the white background from your photos. Now, we are going to jump to the third method to remove the white background easily with a single click. This is the easiest method to follow.
Method 3: Get Rid of the White Background with the Photoshop Magic Eraser Tool
Step 1: Open your photograph with white background
Go to the “File” option from Photoshop and open your photograph with white background to take it out.
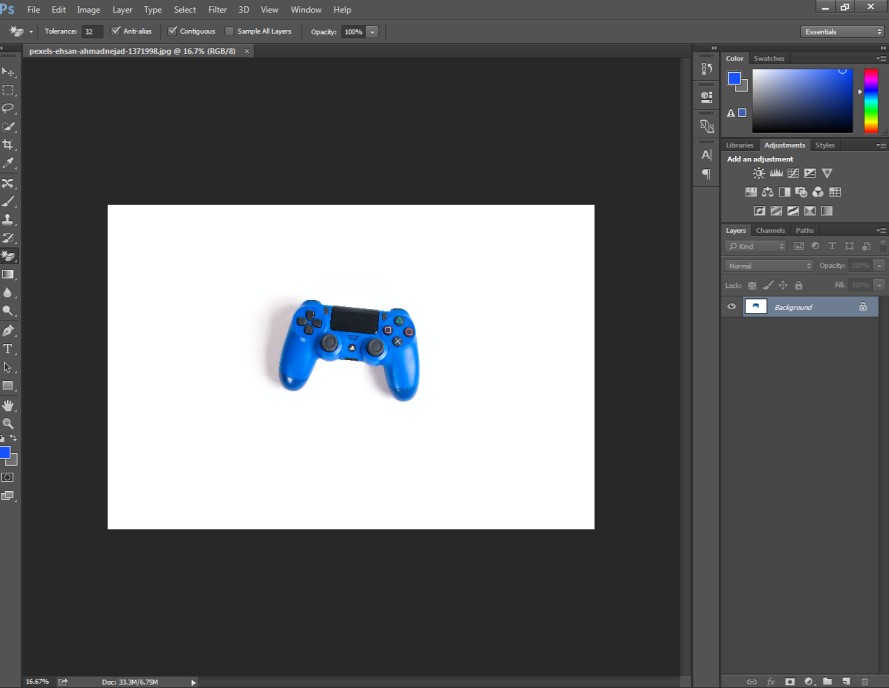
Then, you have to click on the lock icon on the layer. Without unlocking the layer, you cannot get a transparent background for the object.
Step 2: Select Magic Eraser Tool
Go to the Eraser option from the left side and select “Magic Eraser Tool”. You will get the tool from here.
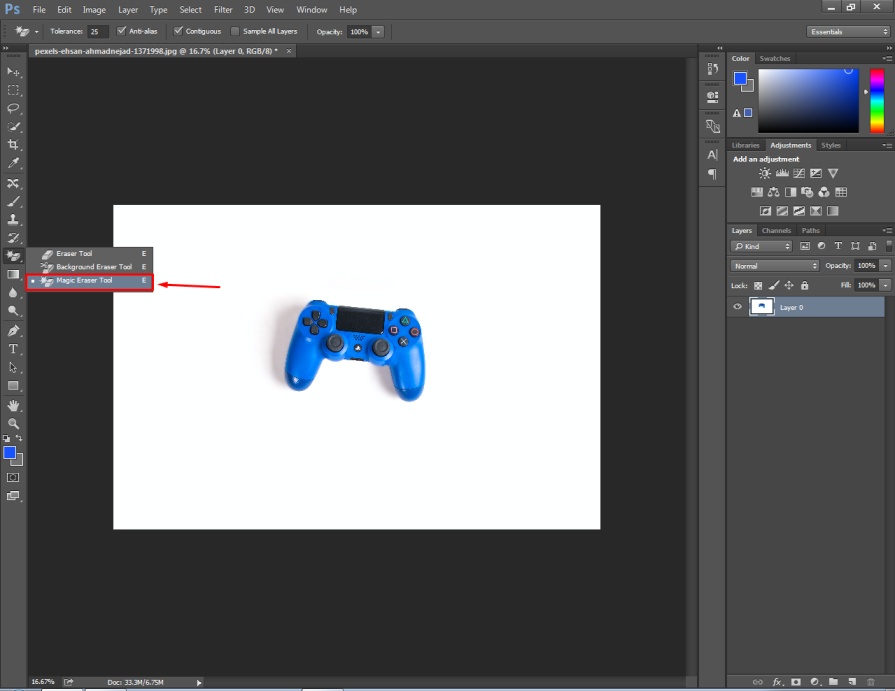
After that, you have to click on the white background to remove it.
Step 3: White background removal
You just need to left-click on the background.
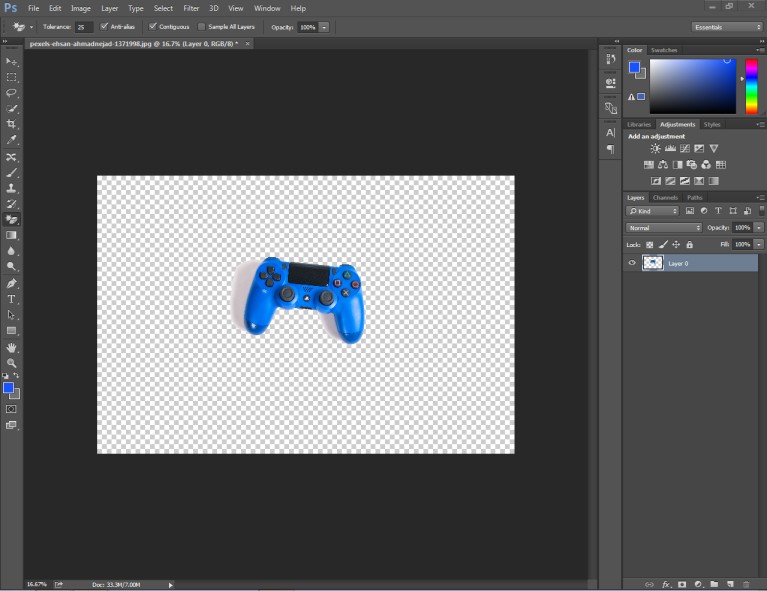
After the first try, there might still be some portion of the background remaining on the picture. You need to zoom in on your image and click on those remaining backgrounds.
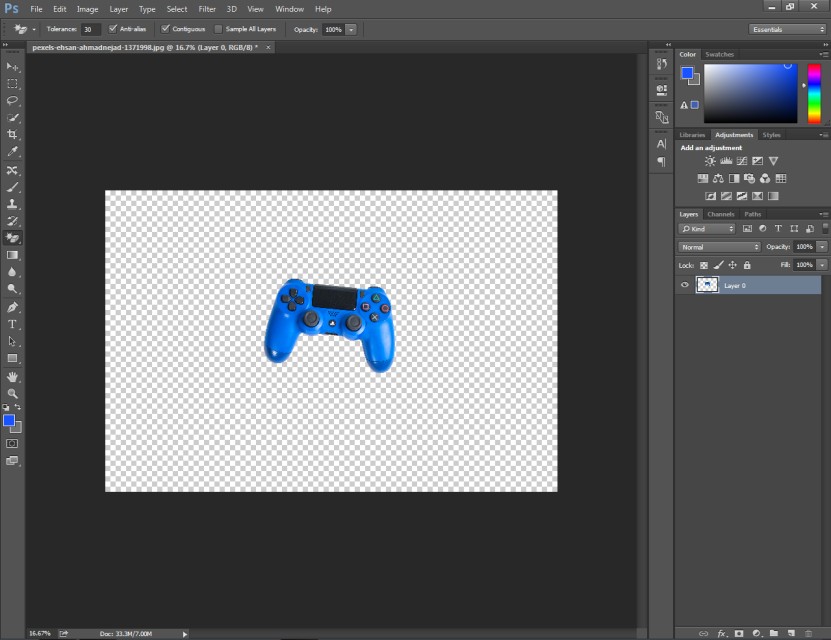
Then, you will get the object without having any background in the picture. Click on the arrow key to fix the placement of the object. You can move the position or rotate the object to make it look balanced.
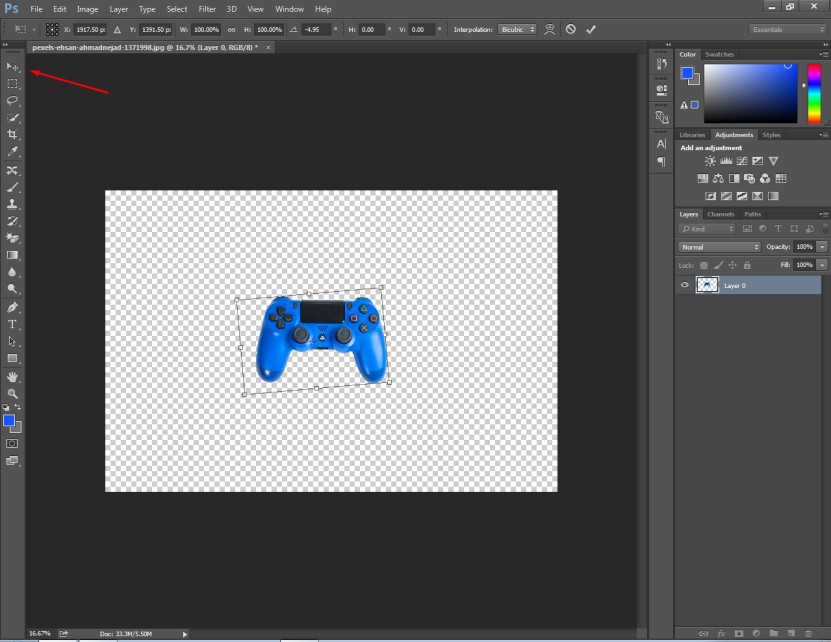
This is the final look after repositioning.
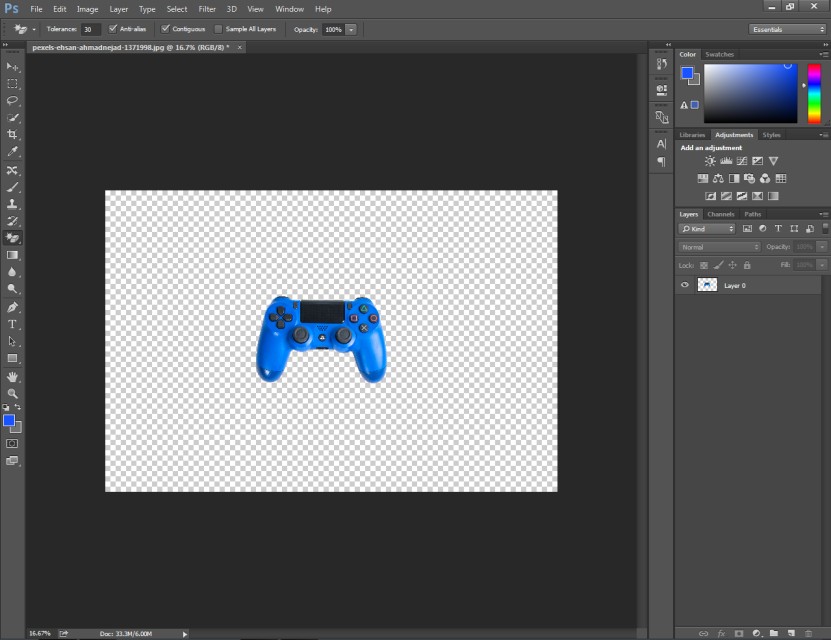
That’s the process of taking the white background out of a picture. If you want to remove the white background within a short time, you can follow this method.
Pros and Cons
Pros
- Use The Pen Tool When You Are Looking For Accuracy.
- Save the image in PNG to keep the transparency.
- Save the image in JPG to keep created paths active.
Cons
- Don’t use the magic eraser tool for complex objects.
- Don’t apply automatic BG remover for complex objects.
- Don’t use the pen tool for soft edges.
Final Thoughts
That’s all about how to take the white background out of a picture. We have revealed the 3 best methods to remove white from any photographs. You can try any of those methods considering the types of objects in your photography.
Do you have a lot of images to remove from the background? You can try Clipping Way to remove your photo background by highly skilled and professional designers. We are offering a 100% money-back guarantee with 24/7 customer support.
FAQ’s
What to do when the white background removal leaves rough edges around the subject?
You can use the Refine Edge feature in Adobe Photoshop to fix the problem. You can also use the feather tool to get a more natural look.
What are the advantages of removing the white background from a picture?
Removing the white background allows you to separate the main object. It becomes easier to blend the image into different backgrounds.
How much do you charge for background removal services?
Our price starts at $0.20 only. You can ask for a quote now to get a special price for your image editing order.
