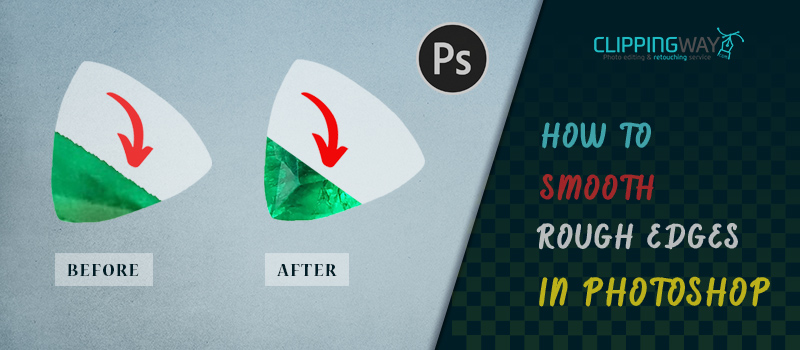
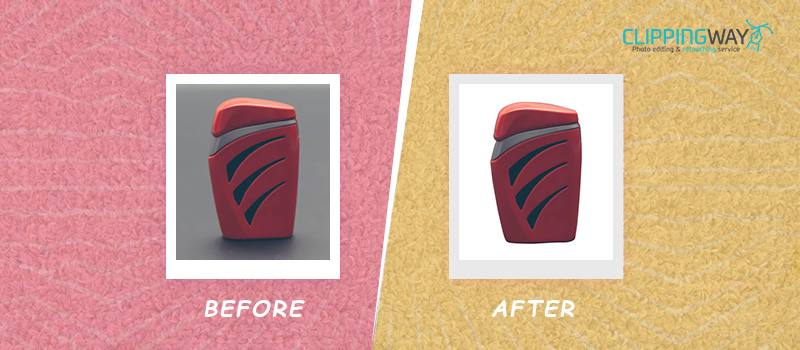
People who are connected with photography have to cut out an object and put it in another background many times. In that case, the picture may look unrealistic because of the rough edges. It reduces the overall quality of the pictures.
To get rid of that issue, you need to pay attention to smooth rough edges. Thankfully, you can do that using Photoshop. In this article, you are going to learn how to smooth rough edges in Photoshop.
After that, you can composite an image perfectly without having any edges. It will make your image realistic and trustworthy. We are going to explain the process with some simple steps.
Here you go.
How to Smooth Rough Edges in Photoshop: Step by Step Process
Step 1: Open picture having rough edges in Photoshop
At the very first, you need to open the image that you want to make the rough edges smooth. We are going to use the below picture for this tutorial.
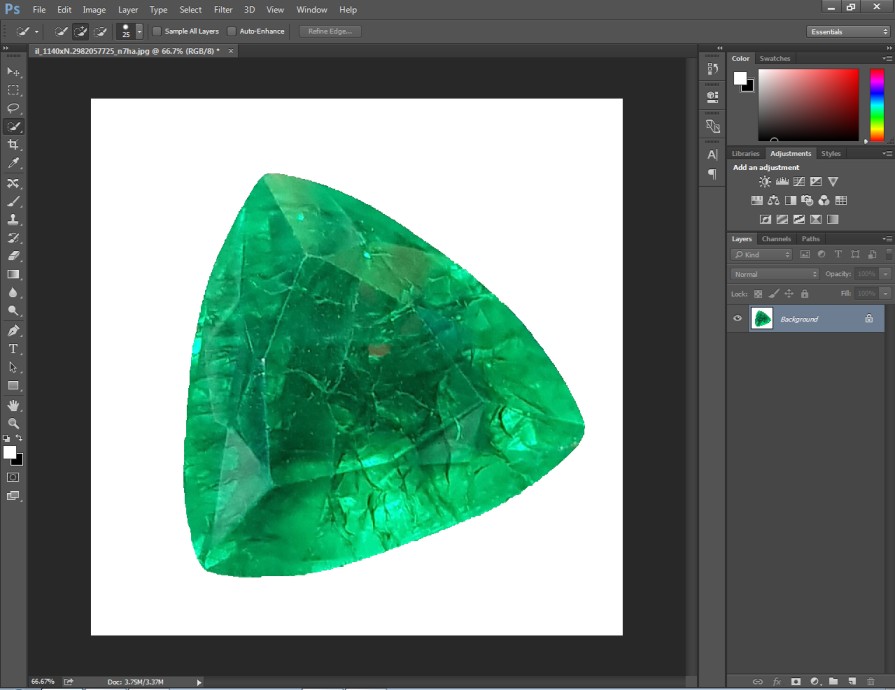
This object was cut out to this white background from a busy background. If we zoom in on the image, the edges will be more noticeable. You can see it in the below image.
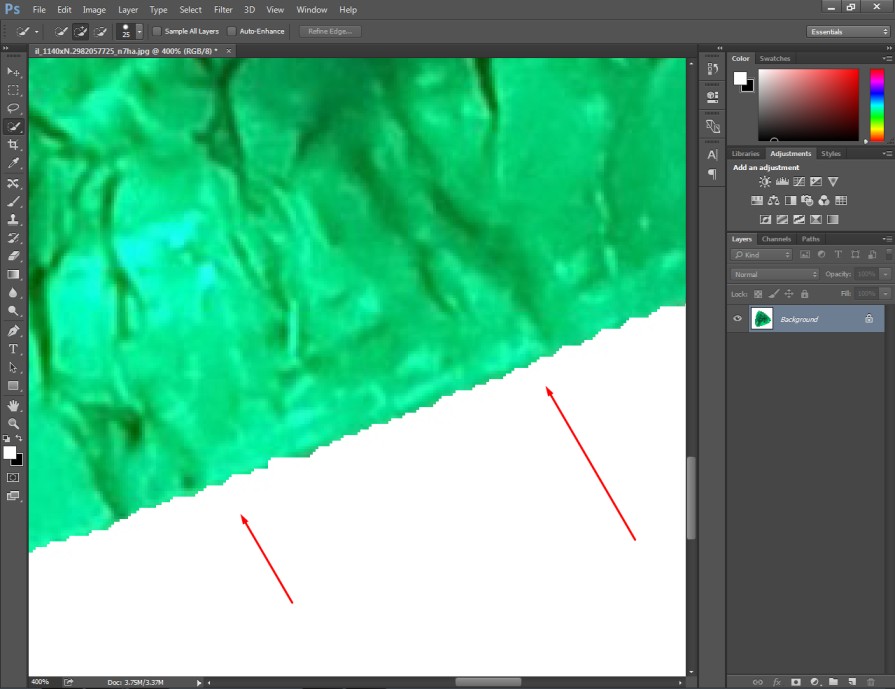
If you upload your product photography with those edges, it will be impossible to impress potential buyers. To fix rough edges, press CTRL + J to copy the background layer. Then, disable the previous layer and click on the copied layer.
Step 2: Select the object having edges
In this step, we need to make a selection of the object. You can do that using Quick Selection Tool. Pick the tool from the left side.
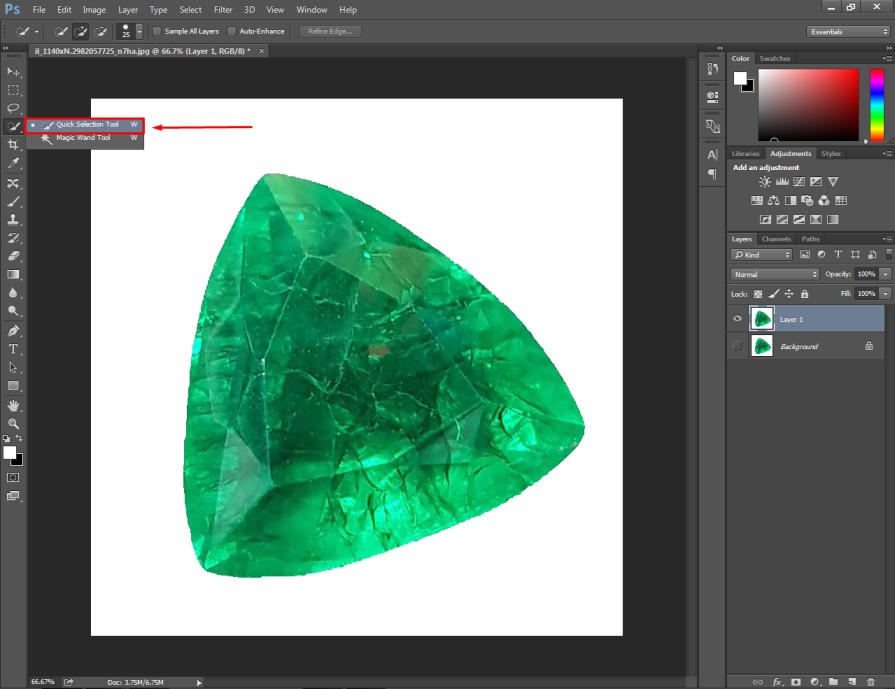
After picking this tool, you have to left-click on the mouse and drag it over the object to make a selection. It will select the object. After that, you will get the object in this form.
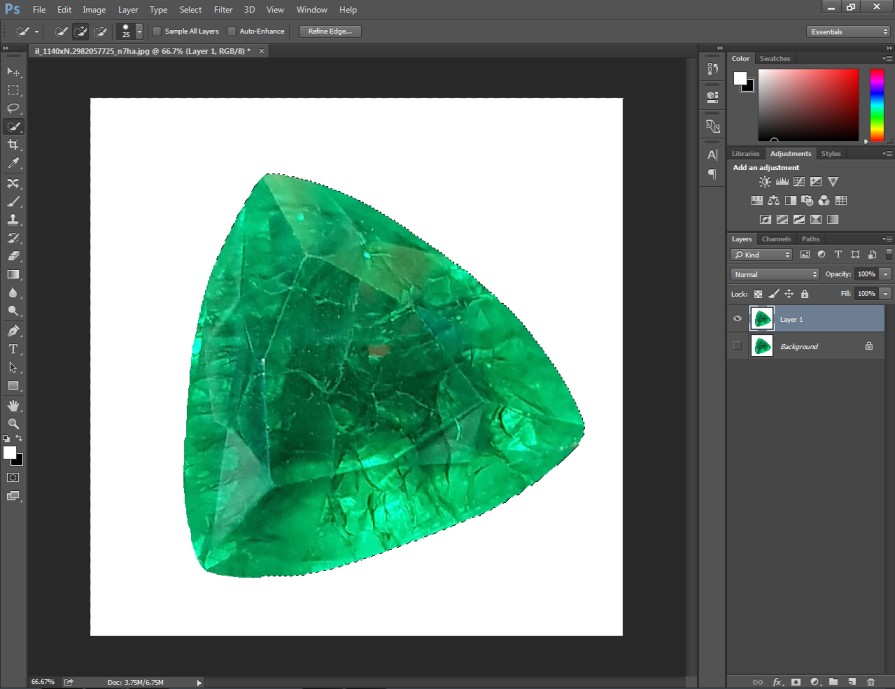
Next to that, you have to press CTRL + SHIFT + I to invert the selection. It will make the background selected.
Step 3: Add a new channel
You need to click on the “Channels” next to the “Layers”. Then, you have to click on Create A New Channel. It will create a new channel for your object.
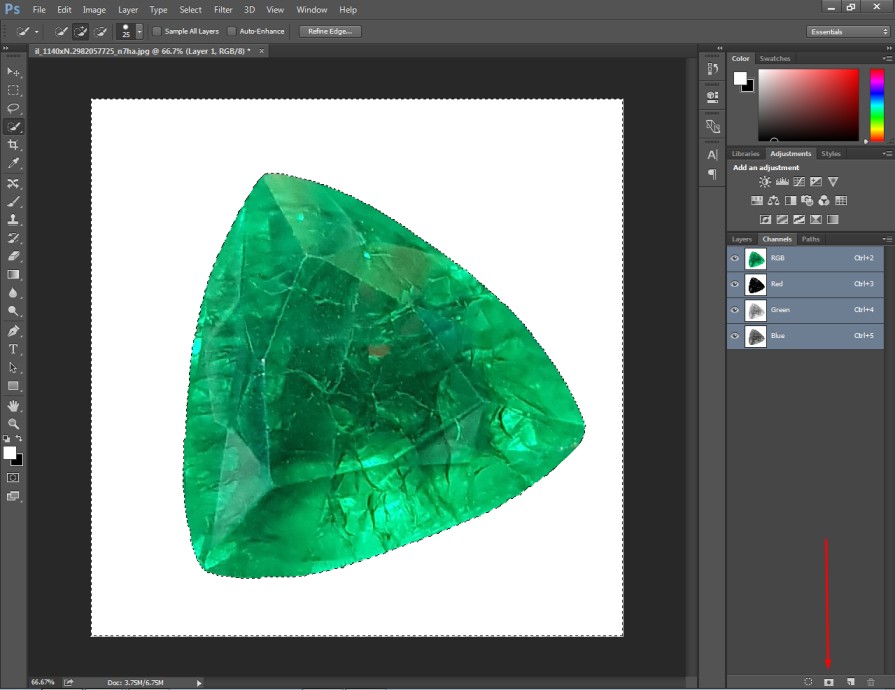
The object should be black. You will find the background white. Here’s the sample.
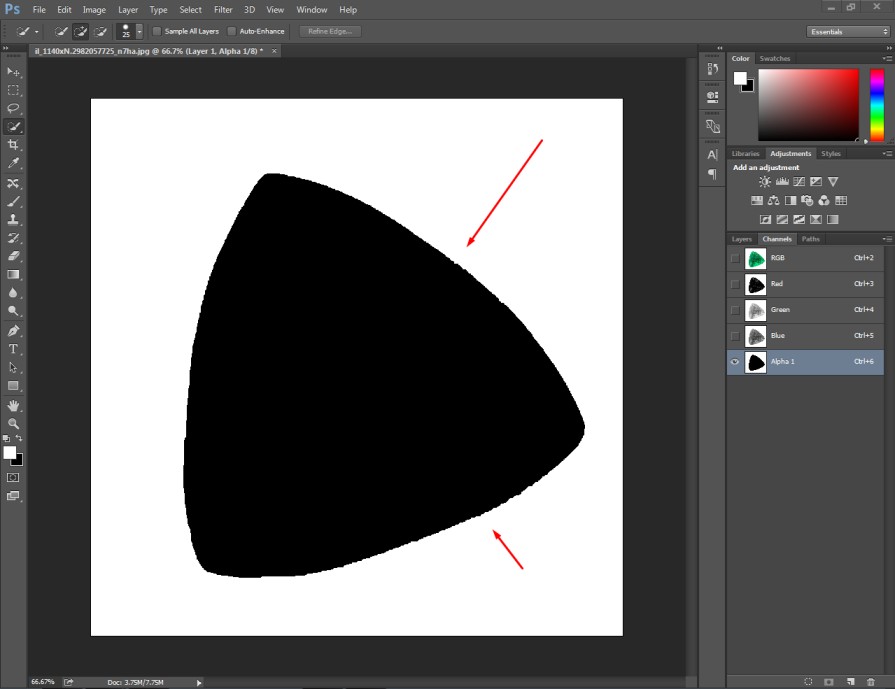
As you can see, there are lots of edges with the object. We need to add a Gaussian blur to fix it.
Step 4: Add gaussian blur
Go to the “Blur” option from the top and select “Gaussian Blur. You can find it from the above.
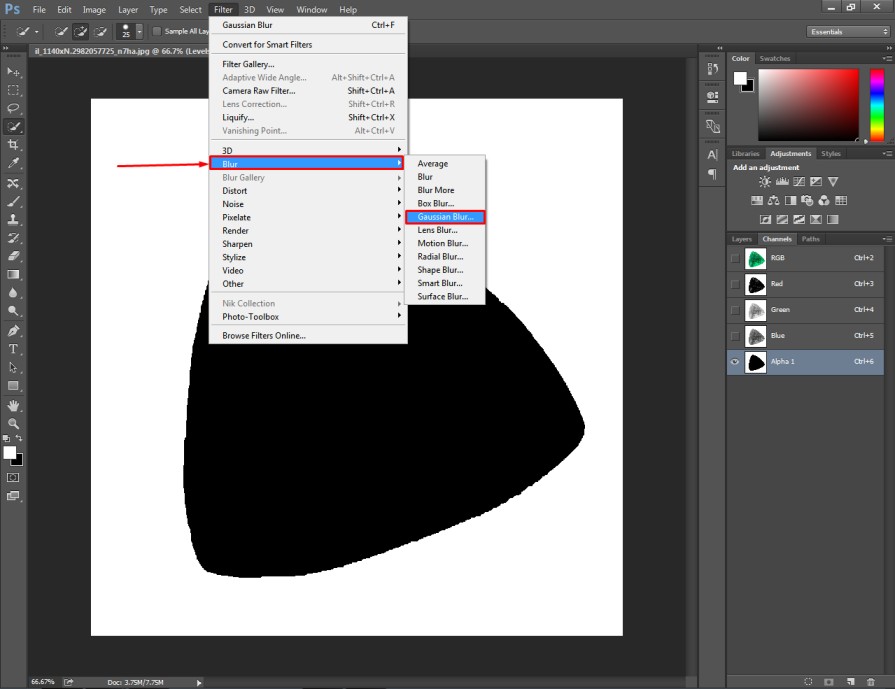
Next to that, you have to insert the radius in pixels for the Gaussian Blur. For this image, I am going to apply 4 pixels. You need to consider the number of edges in your image to set the blur.
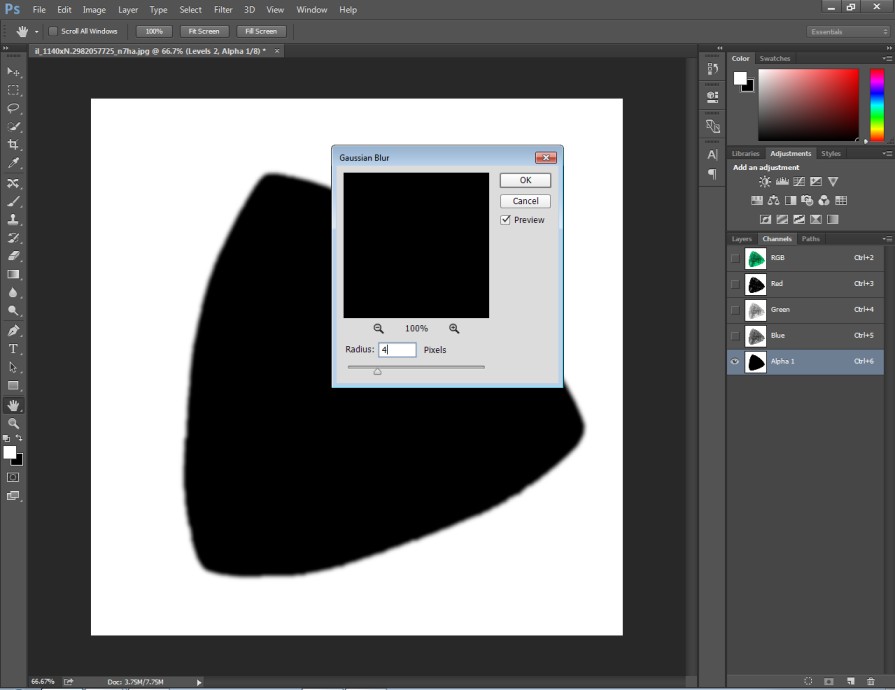
Then, you should press ok to apply the changes. At this stage, we have to make some more adjustments.
Step 5: Adjust levels
Go to the Image Adjustments option from the top and click on “Levels”. You can also use the shortcut CTRL + L to bring the option.
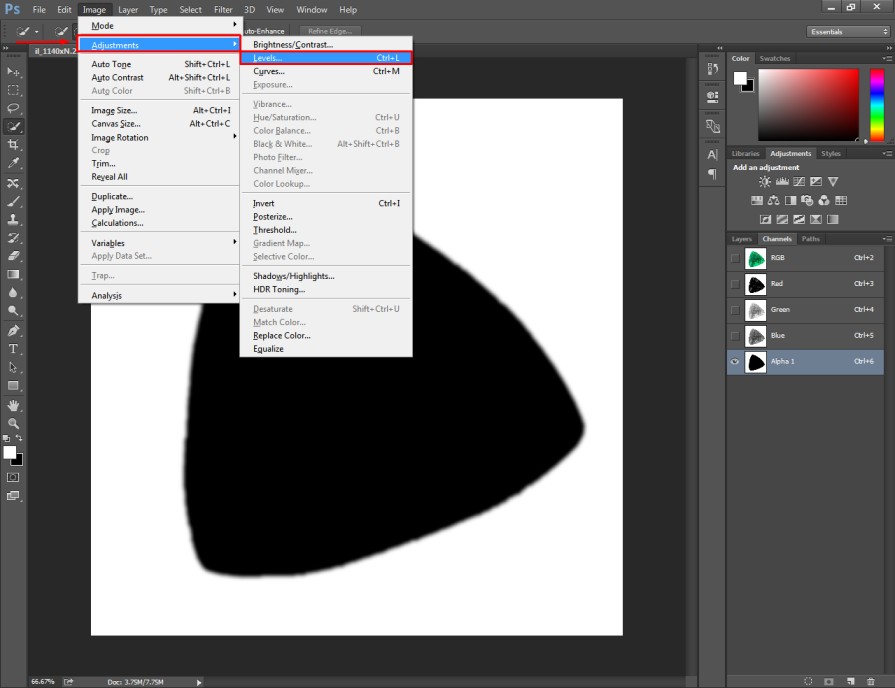
Next to that, you have to move the left slider to the middle. The numeric value of the left slider should be around 125-135. Then, you ought to move the middle slider to the right keeping it around 1.10-1.20.
After that, you have to move the right slider to the left around 175-95.
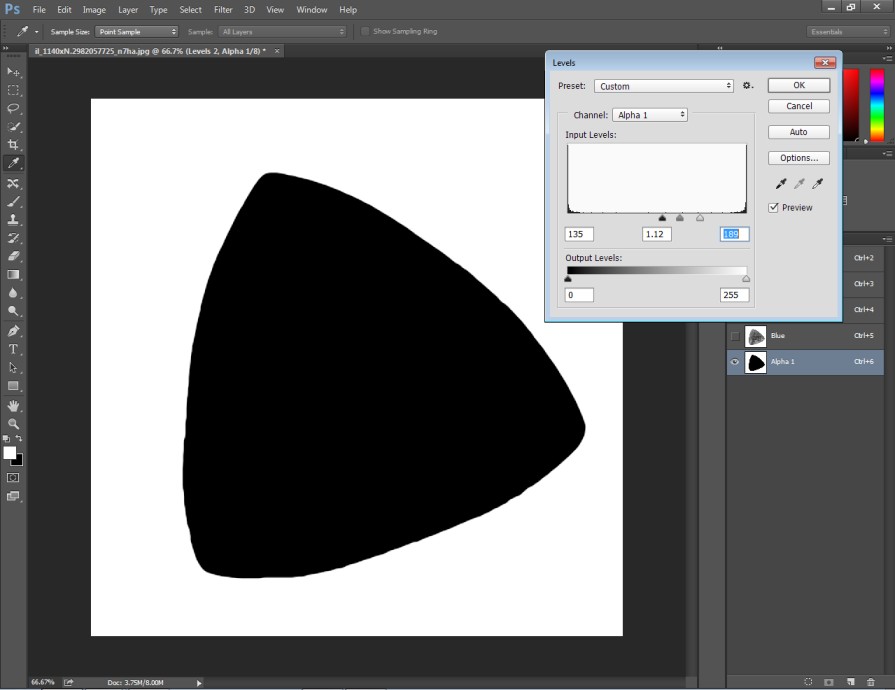
The object in Black form has to look sharp. Later on, you have to press CTRL and click on the new channel “Alpha 1”.
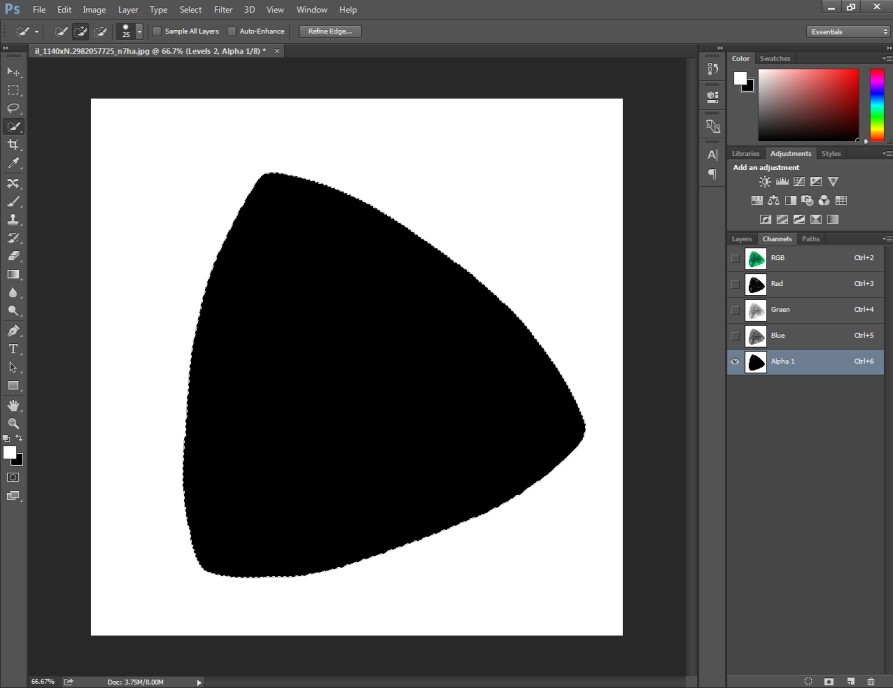
This command will select the object once again.
Step 6: Contract selection
In this step, we are going to modify the selection. If you zoom in on the image, you will see the selection is slightly outside the boundary line of the object.
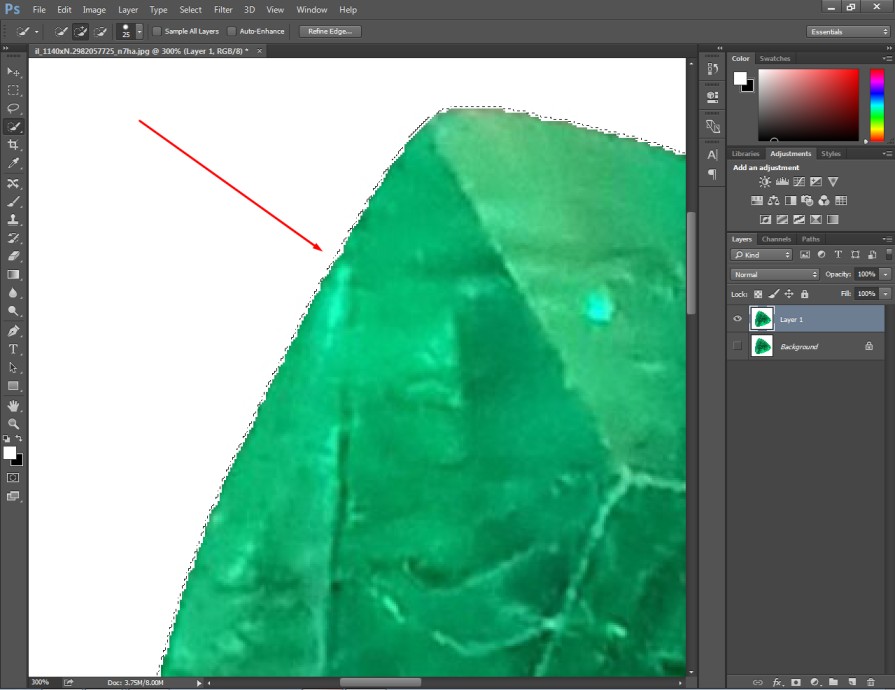
We have to bring the selection close to the object. For doing that you have to expand the “Modify” option. Then, you can select “Contract” from it.
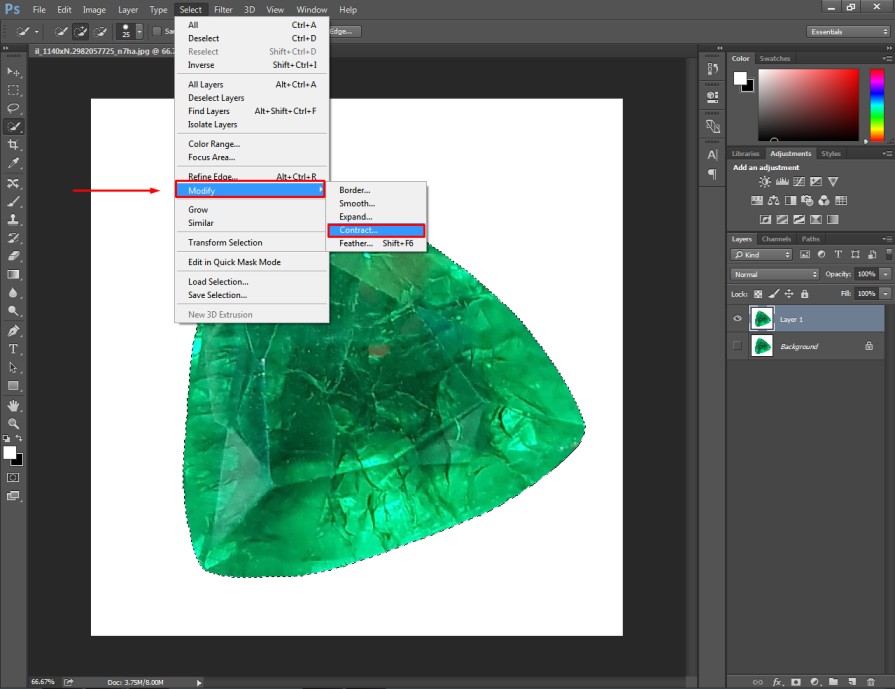
After that, you have to set the amount based on the distance of the selection from the object. For the above selection, I am going to keep it to 5 pixels. Press the “Enter” key to apply the changes.
Next to that, you have to press CTRL + SHIFT + I to reverse the decision and press the “Delete” key. This command will remove the background.
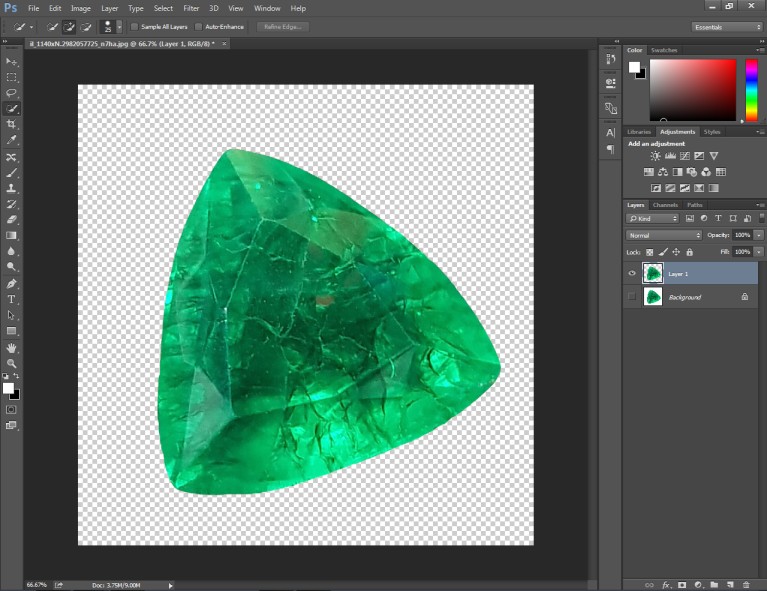
You will get your object on a transparent background without having any rough edges. Now, we are going to create a white background for the object. That will be the final step.
Step 7: Add a solid color background
From the layer adjustments option, you need to click on the solid color.
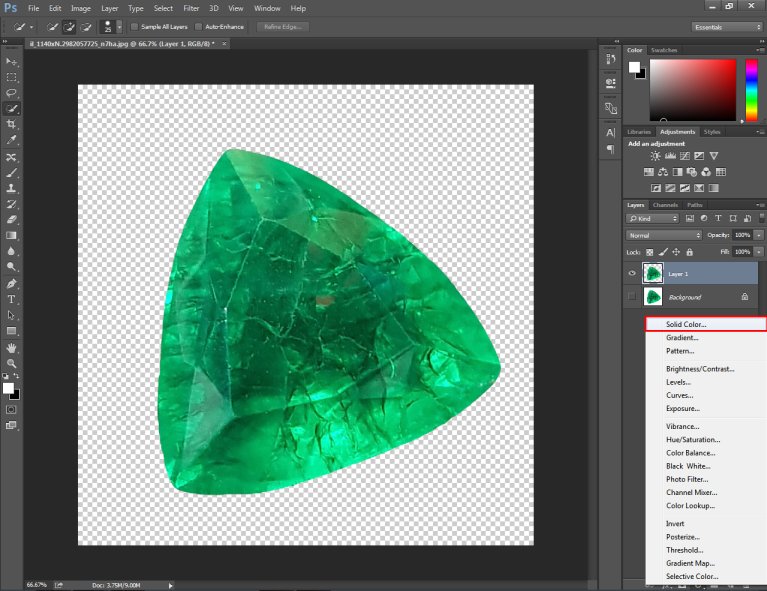
After that, you can select the color for the background from the color picker. We are going to keep the background white. Then, place the layer bottom of the previous layer just like in the picture below.
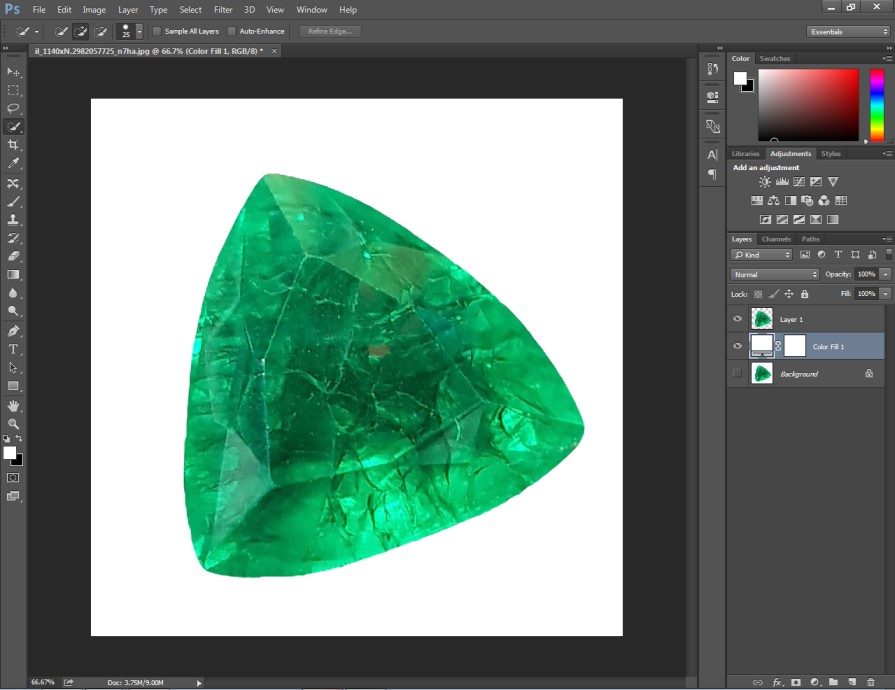
Now, the object is looking far better from the previous condition. It looks more realistic and impressive. If you zoom in on the object, there will be no rough edges. Want to see the sample picture?
Here it is.
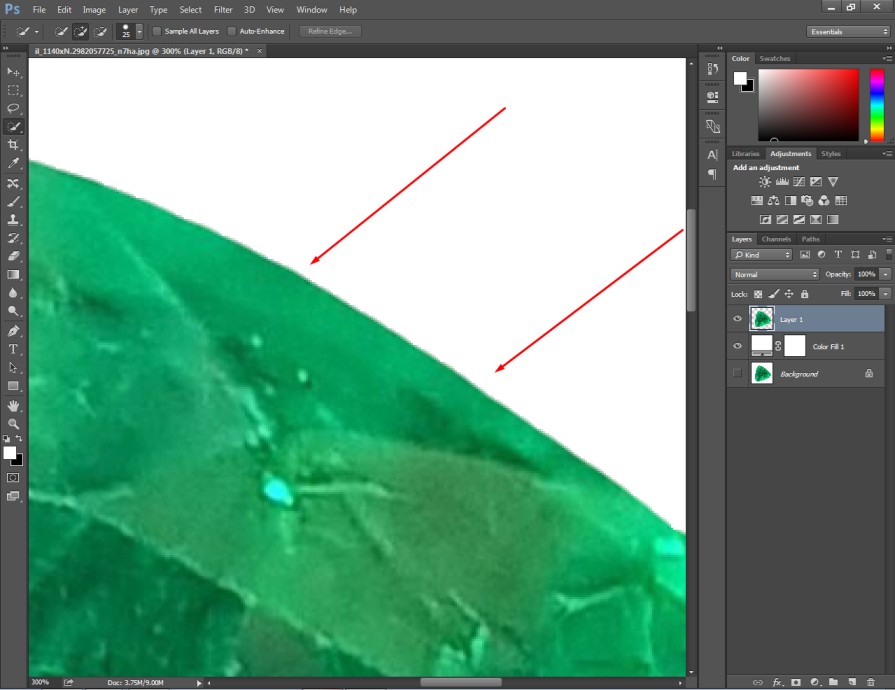
Go to the file option from the top and save your image in your required format.
By following the above 7 simple steps, you can also smooth out rough edges from your photograph. To make editing even better, we are going to provide you 3 bonus editing tips.
Bonus Editing Tips
- Use the pen tool to make the selection precisely.
- Always make a copy of the original image for the reference.
- Save the image in PNG when you want to keep the background transparent.
Common Mistakes
- Don’t use the magic wand tool to make a selection.
- Don’t put the selection too much inner side of the object.
- Don’t forget to apply Gaussian blur after adding a new channel.
Final Words
If you know the proper technique, it won’t be challenging for you to make rough edges smooth using Photoshop. Hopefully, the above technique will assist you to fix rough edges for any images.
However, if you ever feel the need for expert assistance, don’t hesitate to contact us. Stay connected with Clipping Way to get more helpful articles like this one.
FAQ’s
Which tool should i use to cut out an object without edges?
You can use the Pen tool and Quick Selection tool to cut out an object without having edges. You can also use the refine edge option if required.
Why do rough edges appear when i change the background of an object?
Inaccurate selection and low resolution can cause rough edges in the photograph.
Which type of background should i use to get rid of rough edges?
You can keep the background white to make the rough edges less noticeable.
