Blurry Photo, these two words are enough to frustrate any photographer. Many excellent photos become useless just for unexpected blurriness.
The saddest part is sometimes we cannot recreate the same scene that we have captured. I am pretty sure that you have also faced this problem on many occasions. Want to get rid of it? Only need to focus on camera shake reduction during the taking photos.
How to Remove Blur in Photoshop?
We can’t go to the past to capture the photo perfectly. Still, we have a good option. What’s that? You can photoshop how to unblur a picture with the help of Photoshop. Sounds exciting, isn’t it?
It will be so. In a while, you are going to learn how to remove motion Blur in Photoshop. After reading this article, you will be able to clean up your previously taken blurry pictures in photoshop that was great photography.
It will enhance your Photo Retouching knowledge. Without stretching any words, let’s get started.
Step 1: Open the blurry pictures in Photoshop
As we are going to unblurring a photo or image using photoshop, we have to open the picture blurred Picture in Photoshop. Run Photoshop and drag the picture on it.
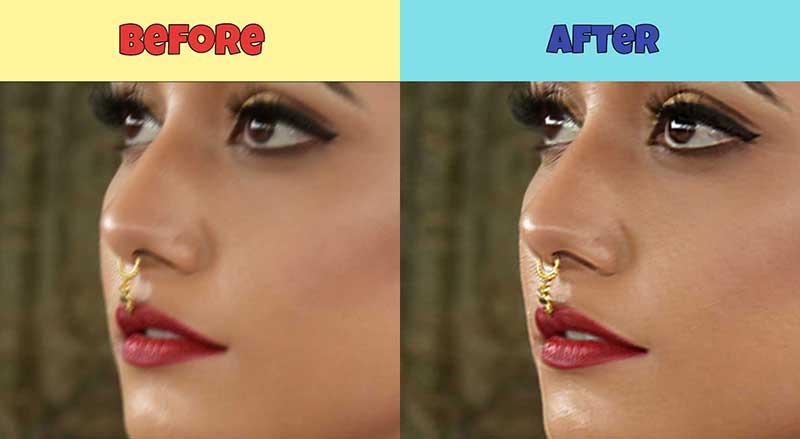
I am going to use this photo for this tutorial.

Zoom into the object and have a look at the blurry area.

In those areas, the object has got blurry. It has extracted the natural beauty of the photo. Let’s bring it back.
Step 2: Take measurement for remove blur in Photoshop
Yes, to clean up a blurry image we have to take some measurements. We have to measure these 3 things to unblur the picture.
- The angle of the Blur
- The distance of the Blur
Know More: How Much to Charge to Edit Photos in 2022
To take the measurement, I am going to use the Ruler tool. Don’t be nervous. It’s an easy step. Pick the Ruler form here.
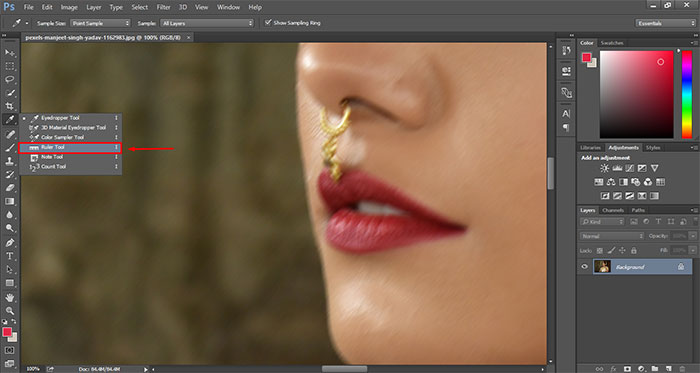
Now, allow me to start with the angle of the blurriness. It looks like that the object has moved left to the upper right. So, let’s create a line in that direction. Press and hold the left mouse and release it when you are done.
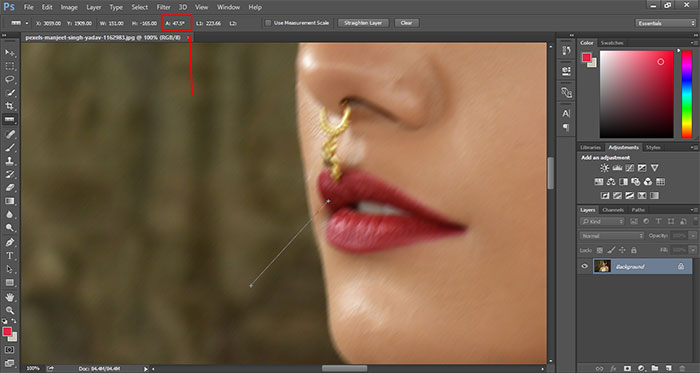
At the top, there will be the Angle of the line. Note this value, we are going to use this value in a later step. Next, zoom in a little bit more and create a line in the blurry area to measure the distance of the blur.
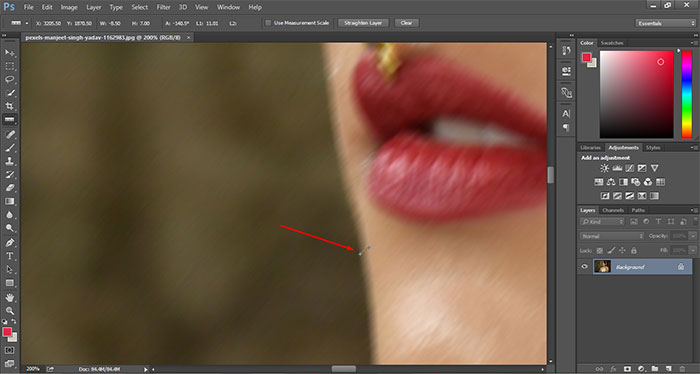
At the right of the Angle, L is showing the distance of that line. Note this value too and jump to the next step.
Step 3: Sharpen the object
In this step, press CTRL+J to take a copy of the original layer.
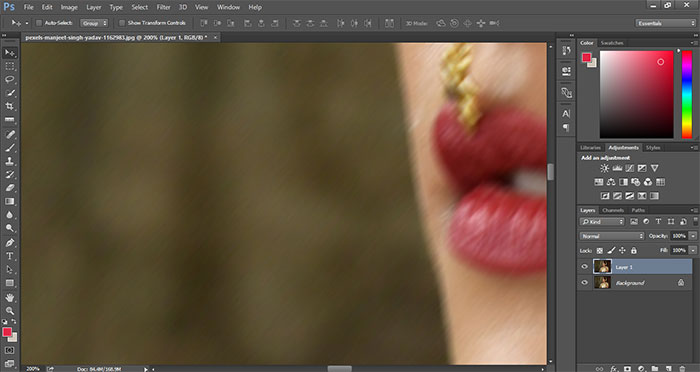
Then go the filter option and hit on the “Convert for Smart Filters”
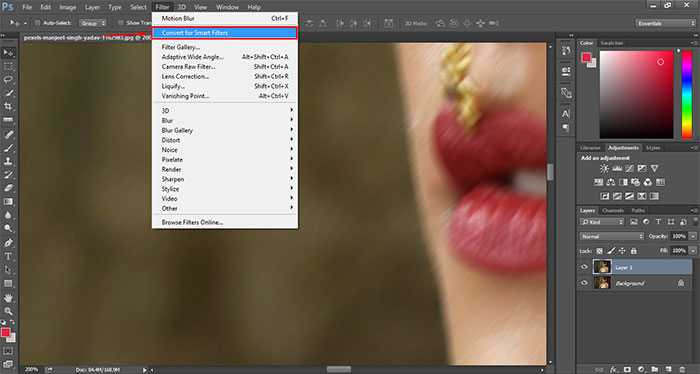
After that, Go to Filter > Sharpen > Smart Sharpen.
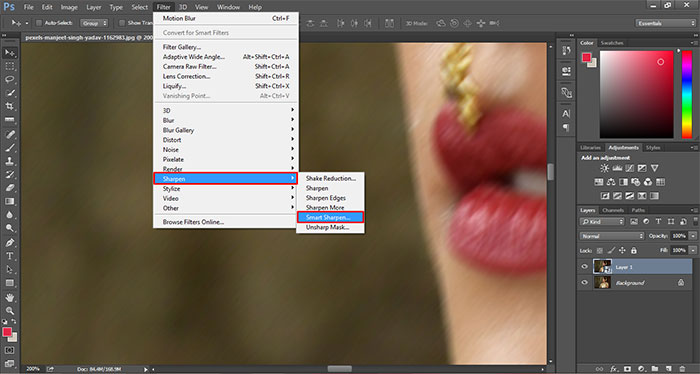
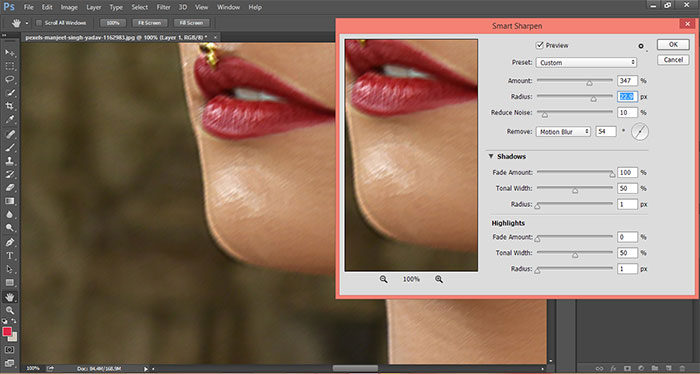
At this stage, smart sharpen options will be visible to you. Don’t get confused by these options. Just give me a few minutes to crack those. First of all, select “Motion Blur” in the box named “Remove”.
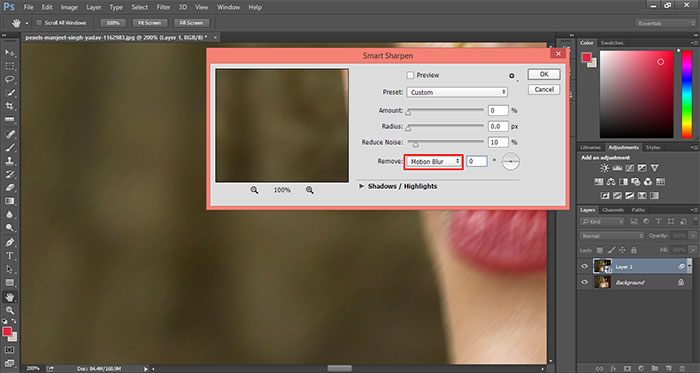
At the right of this, mention the Angle that you got in the 2nd step. Also, put the distance in the Radios Box and set the amount 500%.
Keep the Reduce Noise 10% Make sure that you have put a tick on the Preview. It will make your task easier. Let see what happened to our sample picture.
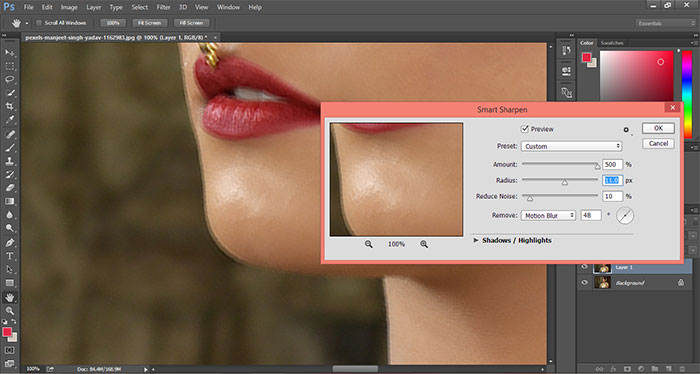
Though the blurriness has got reduced, still there are visible lines and edges. So, let’s change the Radius and Angle.
Slowly increase and decreases those values and inspect the result. When you feel that you have got the right result, keep that value.

Now, I think it’s pretty good. That was the object before.
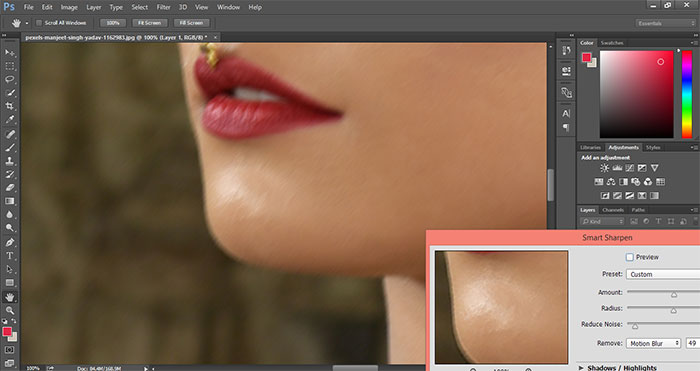
That’s the result till now.
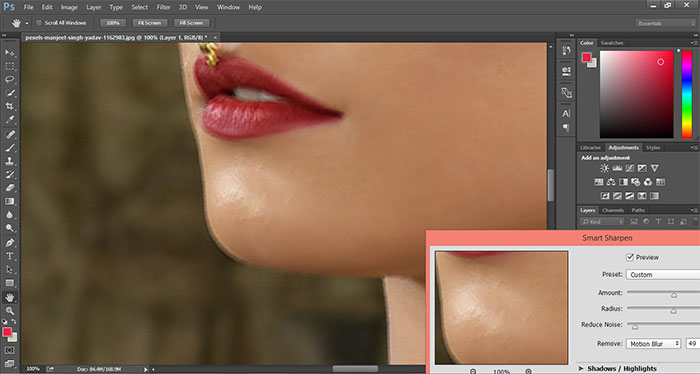
Still, there are visible lines around the object. However, we have to do more corrections. Click on the shadow and there will be more options. Set the “Fade amount” maximum.
Step 4: Refine Edges
Till now, we have got a pretty good result but not feeling fully satisfied. How to undo blur in photoshop completely? Mmm, we have to give a bit more effort. Permit me to Zoom out the picture and have a look at it.

Press on the mask icon from the bottom of the layer panel. It will add a mask to our current layer.
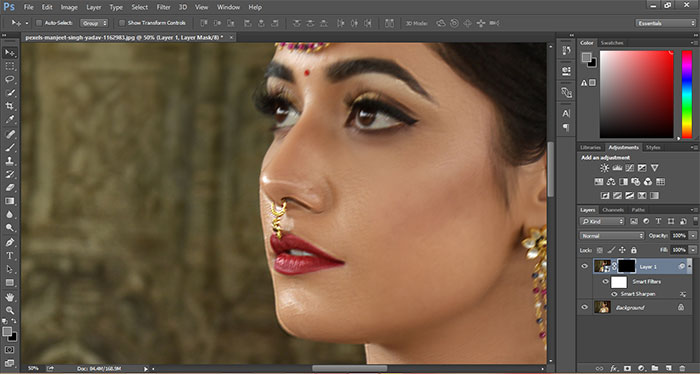
Afterward, Pick the brush tool from the left and make sure that the foreground color is White.

At this stage, Press the left Mouse and brush on the boundary line of the object. It will remove edges from the boundary area.

Step 5: Sharp Inner Portion
We are right at the ultimate step of how to clean up a blurry image in Photoshop. Literally, we will sharp the inner portion of the object.
Press CTRL + J to copy the selected layer. After this, you will discover the layer panel in this form.

Click on the mask of the upper layer and hit on CTRL + I.

After doing this, the mask will be inverted like this picture.
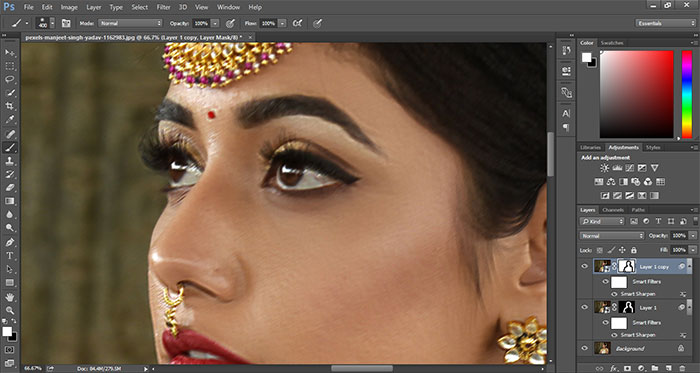
Double click on the “Smart Sharpen” and keep the Fade amount Value to 0.
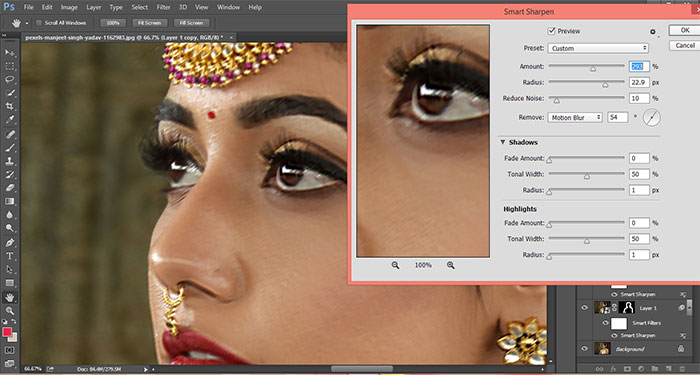
It will remove blurriness from the inner portion. That’s it. We have successfully unblurred a picture with the help of photoshop. That was the picture.
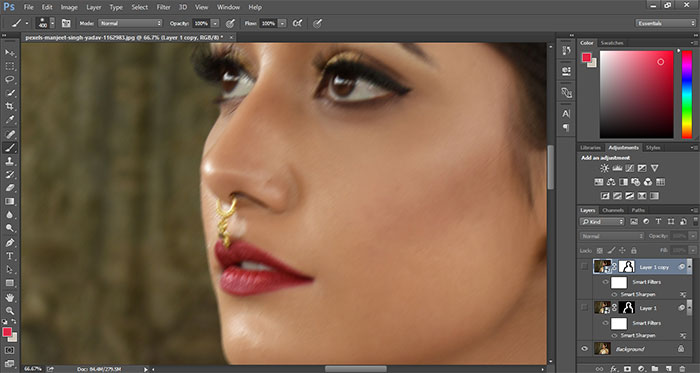
And that is the result.
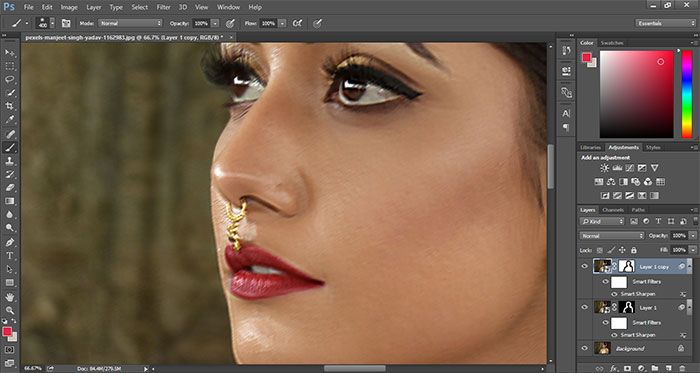
Final Words
That’s all about sharpen an image in photoshop. From now on, you can Remove blur in Photoshop just in a few minutes. Is there any picture you would like to try now? All the best wishes to you.
Start removing blur from the picture and take it out of the recycle bin. Thanks, everyone. If you have bulk amount photo you can get clipping path service with fast delivery.
