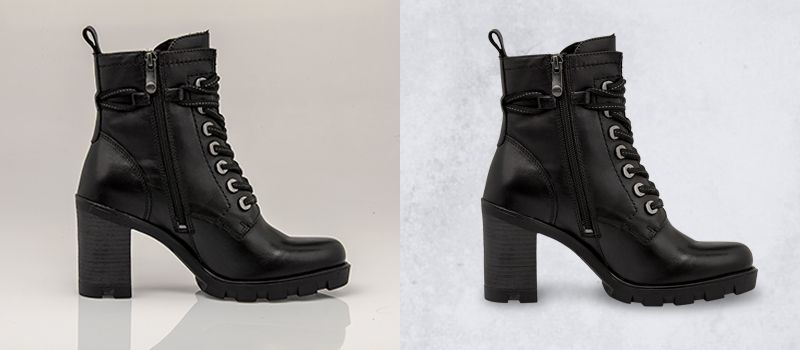
When you are willing to gain viewers’ attention to a certain object through photography, you should showcase the object as specifically as possible.
On that note, photo cut out is the most effective method to do that with efficiency. But, most people are unaware of the correct way to do it.
Through this article, we are going to show it to you. In this article, you are going to learn how to make a cutout of an image. It will assist your photograph to get rid of unwanted backgrounds without losing any details of your targeted object.
The best thing is you can follow the process even without having in-depth knowledge of Photoshop images cut out.
When Should You Make A Cutout of Your Photograph?
In Photography Genres like Product Photography, Fashion Photography, Jewelry Photography, and other commercial photography, gaining attention is the key to getting more conversions.
You can do that using the Professional Image Cut Out to get that attention. Whenever you are looking to grab the attention of viewers, you should make a cut an image in photoshop of your photography targeting the specific object.
You can do it using different photo editing applications. But Adobe Photoshop is referred to by expert designers and professional editors. It has different selection tools to match all types of objects.
Therefore, you should make a cutout to present your object specifically without having any unnecessary elements with it.
5 Steps to Make A Cutout of An Image
Firstly, you have to begin with launching the Photoshop program on your PC. You can do it with any recent version of Adobe Photoshop CC.
Then, go to the file option from the top and open the image to make a cut out. We are going to do it using the below image.
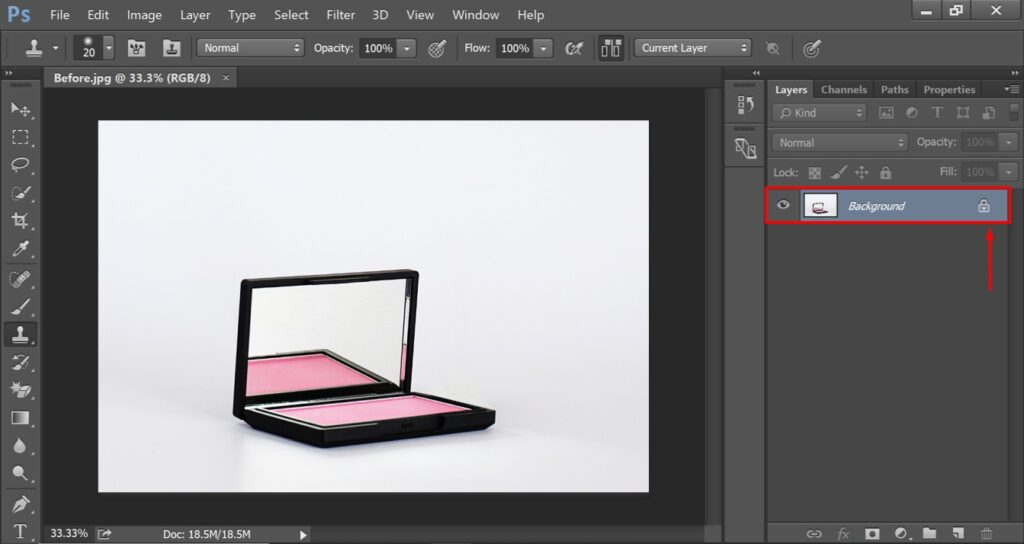
As you can see, the background layer will be locked by default. You just need to double-click on it to unlock it. Otherwise, we won’t be able to get transparency.
Step 2: Pick A Selection Tool
Now, we have to pick a selection tool so that we can isolate the targeted object.
In Photoshop, several selection tools are available to make selections for different types of objects. For this object, we are going to use the pen tool.
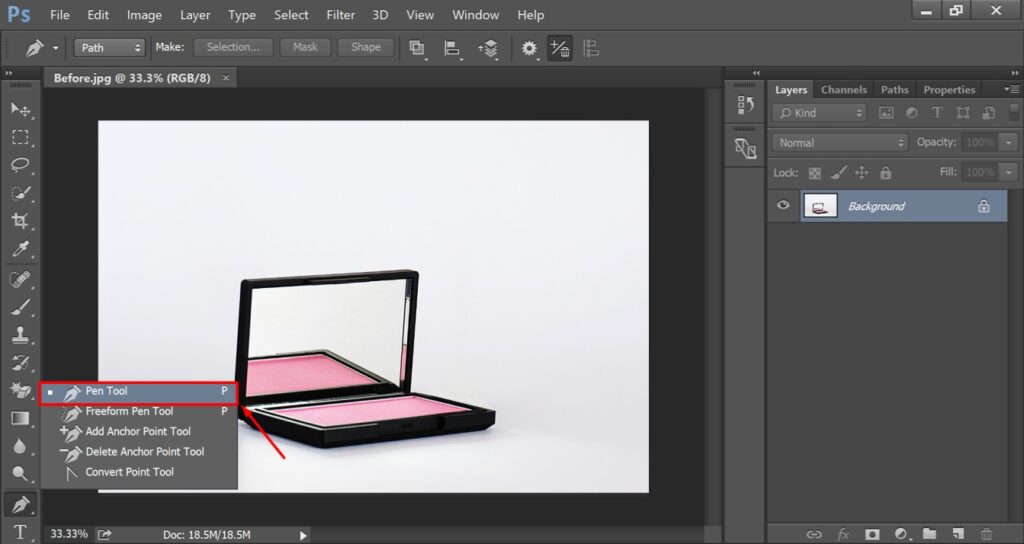
This tool allows us to make a selection in the most accurate way. Now, let me show you the selection process.
Step 3: Separate The Object
In this step, you have to press the shortcut code “CTRL +” together to zoom in on the image. You can use the spacebar to move the image while zooming on it.
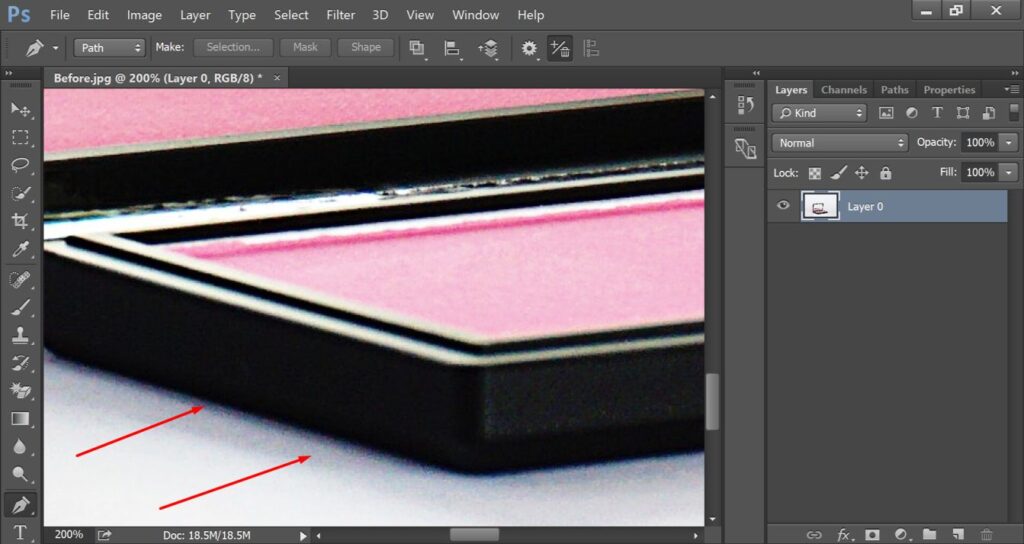
We need to create paths covering those outside the boundary line to separate the product. To create lines, you just need to left-click on the mouse. You should do it in that way.
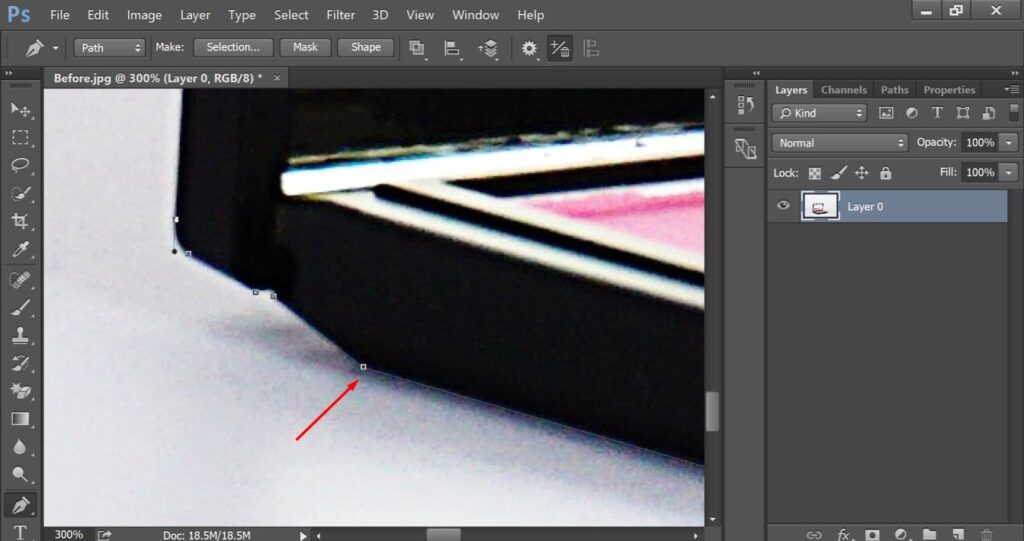
While creating boundary lines, you may have to cover curved areas. For those sections, you have to drag the mouse up and down to get a bending line.
Here’s the sample.
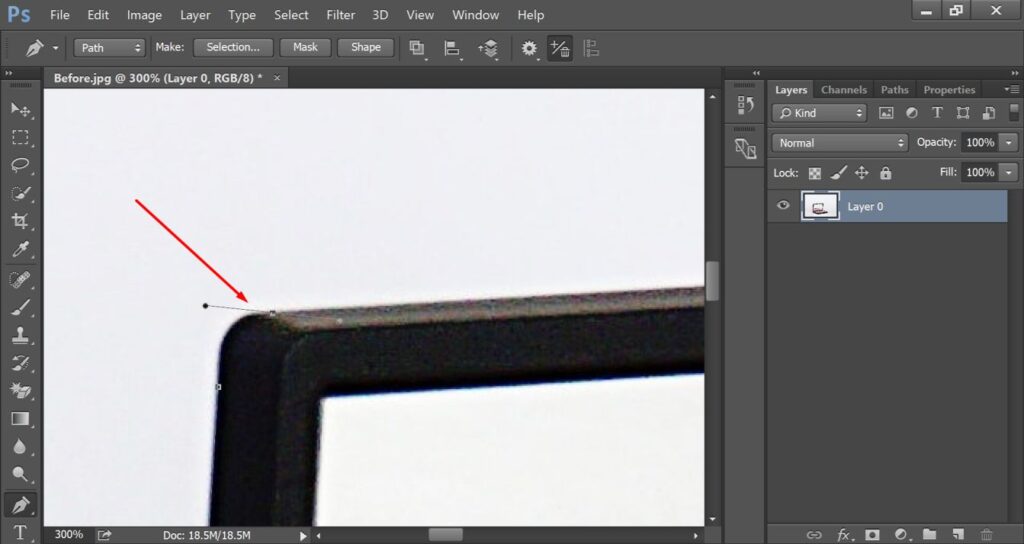
The tool gives you the flexibility to get any shape. You have to make sure that you cover the entire object using the vector line and finish the final anchor point joining the starting point.
Step 4: Select The Product
Now, we are going to select the product. To do that, you just need to make a right click on your object and select “Make Selection”.
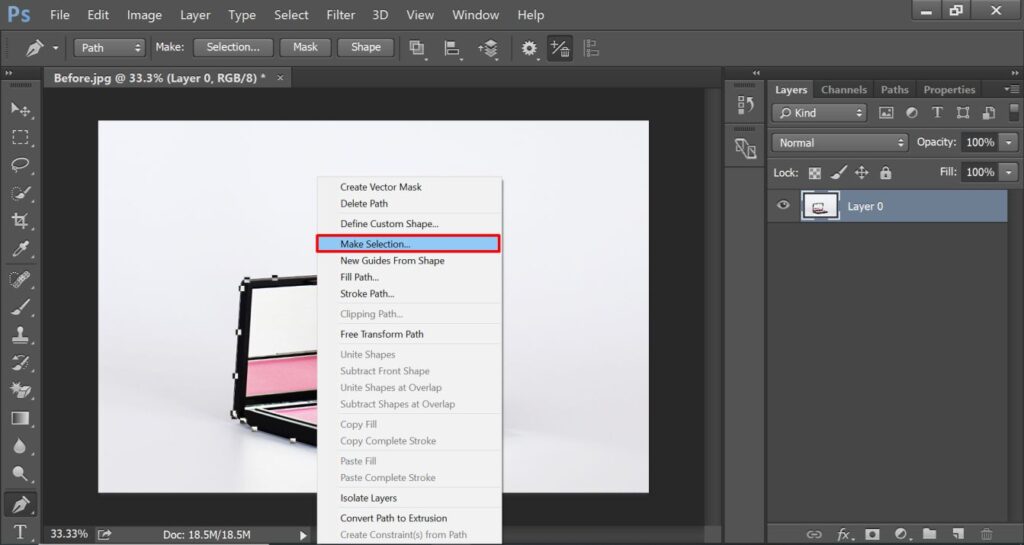
It will move the static vector lines into moving lines. Then, you have to go to the select option from the top and choose “Inverse” from the list. You can get it from here
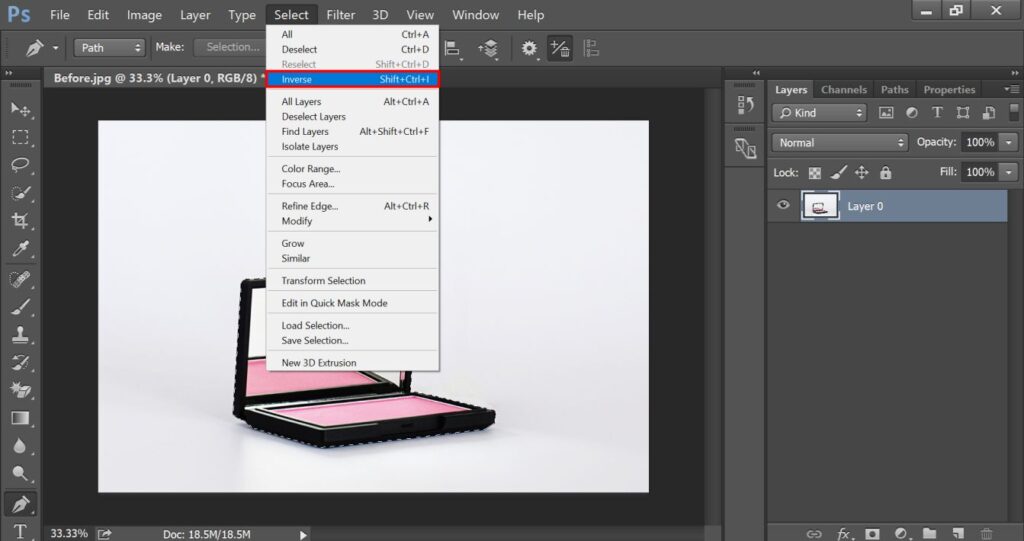
Now, we are going to jump to the final step.
Step 5: Make A Cutout
At this stage, you just need to press the delete key to make a cutout of your image. You can see the final result after the image cut out in Photoshop.
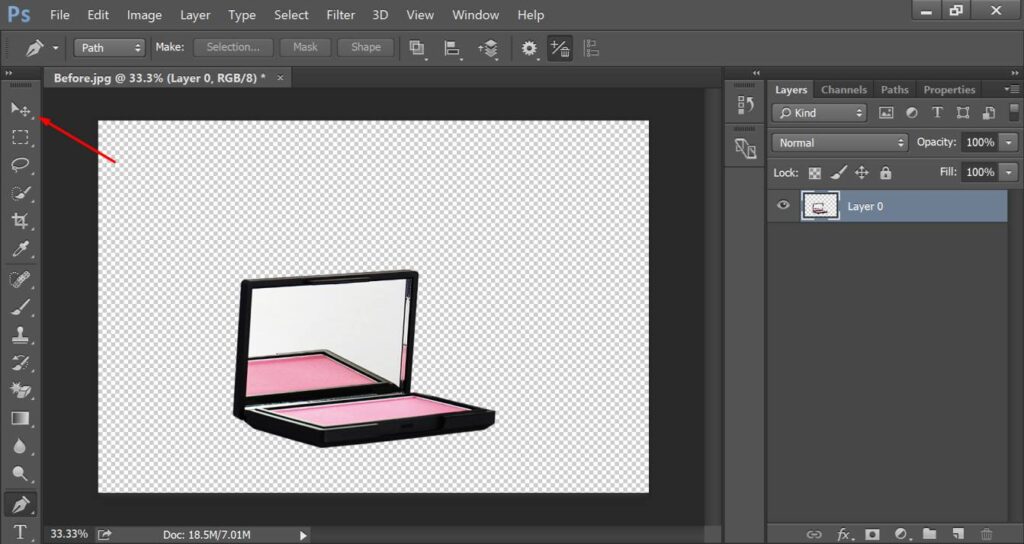
You can also adjust the position of the object using the move tool. Would you like to change the size of the objects? In That case, you can use the free transform option.
You can get it by pressing CTRL + T. I have placed the object at the center.
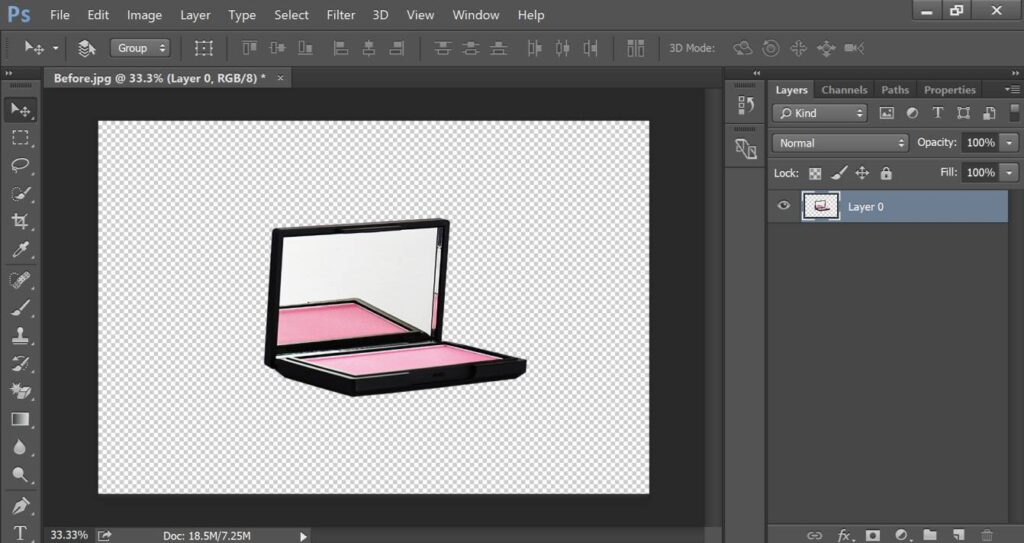
To save the image with transparency, you have to choose the PNG format. If you want to keep the path, you should choose the JPEG format. You will get the save option from the top.
That’s the process of how to make a cutout of an image in Photoshop. Now, let me provide you with some tips so that you can perform the above process with the highest accuracy.
3 Tips
- Use refined edge to fix visible edges near the selected area.
- Try to keep fewer anchor points to make the selection perfect.
- Press the SHIFT Key while resizing an object to maintain the shape.
3 Mistakes
- Do not press delete the selection without inverse selection.
- Do not apply pen tool for hairy, transparent, and, fury object.
- Do not save the image as JPG to get a transparent background.
Sum Up
Though several selection tools are available in Photoshop, the pen tool is the perfect option to make a cutout of an image.
You have to do the selection process accurately to get a perfect result for an image cut out in Photoshop. When you have bulk images, you will need the help of professional editors.
On that note, Clipping Way is the best distinction to get professional image cut out services. We can handle 3500+ images per day.
FAQ’s
How do i turn a picture into a cutout?
You can cut out an image into any shape using Photoshop. The pen tool is a suitable option to cut out an image.
How do i crop something out of a picture?
You can use the cropping tool in Photoshop to crop something from a picture. You can set specific dimensions or use custom dimensions.
How do you cut out part of an image?
You can use the lasso tool, quick selection tool, and pen tool to cut out any specific part of an image.
How do i make a photo cutout online?
You can use photo editing tools like Canva or Fotor to cut out an image online. But it won’t provide you with an accurate result like Adobe Photoshop.
