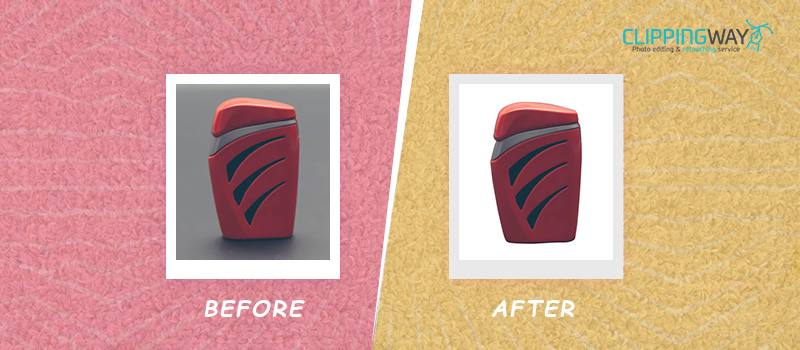
When you are working on Anime or Craft art, having an unnecessary background can distract you from getting a perfect post-processing result. The Silhouette Studio is a popular software to access or create designs and send them to a Silhouette cutting.
Using this free design software, you can remove the background within a short time. In this article, you are going to learn how to remove background in Silhouette Studio. You can do that in silhouette without using any manual selection tools.
What is Silhouette Studio?
Silhouette Studio is a free photo editing platform built-in for designers. Using this photo editing software, you can provide a professional touch to your craftwork.
This application is suitable for working in silhouette and anime images. You can do changes like Background removal, adding texts, cropping and resizing images etc.
After reading this article, you will learn about some of its common features like picture export and important, modify panel, trace panel and cropping. Also, you will learn the trick of erasing the background of your design.
Why Remove Backgrounds in Silhouette Studio?
Are you thinking about why you should remove the background of your design in Silhouette Studio? Well, there are lots of reasons behind removing the background.
You can get a clean and precise result after removing the background of a design. You can only print the design without having any background with it.
This is suitable with the Silhouette printing machine. Therefore, you will get the option to print only the design you need. At the same time, you can keep the background transparent after removing the background.
It will assist you to place the object in different photos easily. That’s the most common reason to remove picture backgrounds in Silhouette Studio.
Now, let me show you the steps that you should follow to do that.
How to Remove Background In Silhouette Studio? 5 Steps to Follow
Step 1: Launch the Silhouette Studio App
First of all, you have to begin with launching the silhouette studio app on your device. After that, you will get a blank canvas on the screen.
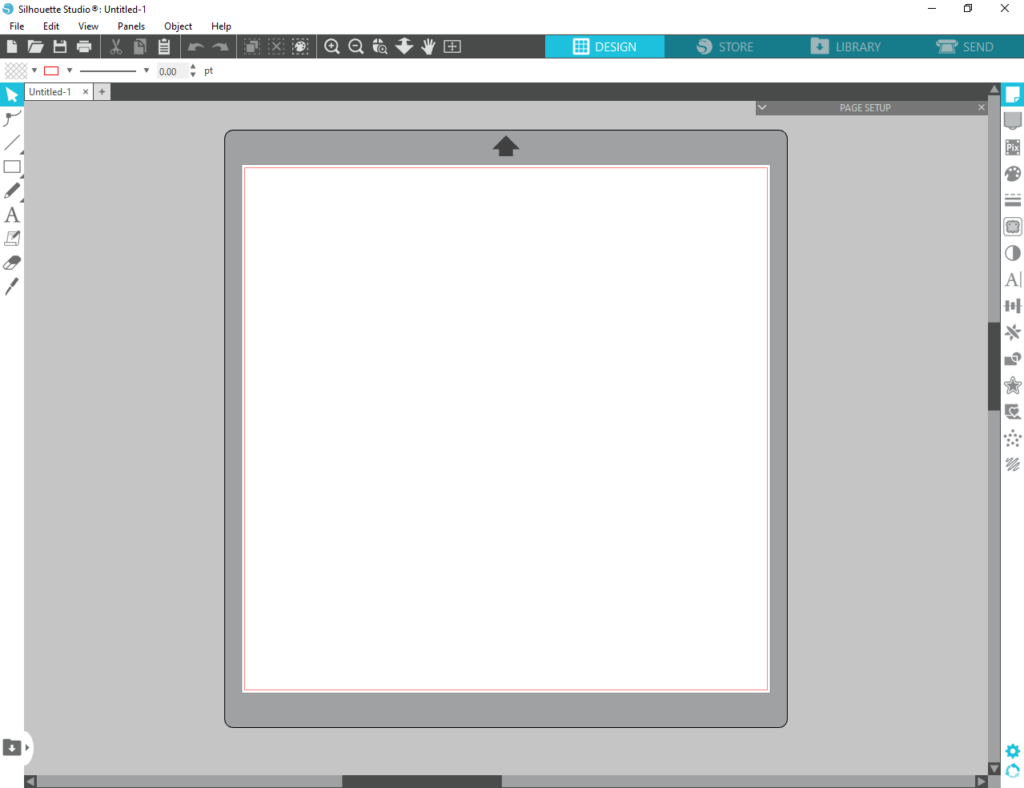
Though, you can change the canvas color like Photoshop. However, we are going to open the image to remove its background. You can click on the “File” option from the top and choose “Open”.
Also, you can select a file from your PC and drag it on the Silhouette App. If You find that the image isn’t fitted properly according to the canvas size, you can resize the image to make it look perfect with the canvas.
You are going to proceed with this image.
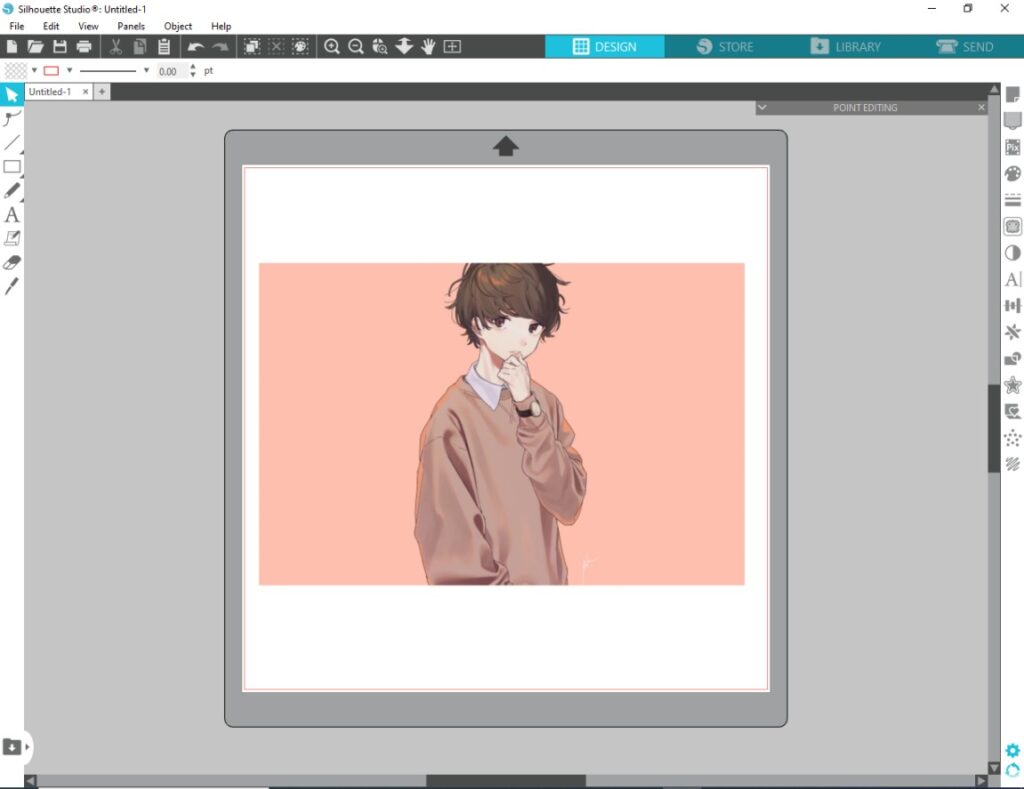
Now, we have to choose the background area to remove.
Step 2: Open the Trace Panel
From the right side of the tool panel, you have to click on the “Open The Trace Panel” option. Here’s the option.
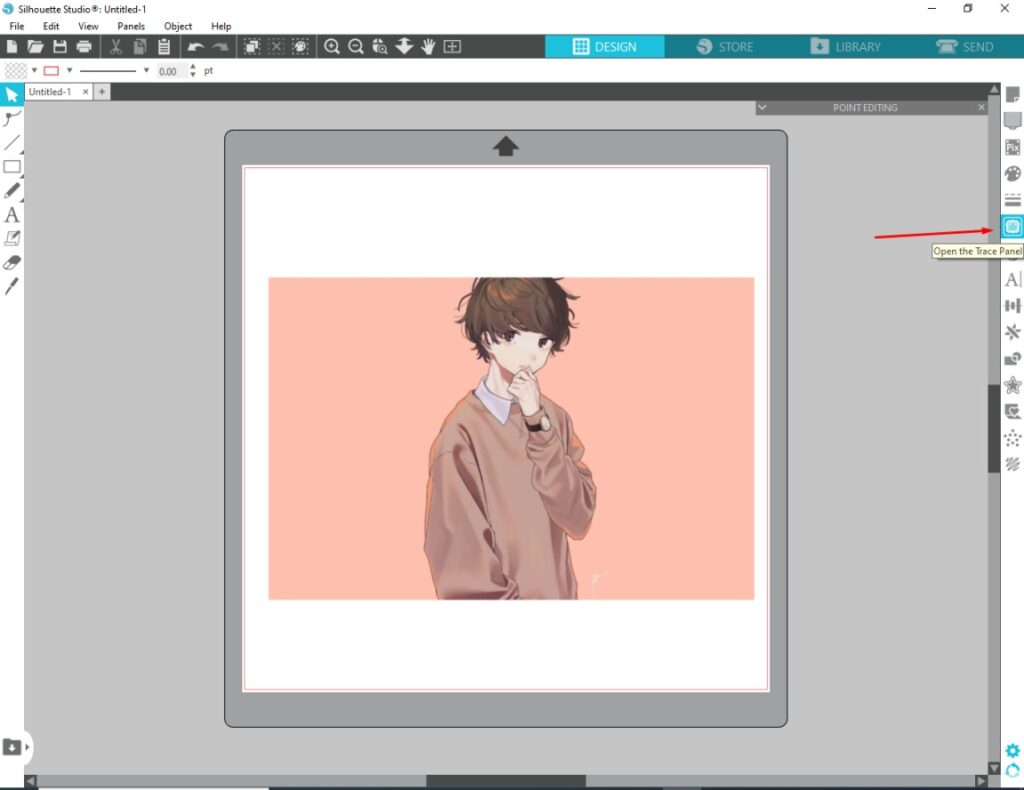
After that, you need to click on “Select Trace Area”. Basically, this operation will indicate the area of your image that you want to trace. You have to select your entire image.
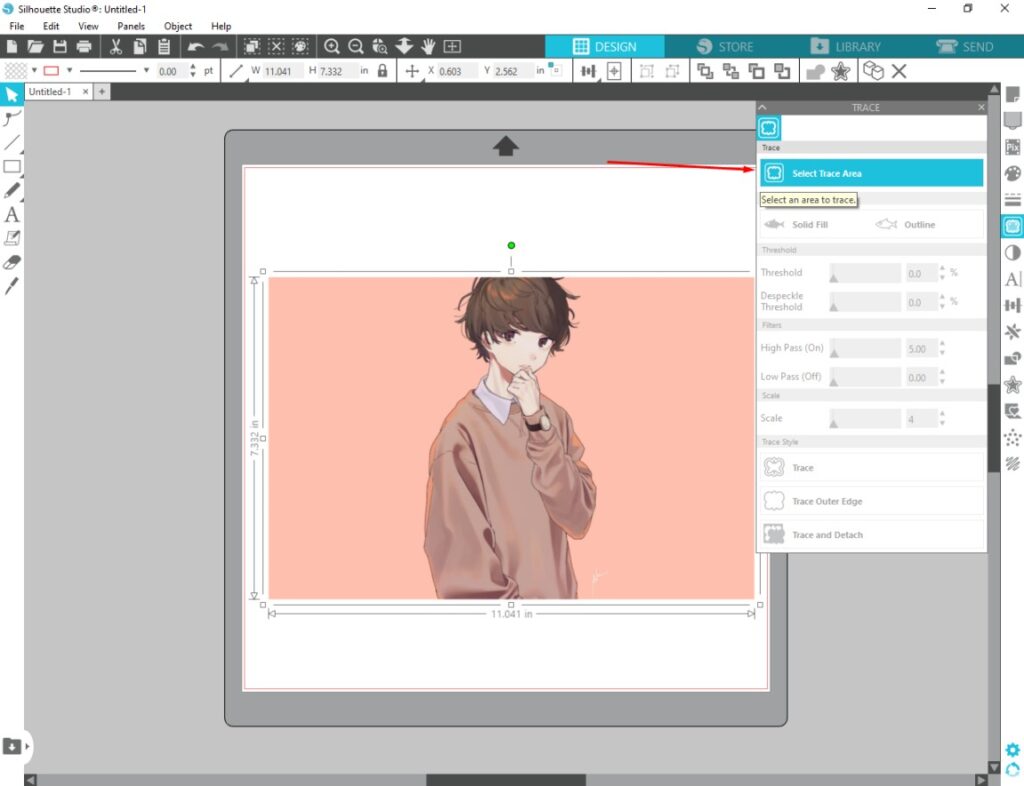
When you trace any portion of your image, it will be marked as yellow. You can change the trace by adjusting the “threshold” option.
Step 3: Trace outer edge
After selecting your image in the trace option, you will find the image getting yellow color.
Here’s the sample.
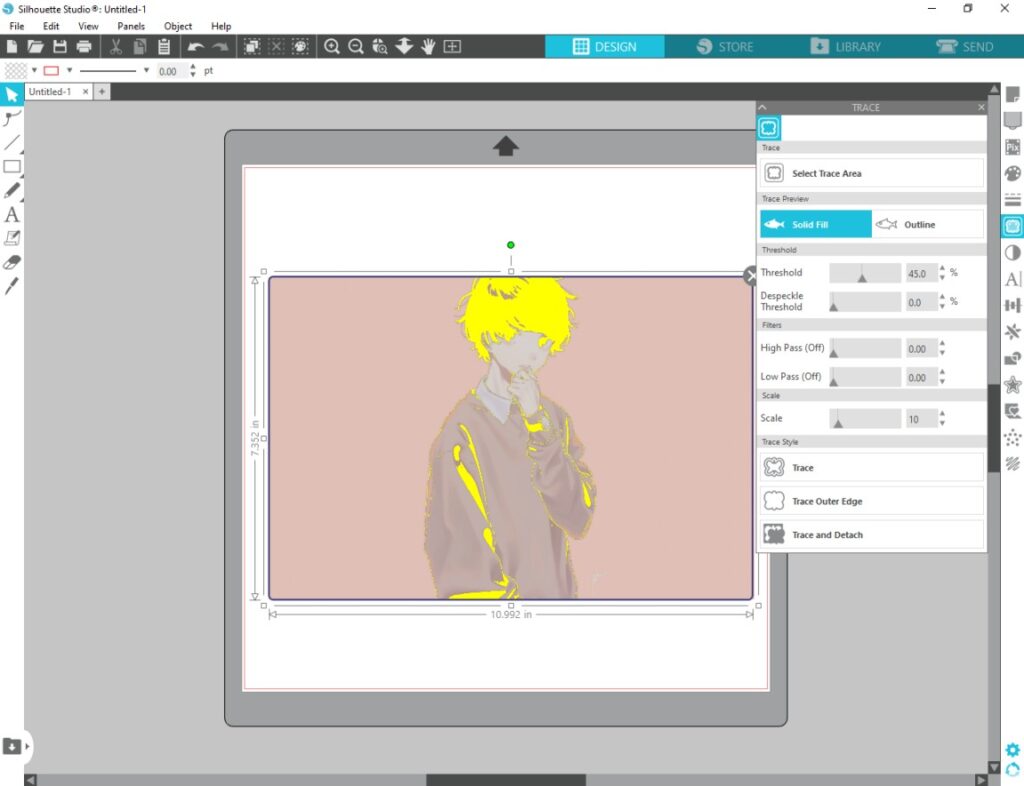
You have to increase the threshold option to mark the object effectively. If I increase the threshold to 71, it will increase the yellow portion in the image.
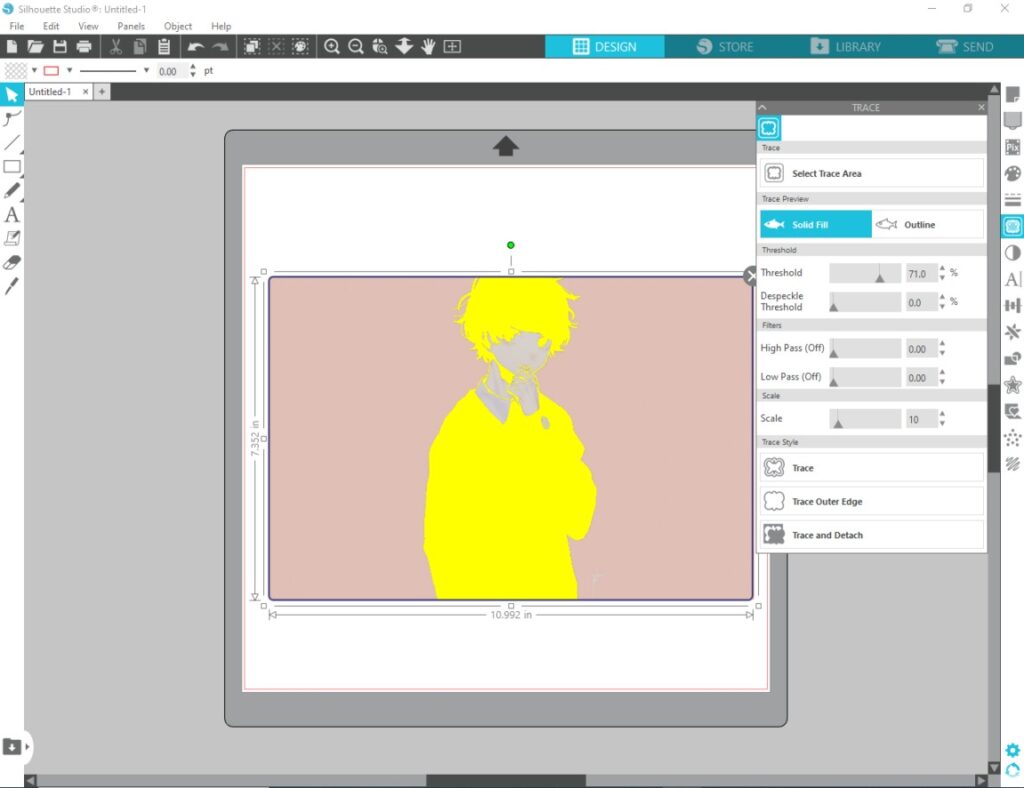
At this point, you have to click on the “Trace Outer Edge” from the right side trace panel. It will create a trace outside the object.
Here you can see the lines.
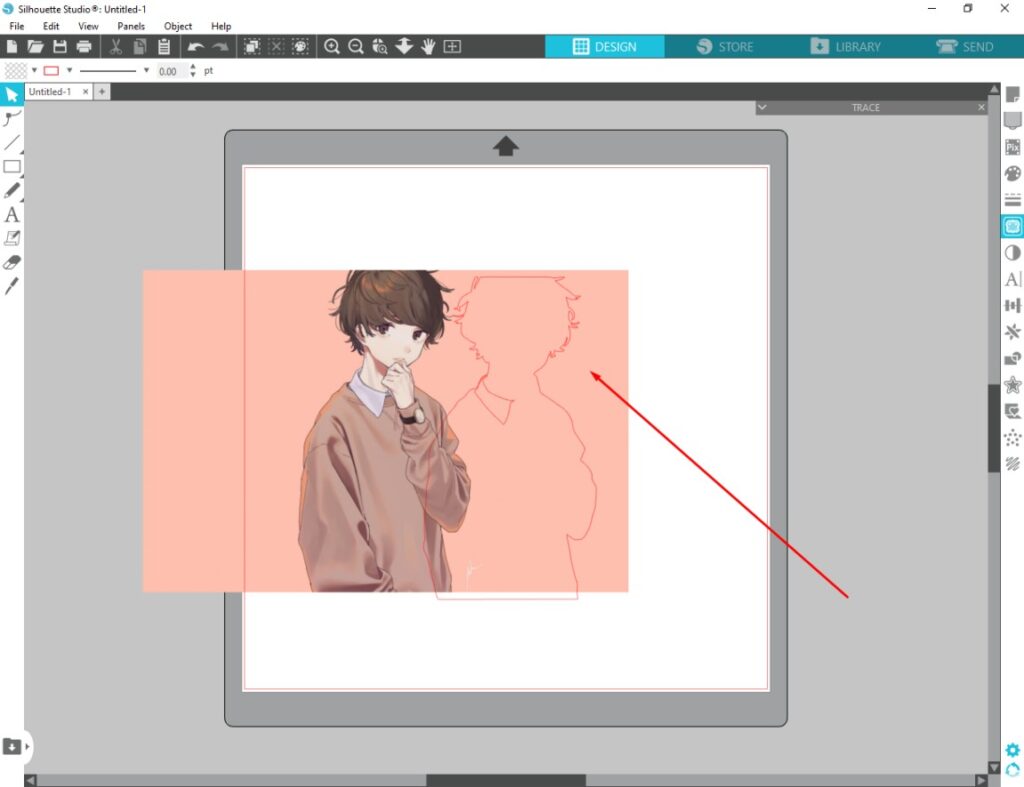
Now, we have got the lines to remove the background from its original image. At this stage, we need to switch to the modify panel.
Step 4: Open modify panel
You need to click on the “Open Modify Panel” from the right side.
Here’s the option.
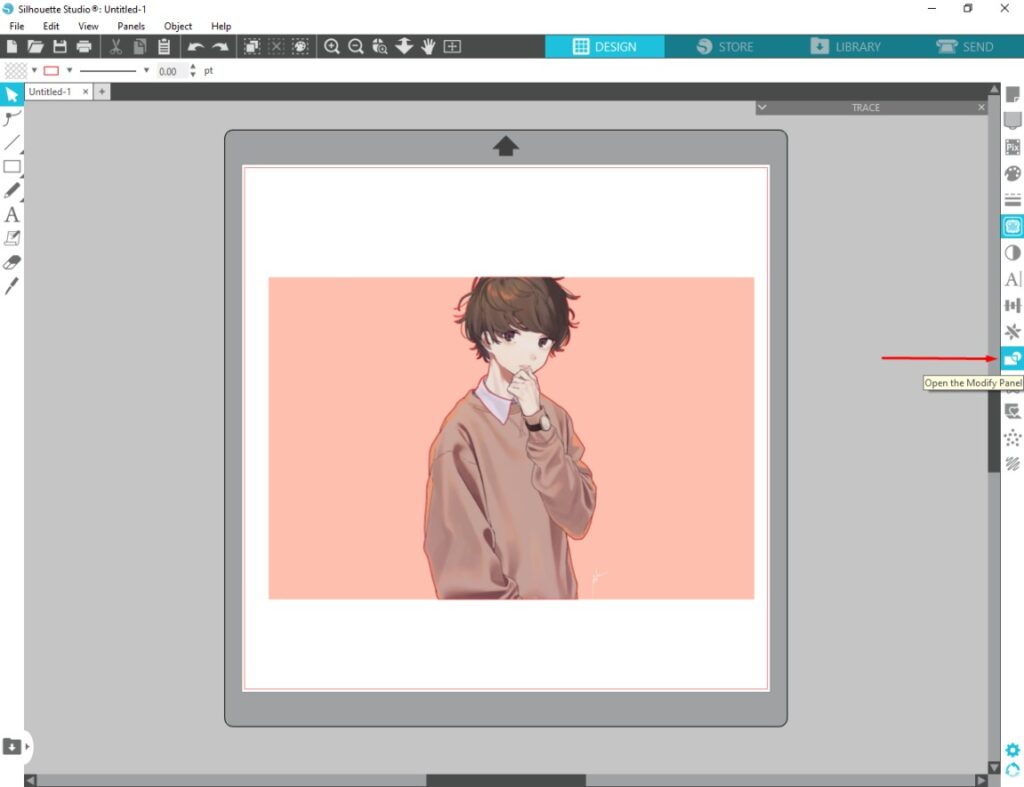
It will show you different options to modify the image like Weld, subtract, divide, and crop. You have to click on the crop option to in silhouette studio how to remove.
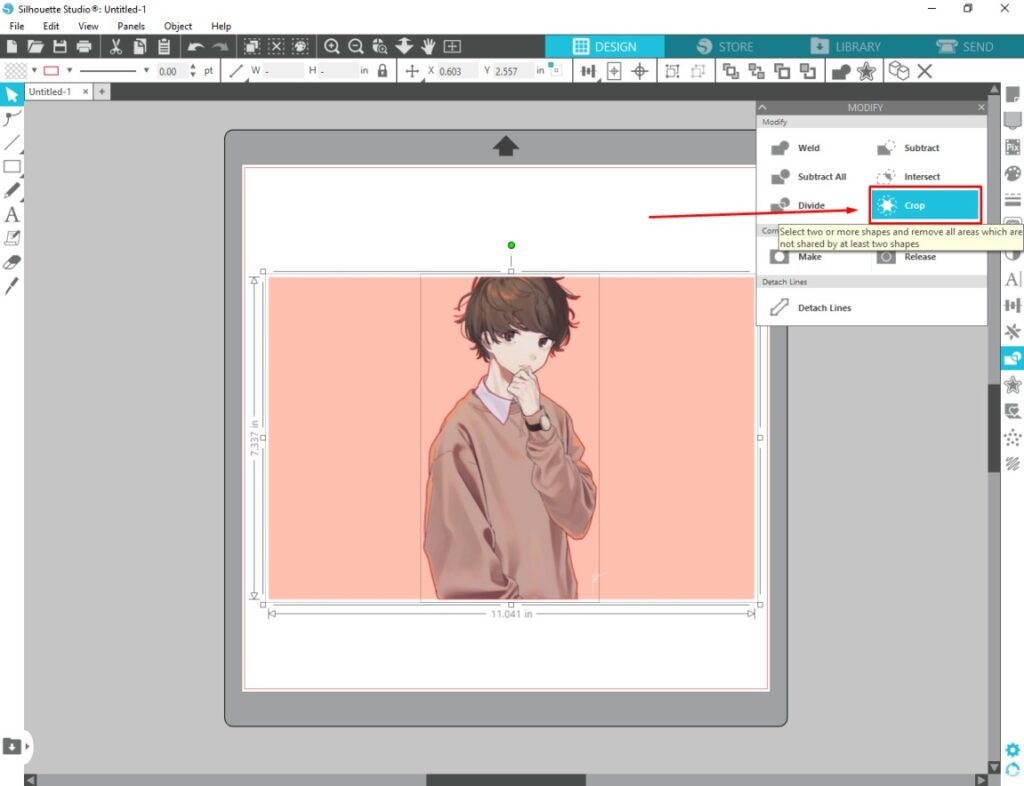
Make sure that you have selected the image by keeping it within the rectangle. It will remove the background based on the outlines that you created earlier.
Here’s the result after removing the background.
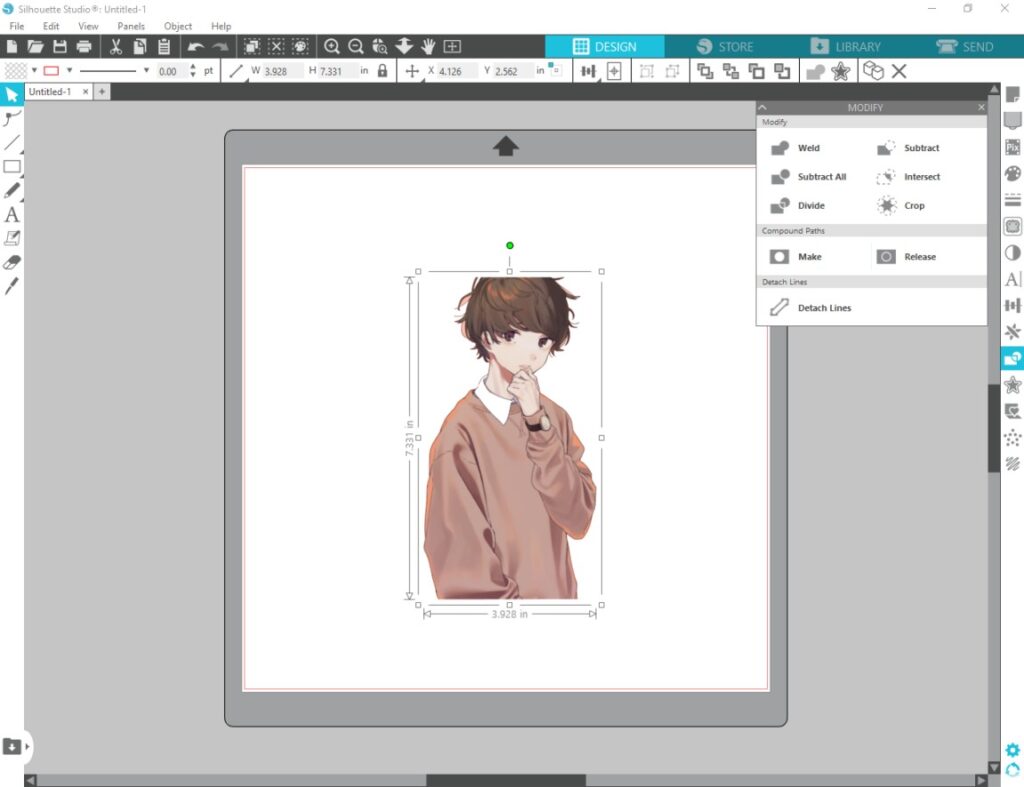
Step 5: Save the image
Finally, you can save the image background without green screen. If you want to print the design, you can print it without having the background. You need to go to the “File” option from the top and choose “Save As”
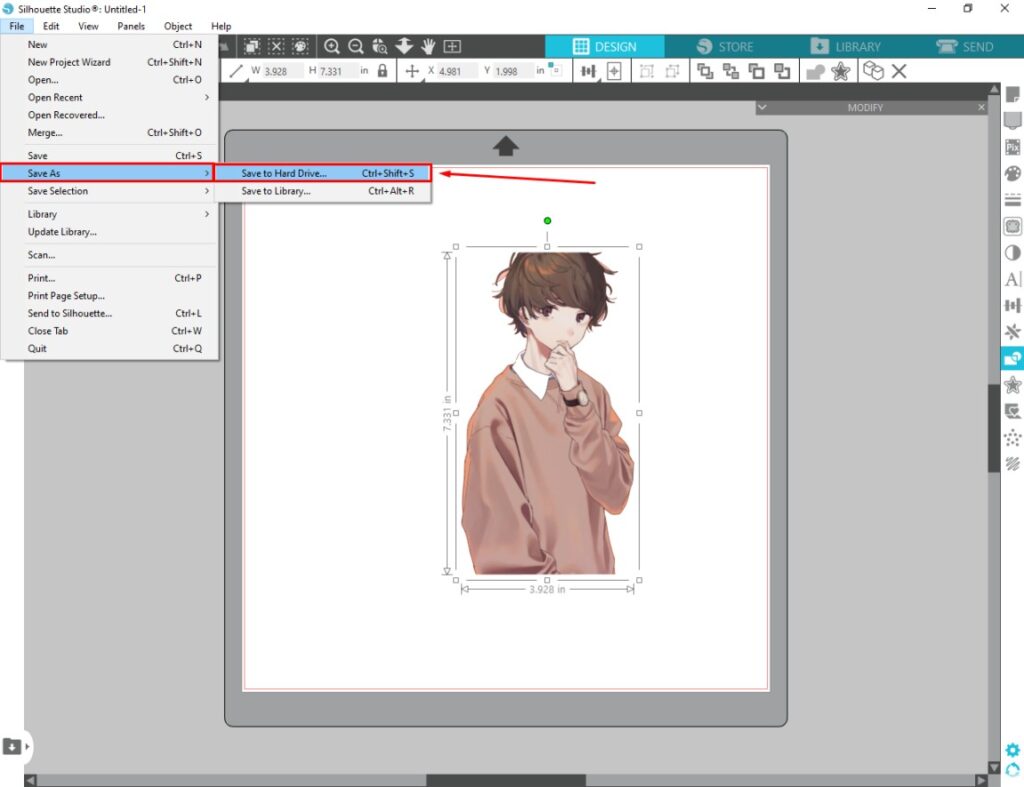
Then, you can choose the format in which you would like to save the image. That will do it for you.
3 Tips To Follow
- Use the zoom option to fit the image according to the Canvas.
- Increase the threshold option to around 70 for a better trace.
- If you want to print the design, save the image as PDF for the best quality.
3 Mistakes To Avoid
- Don’t apply the crop option without selecting the entire image.
- Don’t close the trace panel without applying the “Trace Outer Edge”.
- Don’t apply cropping when the outline isn’t perfectly aligned with the object.
Wrap Up
At this point, you should have got comprehensive knowledge about how to remove background in Silhouette Studio. We have also discussed some bonus tips to follow and some common mistakes to achieve the best result.
However, would you like to know anything else about silhouette studio? Feel free to share your thoughts on that.
FAQ’s
How do i access the “Trace” feature in Silhouette Studio?
To access the “Trace” feature, you have to open your image through Silhouette Studio. Then, you can click on the “Trace” icon in the top toolbar.
What settings should i use for the best background removal results?
You have to adjust the threshold option according to the image background. Then, you have to select “Trace Outer Edge” perfectly to get the best background removal.
Can i remove complex backgrounds with Silhouette Studio?
Yes, you can remove complex backgrounds with Silhouette Studio. But you have to adjust the trace perfectly.
Are there any tips for achieving precise background removal?
You need to make sure to use high-resolution images. Ultimately, you have to do the tracing perfectly to get a perfect outcome.
Can i remove the background if my image has multiple colors?
Silhouette Studio has the capability to handle multi-colored images well. The “Trace” panel helps to separate the different colors for easier background removal.
