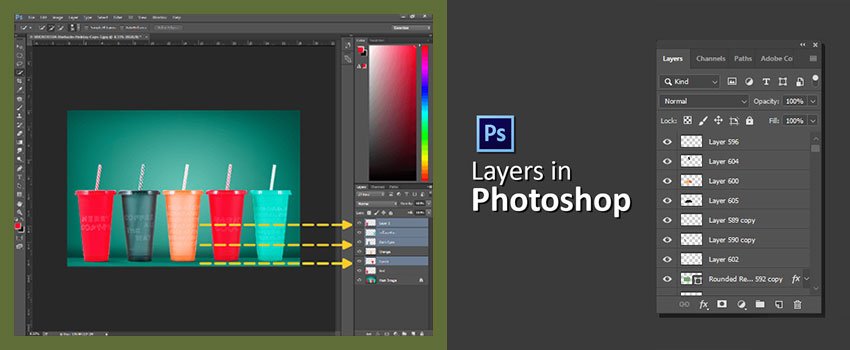
Selecting objects is one of the most important things when it comes to Outsource Photo Editing. Many times, we have to deal with specific areas of an image.
Through this article, you will learn how to invert selection Photoshop. In that case, making a selection makes sure that the changes will only apply to that expected area.
Inverting the selection is also important as we have to invert the selection in many cases.
Most photo editing enthusiasts love to use Photoshop as it offers almost all kinds of photo editing options. Are you also one of them? Alright, this article is going to be helpful for you.
How to Invert Selection Photoshop?
Plenty of tools are available in Photoshop for making selections. But the invert selection method in Photoshop is the same for all types of selections. Allow me to show you step-by-step guidelines.
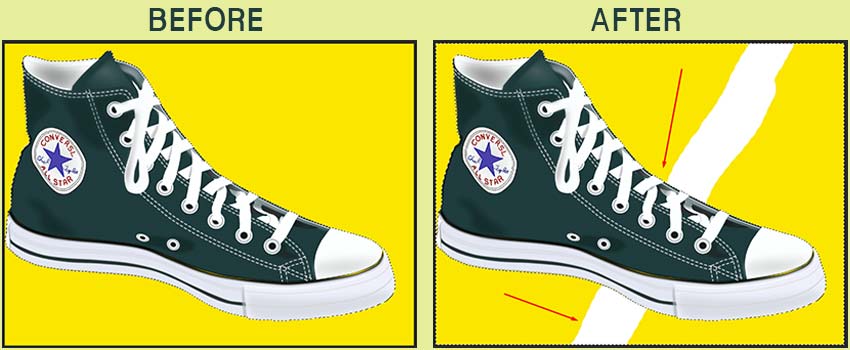
In this picture, I’ve selected the shoe using the Quick Selection tool.

In this form, any kinds of changes will be only applied to the Shoe. To invert this selection in Photoshop, go to the “Select” option. Then, choose Inverse from the expanded list.
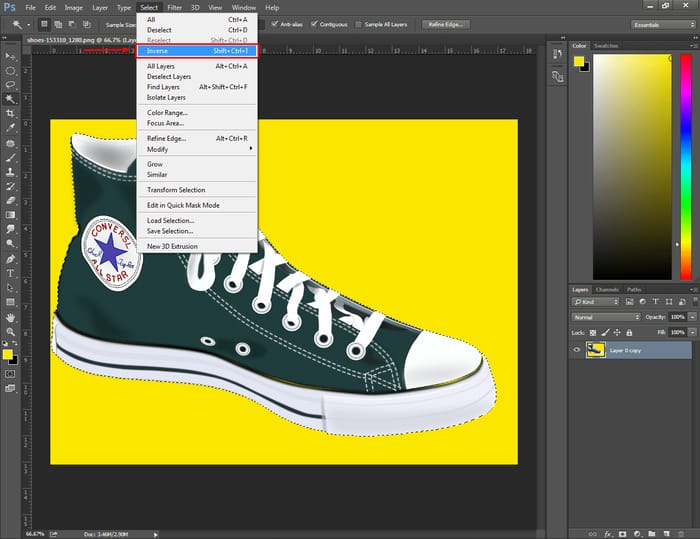
That will do the task. The selection will be inverted immediately. This is easier than you would have assumed, isn’t it?
Know More: Ultimate Amazon Product Photography Guide (Must See)
Invert selection using shortcut
However, do you want to invert the selection in Photoshop using shortcut? I am going to introduce you to this method too. When you are in a hurry, you can use “SHIFT + CTRL + I” (For Windows Users) to invert the selection.
If you are using MAC devices, then you have to press “SHIFT + CMD + I”
Both are extremely easy to apply. At this point, some of you might think what’s the difference between making selections and invert selections? Let me make it clear with an example.
Know More: How to Replace Color in Photoshop | How to make something look Gold in Photoshop
How does Invert Selection Work?
Have a look at this screenshot.
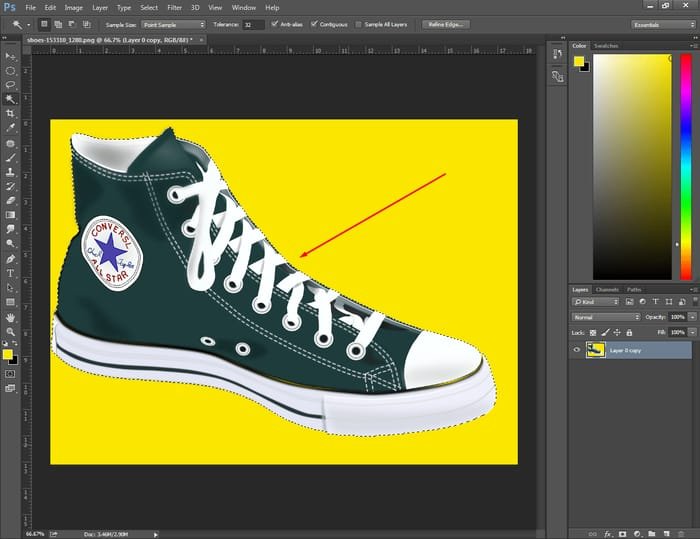
The black & white dotted line is showing that the shoe is selected. In this form, the selection is applied to the shoe.
Let me take the brush tool and paint it on that picture.

See, only the area within the selection has been painted with the brush tool. I have also painted outside the selection on the yellow areas but it hasn’t changed. With the selection, we restrict the outside area.
Suppose we have to remove the background of this picture. Invert selection will make the job easier to use. Let see what happened after inverting the selection.

Now, you can see the outside area has become selected and the shoe has been unselected. As a result, the changes have only been applied to the outside area of the shoe. The same thing will happen for any other image editing methods.
Have you got it? I hope so.
Conclusion
We are at the bottom of today’s article about how to invert selection Photoshop. I have shared two methods with you.
Hopefully, you have enjoyed it and will be able to apply it while photo editing. This excellent trick will save some of your valuable time.
Do you love to read about photo editing? Clipping Way will impress you with exciting articles about photo editing. For any kind of information about Photo editing, don’t hesitate to contact us. Thank you.
FAQ’s- I’ve Got Some Questions
What is the shortcut for invert selection in Photoshop?
For Windows User, Press CTRL + SHIFT + I. For Mac Users, press CMD + SHIFT + I.
How to undo invert selection in Photoshop?
Simply, press CTRL + Z to undo invert selection.
What is Ctrl +J in Photoshop?
It will make a copy of the selected layer. If any particular area of the layer is selected, it will copy only the selected area into a new transparent layer.
