What is the most useful tool in Photoshop? For sure, most people are going to answer “Layer Mask”. Without creating a mask in Photoshop, can you imagine professional photo editing? I don’t think so.
However, only a few people know how to make the best use of layer masks in Photoshop. That’s why we need to know how to copy a mask in Photoshop and move a mask in Photoshop. Are you also willing to do that?
Well, this post is going to be very useful for people who are looking to Outsourcing Photo Editing. If you are an enthusiast about Layer Mask in Photoshop, you ought to read this post. Within a short time, I am going to explain to you how to copy a Mask in Photoshop.
Without making any further delay, let’s jump into the procedures.
How to Copy A Mask in Photoshop?
To copy a Mask in Photoshop, you have to create a mask in Photoshop. Now, let me show you the copying procedures.
First, have a look at this picture.
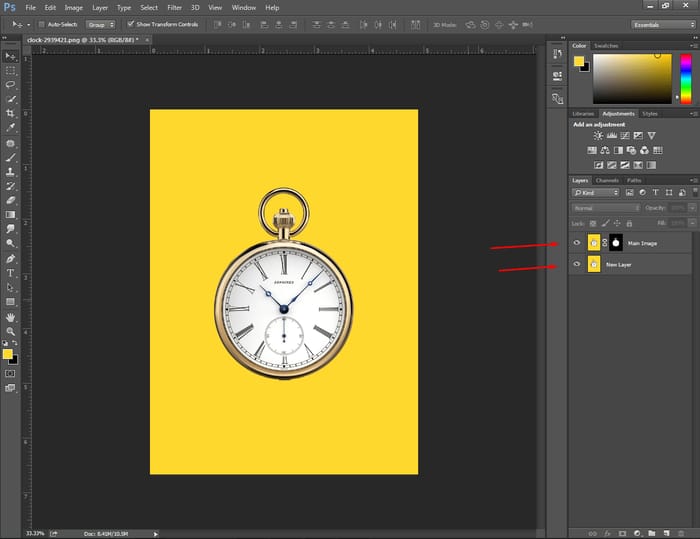
We have created a layer mask right at the top. Along with this layer, there is a new layer. We are going to copy the mask into that new layer.
Do you want to make a mask visible in Photoshop before copying it into a new Layer?
You can do that by pressing on “ALT” and click on the Layer. It will enable Mask view on the screen. Here you can see the example.
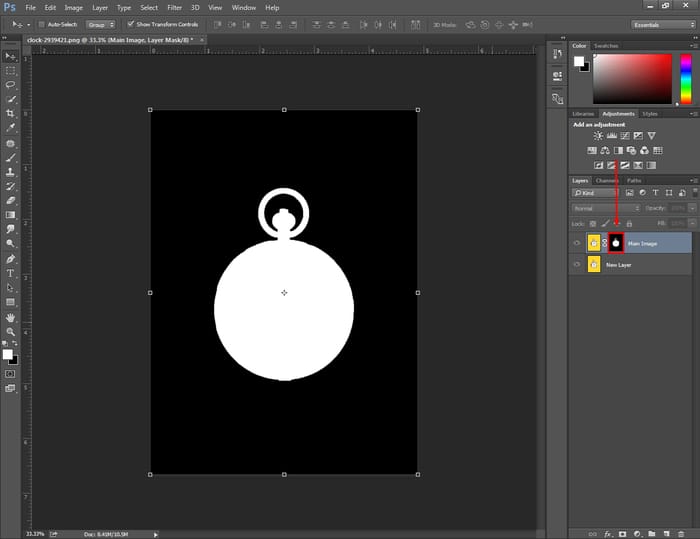
To make the selection more precise, you can work on it here with the brush tool. The white areas are going to become visible and the black areas are going to be hidden.
After correcting, press on “ALT” & Click on the C icon once again. It will bring back the picture to normal view.
Know More: How to Replace Color in Photoshop | How to make something look Gold in Photoshop
At this point, both layers are active. That’s why we are still seeing the background.
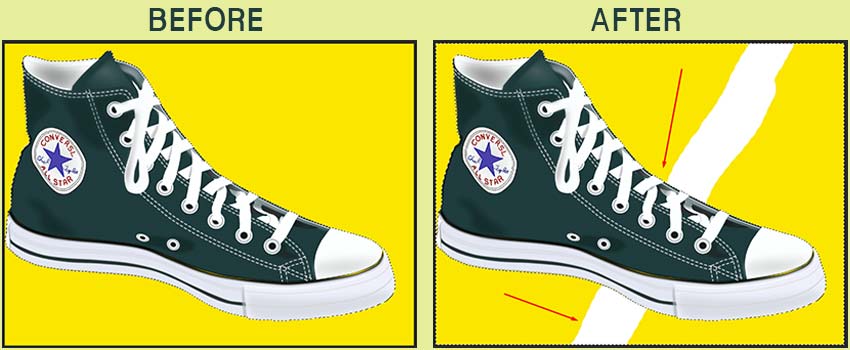
Disable the New layer by clicking on the “Eye” icon from the left of the layer. After that, you will find the Black areas hidden and it will be transparent like this one.
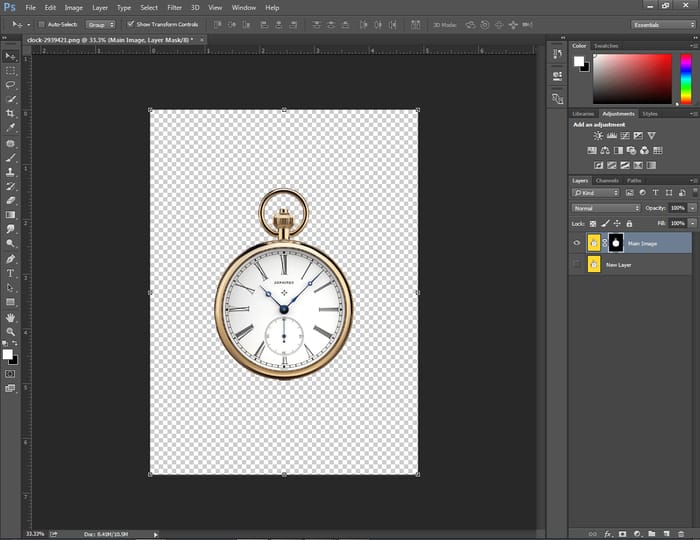
Now, all change will only affect the White areas. Want to see an example? Here you go.
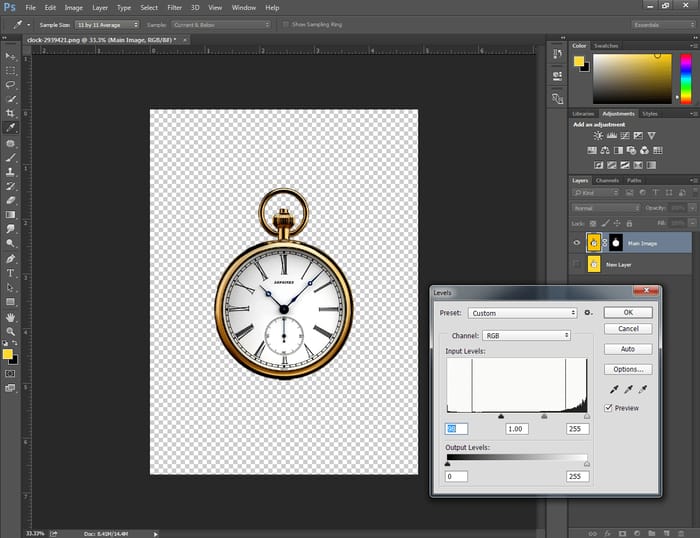
That makes the masking method too useful. You can hide any portion from a picture without removing it. So, you can always bring back any elements whenever you want. It is non-destructive photo editing.
At this stage, we are going to copy a mask into another layer in Photoshop. To do that, you need to press and hold “ALT” on the keyboard.
After that, click on the Mask icon from the layer and drag it down to that layer where you want to copy it. It will immediately copy the mask into that layer. Here you can see, the mask has been added with the new layer.
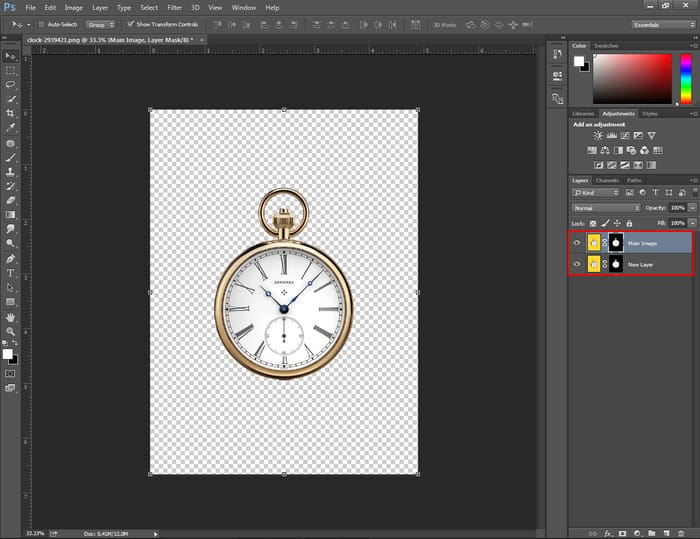
So, how was that procedure? Hopefully, you will be able to follow those procedures.
Know More: Complete Amazon Product Photography Guideline (Must See)
Mmm, we’ve learned about how to copy a mask. What about moving a mask into another layer? Sounds good, isn’t it? The procedure is pretty simple and it will take less than 2 minutes. Permit me to show you how you can do it.
Moving A Mask Into Another Layer in Photoshop
To move a mask in Photoshop, you need to left-click on the mouse and drag it down to the new layer.
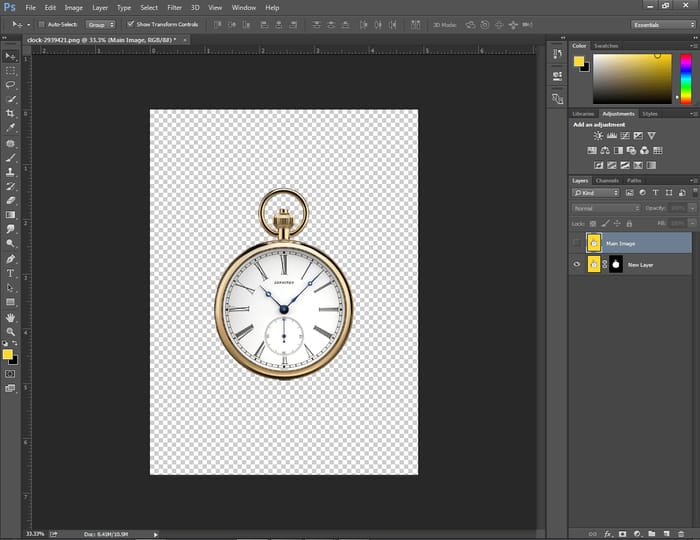
It will take the mask into that layer.
Delete mask from a layer
Many people ask about how to delete Mask from a layer. Allow me to give you the answer.
Simply, you just need to double-click on the mask icon from that layer and mask properties will be visible on your screen. At the below of the box, there will be a delete icon.
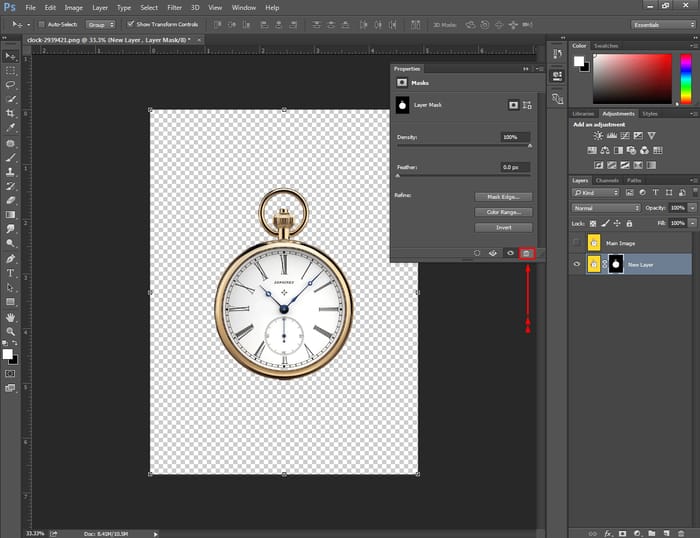
You just need to click on that icon and the Mask will be deleted.
Bring back a deleted mask
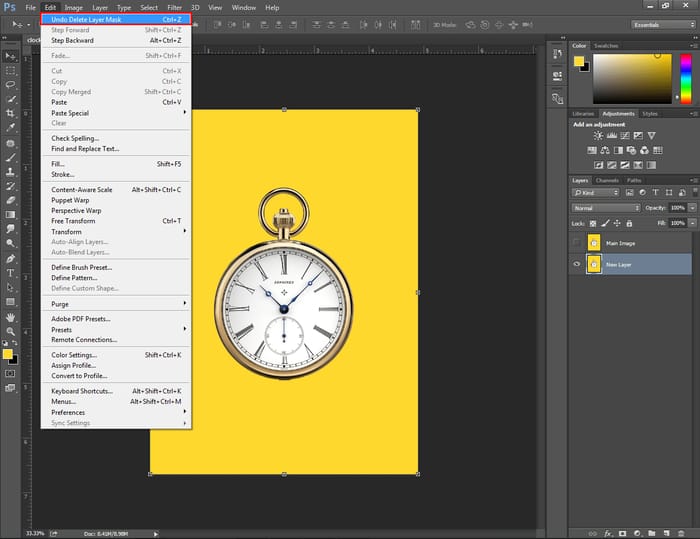
Do you want to bring back a deleted Mask? On many occasions, you may need this. Go to the “Edit” option right at the top and you will find “Undo delete Layer Mask”. Left-click on it and the job will be done.
Final Thought
That was all about how to copy a mask in Photoshop. I hope you have learned the concept. Along with the copying procedures, I’ve also included the procedures of moving a mask, deleting a mask, and bringing back a deleted mask.
Hopefully, those methods will assist you to deal with masks in Photoshop.
Would you like to read more articles related to Photoshop tutorials? Stay tuned with Clipping Way to get more amazing articles related to Photoshop and photo editing. Best wishes to all.
FAQ’s – I’ve Got Some Questions
How do i save a masked image in Photoshop?
You have to save the file in the PSD extension if you want to keep the mask in the picture. When you save a masked image as PSD, you will lose the mask option.
How do i copy a layer mask?
Firstly, you have to Press & Hold ALT. Secondly; drag the mask on the desired layer with the left click.
How do i select a mask in Photoshop?
You need to click on the mask icon after making the selection with the help of any selection tools in Photoshop.
How do you apply a saved mask to an image or layer?
If you want to apply a saved mask to an image, you have to copy the mask on that image or base layer.
How do i use quick mask in Photoshop?
You have to select a portion of an image with any select tools and click on “Quick Mask Mode”. After that, you will be able to use the Quick mask in Photoshop.

