The pen tool is one of the most powerful selection tools in Photoshop. Professional designers always use the pen tool to make a precise selection. If you master the art of using pen tools, you will be able to make selections like professional designers.
Beginners think that it’s too complicated to use the pen tool. Within a while, I am going to clarify this misconception. Through this article, you will learn how to use pen tool in Photoshop like a pro. After reading this post, you will know the proper use of pen tools.
What is The Pen Tool in Photoshop?
Basically, the pen tool is a selection tool that makes a selection of objects by creating paths. Designers can create different shapes by using this tool.
The pen tool is also used for making clipping paths in Photoshop. Overall, designers can select any object with hard edges using the pen tool.
You might be wondering how to make selections with the pen tool in Photoshop. Well, you just need to select the tool and draw paths around the targeted object. It creates vector paths to cover any object with any shape.
You can accurately select simple, medium, complex, and super complex objects with the pen tool. Allow me to show you where the pen tool is located in Photoshop.
Where to Get The Pen Tool in Photoshop?
You can enable the pen tool from the left side of the editing tool panel. It shows the sign of the pen nib. You can get it from this pen tool icon.
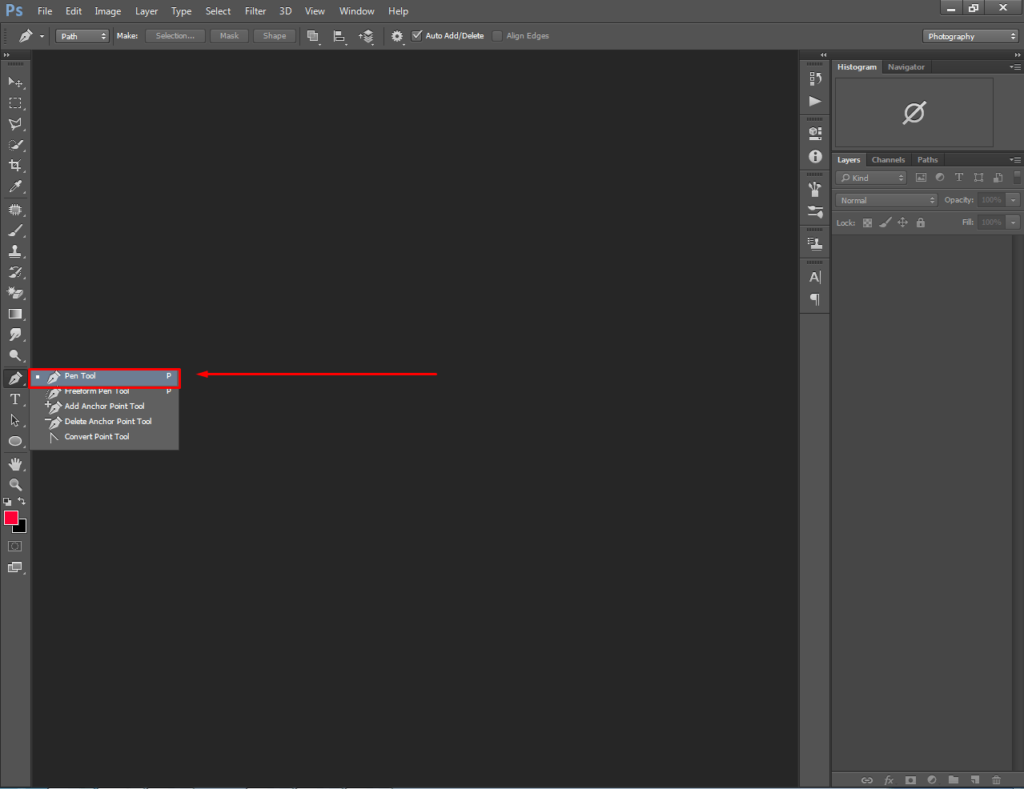
Within this tool, you can also notice the freedom pen tool, add anchor point tool, delete anchor point tool and convert point tool. You will know about those tools in the below part of this article.
Those tools are used for customizing the created paths. “P” is the shortcut key to enable the pen tool.
How To Draw Paths Using The Pen Tool In Photoshop?
Using the pen tool, you can draw both straight and curved vector lines. First of all, pick the standard pen tool and select the “Path” option from the top.
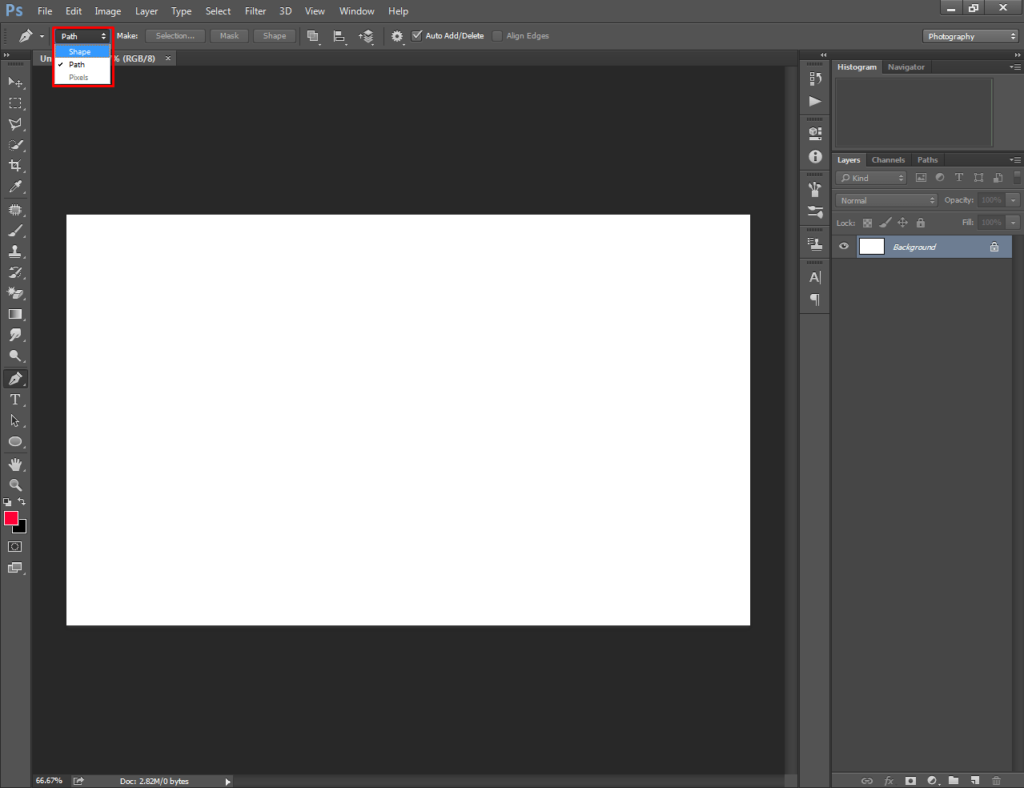
Simply left-click on the canvas and it will create an anchor point. Then, click anywhere else on the canvas. Both anchor points will get connected together with straight lines.
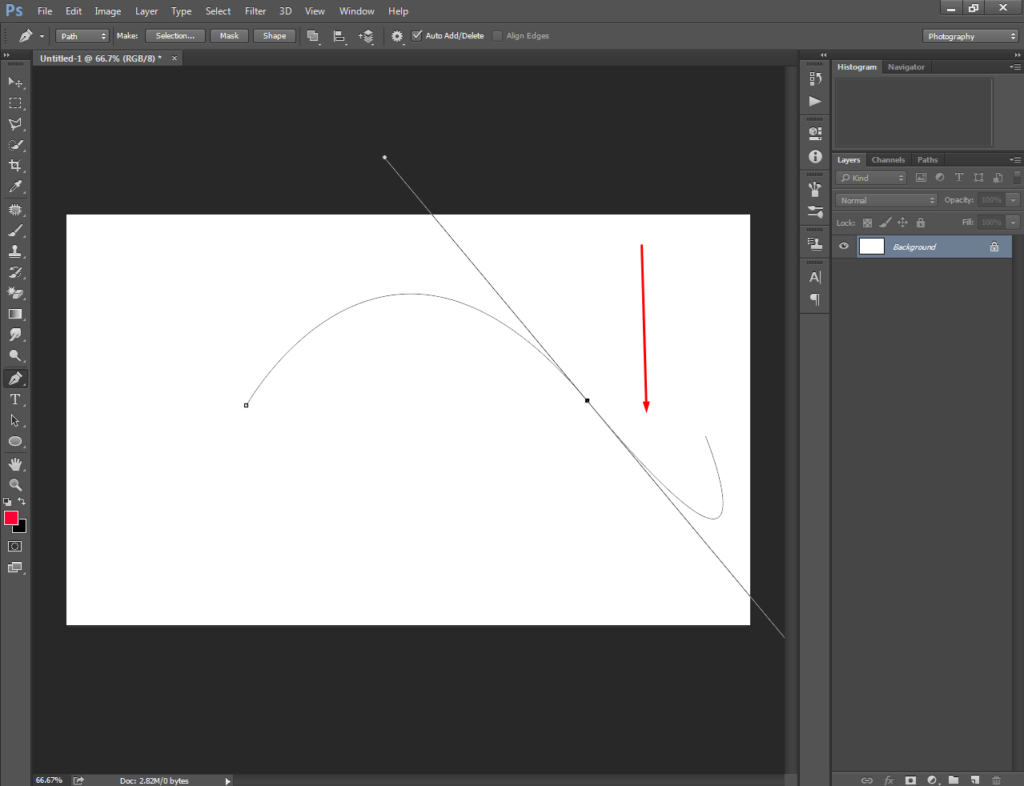
To draw curved lines in Photoshop, you have to click and hold the mouse key. Next to that, drag the mouse up or below to get curved lines. Here’s an example.
Now, you should be ready to apply the path creation technique to an object. Let’s select an object using the pen tool.
Step 1: Open your photo in Photoshop
At the very first, you have to open your photo. You can directly drag the image in Photoshop or you can select the image from the “open” option. After that, you have to click on the standard pen tool from the left.

At the top, there will be two options: shape and path. You have to choose the path option to select any object.
Step 2: Zoom In the image & create path
In the second step, press “CTRL and +” together to zoom in on an image. You have to zoom in until you get a clear view of the edges. Then, you have to click on the object’s outline area.
You should start from the below or corner of your object. I have created the first anchor point from here.
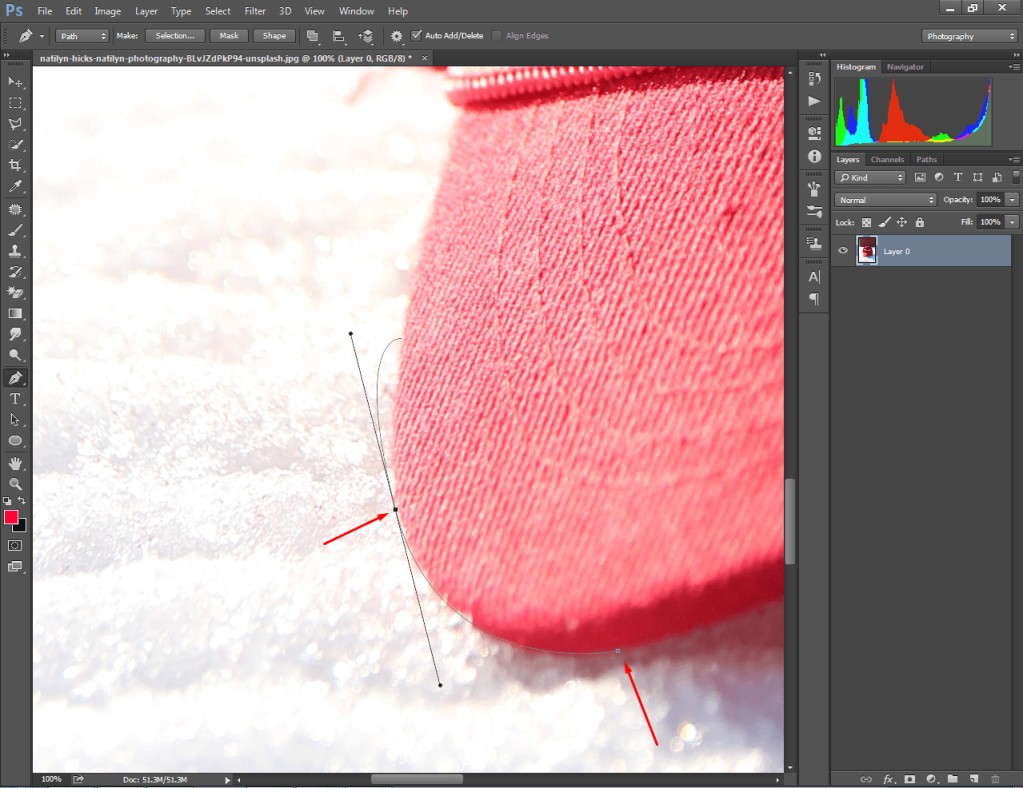
After bending the line, the path line goes in a different direction. In that case, press the ALT key and click on the anchor point to delete the unnecessary path line.
After that, you can proceed to create more anchor points to cover the object. While selecting an object using the pen tool in Photoshop, you may have to change the direction of the path at some points.
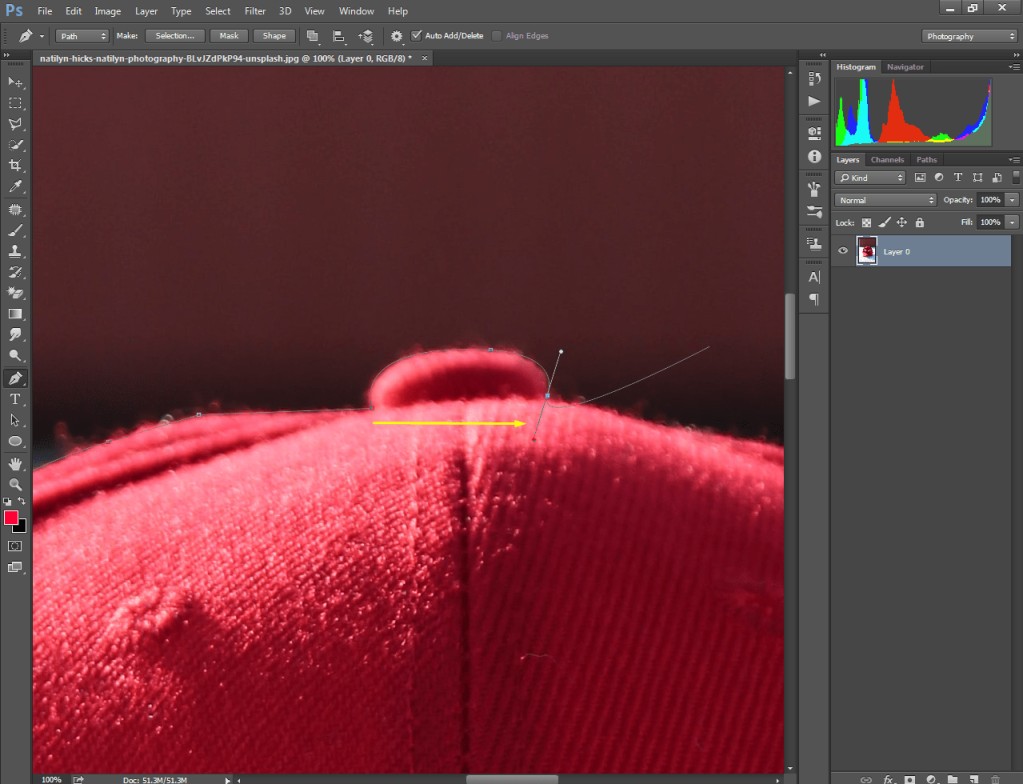
In that case, hold the “ALT ” key and drag the lines according to the object shapes to change the direction of paths. Make sure that the created anchor points and paths cover the object excluding the background area.
Step 3: Close your path
After completing the selection around the object, you have to close your path to the starting point.
Here’s an example for you.
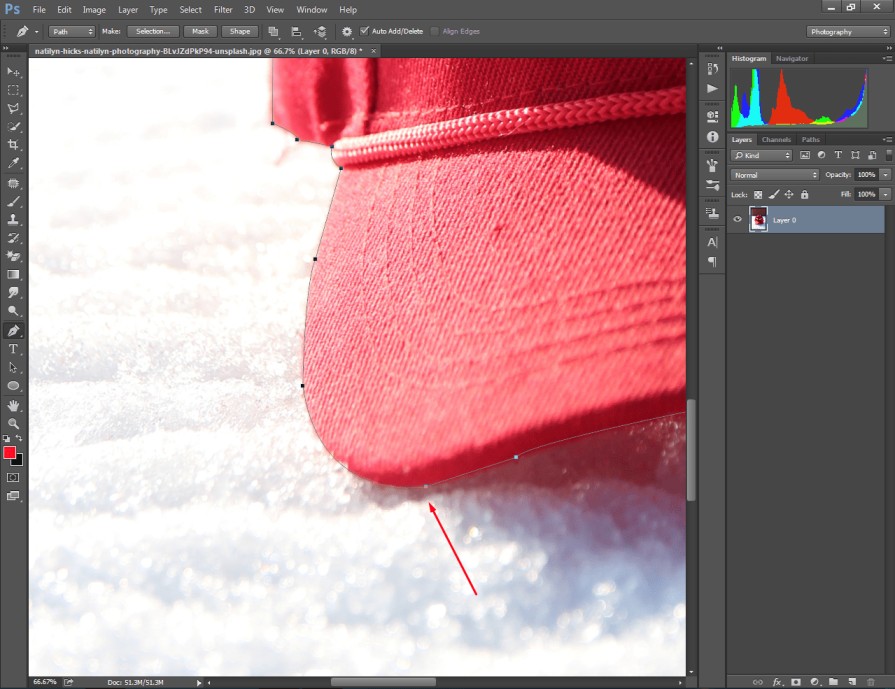
I have closed the path on the same anchor point from where I get started. You have to do the same thing with your image. Have you got how to close the path? Alright, here’s the ultimate look after creating paths with the pen tool.

You can save the created path from the path panel. To do that, you have to click on the path panel and double-click on the “work path”. It will show you a box to rename your created path.
Rename it and press Enter to save the path. Now, it’s time to make a selection. Here’s the selection process for the next step.
Step 4: Make Selection
At this point, you need to right-click on your object and choose “Make Selection” from the menu.
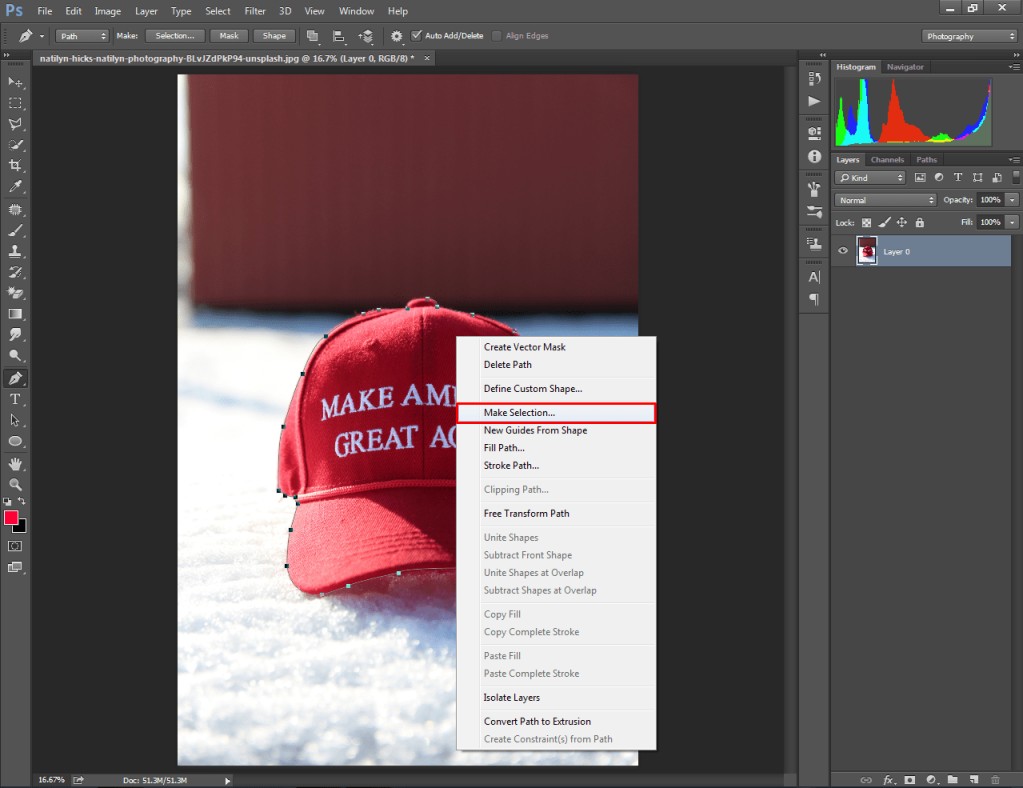
Immediately, the vector path lines will be converted into selection. Here’s the object in the selected form.

Finally, we got the object selected using the pen tool in Photoshop. Now, you can easily isolate the object from its original background. You can also save the image along with the path.
To keep the path alive, you have to save the image in JPG format. When you save the image in PNG format, your saved path will be lost.
How to use pen tool to remove background in Photoshop?
After making a selection with the pen tool, you can easily remove the background with just a single click. Have you got your object in the “Make Selection” form? Okay, press “CTRL + J” to load your selection on a new transparent layer.

After that, disable the primary layer and it will present your selected object on a transparent background. If you save that image in JPG, it will make the background white.
Do you want to keep the background transparent as it looks in the above image? To get that, you have to save the image as PNG.
How to use freedom pen tool?
In the pen tool option, there is another tool named “Freedom pen tool”. So, how to use that Freedom Pen tool? This is another form of the pen tool in Photoshop. With that tool, you can draw paths freely without having any specific lines or shapes.
You just need to hold the left mouse key and move the cursor over the image. It will draw paths. In graphic design, the freedom pen tool is used for creating random shapes.
But it’s a bit tough to make accurate selections using that tool. Therefore, expert designers prefer to use the standard pen tool over the freedom pen tool to create accurate path. A few options are also available to customize created paths. You are going to know about that below.
How to Use Add Anchor Point Tool?
Let me show you some basic pen tool techniques. Below the freedom pen tool, you will find the “Add Add Anchor Point Tool”. Suppose you have created a vector line. But you want to bend the path from the middle point. In that case, you have to add an anchor point on that line.
That’s where this tool is important. Using this tool, you can add anchor points to existing paths. For example, we have to add an anchor point in the middle of that line.
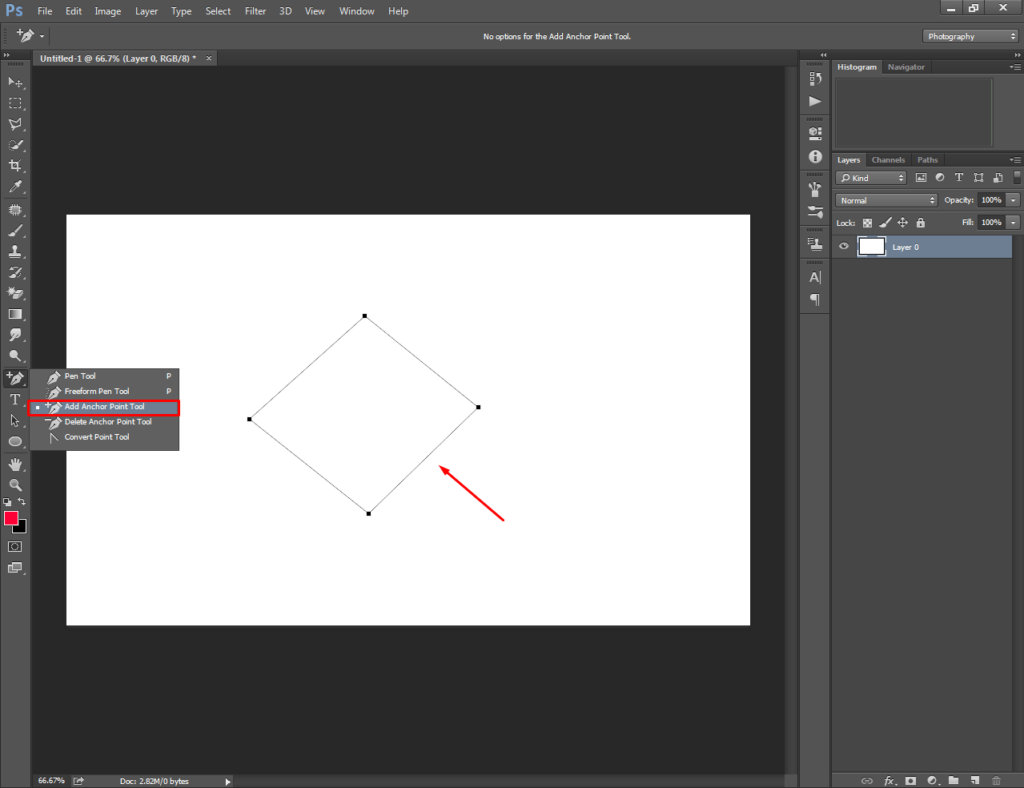
To do that, you have to select “Add anchor point tool’ from the pen tool option and click on the vector line. It will create a new anchor point. Here’s the outcome.
How to Use Delete Anchor Point Tool?
The delete anchor point is required to delete an existing anchor point from the path line. Let’s have a look here.
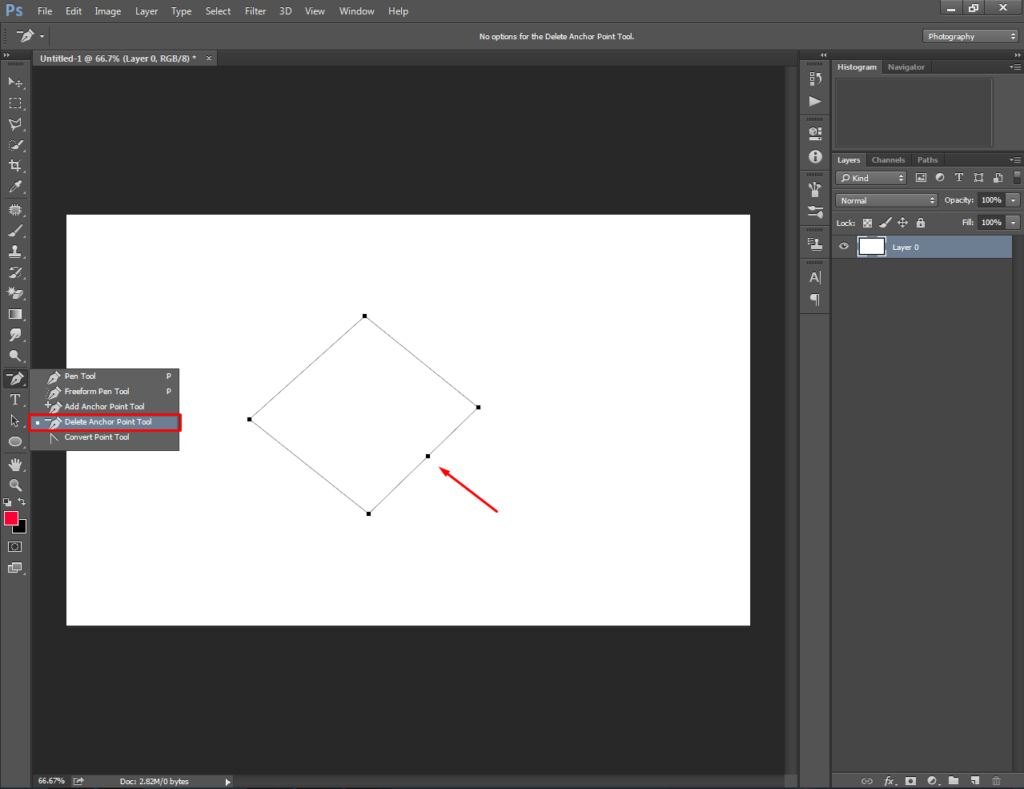
To remove the indicated anchor point, you have to select the “Delete anchor point tool”. After that, click on the anchor point using the left mouse key. It will erase the anchor point.
How to Use the Convert Point Tool?
To know properly how to use the pen tool in Photoshop, you have to learn the usage of the convert point tool. With the assistance of this tool, you can move and stretch the path line in any direction. Have a look at this rectangle.
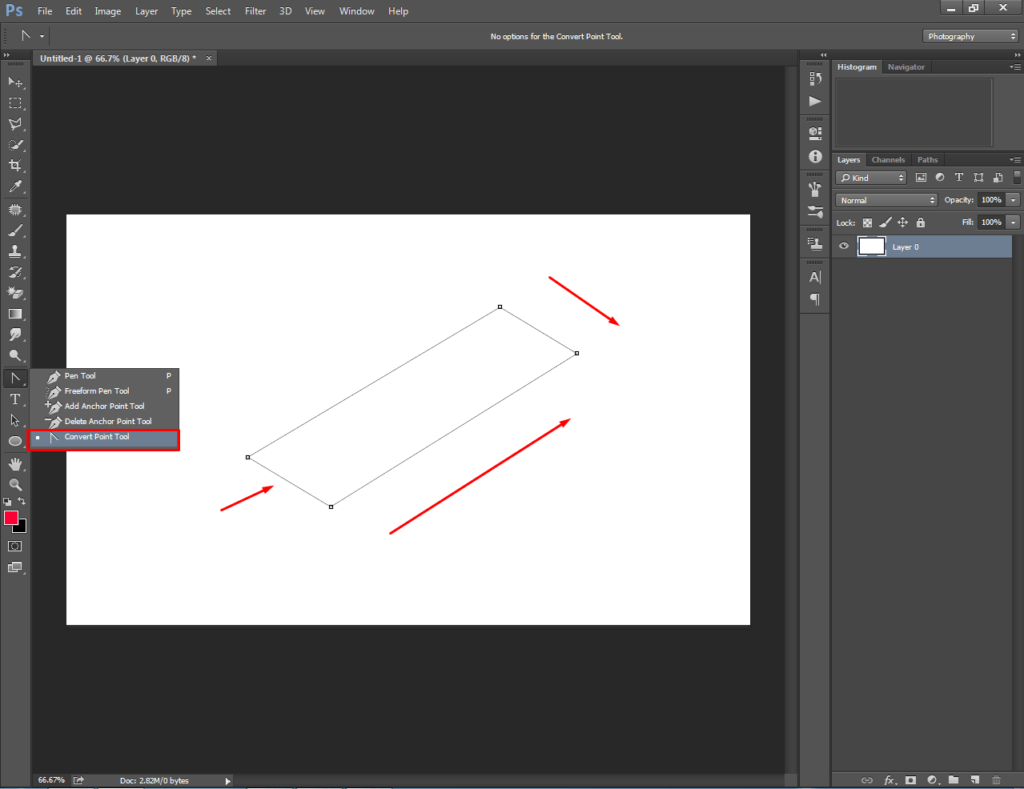
Click and hold the mouse on the rectangle. Then, drag it to the direction you want to stretch the line. It will keep the baseline static and move the line that you have clicked on.
How to add and use curvature Pen Tool in Photoshop CC?
The curvature pen tool is available in Photoshop CC 2018 and other latest versions. This is another type of pen tool specially used for creating curved paths. With the help of this tool, you can draw curved and circular shapes without bending the line.
Want to know how to use the curvature pen tool in Photoshop CC? Well, you have to create more than two convert points to get a curved path.
To get a closed circle path, you have to click on the initial convert point. You need to go to the path panel and double-click on the work path to save it.
Can i Add Additional Paths to An Existing Path Using the Pen Tool?
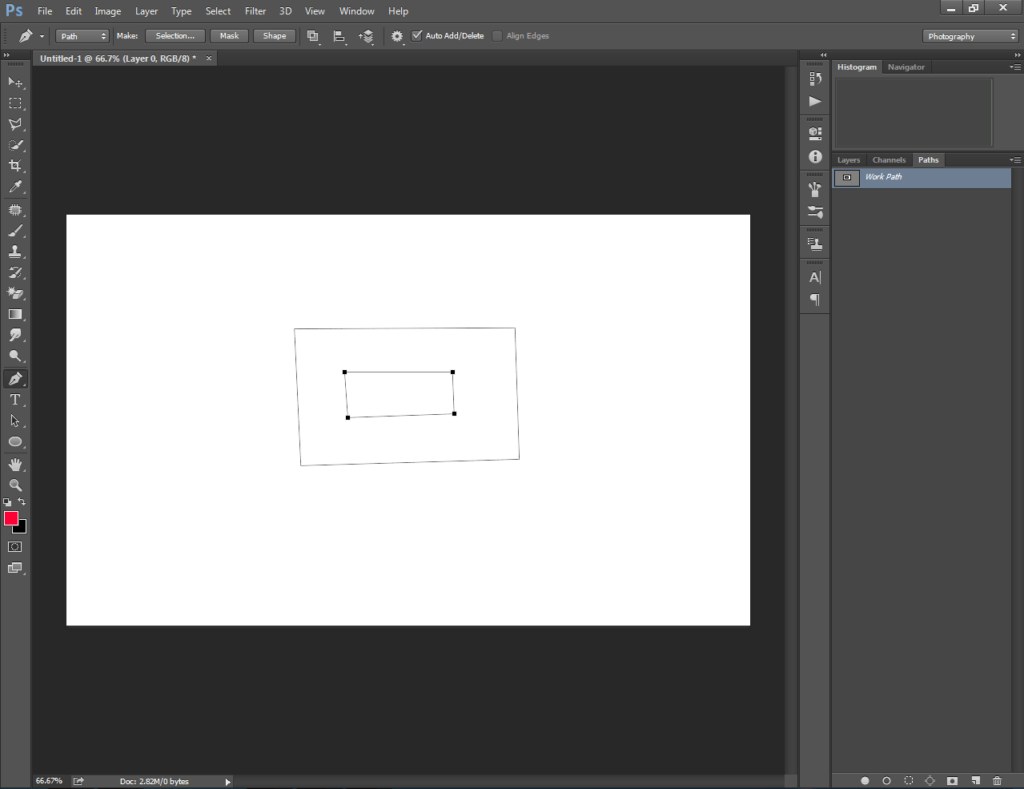
While using the pen tool, beginners often feel the necessity to add additional paths within existing vector lines. Adobe Photoshop allows you to do that with the “Exclude Overlapping Shape” feature. For example, we can add a new path within this rectangle.
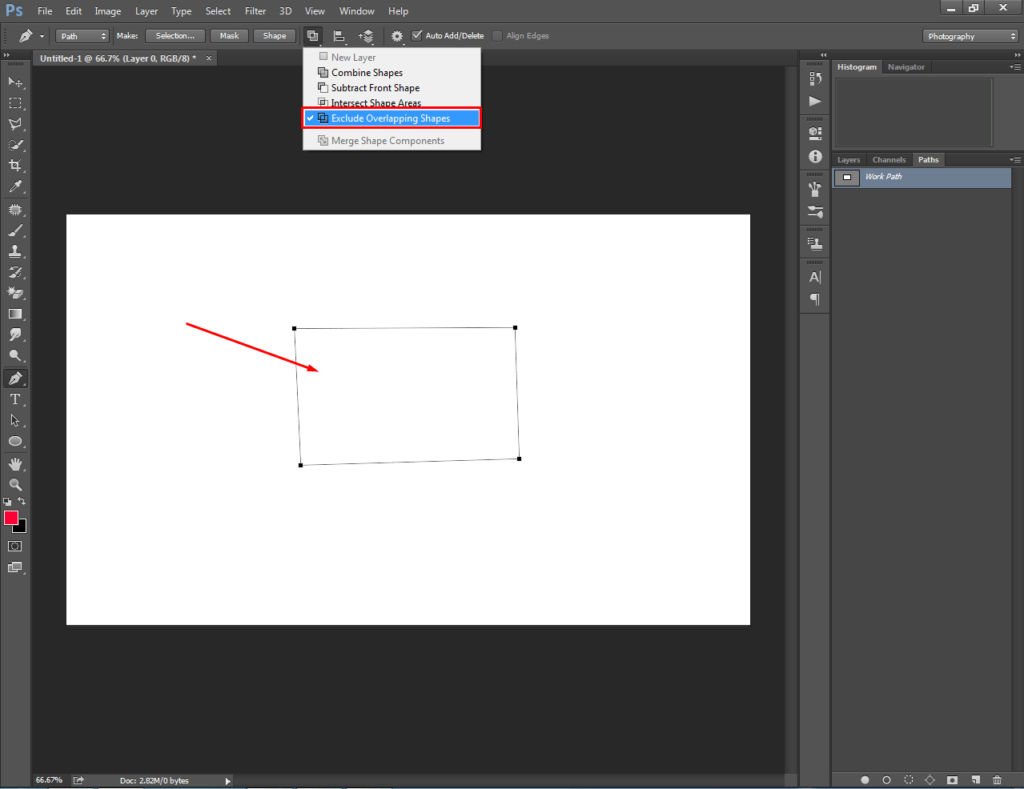
We need to select the “Exclude Overlapping Shape” option from the top and start creating paths from the center. After that, we can enable path selection for those closed paths together.
Now, let me show you an E-commerce product photo example. While working on Mug, you have to add an additional vector line in that handle area.
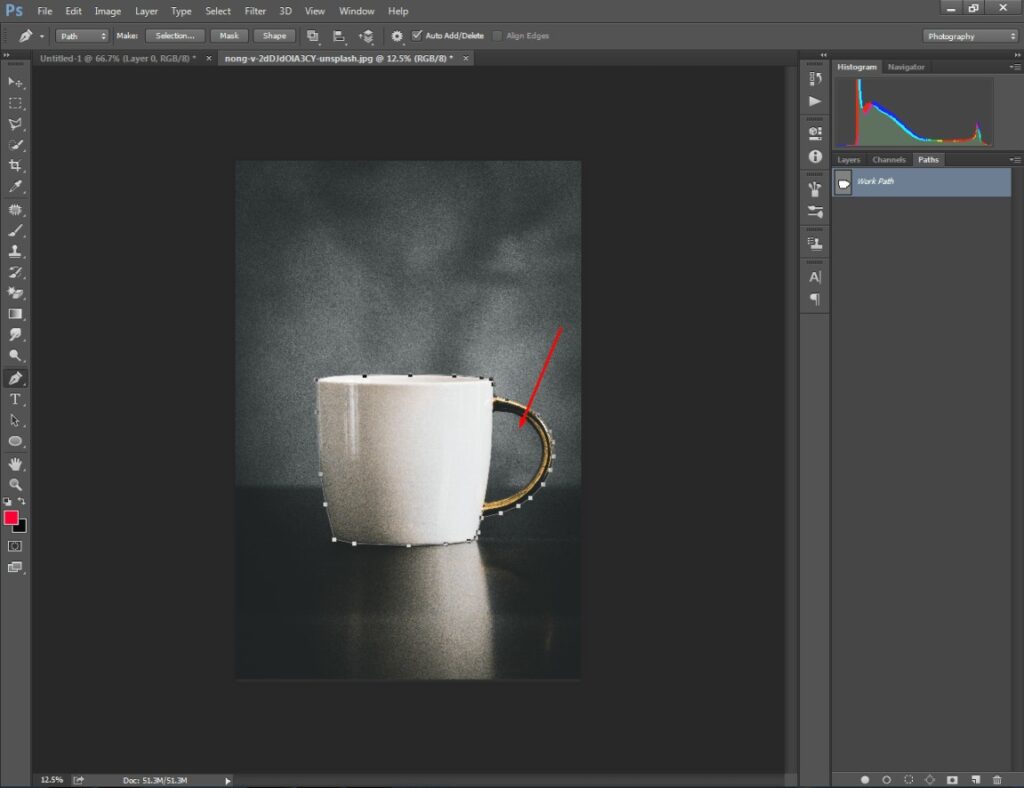
So, you have to select the exclude overlapping shape options and start creating paths following the above procedure.
That’s it.

Now, we are going to move on to the “Shape” option.
How to Use Pen Tool in Photoshop to Create Shapes? Path Vs Shape
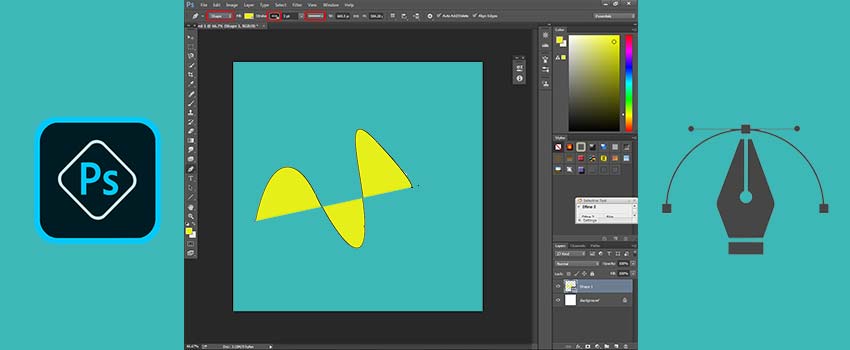
Basically, the pen tool works in two different modes: path and shape. When you select the path mode, the pen will create a vector line without adding any additional layer. In that case, it works as a selection tool only.
On the other hand, shape mode adds an additional fill layer along with the path. Here’s the shape option available at the top.
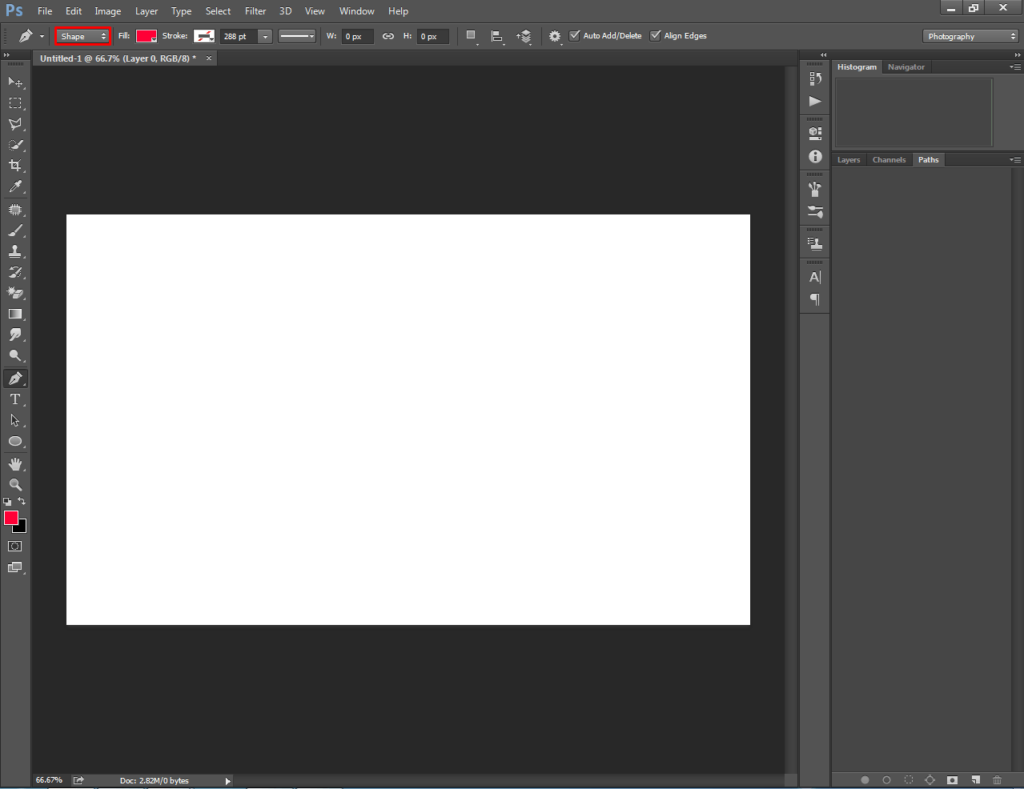
When you pick that option, your created path will be filled as a new fill layer. Here you can see the sample.
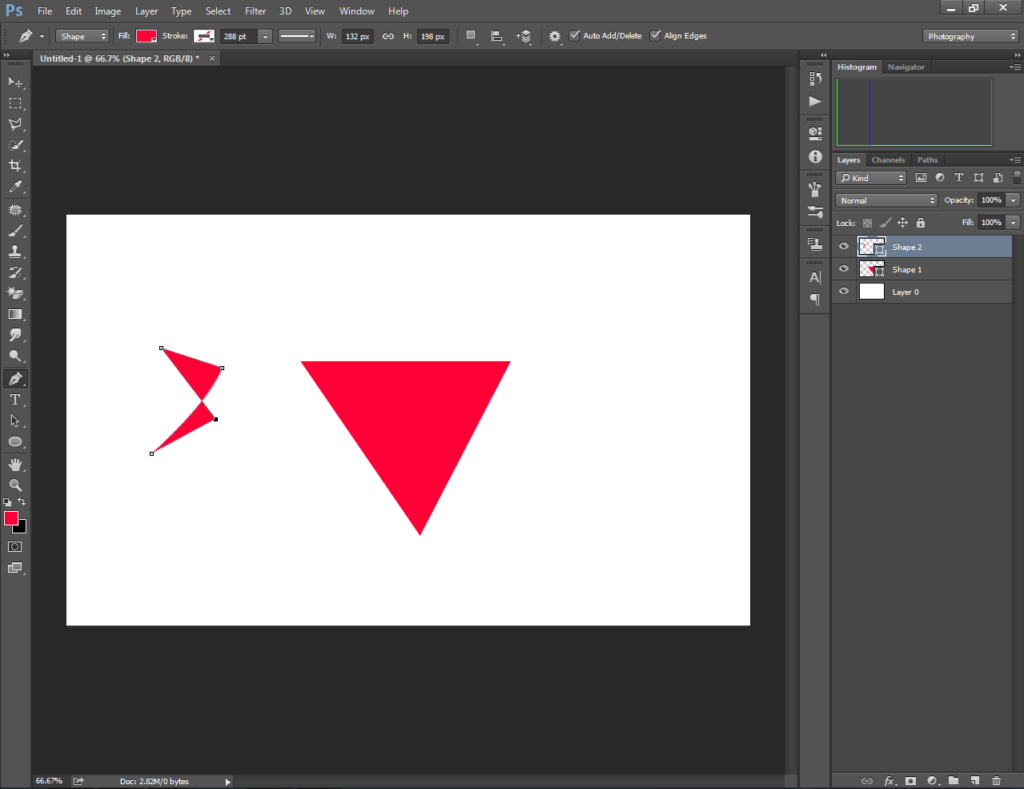
Using that mode, you can create shapes like stars, hearts, diamonds, or anything else. Sometimes logo designers use this feature to create amazing logos using the pen tool.
At this point, you have learned how to use the pen tool in Photoshop to edit your imagery. Have you got any additional queries?
Get it covered here.
Get professional touch on your photography
We’ve got a team of professional designers to fulfill your Clipping Path Service requirements. You can start your photography project now.
Final Thoughts
We have covered everything in detail about how to use pen tool in Photoshop. Now, you are ready to make the best use of this essential Photoshop selection tool.
Would you like to get more useful Photoshop tutorials? Keep in touch with us to get more awesome articles.
FAQ’s
What are the uses of pen tools in photo editing?
The pen tool is used for Clipping path, background removal, logo designing, and deep etching.
Which type of pen tool is mostly used by professional designers?
The standard pen tool is preferred and used by most professional designers.
How to undo two or three steps backward while creating paths?
You can undo several steps backward by pressing CTRL + ALT + Z.
How can i use the Pen tool in Photoshop 2024?
Pen tool works almost similarly in all versions of Photoshop. You can follow our above-mentioned tutorial to use the pen tool in Photoshop 2024.
