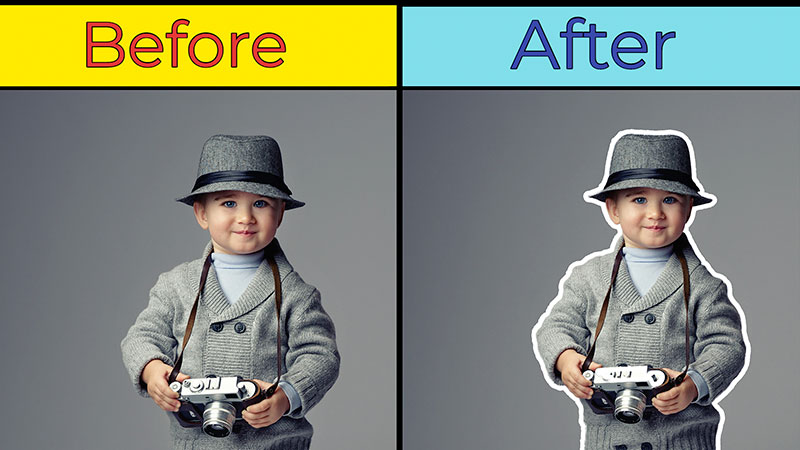
Sometimes we feel the necessity of making an object a bit more attractive. At this point, making an outline of the object can be a useful option.
Creating an outline around the object isolates it from its background and gives a catchy look. By using Photoshop you can how to outline an image in photoshop.
Most people think that it’s a long procedure and Outsourcing Photo Editing is needed for that.
Only a few people know about the original technique and they can do it themselves. Through this article, I am going to reveal the technique.
Read this article to the end and learn how to outline an image in Photoshop. This is going to be an easy and helpful tutorial.
So without any further delay, let’s begin.
How to Outline An Image in Photoshop?
Step 1: Open the picture in Photoshop
To bring a photoshop outline shape, open the picture in photoshop. There are two options available to do that. You can open the picture from the FILE > OPEN and then choose the image. Or, you can simply click and drag the image in Photoshop.
For this tutorial, I am going to use this image.
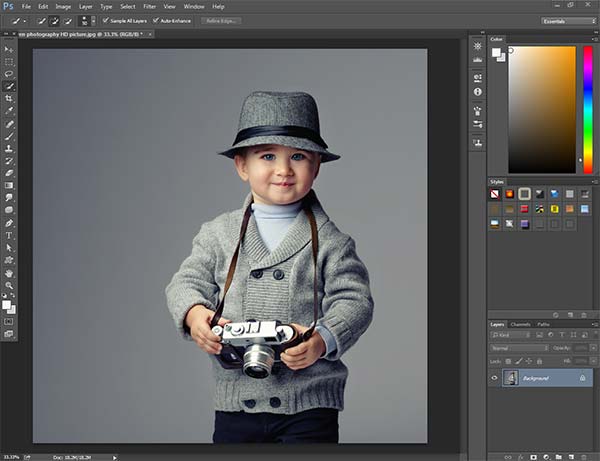
Let’s move to the next step.
Step 2: Select the object
In the 2nd step, you have to select the object of that image. As we know, there are lots of selection tools available in Photoshop. To convert images to outline photoshop, we should pick the quick selection tool.
Pick the tool from here.
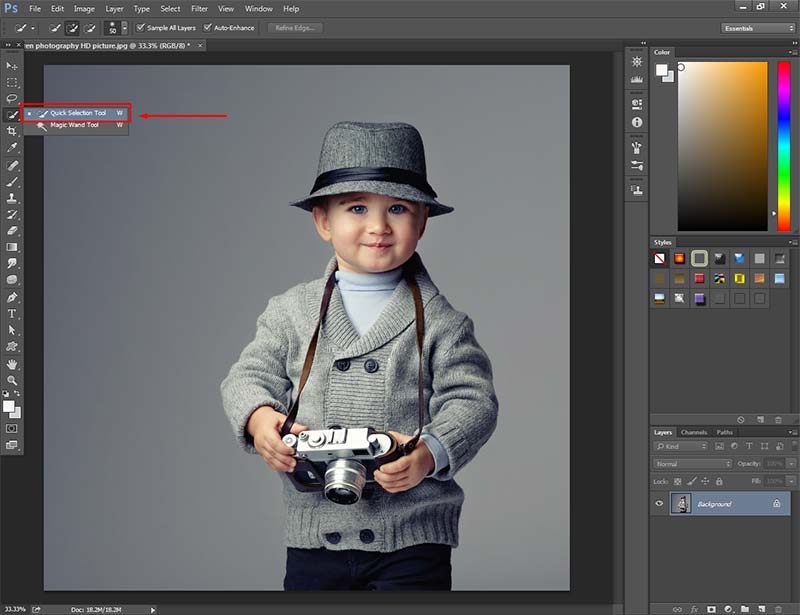
Make sure that the Multiple Selection option is enabled from the top. Also, set the hardness 0 from the top. There is no need to change the Angle, Keep it 0. Put roundness to its default value of 100%. Then, set the spacing 1%.
Know More: Make an Image Transparent Background in Photoshop
Let’s have a look here.
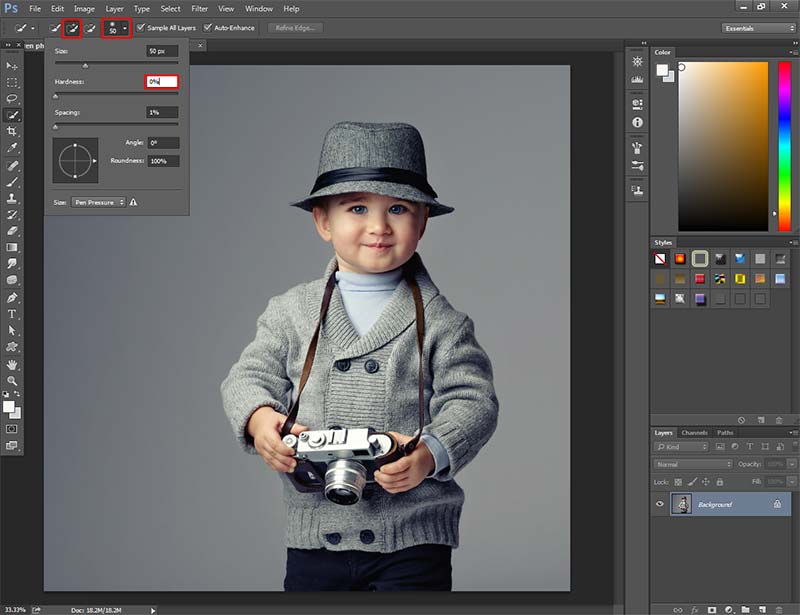
Now, zoom in on the picture by pressing “CTRL & +”. Press and hold the left mouse, move it over the object to make the selection. In this process, there will be some areas where the selection might not be perfect. Just like this.
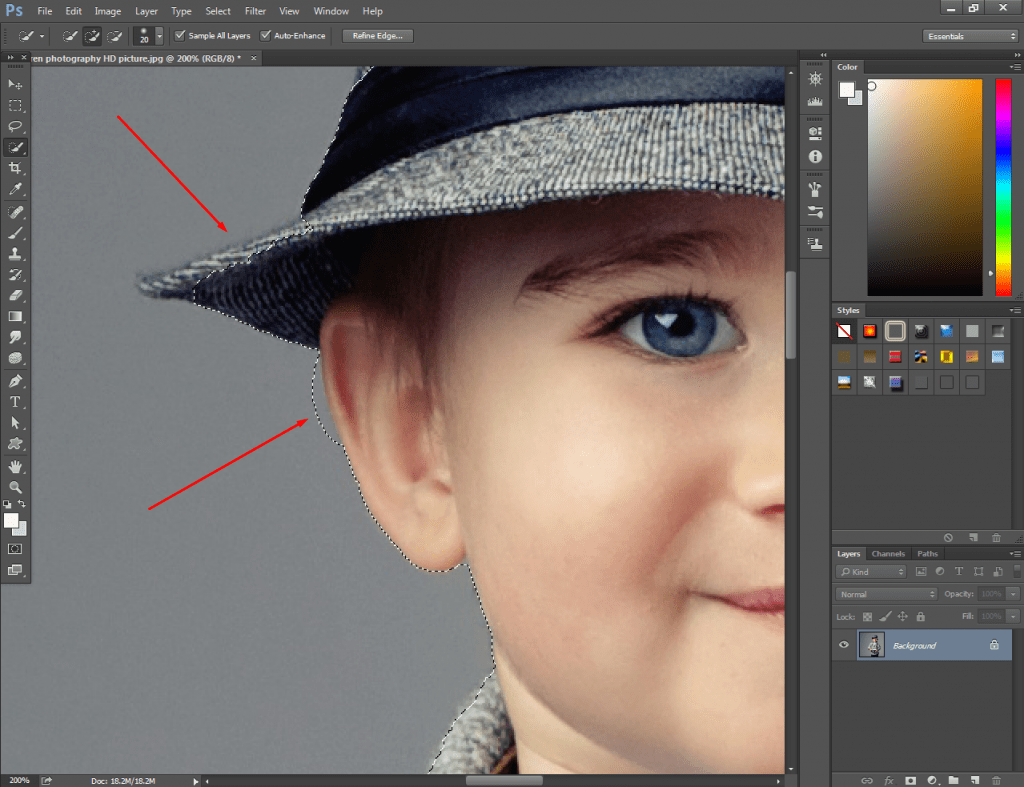
If the selection goes outside of the object press ALT and Left Mouse Button to fix that area. When the selection goes inside, simply operate the mouse from the inner part of the object.
To change the shape of the point use “CTRL + { “ and “CTRL + } ” Allow me to show you my selection.
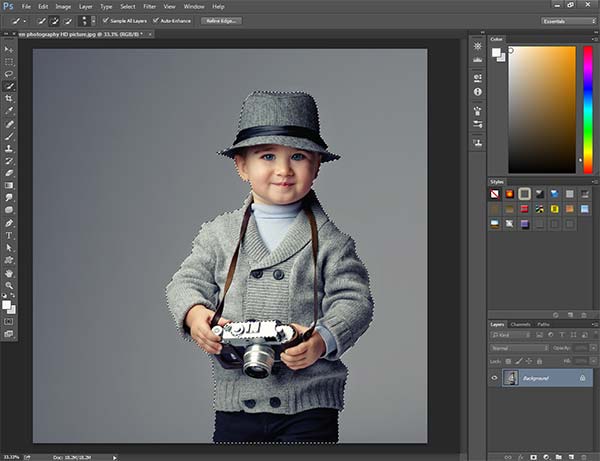
Though this is not the ultimate selection, we have to do some corrections.
Step 3: Refine edges of the selection
To outline an image in Photoshop, making a proper selection is very important. Any mistake in the selection will affect the ultimate results. Just to be on the safe side, click on the “Refine Edge” option.
Then, a new option plate will appear. Increase the Radius until you got a satisfactory view of the object. Here, I am using 7.2 Px for the sample picture. After setting the Radius, customize the “Smooth” option from Adjust Edge.
It will make the edges smooth. I have set it to 9. Permit me to show you how I have customized Refine Edge.
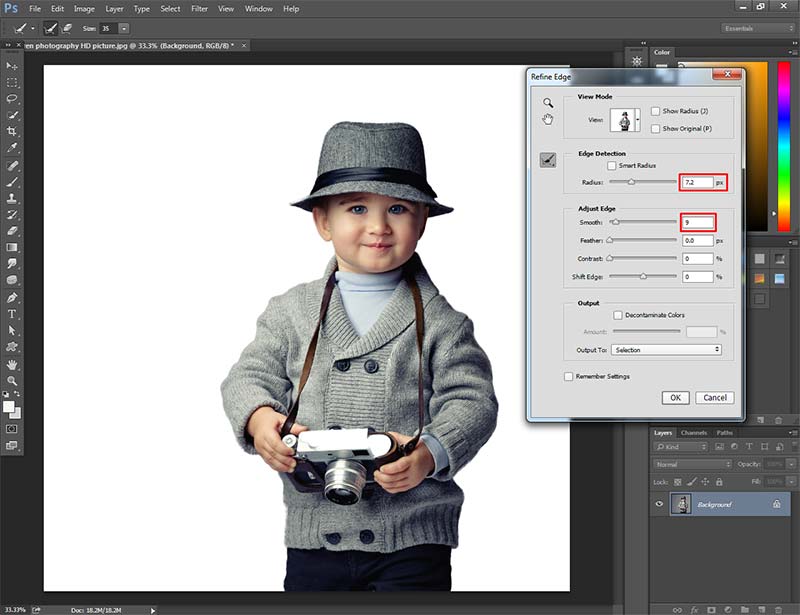
Press ENTER, when you are done, and jump to the next step.
Step 4: Bringing Photoshop outline effect
Now, we are going to bring the photoshop outline effect. Take a copy of the selection into a new layer by pressing “CTRL + J”. Right-click on the new layer and choose Blending Option.
A new box will be visible with lots of blending options. Hit on the Stroke and you will find these options.
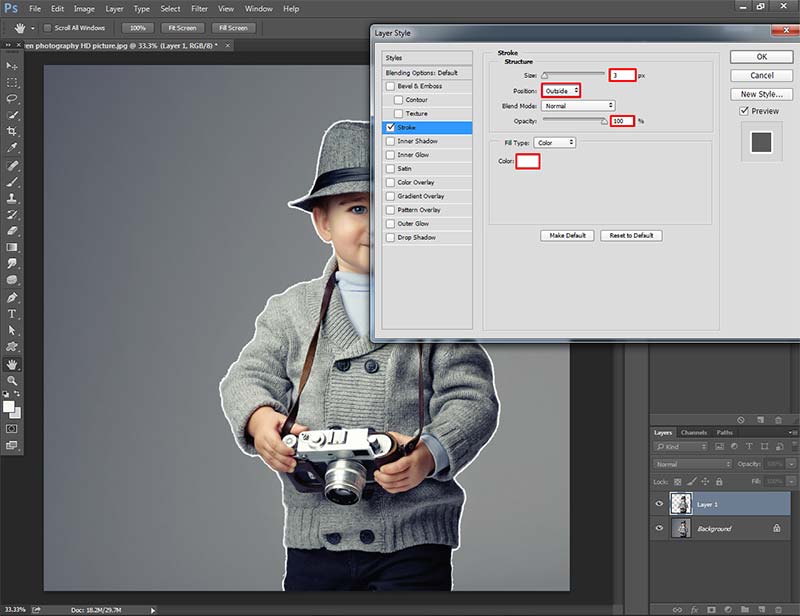
From the size, you can control the width of the Outline. After this, set the position Outside. Keep the blend bode “Normal” and choose the opacity you want. I am going to keep it at 100.
Know More: How to Deselect in Photoshop | How to make something look Gold in Photoshop
The “Color” option is available below. Clicking on it, you can change the color of the outline. Make sure that you have put the tick on the Stroke. Press ok to finish the procedure. That’s it. We have successfully outlined the image.
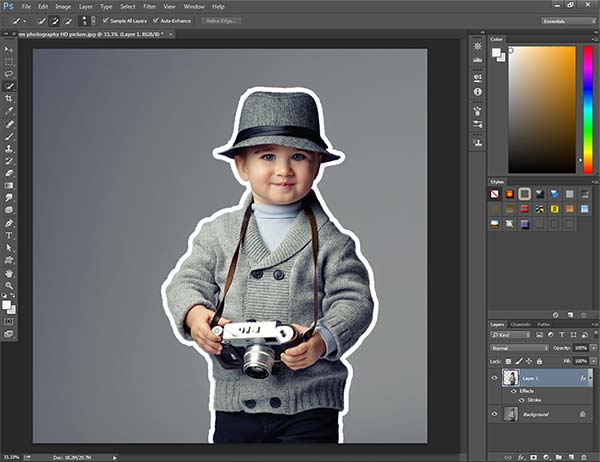
Now, you can change the size and color of the outline just in a few clicks. Isn’t it cool? I think so.
Final Words
I hope you have learned how to make an outline of an image in photoshop with ease. From now on, you should be able to do it with any object. Stay with us to get more amazing photoshop editing tutorials.
Thanks for being here.
