When you want to separate something from its original background, an image cut-out is the most suitable technique to follow. You can change the background of any picture by doing a transparent cutout. Through this article, we are going to share the step-by-step process of that.
After reading this article, you will learn how to make a transparent cutout. We are going to reveal the best method of how to do a cutout in Photoshop. It will help you to isolate objects from any type of background.
We are going to inform you of three different methods with some bonus tips. Here’s the first method.
How to Make A Transparent Cutout: Using the Pen Tool
Step 1: Open your picture to do a cutout in Photoshop
First things first, we are going to begin with opening the image in Photoshop that we want to make a transparent cutout. We are going to use that picture for this Photoshop image cut out tutorial.
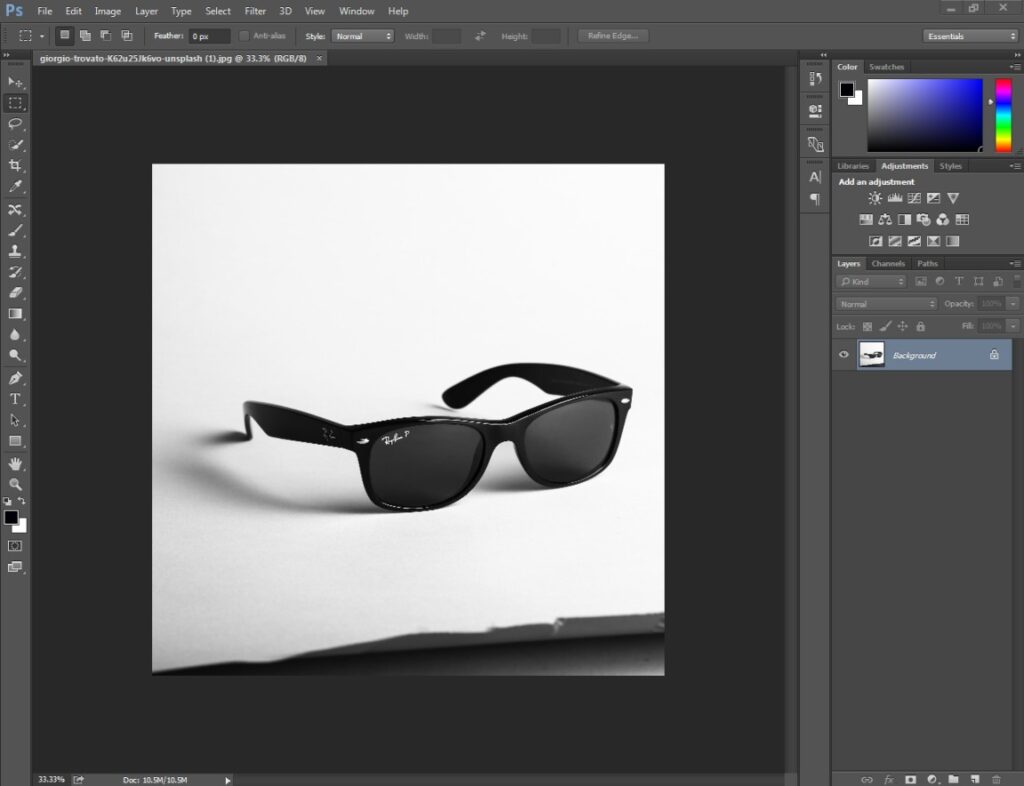
Then, you have to double-click on the background layer to unlock it. Unlocking the layer enables transparency for the layer.
Step 2: Pick a suitable Selection Tool
You have to choose a suitable selection tool considering the shape of your object. As we have mentioned earlier, we are going to pick the Pen Tool for this process.
Pick it from here.
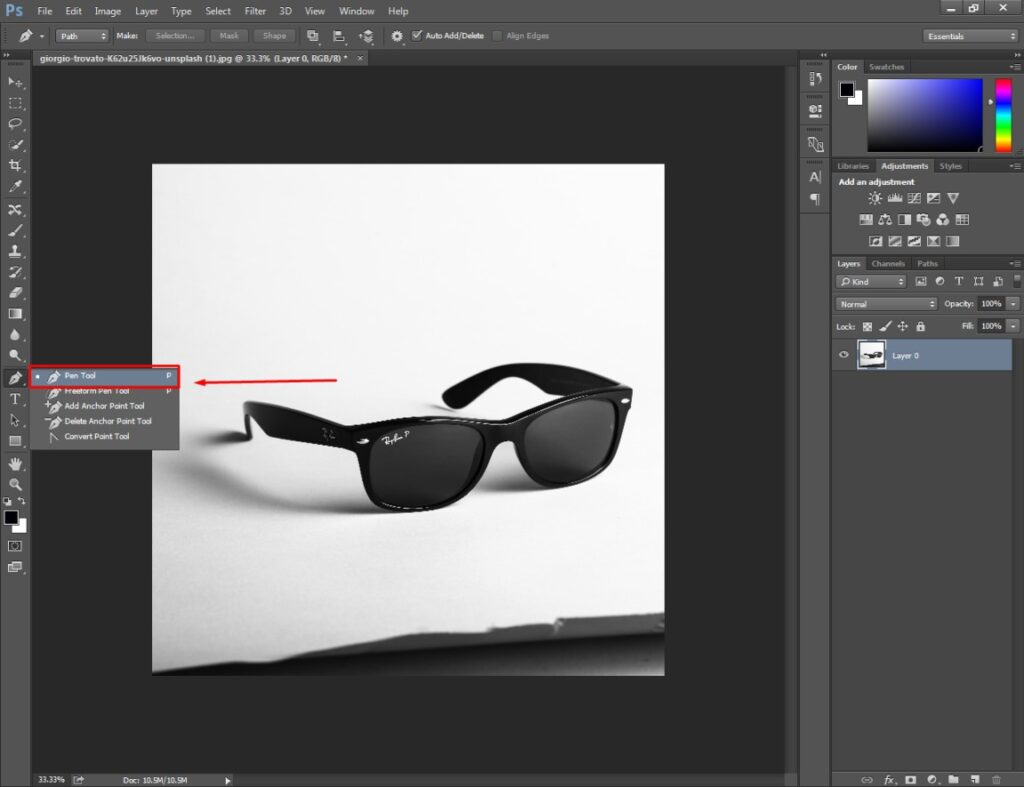
You have to zoom in on the object and start creating a path to use the pen tool. Do a left-click on your mouse key to create an anchor point? You have to cover your object using paths.
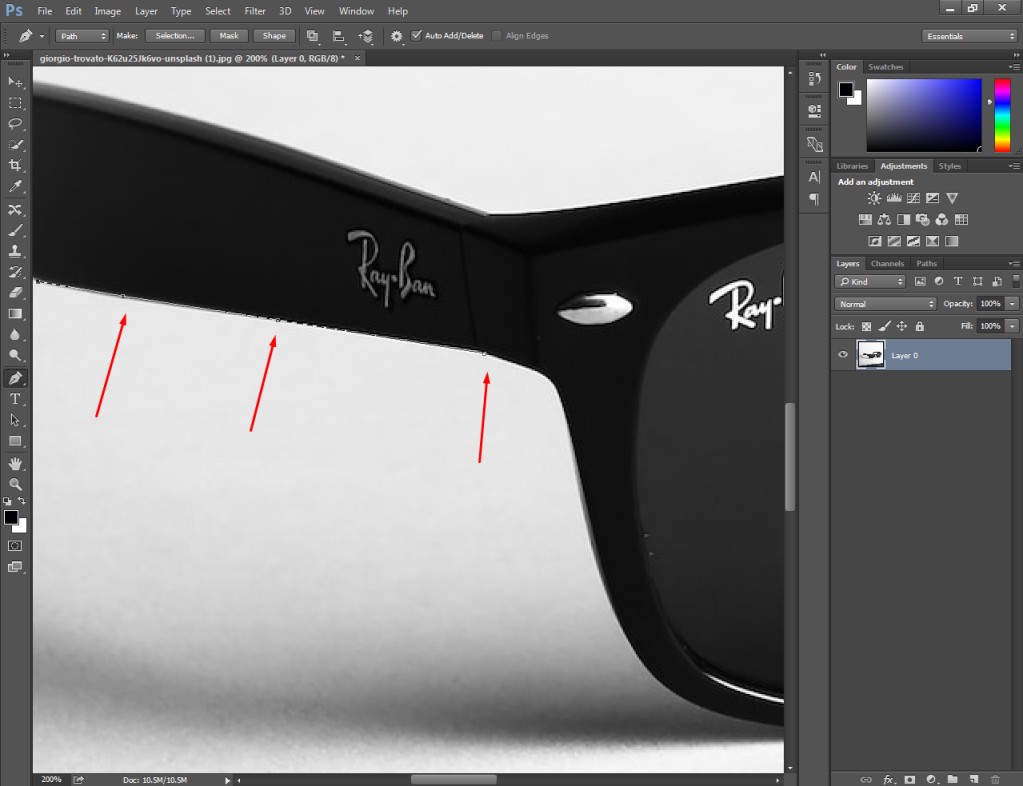
For the bend areas, you have to drag the mouse up and down to get the required path lines.
Step 3: Select object using paths
Press ALT and click on the anchor point to delete unnecessary paths.
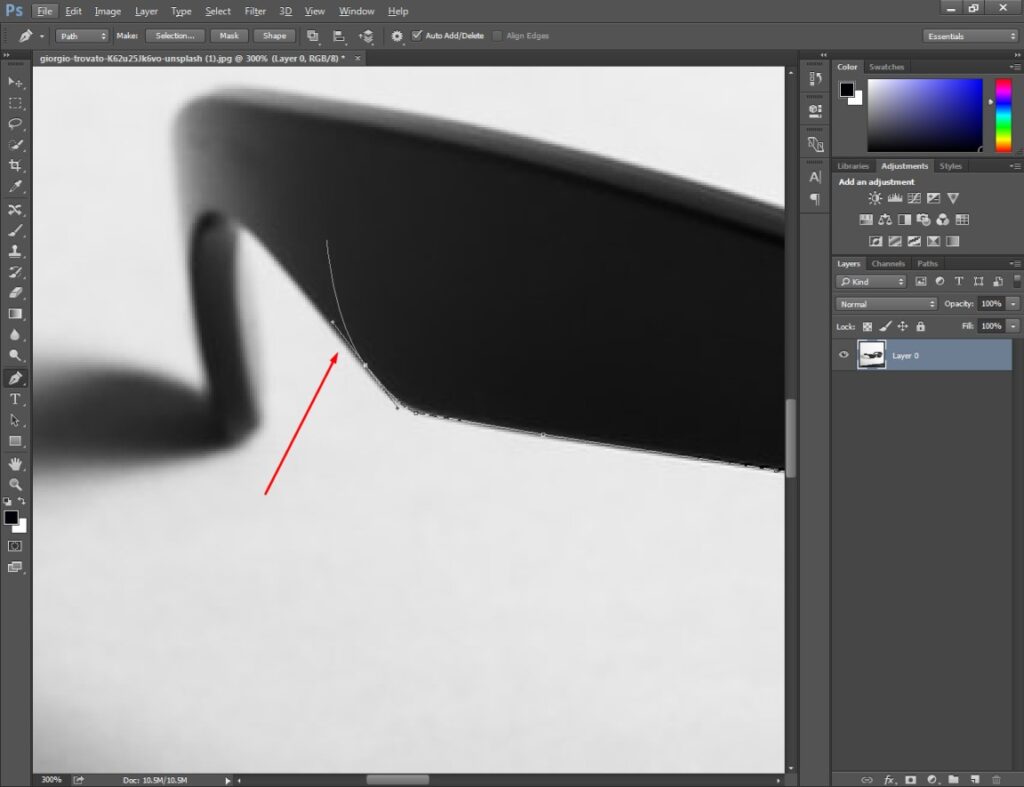
Also, you need to create paths accurately within the object. You can use bend lines when necessary. You just need to make sure that the paths are covering the object’s boundary area.
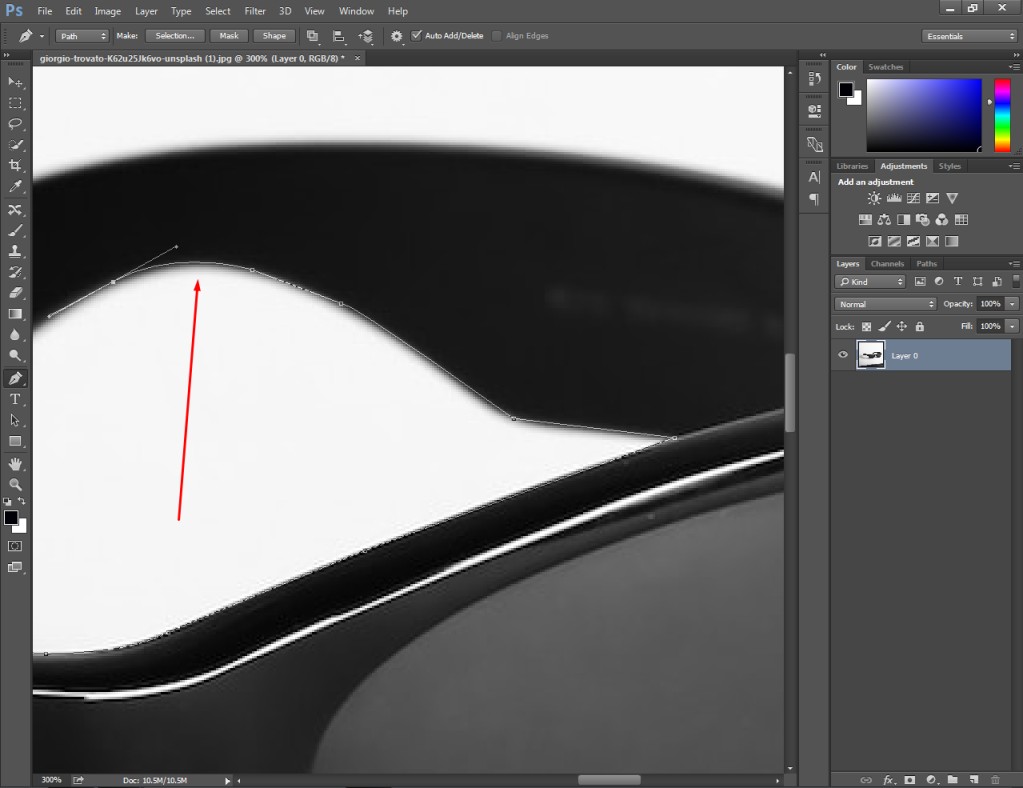
After covering the entire object, you will get your object in that type of look surrounded by vector paths.
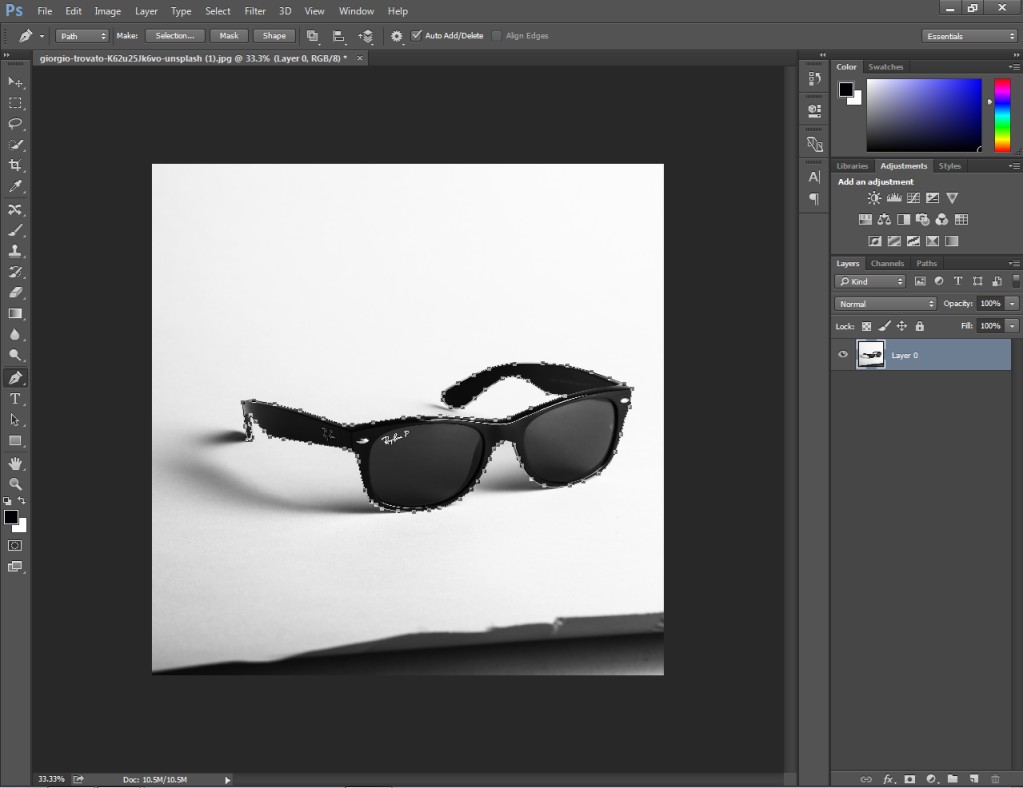
At this point, we are going to proceed to make a selection.
Step 4: Make a selection to cut out the object
You have to right-click on your object and you will get that options list on your screen.
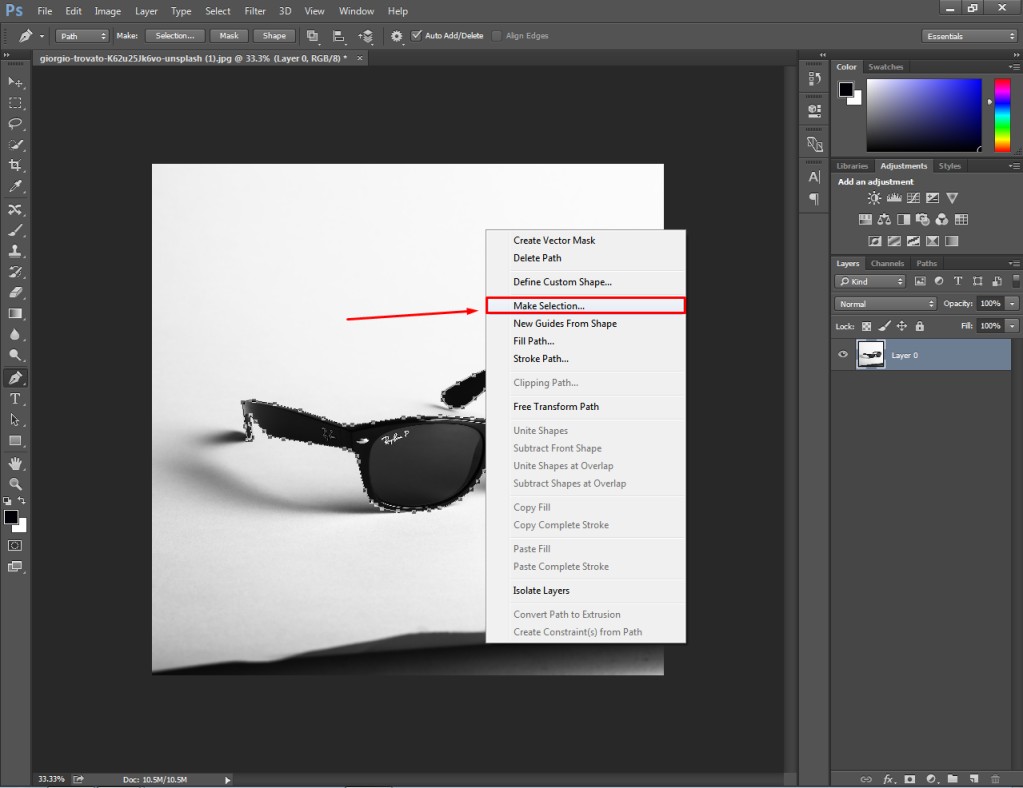
After that, you will get the refine edge option. If there are soft edges in your objects, you can set it to 1 or 2 pixels.
Step 5: Add layer mask
This is the final step of how to make a transparent cutout in Photoshop. When the object is selected, you have to click on the “Add layer mask” option from the link below.
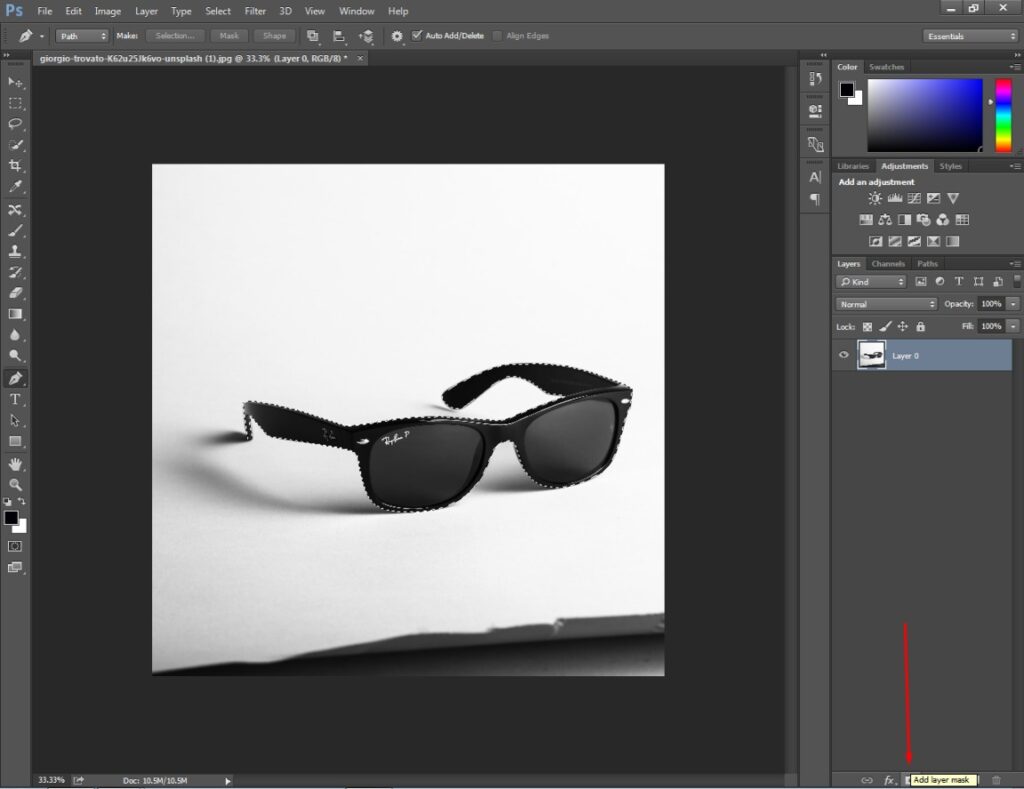
It will cut out the object on a transparent background. You can see that in the below picture.
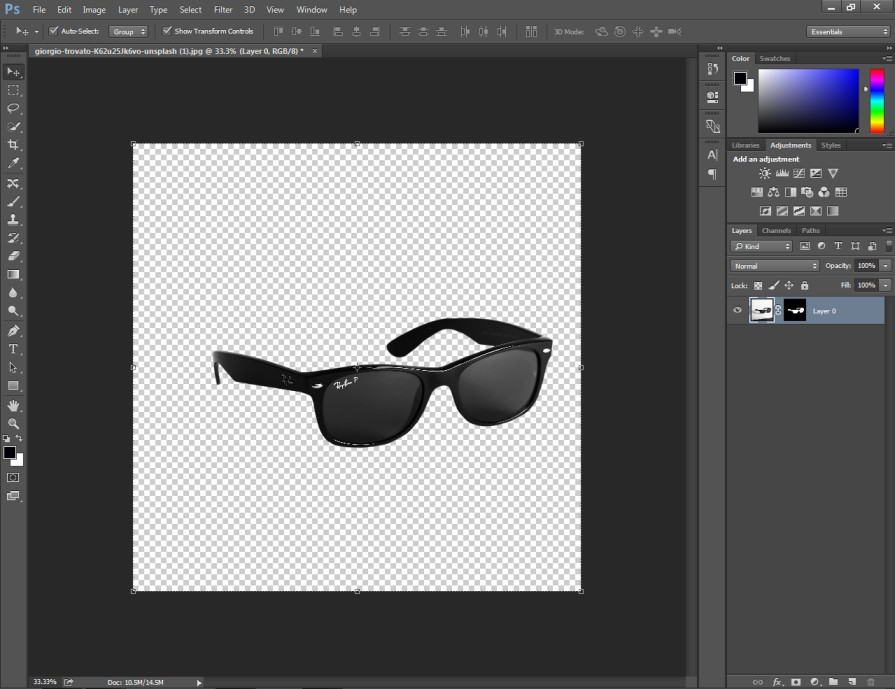
If you want to make any further adjustments, you can work on the mask. You can also move the object to place it center according to the frame. You will get the arrow key at the top of the editing toolbar.
To move the object, you have to click and hold the left mouse key on the object. Then, you can move the object using the mouse.
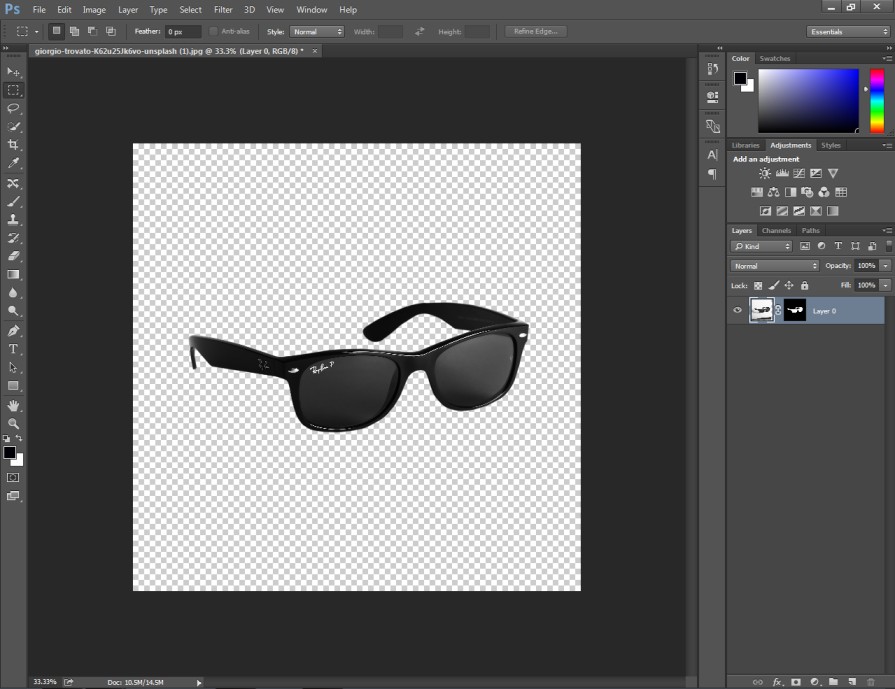
At that point, your image will be ready to get saved.
Step 6: Save the image
Finally, go to the “File” option from the top and choose “Save As”.
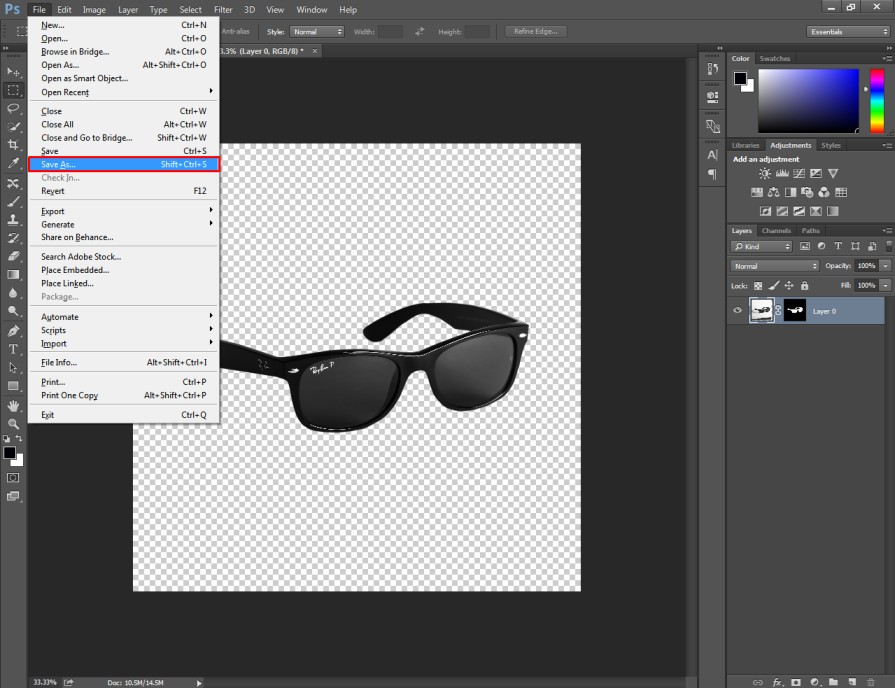
Do you want to keep the path active even after saving your image? Well, you have to choose the JPG format. But it won’t keep the background transparent. To keep transparency, you have to save the image in PNG format.
By following the above method, you can do an image cut out in Photoshop. When you’re working on an object having hard edges, you should follow this method to make a transparent cutout.
Would you like to cut out an image background of a transparent object? The second method is going to be useful for you. You can follow this method to separate a glass or plastic bottle from its background.
How to Make A Transparent Cutout for A Transparent Object?
Step 1: Open transparent object in Photoshop
Open the image of the transparent object that you want to isolate from the background. For this method, we are going to use the below image.
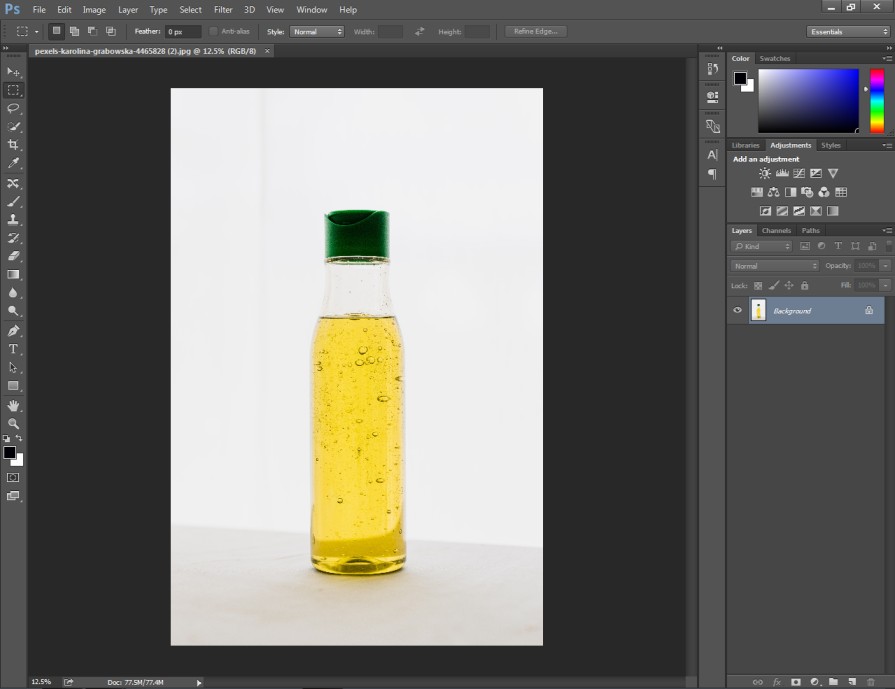
You can also take a picture with a glass or bottle in it. Then, we are going to pick the selection tool.
Step 2: Quick Selection Tool
For this method, we are going to use the quick selection tool. In that method, you don’t have to select the object manually.
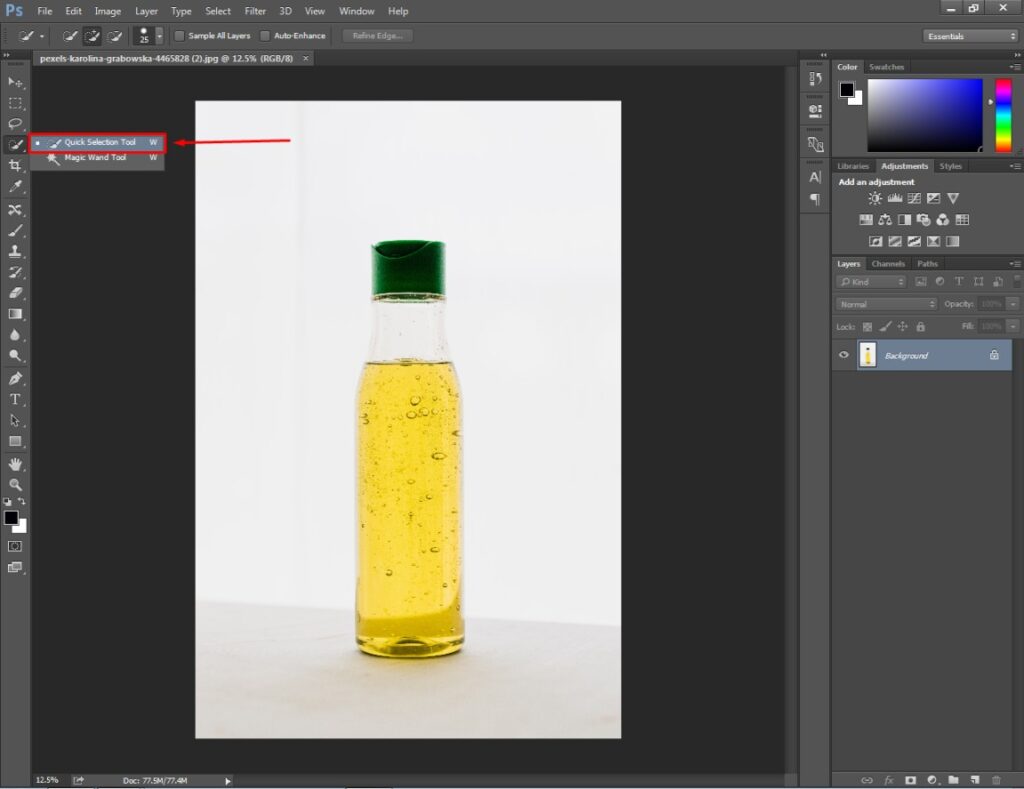
To select a transparent object using this tool, you have to press and hold the left mouse key. After that, you have to move the mouse over the object. If you want to subtract a portion from the selection, you have to hold the ALT key and drag the mouse over the selection.

Now, we have got the object selected. Next to that, we have to make the transparent cutout.
Step 3: Choose Layer Via Copy
At this stage, you have to go to the “Layer” option from the top and select “Layer Via Copy”. You can also utilize the shortcut key CTRL + J to do that.
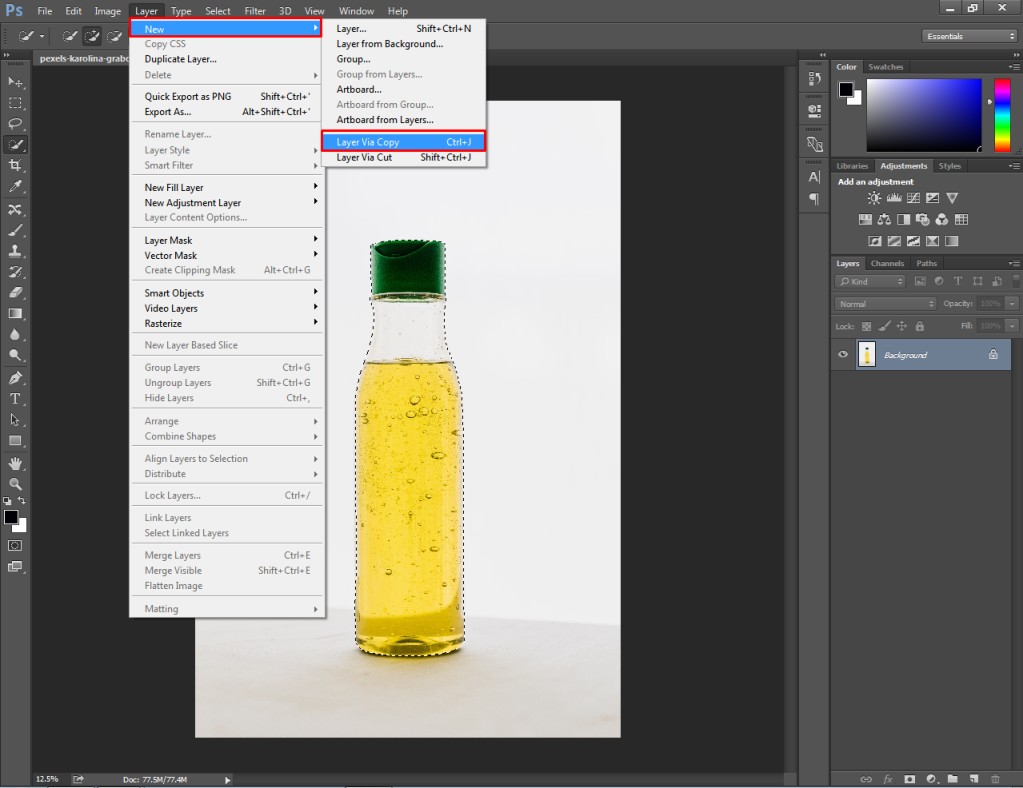
It will erase the background. You will get the selected object on a transparent background.

That’s the process of how to cut out any object and putting it on a transparent background.
Finally, we are going to move to the third method of how to make a transparent cut out in Photoshop. For this method, you don’t have to use any selection tool. Therefore, this is the easiest method to follow for beginners.
How to Make A Transparent Background from White Background?
Step 1: Open the image with white background
This method is applicable when your photograph has a white background. For this method, we are going to use this picture having a busy white background.
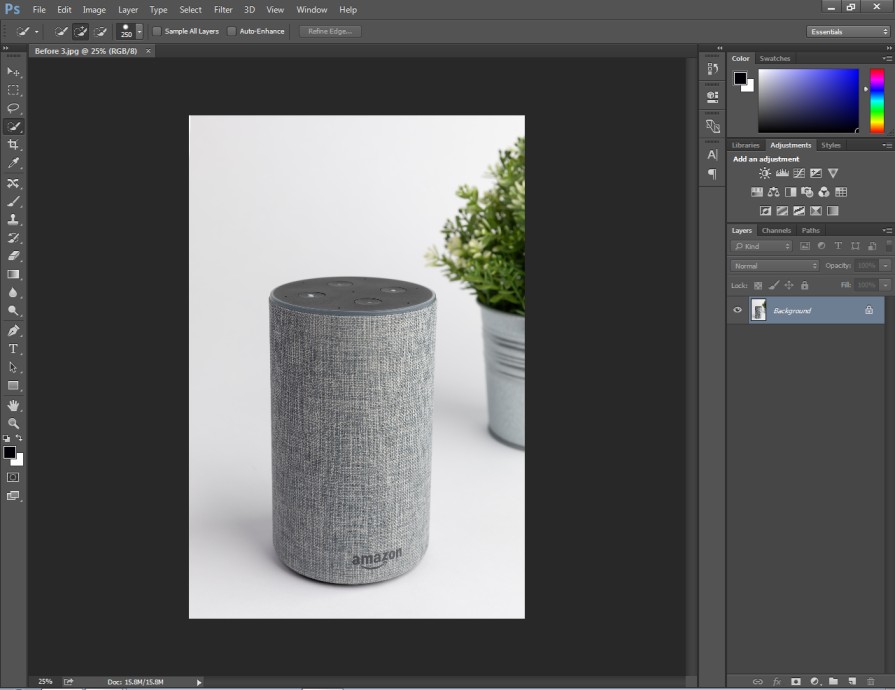
Next to that, you have to pick the eraser tool.
Step 2: Choose “Magic Eraser Tool”
Click on the eraser tool option from the left side and pick the “Magic Eraser Tool”. You have to make some adjustments to customize the eraser settings. You should keep the tolerance value around 30.
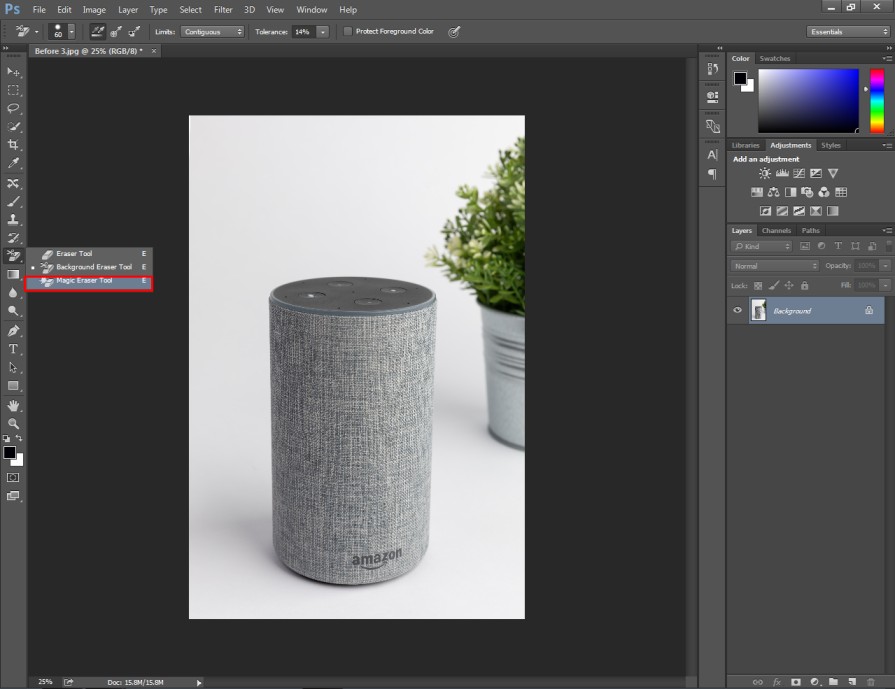
Then, you have to set the opacity to 100%.
Step 3: Eraser the white background
You just need to click on the white background of your image and it will erase the background.
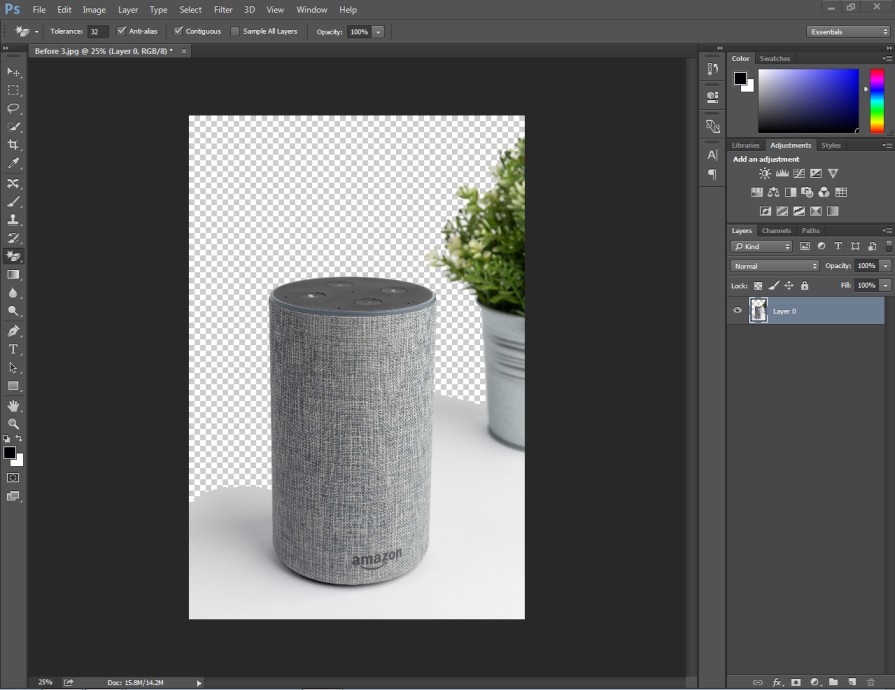
After the first click, the background may not be removed completely. You need to click on the remaining areas to erase the entire background. If anything goes wrong, you can undo your command with CTRL + Z. To undo several steps, you can press CTRL + SHIFT + Z.
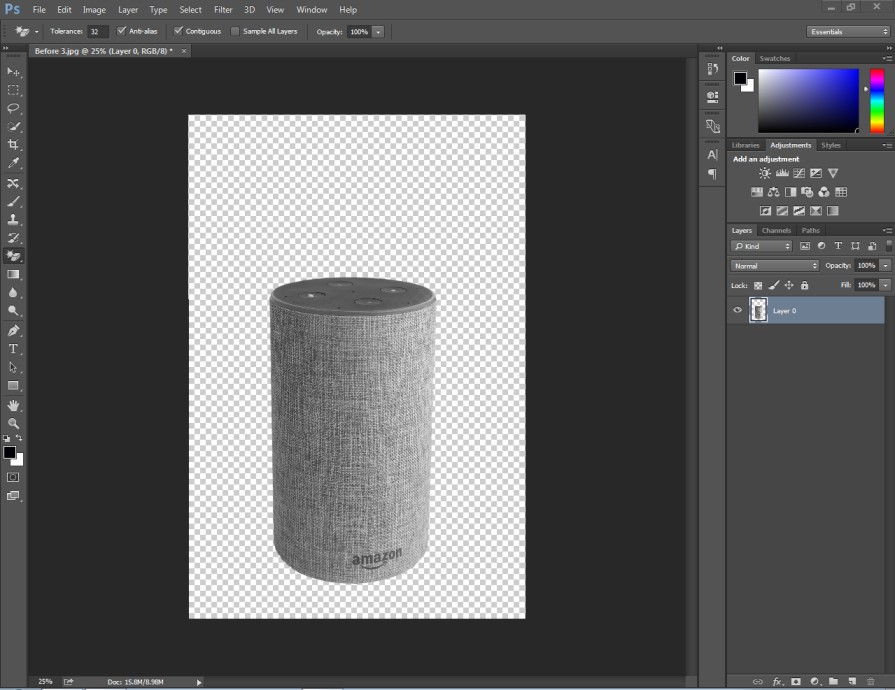
This is the final result. You can change the placement of your object using the arrow key. You should remember that if you save the image in JPG format, the image will lose its transparent background. Saving the image as PNG will be a suitable option.
5 Tips To Follow
- Use the pen tool for objects with sharp edges.
- Use the mask feature for objects with soft edges.
- Use the object selection tool if you have the latest version of Photoshop.
- Add a mask to the layer rather than deleting the background.
- Use the color range option to cut out trees.
5 Mistakes To Avoid
- Do not use the pen tool for hair and fur.
- Do not use the quick selection tool for soft edges.
- Do not save the image in JPG if you are looking for transparency.
- Do not use a specific selection tool for all objects.
- Do not use the magic eraser tool for busy backgrounds.
Final Thoughts
We have shared the 3 most convenient methods of how to make a transparent cutout. From now on, you can easily do image cutouts for any type of object. You can choose the suitable method based on your skill and object type.
Don’t hesitate to contact us if you want to Image Cutout Service task. Clipping Way is the best place for photographers and online sellers in order to get the best image editing service. Call us now to discuss further about that.
FAQ’s
Which tool is the best option to make a transparent cutout?
You have to pick the selection tool based on the object that you are working on. The pen tool is the best option when you are looking for accuracy.
How can I fix the edges while doing a cutout in Photoshop?
You can fix the edges of a transparent cutout by using the “Refine Edge” option. Also, you can add a mask to the layer for a precise image cut out.
What file format should I save my transparent cutout in Photoshop?
For images with transparency, you should choose the PNG format. It will preserve the transparent background.
How can I remove a complex background with fine details?
You have to select the background using the quick selection tool or object selection tool. Then, add a mask to that layer and make adjustments using the brush tool in the mask view.


